Boot to Qt on Raspberry Pi
I got Raspberry Pi 3 Model B and now will use it for my experiments with Qt for embedded projects. Here I’ll tell about assembling process of the board and will run Boot to Qt demo on it.
I bought not only board itself, but some accessories with it. The full list is:
- Raspberry Pi 3 Model B (~58 USD);
- 7" Touchscreen 800x480 (~116 USD);
- 8GB microSD card (~14 USD);
- case for board and display (~21 USD).
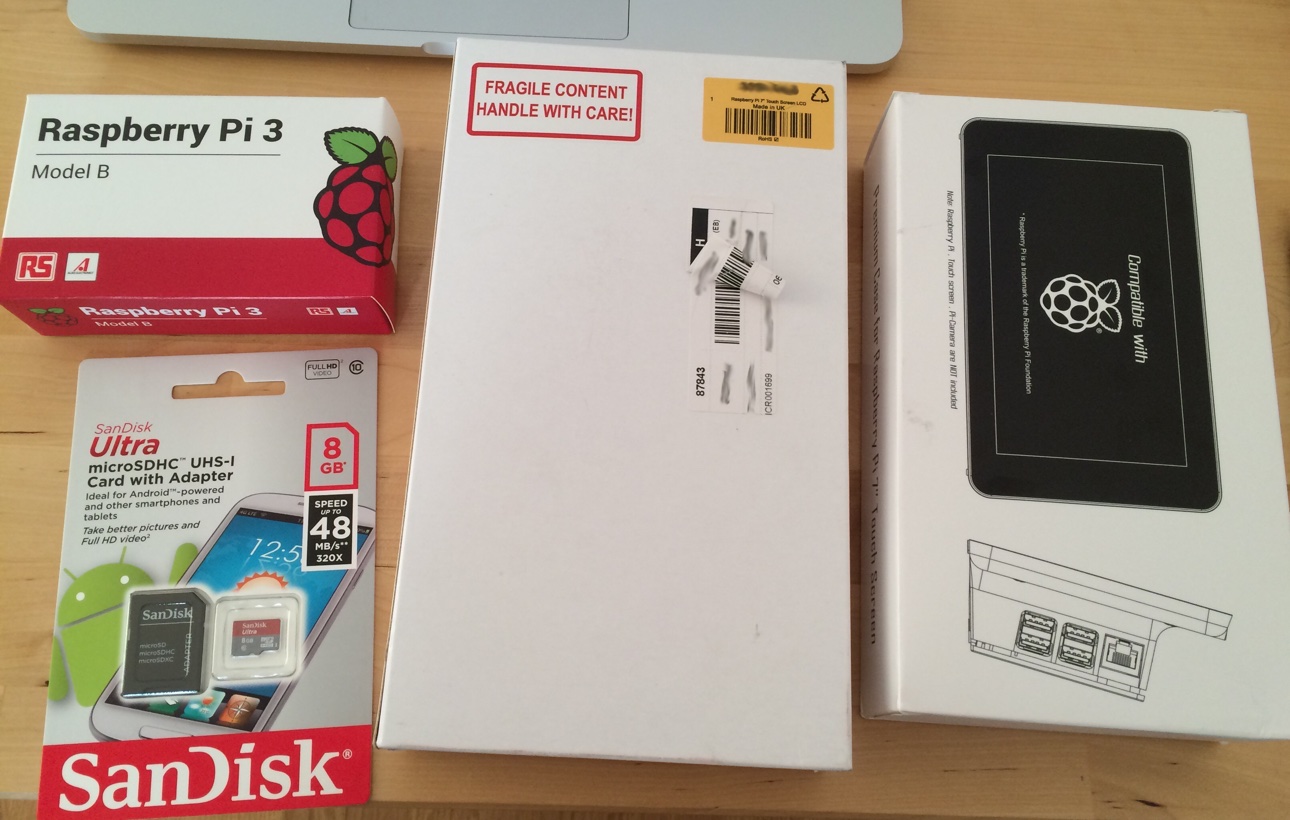
Unboxing
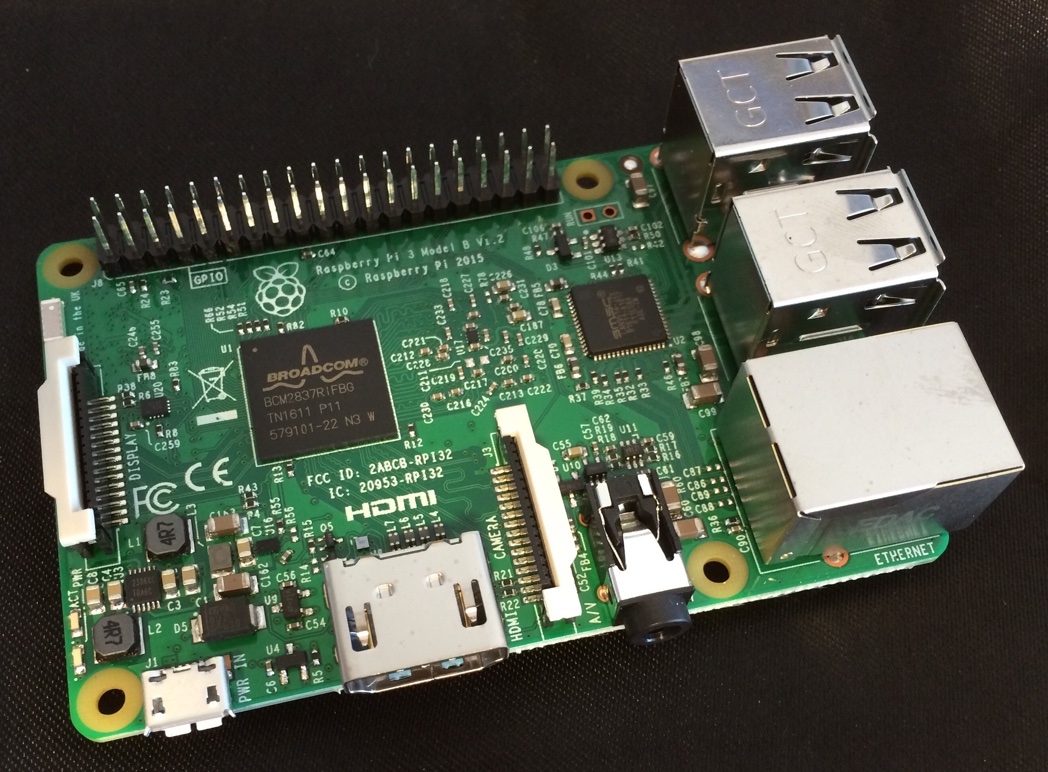
Here’s the board:
That’s the touchscreen:
You can see that it comes with adapter, ribbon cable, jumpers and screws for attaching the board.
And that’s the case for board and screen:

It also has screws for fixing to the touchscreen.
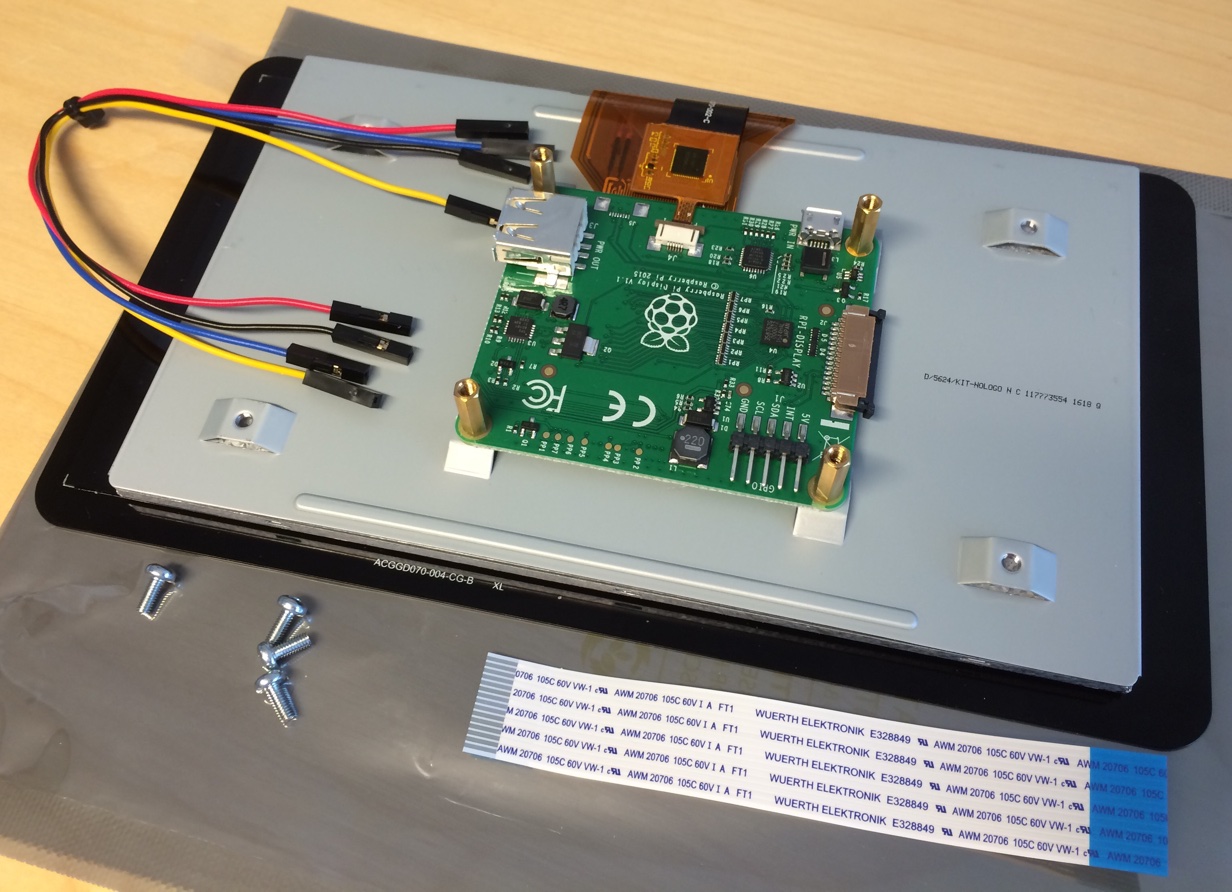
Assembling
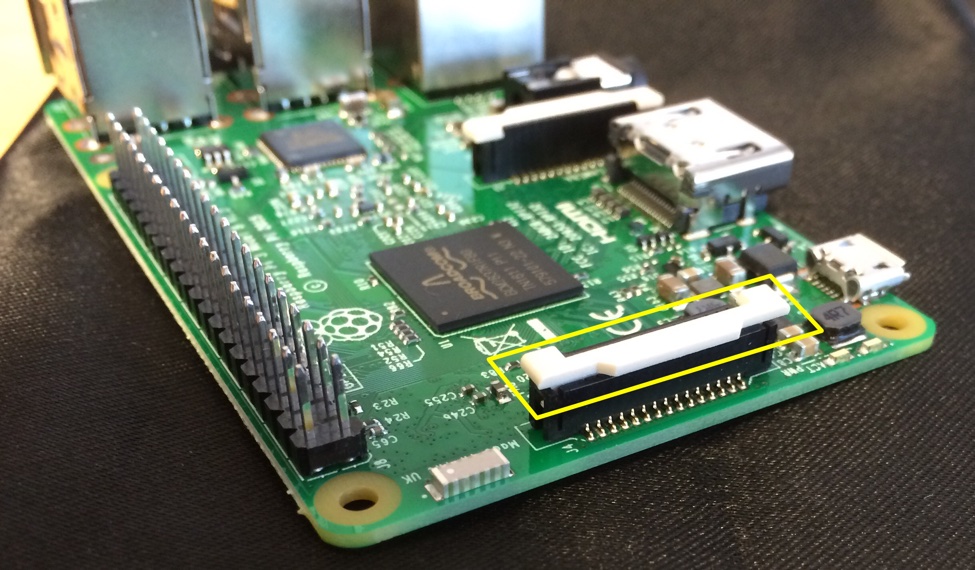
You need to connect DSI port on board with DSI port on touchscreen. If you see this port first time in your life, it could be tricky - first you need to loose the holders (if they are not already loosen). I marked it yellow on photos. One for board:
and one for touchscreen:
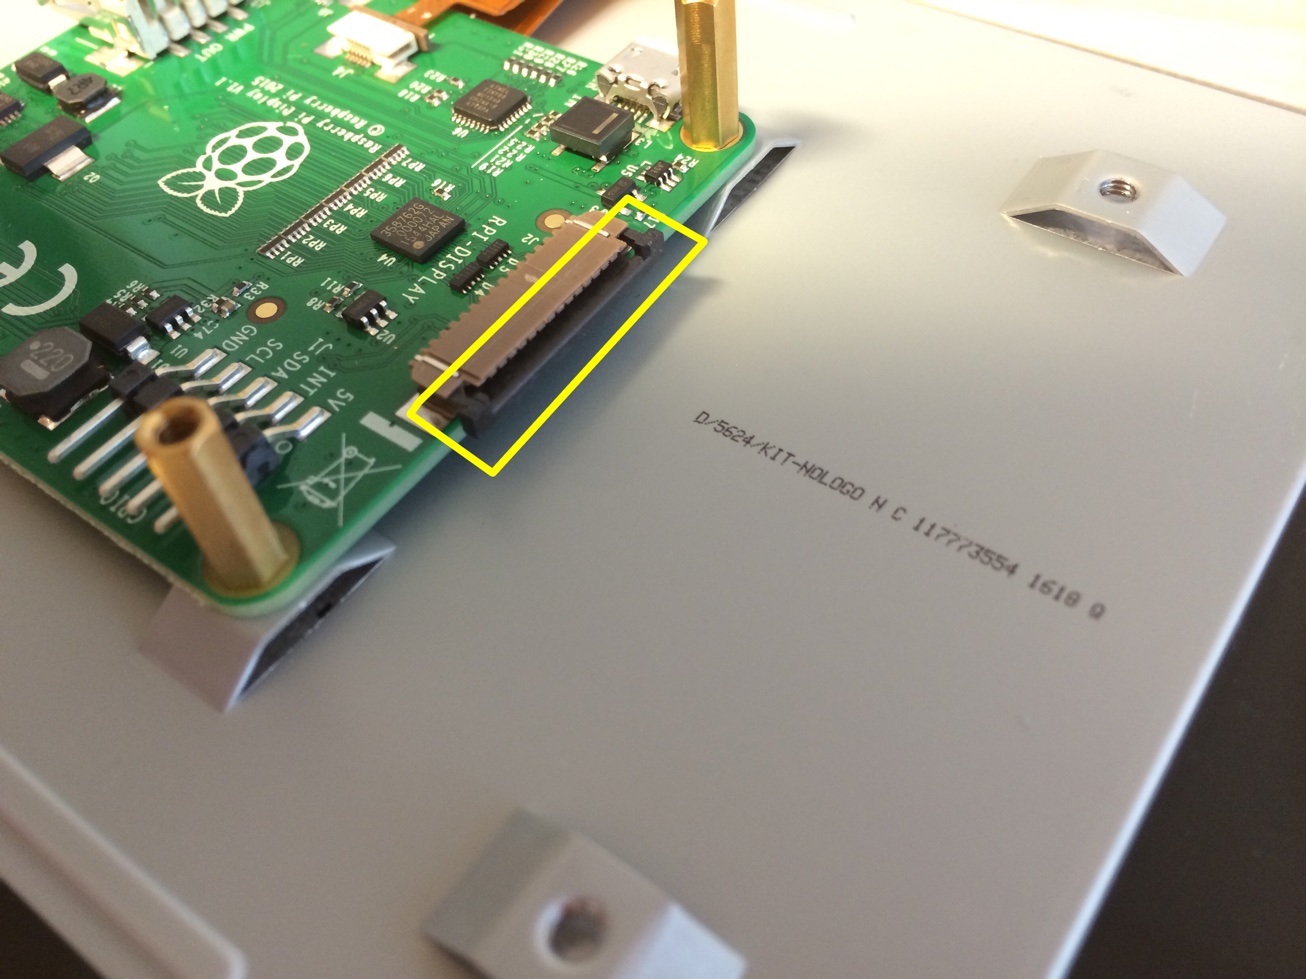
Use your nails, but be careful, don’t apply too much pressure.
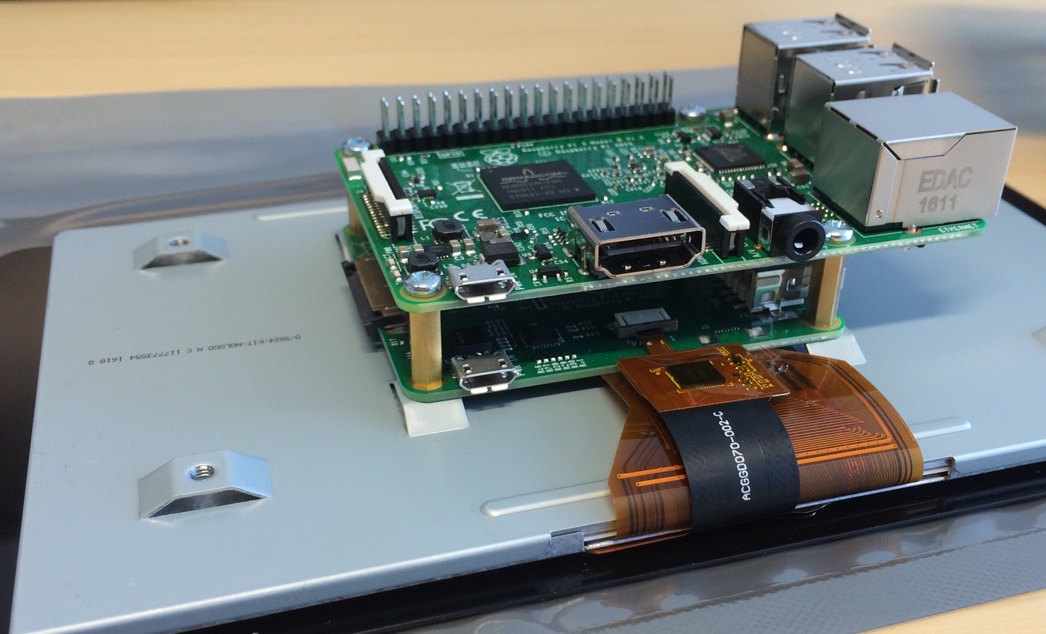
Now you can attach the board to the touchscreen using 4 screws that came with touchscreen:
and connect DSIs with ribbon cable. You put it in DSI port and “fasten” the holder. Here’s the picture to give you understanding about where and which side of the cable should be:
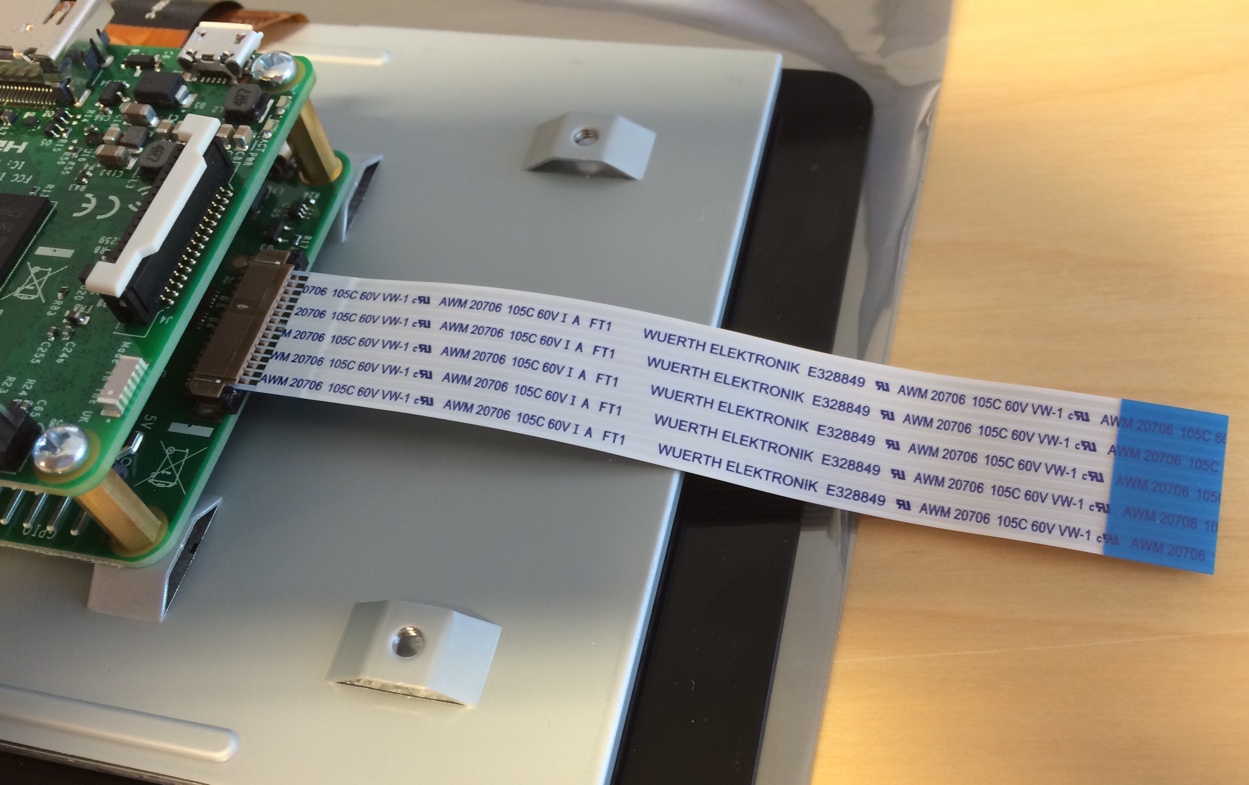
Now plug in the other end of cable (to the DSI of board).
Then you need to connect board and touchscreen with jumpers to provide power supply. You need to connect 5V and Ground on the board with corresponding contacts on the touchscreen:
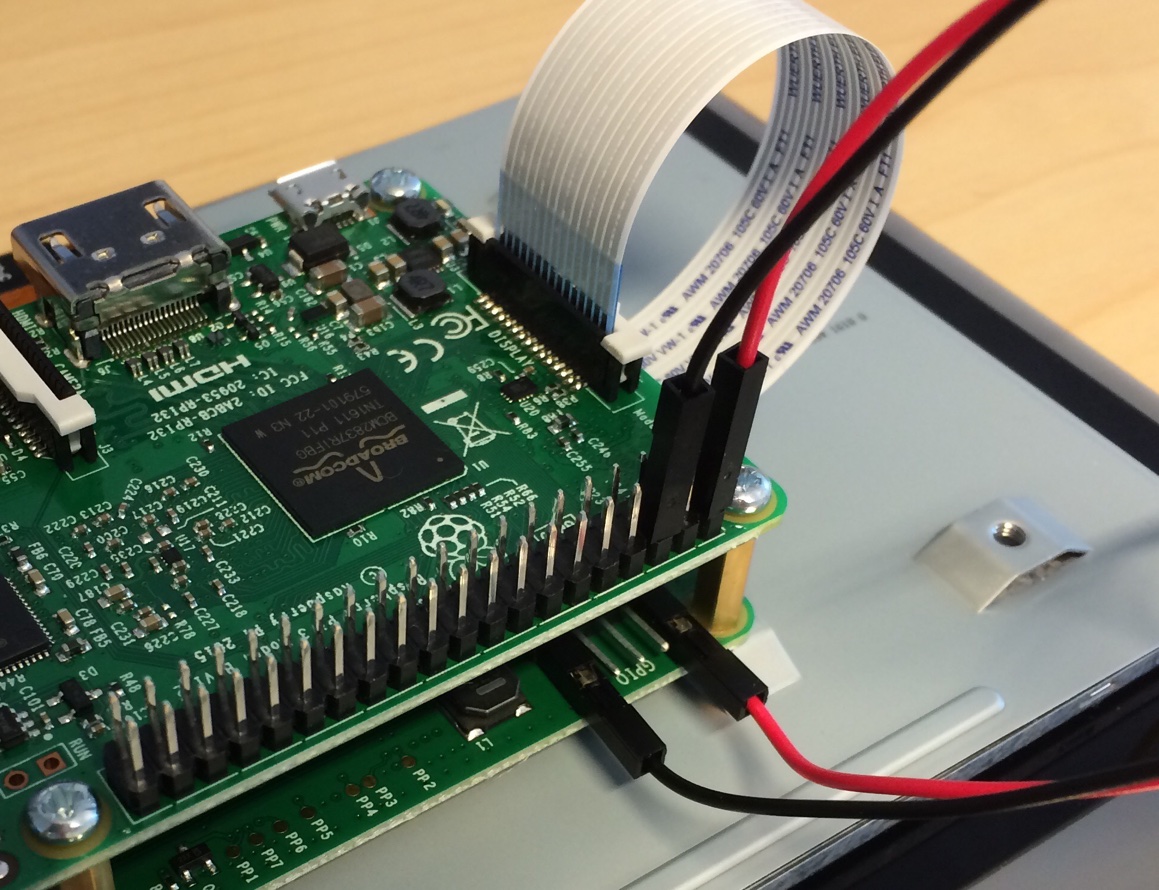
As you can see, 1 and 3 connectors on the board are connected with 1 and 5 connectors on the touchscreen. And other jumpers are not needed, just leave them hanging.
Here’s another good article about assembling Raspberry Pi with this touchscreen.
The only thing left - to mount touchscreen with board inside the case and fix it with screws. Be careful with cables while putting everything into the case.
That’s how it looks assembled:
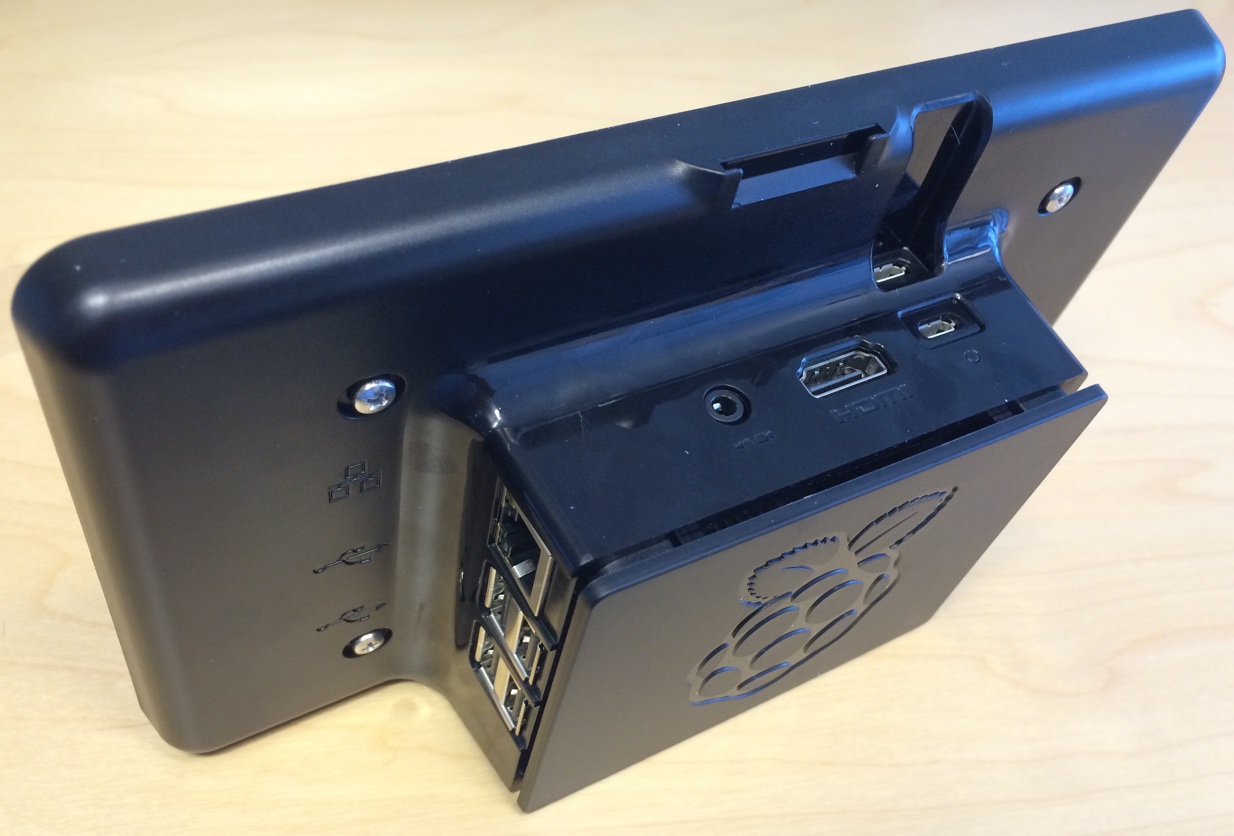
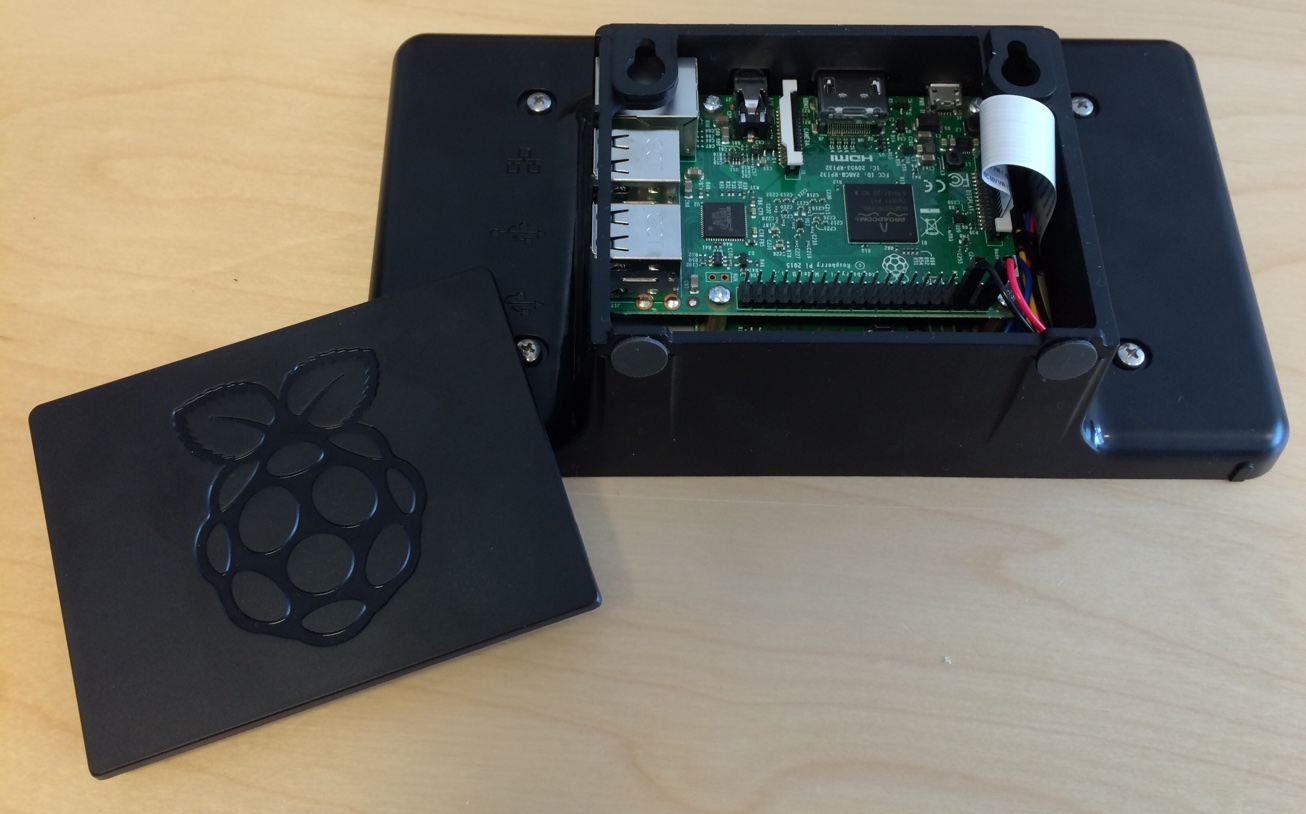
And you can take off the back cover to see the insides:
I also made a video of assembling process, in case this manual is not enough:
If video doesn't play in your browser, you can download it here.
Boot to Qt
Ok, I’ve missed the microSD card preparing stage. Not very nice of me, especially when everything is already assembled and now you need to disassemble the case to be able to insert the card in slot. But let’s pretend that it’s not a big deal and continue.
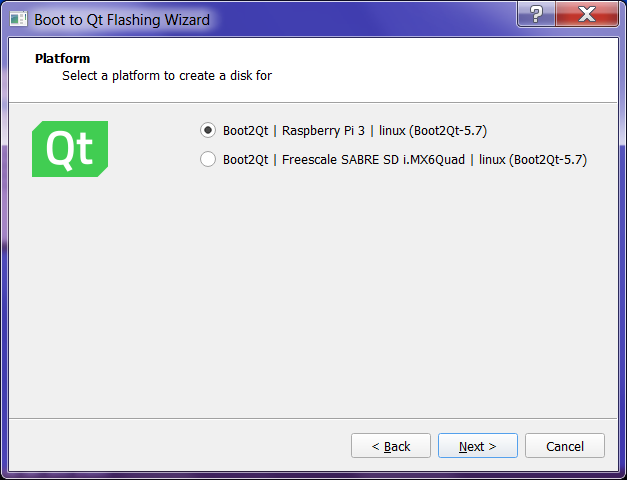
So, nothing new here. You just flash the card with wizard from Qt Creator, but this time choose Raspberry Pi image instead of Freescale (you need to install it, obviously):
And put the flashed card into the Raspberry Pi.
By the way, on the official documentation page there is this optional way to write the image to the card on Linux:
sudo dd bs=4k if=5.7/Boot2Qt/raspberrypi3/images/b2qt-embedded-qt5-image-raspberrypi3.img of=/dev/DEVICE-NAMEDidn’t work for me at all. It just writes the files from the *.img file to the card, but Raspberry Pi won’t even start loading with this card. And wizard from Qt Creator also creates new partitions on the card and everything is working fine, so I don’t know, what’s the point. Anyway, just use wizard.
Ok, we’ve prepared the card and ready to start.
BUT.
There is a surprise here. When you plug in the micro-USB (better to the board’s slot) and start the device, the image on screen would be upside down, so you cannot stand the case like it should be. This happened by mistake of the touchscreen manufacturer or something like that.
But okay, it can be fixed. You need to insert the card into computer (I hope you didn’t assembled the case back, did you) and edit the file config.txt in the root directory. If I’m not mistaken, it can be done only from Linux or Mac OS (and not in virtual machines, but in real systems) as Windows won’t open the contents of card in its Explorer. Anyway, I did it from Mac. And sure, you can do that via ADB by executing shell commands right on the device, but in current stage we haven’t connected to the device yet.
Ok, we opened the file and there is this commented option there: #display_rotate=0. So, we just uncomment it and set from 0 to 2, right?
NO.
Instead, you should leave it commented and add another option lcd_rotate:
## display_rotate
##     Rotate the display clockwise or flip the display.
##     The 90 and 270 degrees rotation options require additional memory on GPU,
##     so won't work with the 16M GPU split.
##
##     Value    Description
##     -------------------------------------------------------------------------
##     0        0 degrees (Default)
##     1        90 degrees
##     2        180 degrees
##     3        270 degrees
##     0x10000  Horizontal flip
##     0x20000  Vertical flip
##
#display_rotate=0
lcd_rotate=2
Save the changes, put the card back to the device and you can now Boot to Qt on your Raspberry Pi:

How to edit configuration file via SSH
So, you’re so cool that you can actually manage SSH. Okay, connect to the device:
ssh root@IP-ADDRESS-HEREFind the partition with config.txt:
fdisk -lThat will give you something like that:
Disk /dev/mmcblk0: 7948 MB, 7948206080 bytes
4 heads, 32 sectors/track, 121280 cylinders
Units = cylinders of 128 * 512 = 65536 bytes

       Device Boot      Start         End      Blocks  Id System
/dev/mmcblk0p1   *          65         704       40960   c Win95 FAT32 (LBA)
/dev/mmcblk0p2             705       20416     1261568  83 Linux
Mount the first one:
mount /dev/mmcblk0p1 /mntOpen the file with vi:
vi /mnt/config.txtPress i key to enter edit mode. Using Control + F (or arrow keys) scroll down to the display_rotate strings and put there lcd_rotate=2 (like it was described in the article). Now press ESC key to exit edit mode. And now press Shift + Z + Z combination to save the file and exit.
And just in case, unmont the card:
umount /dev/mmcblk0p1Done, now you can reboot the device - screen orientation will be fine.
Connect to PC
Here’s a bummer - Raspberry Pi 3 Model B uses its micro-USB for power supply only and you cannot “talk” with it via USB. So, you need to connect it to your network (the same network your PC is connected to).
Just plug in the Ethernet cable and get IP address from DHCP (you can find all this in the settings of Boot to Qt launcher):
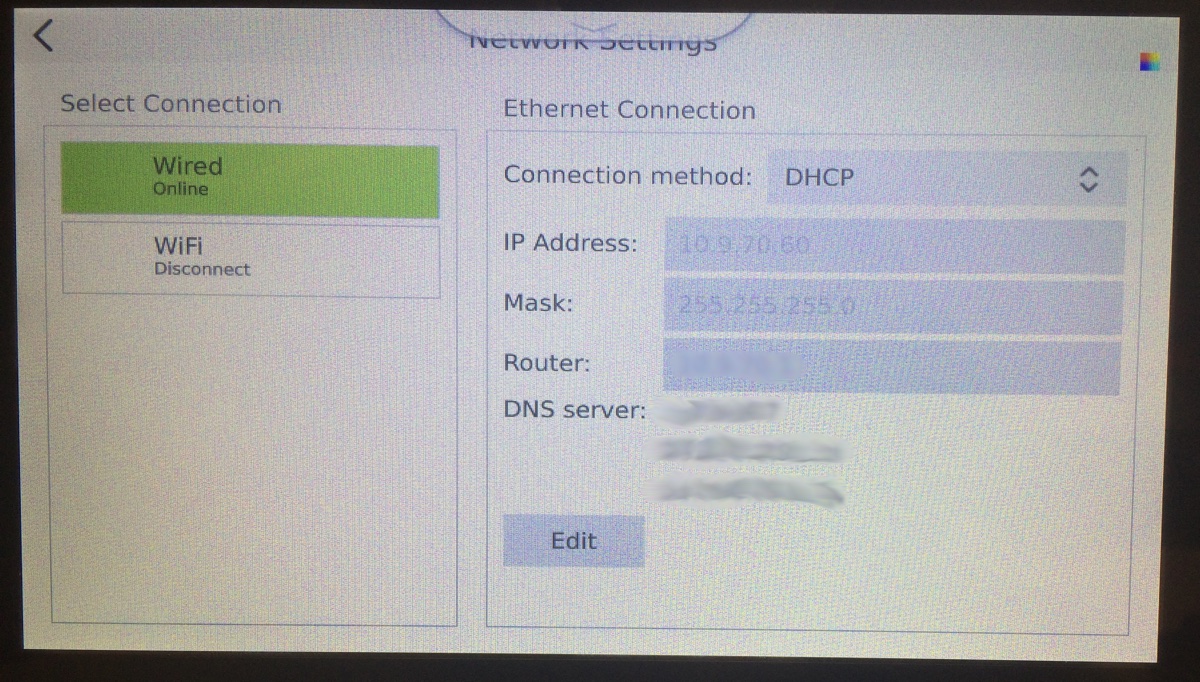
Now you know the IP address (10.9.70.60), so you can connect to the device from your PC via ADB:
d:\programs\sdk-android\platform-tools>adb devices
List of devices attached

d:\programs\sdk-android\platform-tools>adb connect 10.9.70.60
connected to 10.9.70.60:5555

d:\programs\sdk-android\platform-tools>adb devices
List of devices attached
10.9.70.60:5555 device

d:\programs\sdk-android\platform-tools>adb shell ls -l
total 68
drwxr-xr-x  2 root root  4096 Jan  1  1970 bin
drwxr-xr-x  2 root root  4096 Jan  1  1970 boot
drwxr-xr-x  5 root root  4096 Jan  1  1970 data
drwxr-xr-x 15 root root 13520 Jul 25 14:11 dev
drwxr-xr-x 40 root root  4096 Jun 22 20:55 etc
drwxr-xr-x  3 root root  4096 Jan  1  1970 home
drwxr-xr-x  8 root root  4096 Jan  1  1970 lib
drwx------  2 root root 16384 Jun 30 21:06 lost+found
drwxr-xr-x  2 root root  4096 Jan  1  1970 media
drwxr-xr-x  3 root root  4096 Jan  1  1970 mnt
drwxrwxrwx  4 root root  4096 Jul 25 11:38 opt
dr-xr-xr-x 95 root root     0 Jan  1  1970 proc
lrwxrwxrwx  1 root root    10 Jan  1  1970 root -> /home/root
drwxr-xr-x 12 root root   380 Jul 25 14:11 run
drwxr-xr-x  2 root root  4096 Jan  1  1970 sbin
drwxr-xr-x  2 root root  4096 Jan  1  1970 srv
dr-xr-xr-x 11 root root     0 Jan  1  1970 sys
drwxrwxrwt  8 root root   160 Jul 26 13:03 tmp
drwxr-xr-x 10 root root  4096 Jan  1  1970 usr
drwxr-xr-x  9 root root  4096 Jun 22 20:55 var
Here you can see that we’ve connected to the device using its IP address and executed simple shell command to make sure that connection is legit. And yes, since it’s a Linux, you can run lots of shell commands that way, including ifconfig and others. You can also connect to the device via SSH as root@10.9.70.60 (no password required).
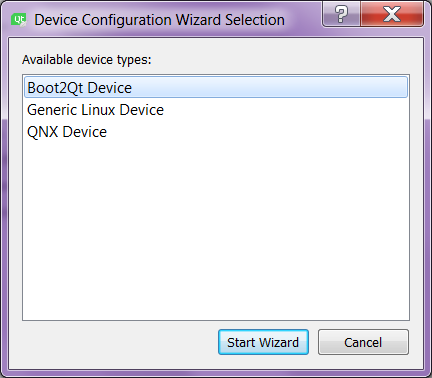
Now you can add your Raspberry Pi into the Qt Creator almost like the last time. The difference is: now you need to add new device via IP address. Press Add button in the Devices tab:
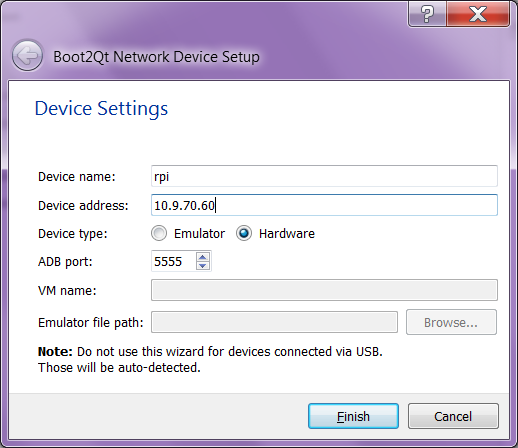
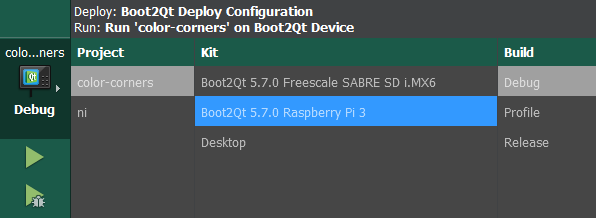
Then add new kit, target and we can now run our test application from the last article:
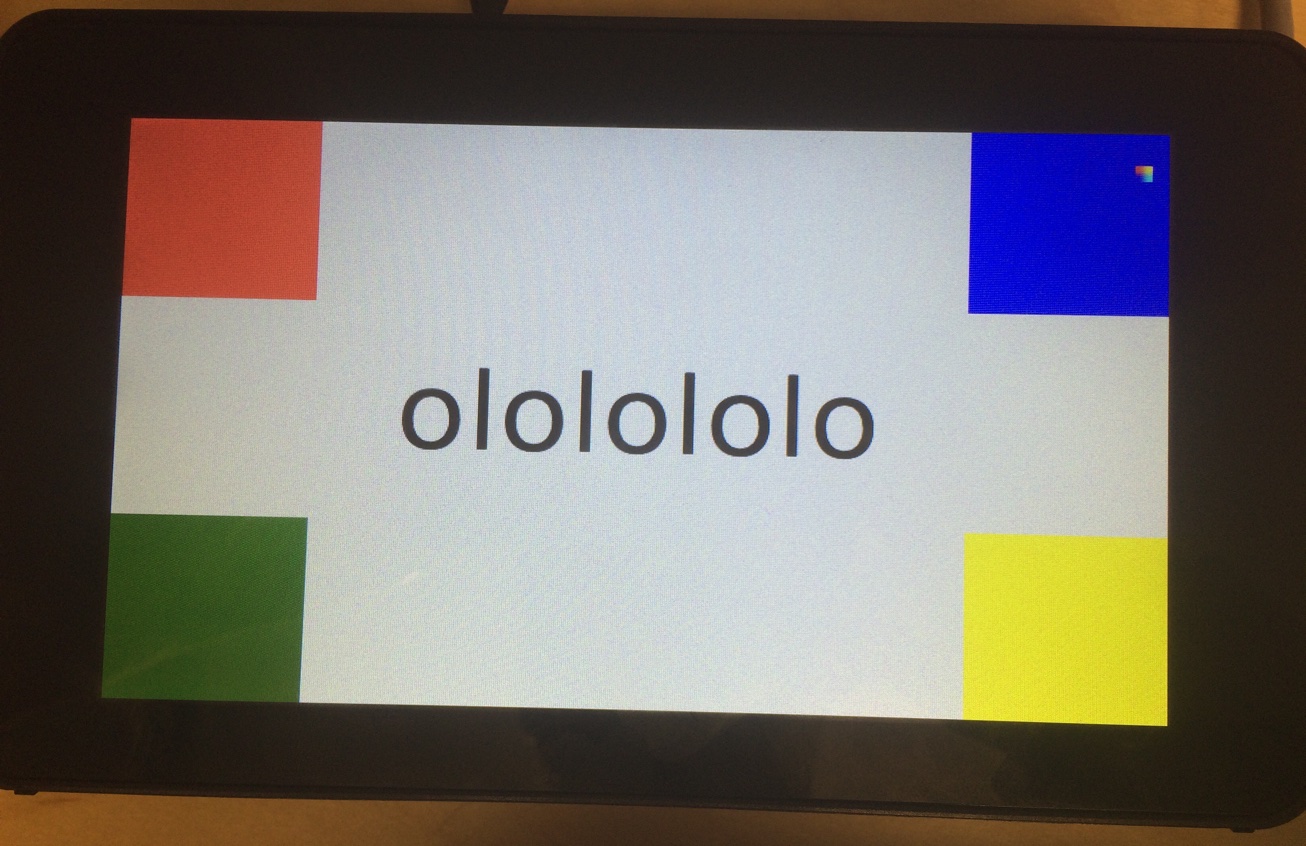
That’s it.
If you want some of your own applicatuons to start instead of the Boot to Qt launcher, read this article.
About one year after this post was created, The Qt Company made a video tutorial that covers the same subject: