Steam Deck
If you play games (actual games, not press-X-to-win blurry movies), then undoubtly you have heard about Steam Deck. Otherwise you can probably better just go watch some more of your favorite titles on PS/Xbox/Switch/whatsthename instead of reading this wall of text.
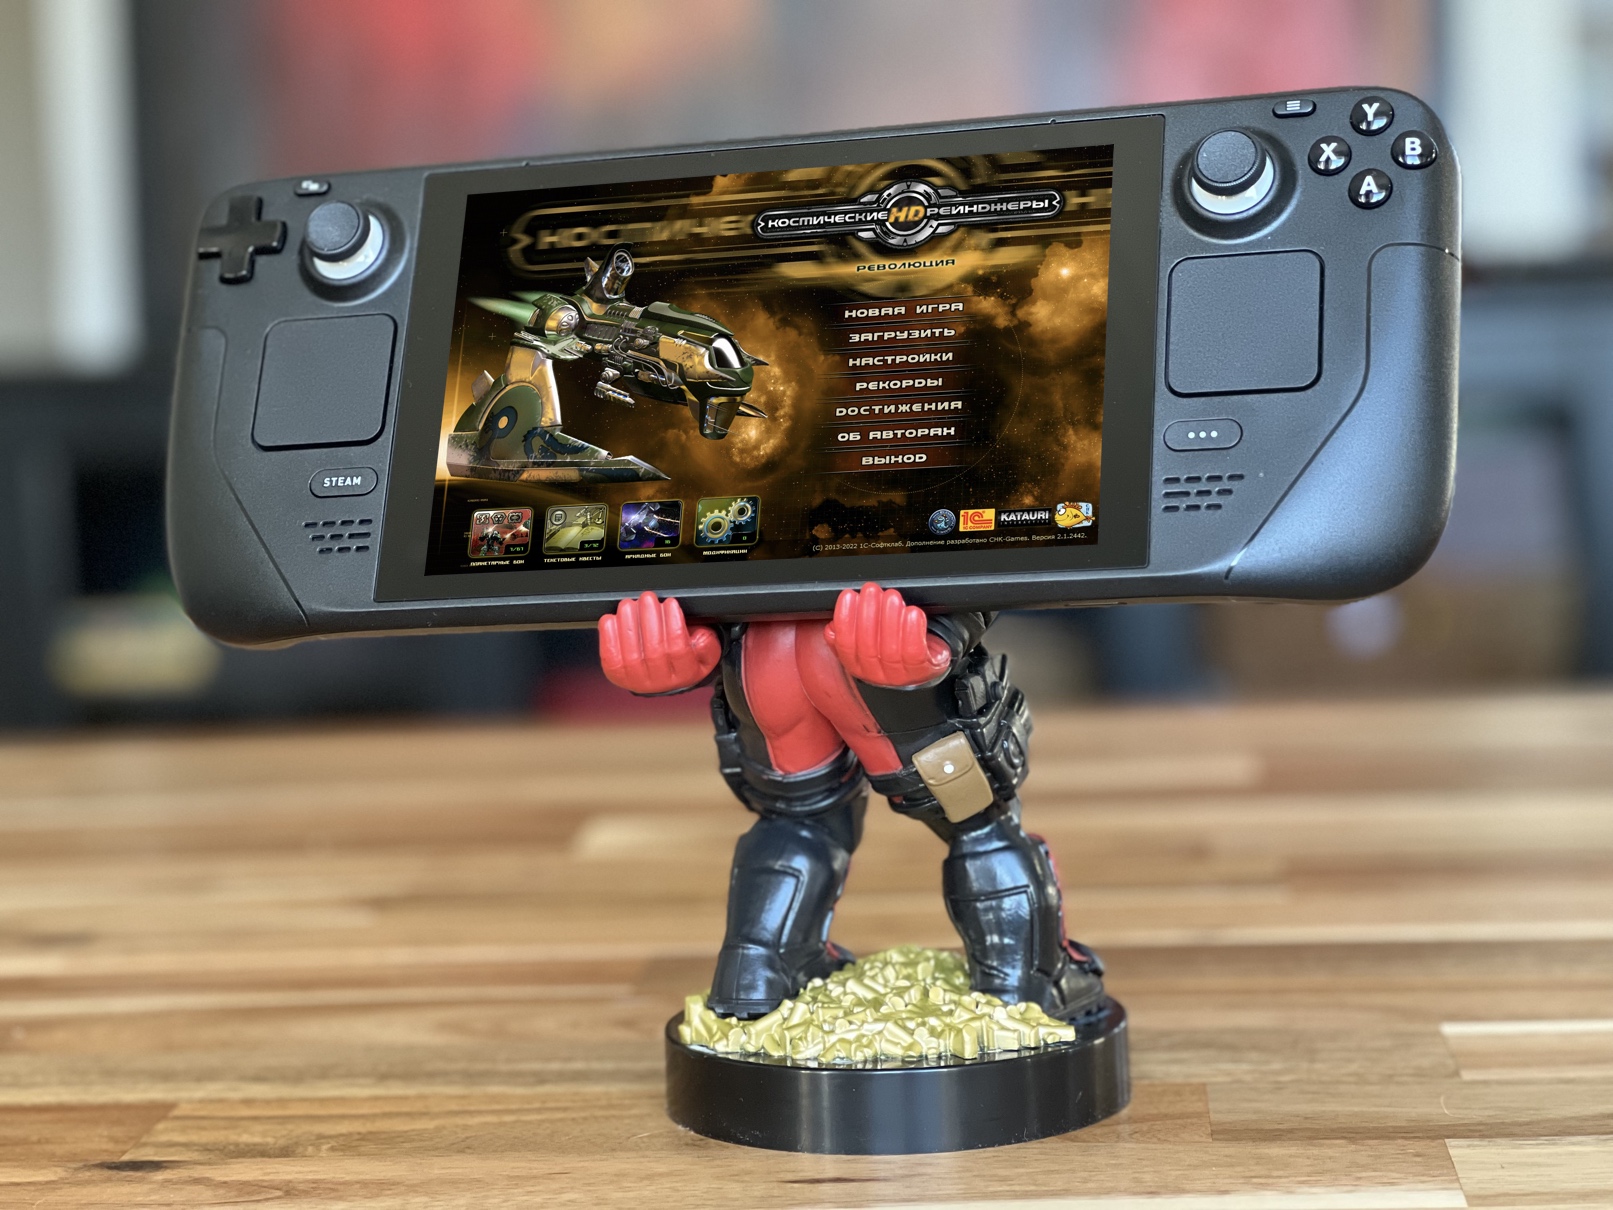
Yes, I’ve got my very own Steam Deck too. And as many have already said, it does exceed all the expectations (and then some).
How did I get it
This entire section is unlikely to be of interest for many, so I’d probably recommend to skip it. It is here mostly for myself to document the torture of waiting and overcoming “logistics” troubles.
Ever since I had learned about Steam Deck existence somewhere in summer of 2021, I’ve been dreaming about getting it. Valve has quite a reputation in my eyes, and so even I knew almost nothing about Steam Deck, except for its advertisement, I immediately believed that this is going to be a great device for gaming and was willing to pay for it right on the spot.
But that wasn’t quite possible to do when they began selling it on the 25th of February 2022 (the next day after Russia started an actual war against Ukraine - a horribly coincidencial timing, it was like news from a different universe), because of two reasons:
- You couldn’t just buy it, as stock units availability was limited, and there was already a queue of several months of reservations;
- I live in Norway, and Steam Deck still isn’t available for purchase there (and probably never will be, just like Valve Index).
Nevertheless, I was waiting and waiting for something to change, and eventually something did: in October 2022 Steam Deck became available for purchasing without reservations. That triggered me to finally do something instead of just waiting for Valve to start selling it in Norway, and since I have friends in US, I’ve come up with an idea to order it to their home address, and then pick it up on my next visit to US, which I already had planned in the next months. Worst case, they could’ve sent it to me with DHL or something. And of course, if I had friends in any of the EU countries (Sweden would be the best in this case), it would’ve been even easier/faster.
Another option was to use some “proxy” forward-delivery service, which provides a delivery address in US and forwards the package to you into another country, and if I didn’t have friends in US, I would probably use one of those.
Purchasing Steam Deck in US store from outside US
So, how does one purchase something in Steam’s US store, when one’s account belongs to a different region (Norway, in my case)? Well, one just does not. Your account needs to belong to US region, and you need to have a US bank card, which is a show-stopper for many (but fortunately I did have one).
Okay then, I decided to create a new Steam account in US region and purchase Steam Deck from it. My first attempt was without VPN, and surely enough Steam auto-detected my country to be Norway. There is a dropdown list with countries, where you can select US, but in the end you’ll still get Norway, which you won’t be able to change. Someone might say, but you can change the region to US, just purchase something in US dollars, and I know about that, but actually this is a kinda Catch-22 situation, because when I was trying to add my US bank card, it was redirecting me to a page saying that to change the region I need to purchase something using the currency of that region, and when I was trying to add my US bank card in order to do so, it was redirecting me to a page saying that… and so on. So that attempt failed.
Next attempt was to create an account through VPN which was set to use a US server, but Steam gave me an error right away, saying that I need to disconnect from VPN and try again, so they do detect VPNs. Just in case I also tried to create a virtual machine in Azure in US region and set-up a VPN connection through it, hoping that self-made server most certainly isn’t in their list of known VPN’s, but I still got an error message about detected VPN, so apparently they are blocking entire Azure (and probably also AWS, Digital Ocean and others) IP range too.
It is very unlikely that Valve can detect all possible VPNs on the planet, so you may find a VPN that hasn’t been “blown” yet, but I just gave up at that point.
And then I realized that I don’t have to create a new account, I can just “migrate” my current account! It is quite hilarious that I haven’t thought about this right from the beginning, but actually I’ve read somewhere in Steam terms and conditions that it is not allowed to move your account to a region where you are not really living, so probably one might want to think about this before risking one’s main Steam account.
Anyway, to change the region in an existing Steam account you need to buy something using the currency of that region. I tried to do that by purchasing Razortron 2000 (because it costed 0.28 USD at the moment) using my US bank card, but it still didn’t let me change the country from Norway. I almost despaired, but then I tried to do the same via VPN, and for this operation it didn’t give me the VPN error! Fucking finally, after that the region of my Steam account changed to US.
Apparently, I could’ve tried the same on my very first attempt with a freshly created account, and probably then I could’ve broken the cursed circle of Catch-22 redirections. The only difference would be that for the absolutely new accounts Steam seems to set a minimum threshold of 5.00 USD purchase. Anyway, luckily I don’t need to test that theory.
It is allowed to change the region once per three months, and I will probably return my account back to Norway after that cooldown. I would like to keep it in US, but I’m a little scared of getting a ban for not actually living in US (if that is really a thing). I am also somewhat concerned that performing such region-switching trickery to purchase Steam Deck was already against Valve’s rules/ToS.
Speaking about terms and conditions, one thing for sure - I won’t be able to return my Steam Deck for repairment/replacement, should anything happen to it, at least not directly I won’t.
Ordering and waiting for delivery
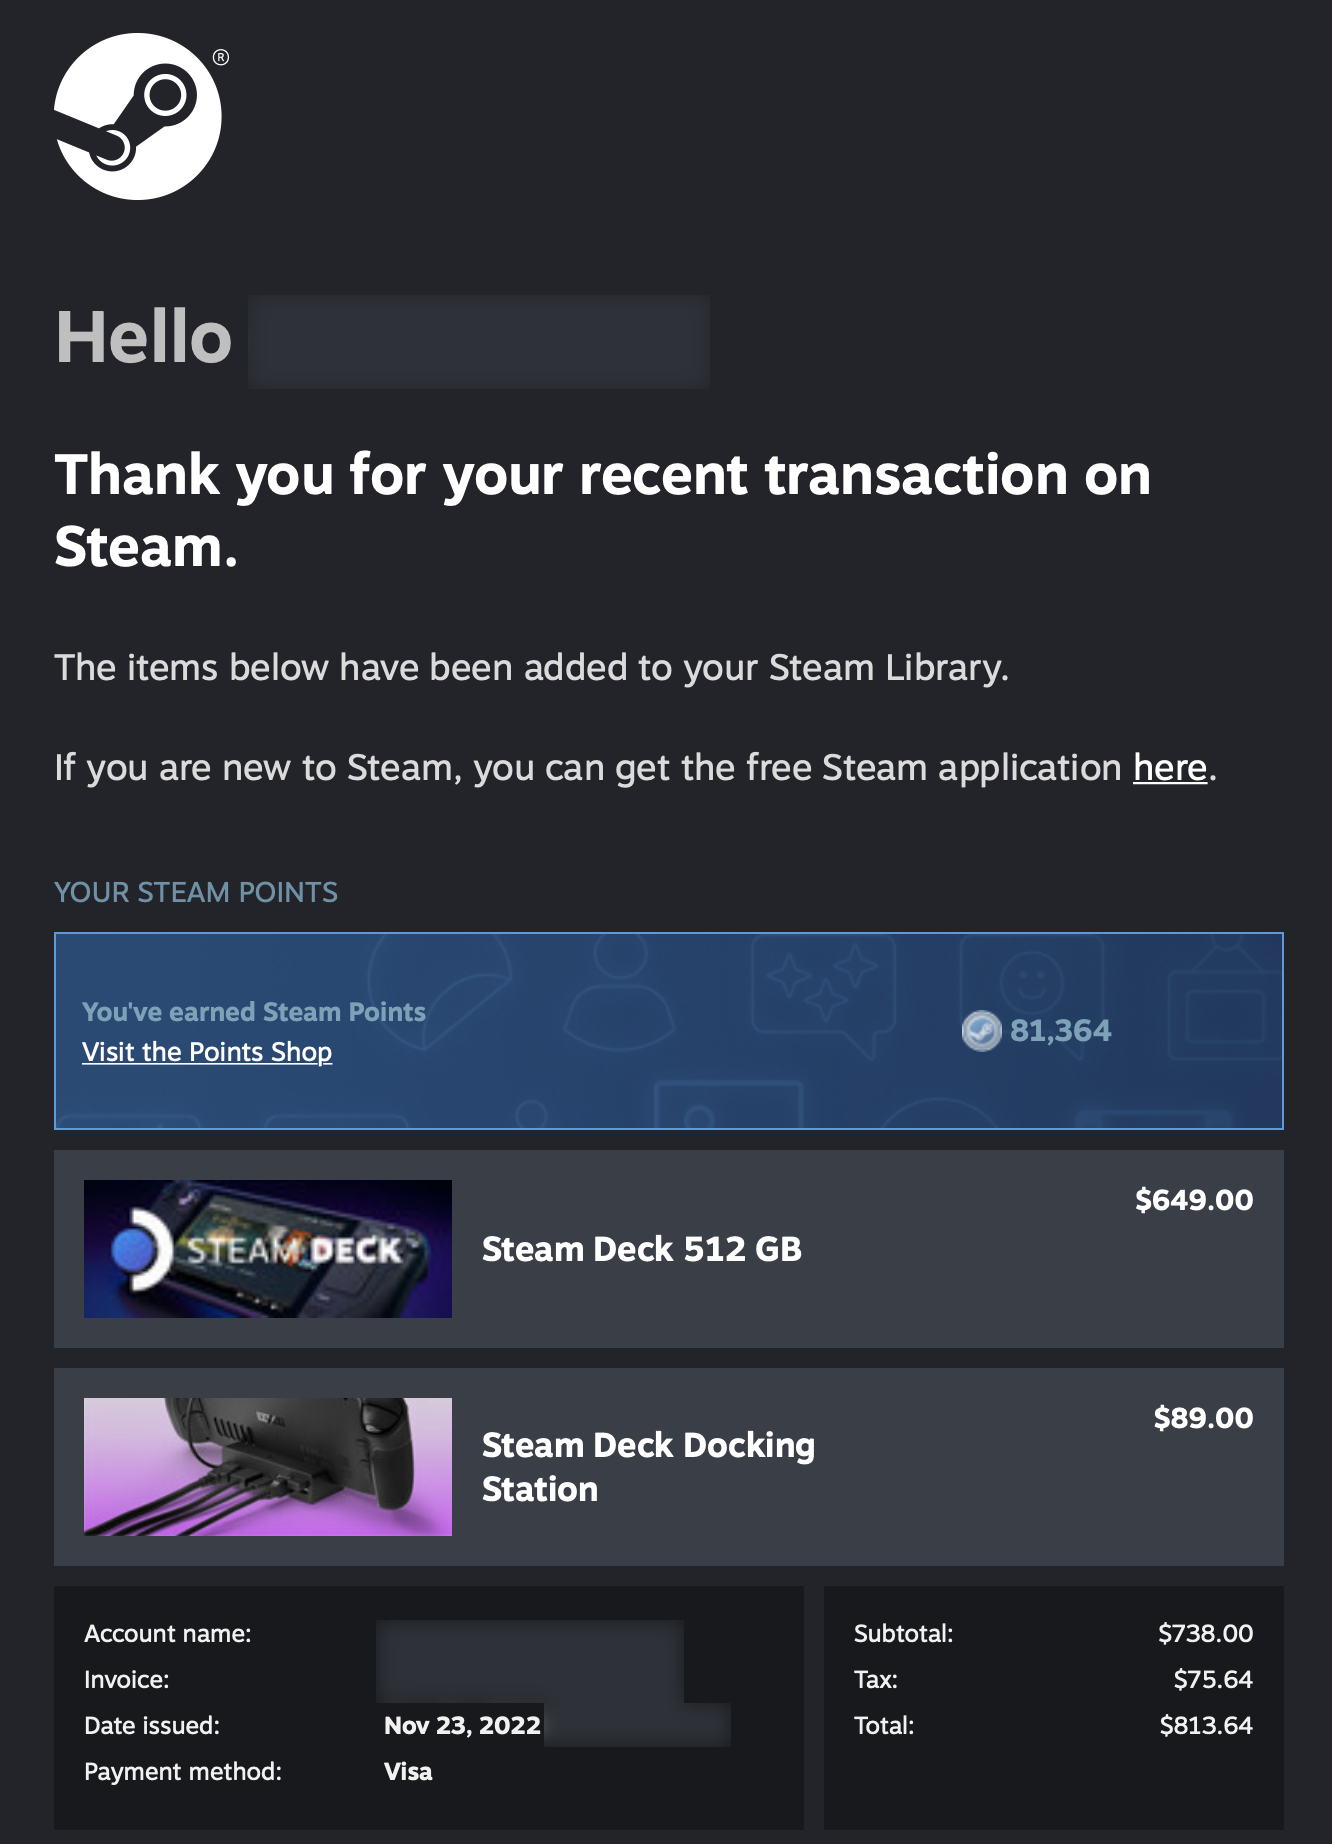
I decided to buy Steam Deck 512 GB model (more on that later) and also Steam Dock. Added both to the shopping card, total amount with taxes was 813 USD:
- subtotal: 738.00 USD
- tax: 75.64 USD
- total: 813.64 USD
Clicked on payment, but it didn’t succeed, because my US bank (Wells Fargo) blocked the operation. That got me worried for a minute, but it turned out to be just a security measure, probably because I’ve never used this card for buying anything on Steam, and to lift the restriction I only needed to call the bank and approve the operation through a robot (didn’t even need to talk to an actual person). And some minutes later I also got an automatic e-mail from the bank describing the situation and suggesting to approve the operation by merely clicking on the provided link, but I’ve already settled this via the phone by then.
Since the first operation was already blocked, Steam wasn’t letting me to proceed with the payment, so I had to click on editing the payment method, save it without changes and try again. This time the payment succeeded, and I got a confirmation e-mail:
After that if you’d like to check your order status you can do it in your Steam account purchase history: there will be a link called “View Shipment Details” in the table row with your Steam Deck order.
Delivery chronology
- 2022-11-23 (0 days):
- placed the order;
- 2022-11-24 (1 day):
- status changed from
Payment ProcessedtoPacked;
- status changed from
- 2022-11-25 (2 days):
- status changed to
Shipped(probably it was onPicked upfor some time too, but I haven’t noticed); - got an e-mail with tracking;
- status changed to
- 2022-11-26 (3 days):
- FedEx tracking says that both packages “left FedEx origin facility CAROL STREAM, IL”, also both are showing in the application;
- and Steam Deck turned out to be
In Transit, apparently already from one of the previous days;
- 2022-11-29 (6 days):
- Steam Dock first changed to
In Transit, then toOut For Deliveryand then later that day it was delivered. Delivery time window was set to 09:05-11:40, but in fact it was delivered at 12:31, and push notification arrived in the application another 30 minutes later. By the way, just look at this atrocious delivery photo. Here’s a full log with the weight (0.91 kg); - Steam Deck hasn’t arrived yet. So yeah, even though I purchased both of them in one order, delivery dates turned out to be different;
- Steam Dock first changed to
- 2022-12-01 (8 days):
- Steam Deck got delivered. Here’s a full log with the weight (1.81 kg).
Thus, the total time from the day I placed the order till both Dock and Deck got delivered was 8 days, which is pretty good. But of course in my case that was just the delivery to my friends home, and I still needed to go to USA and pick it up from them, which happenned only some weeks later.
So, overall, it is not a very easy/quick procedure for a non-US resident:
- need to have a US bank card;
- need to have friends or someone living in US to be able to use their address for delivery;
- need to somehow fetch the package from friends.
And even though I have my Steam Deck now, I still would very much like Valve to start selling it in Norway. At the very least so I could send it for repairment, if anything happens.
Differences between models
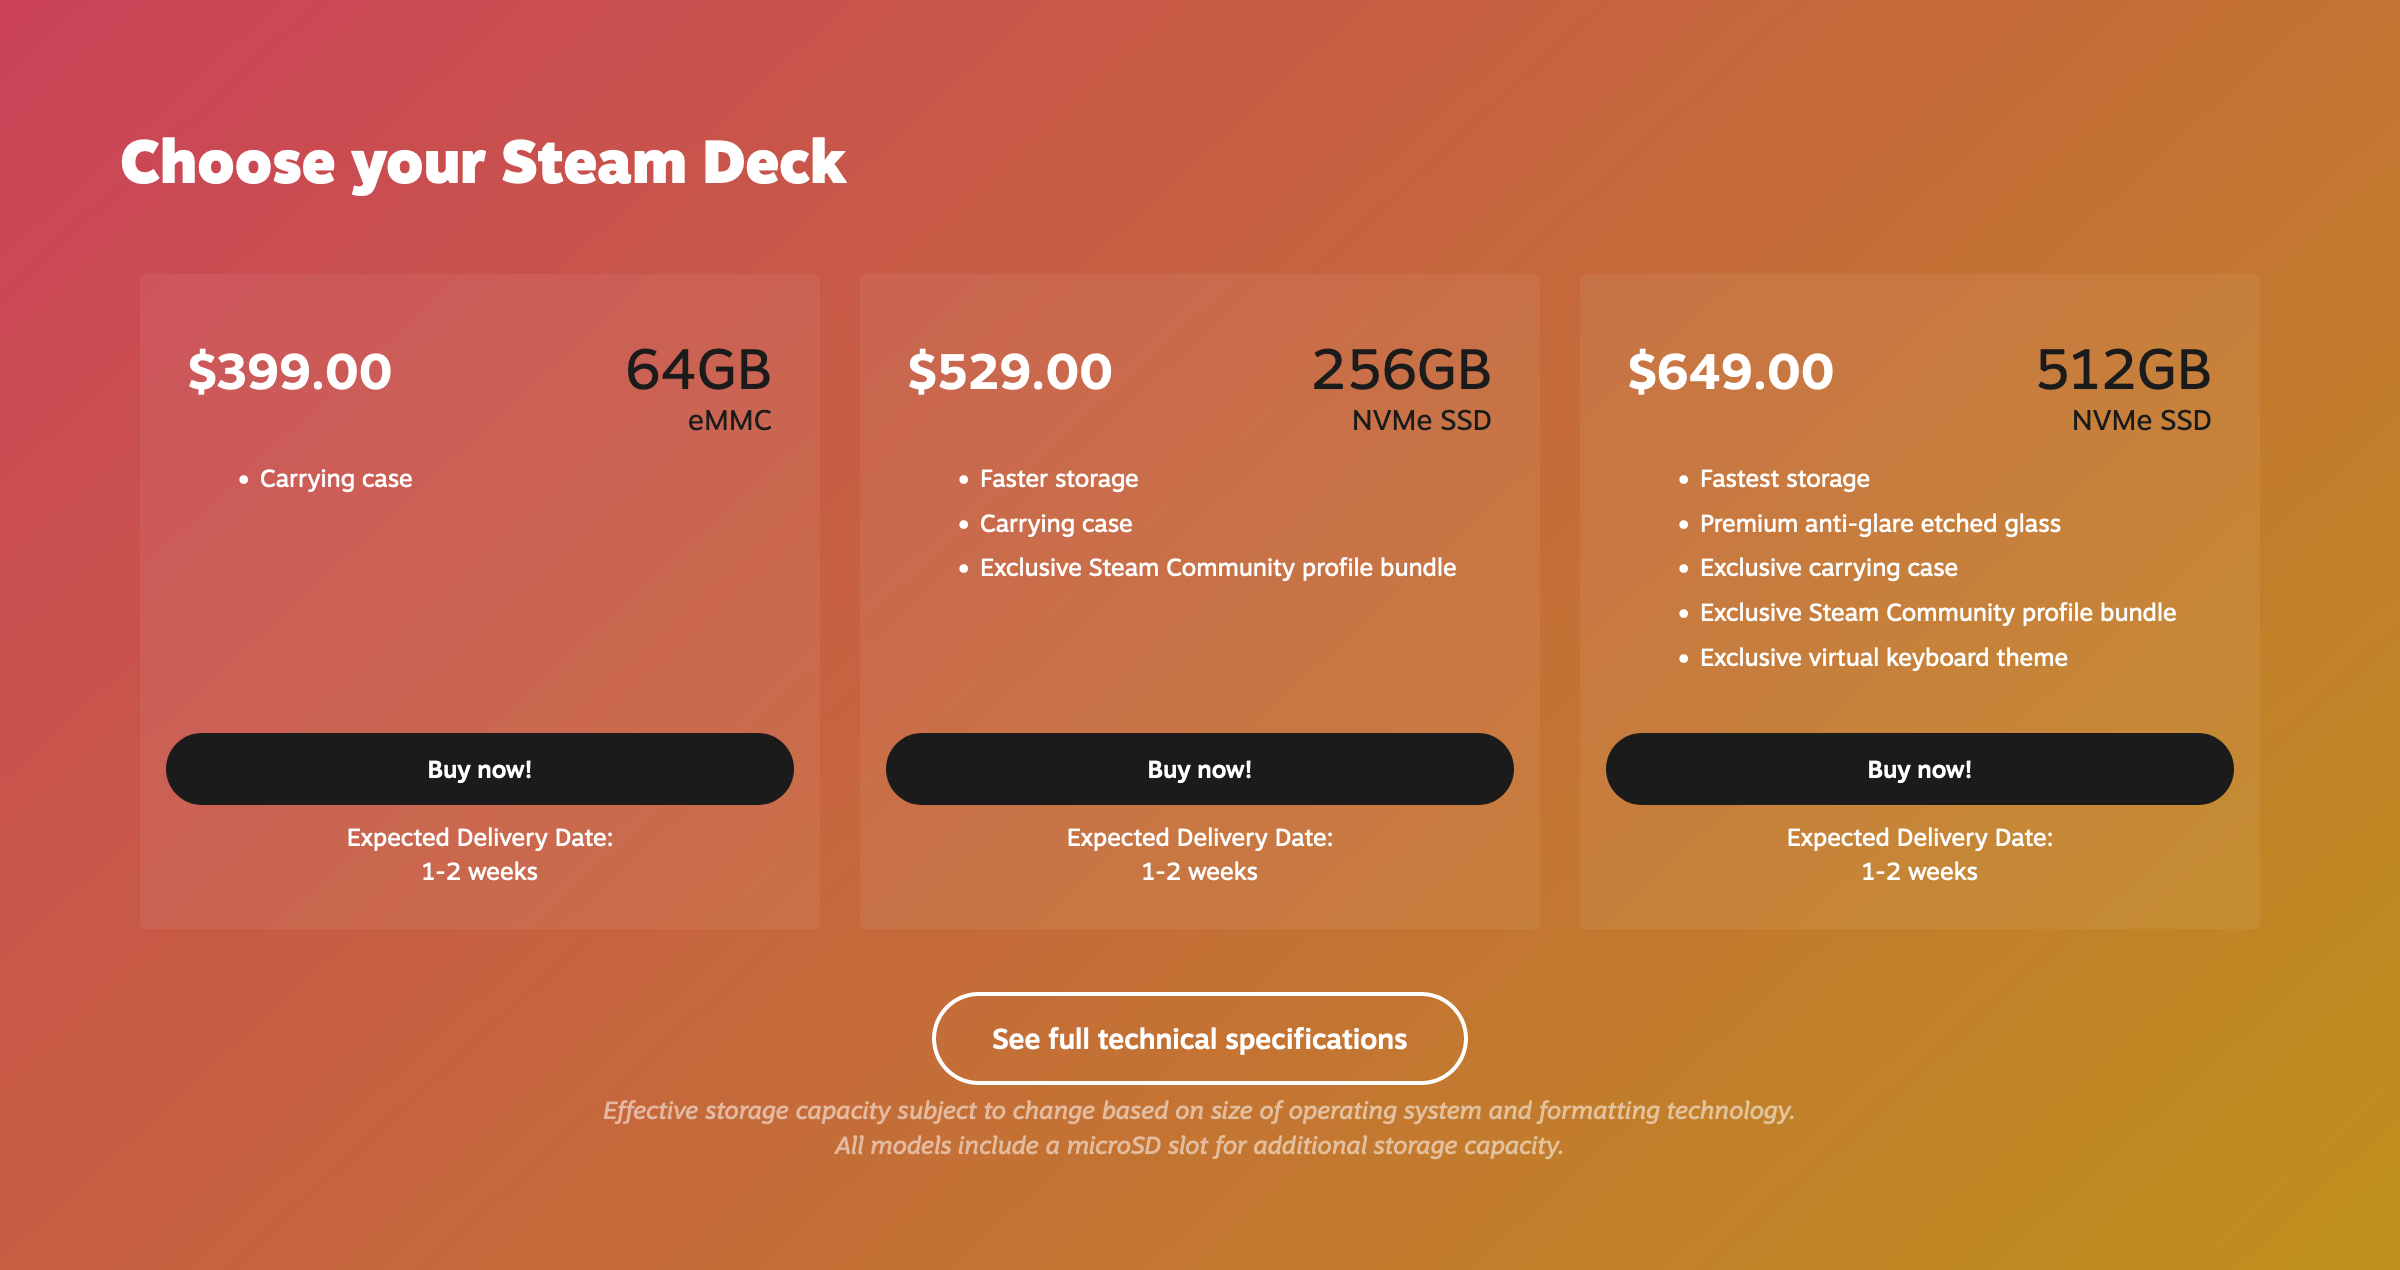
From the moment Steam Deck sales started in 2022 and up until now (2023-04-10) there have been 3 models available for purchasing (later they also released OLED variant):
There are some more differences than what’s listed on the website, and you most definitely have already read about those all around the internet, but I’ll still make a comparison table of my own:
| Steam Deck 64 | Steam Deck 256 | Steam Deck 512 | |
|---|---|---|---|
| Storage space | 64 GB | 256 GB | 512 GB |
| System disk (2230 M.2) | eMMC (PCIe Gen 2) |
NVMe SSD (PCIe Gen 3) |
high-speed NVMe SSD (PCIe Gen 3) |
| Screen | - | - | anti-glare etched glass |
| Case | white logo, black zip handlers, black insides | white logo, black zip handlers, black insides | blue logo, white zip handlers, gray insides, different fabric (of insides?) |
| Accessories | - | - | microfiber cleaning tissue, poach for charger |
| Steam profile bundle | - | yes | yes |
| Additional virtual keyboard skin | - | - | yes |
| Price | 399 USD | 529 USD | 649 USD |
There is apparently also an exclusive transparent model with a white case, which supposedly was given out internally to Valve employees on Christmas, although that might be just a rumor. But if it does exist, its hardware is probably the same as in stock models.
Full technical specifications for all the models are published here.
The most important conclusion to make from this table is that the performance in terms of CPU / RAM / GPU is the same across all 3 models. Except for the disk read/write(?) speed difference, which might be negligible.
This means that one can just purchase the cheapest 64 GB model and get the absolutely same gaming performance, which essentialy is the only thing that matters, as the rest is just cosmetics. Except for the anti-glare screen, which can probably make a difference in certain scenarios.
About the storage
Let’s talk about the storage then, since performance-wise all 3 models are the same. Basically the choice comes down to how much available storage space you’d like to have on the system disk. Arguably that isn’t very important either, as Steam Deck has a slot for microSD cards, so you can buy a 64 GB Steam Deck and a 1 TB card and you’ll have plenty of space.
Actually, you will most likely buy a card in any case, and for example I purchased a 512 GB card (SanDisk Extreme 512 GB for 51 USD) even before I ordered my Steam Deck. I can assure you, getting Steam Deck 64 GB model and no card is absolutely not a viable option, because free disk space will flow away like water through your fingers. Hell, it is not rare nowadays when even a single game can occupy more than 100 GB of space.
And even you did get a card, and let’s say it has a capacity of 9000 terabytes, you still probably will regret having a system disk with only 64 GB:
- one reason is the ever-growing shader cache, which will eat away gigabytes in an uncontrollable manner;
- second reason, which might not be important for everyone, is using Steam Deck as a “regular” PC, which involves storing various files, installing additional software, some (all) of which you wouldn’t want to store anywhere but on the system disk (development tools and libraries, CLI utilities, applications, etc).
So yeah, 64 GB model is probably only suitable for those who intend to use their Steam Deck for nothing but games. Which is probably the case for majority of users, actually.
Read/write speed-wise, SSD is definitely faster than a microSD card, so your games will load faster from SSD. But the difference isn’t that big to matter much, for example here’s a comparison of Portal 2 load times.
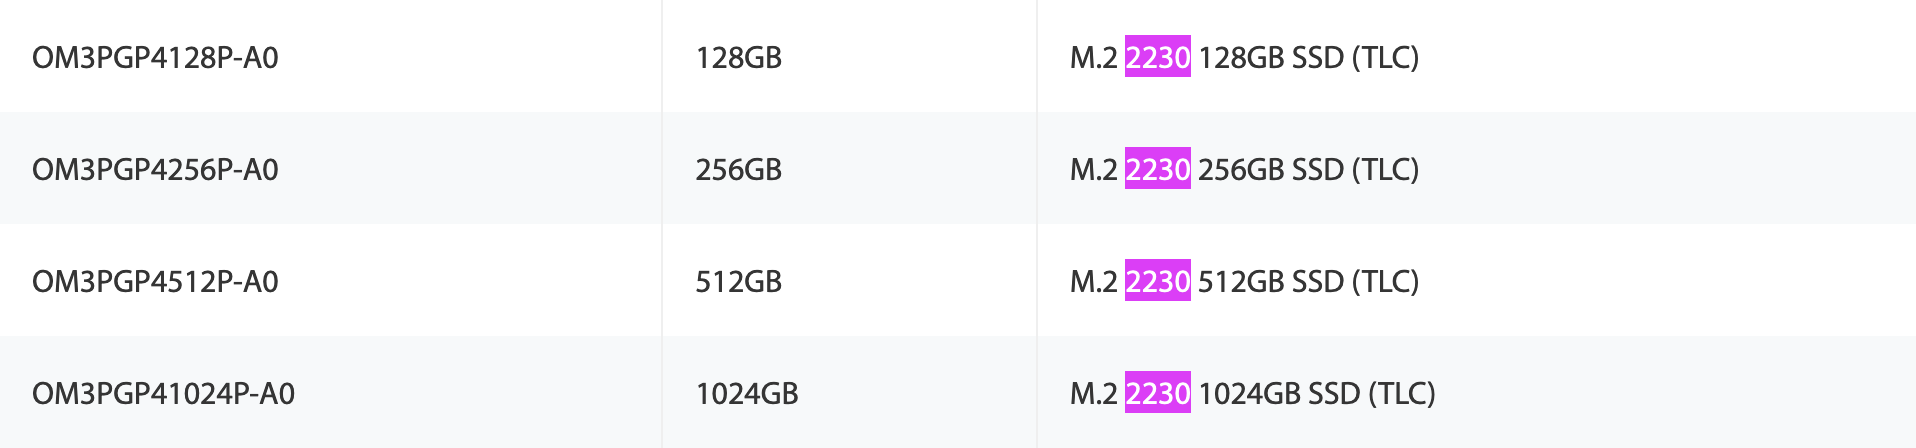
Another option which some might consider is to still get the 64 GB model but replace the default 64 GB disk with a 512 GB / 1 TB disk purchased separately. While this most certainly works and lets you save quite some money (Steam Deck 64 GB model plus 1TB SSD can end up being cheaper than Steam Deck 512 GB model), I most certainly wouldn’t do that, as I am not brave enough to disassemble my Steam Deck, plus Valve itself does not recommend to perform such an operation (more about reasons for that later).
x2 or x4
The 256/512 GB SSD can be PCIe Gen 3 of either x2 or x4 variation/model. Valve says that “in our testing, we did not see any impact to gaming performance between x2 and x4”, which of course means that x4 is so much better. But how can you check which one you got?
The disk model is specified on your Steam Deck components page, and I have Kingston OM3PDP3512B-A01. Device Viewer application reports the same. But how to check whether it’s x2 or x4? The Kingston website doesn’t even have this model in the list:
But fear not, you can get check that using the following command:
$ sudo lspci -s 01:00 -vv | grep 'controller\|Width'

01:00.0 Non-Volatile memory controller: Kingston Technology Company, Inc. OM3PDP3 NVMe SSD (rev 01) (prog-if 02 [NVM Express])
        LnkCap:    Port #1, Speed 8GT/s, Width x4, ASPM L1, Exit Latency L1 unlimited
        LnkSta:    Speed 8GT/s, Width x4
So I got x4.
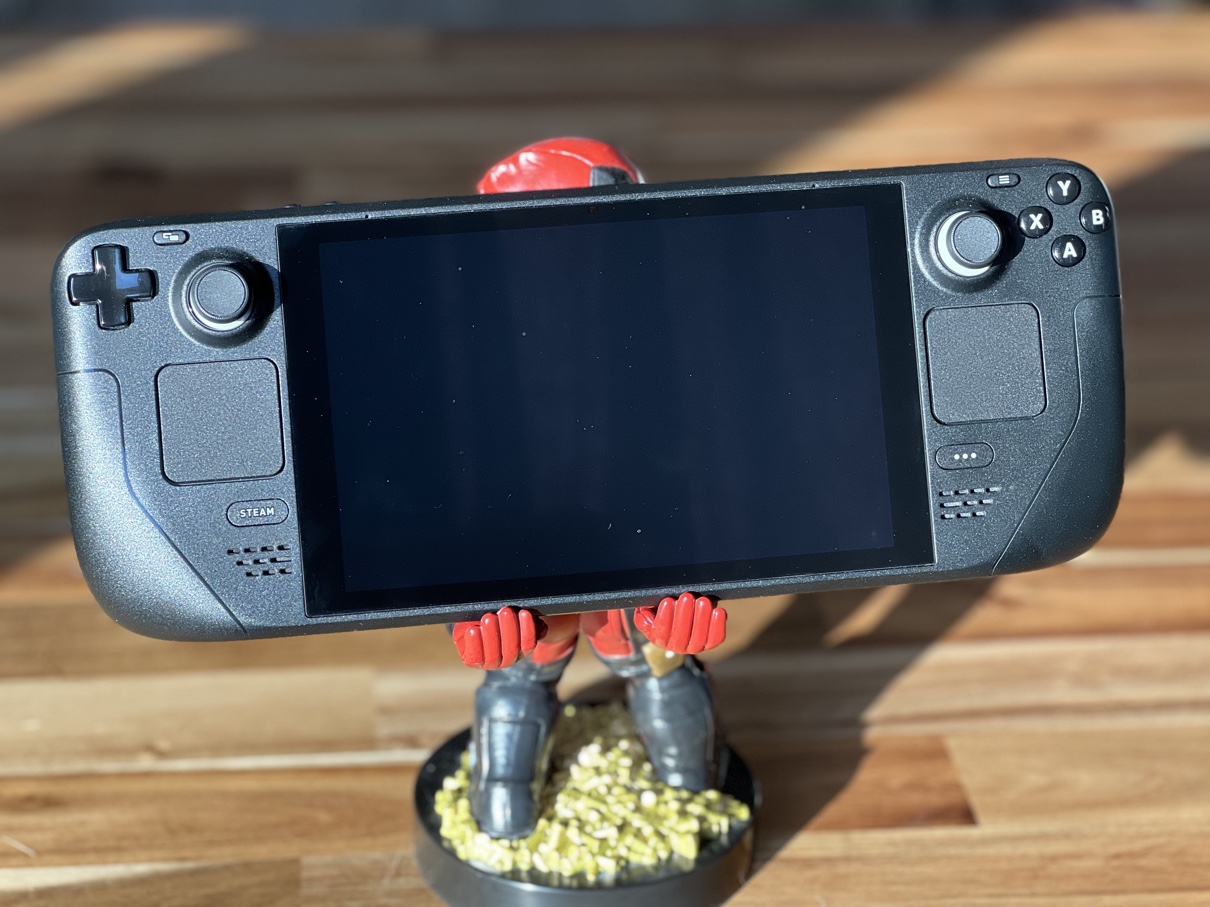
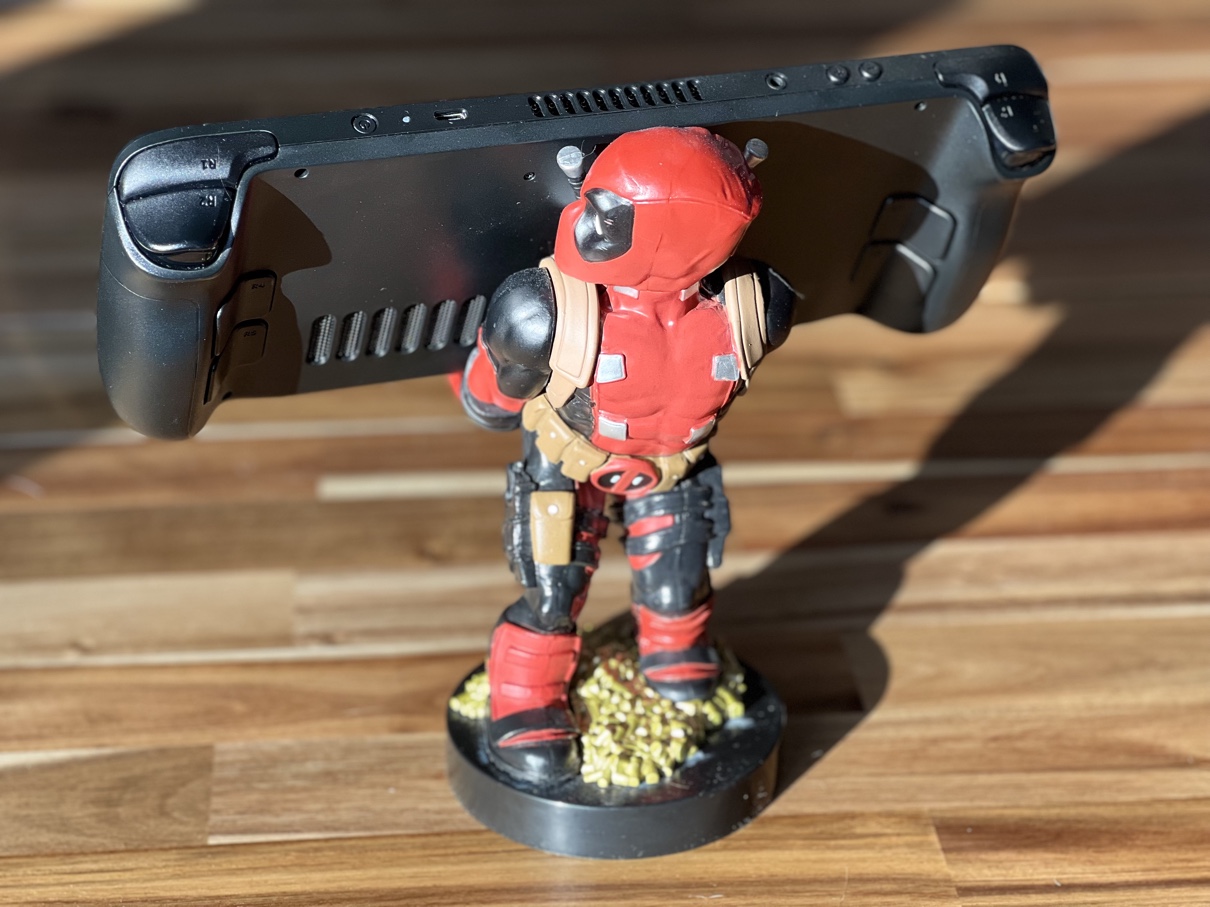
How does it look
Here are some photos of Steam Deck itself, as if you haven’t seen enough of those already:
Accessories included with 512 GB model:
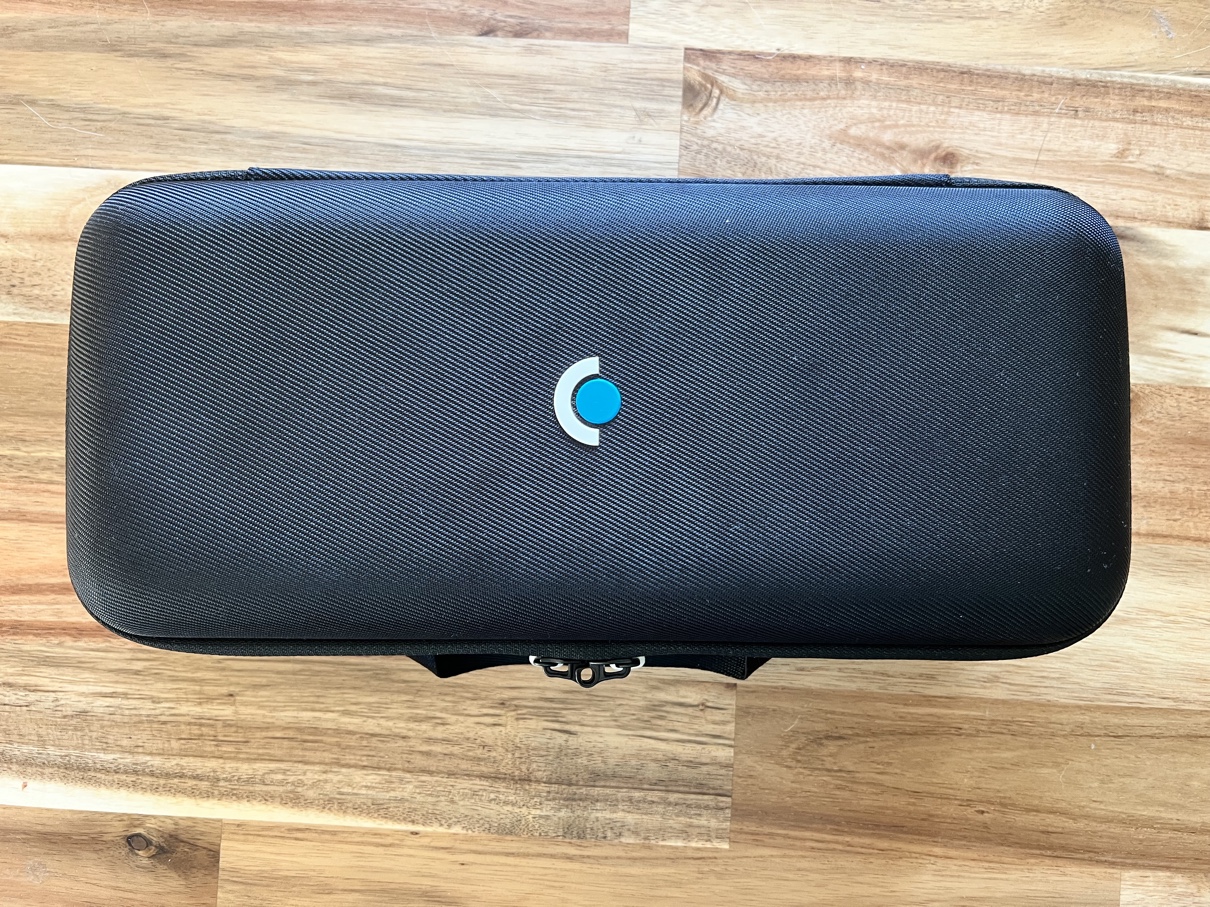
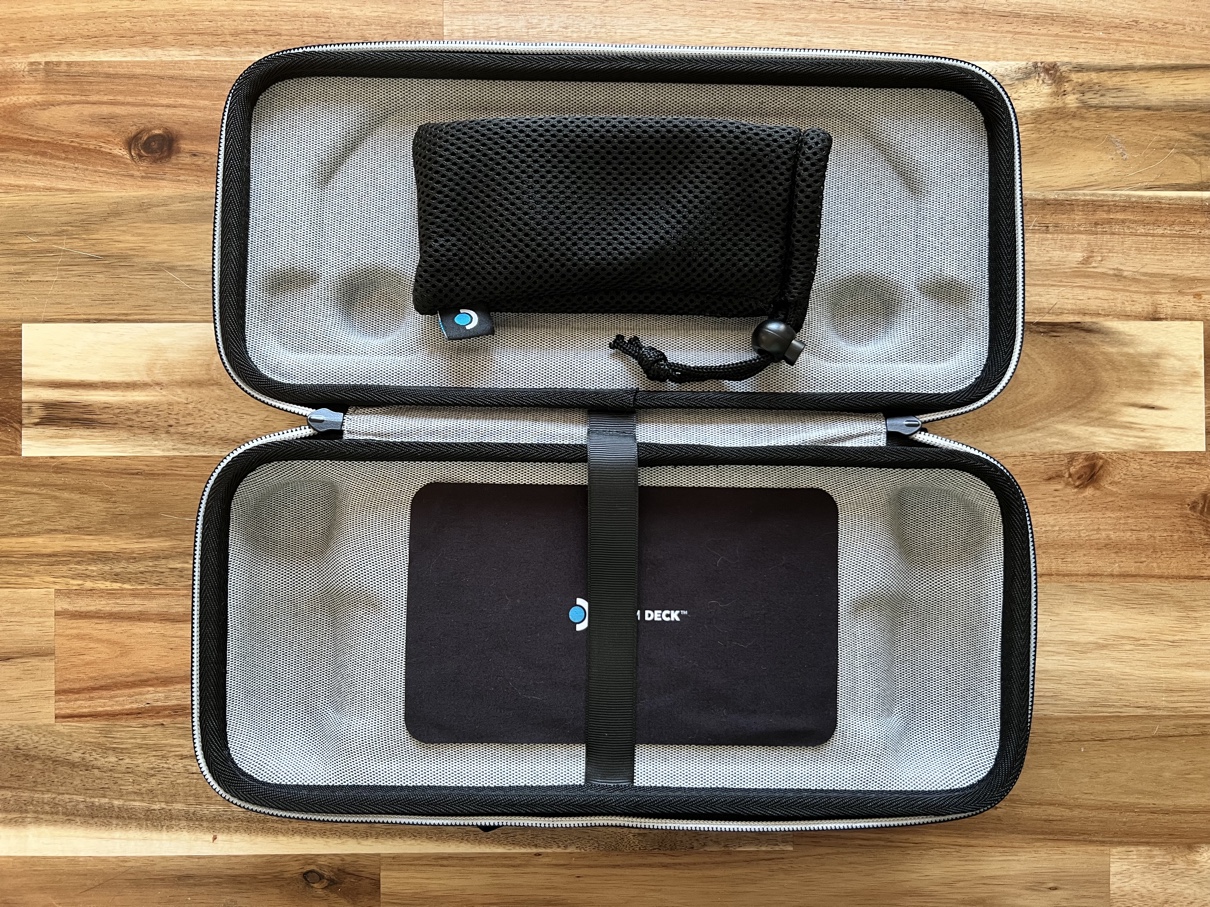
The case is of a very high quality. If it was sold separately, it could easily cost 50 USD but likely more, so it is very generous to provide this one included.
The cleaning tissue is a nice to have kind of thing, and pouch can be used for putting something (a charger) into it and stucking it under the strap on the backside of the case - there is a kinda pocket-cave there.
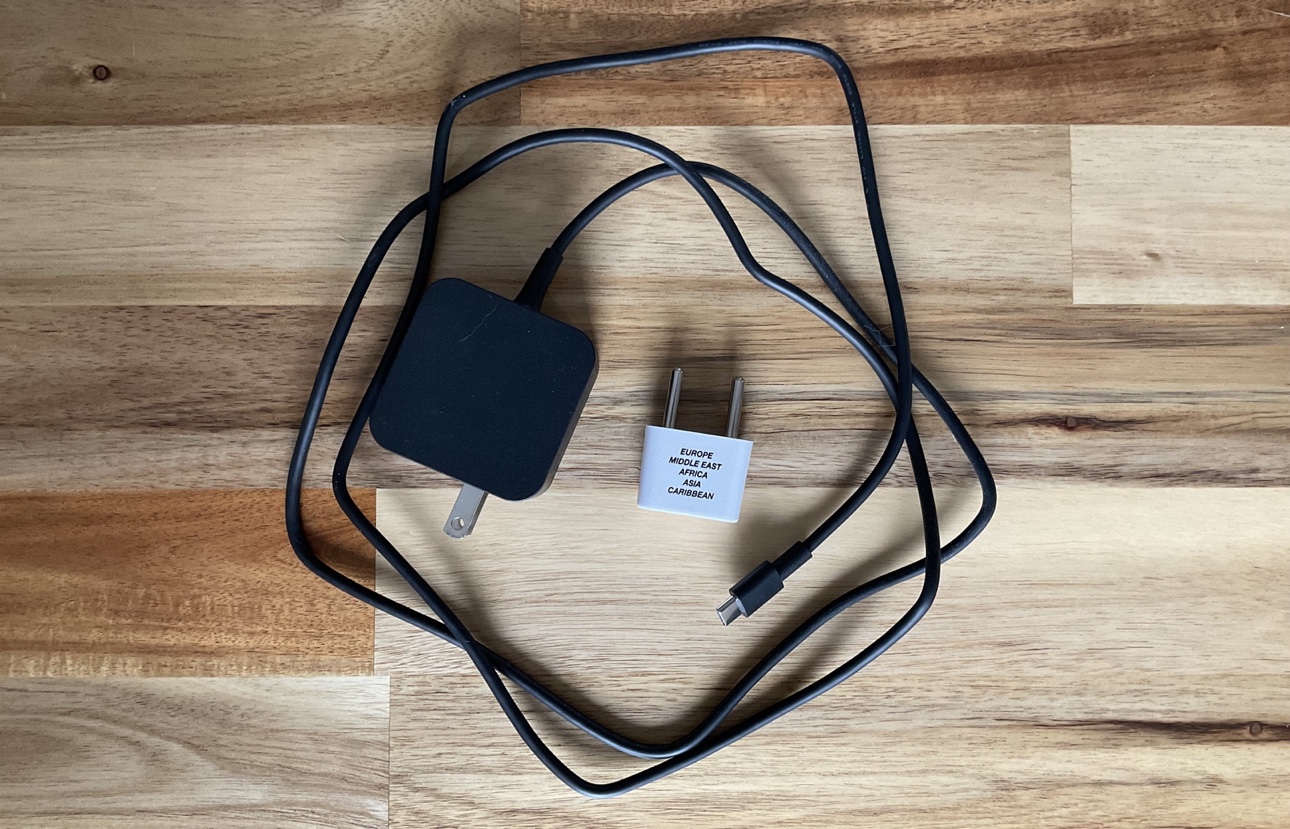
There is also a 45 W charger included, and since it’s a US plug, I needed to use an adapter (not a converter, because Steam Deck (like any other modern device) supports both 120 and 220/230/240 V):
Here are also photos with everything plus iPhone XR and Apple Watch for size comparison:
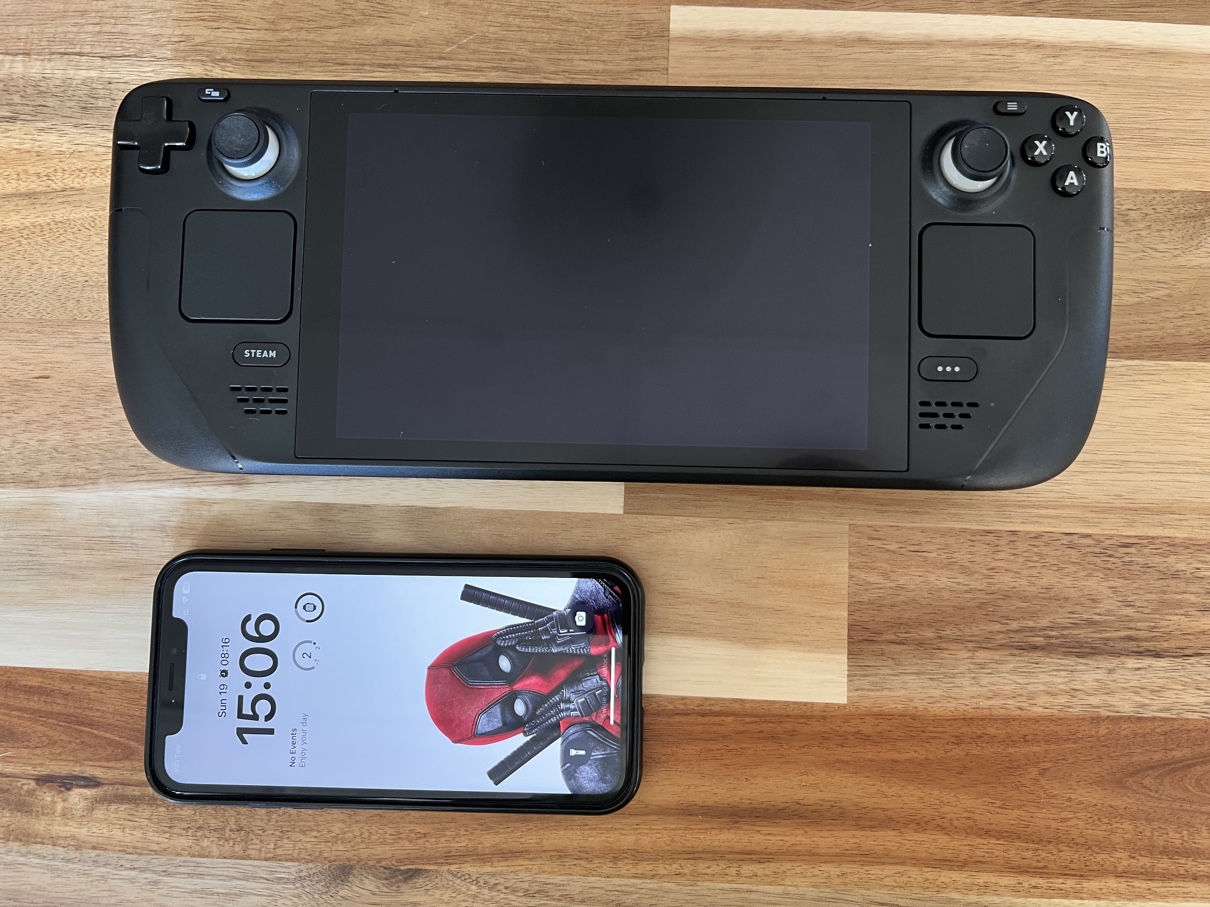
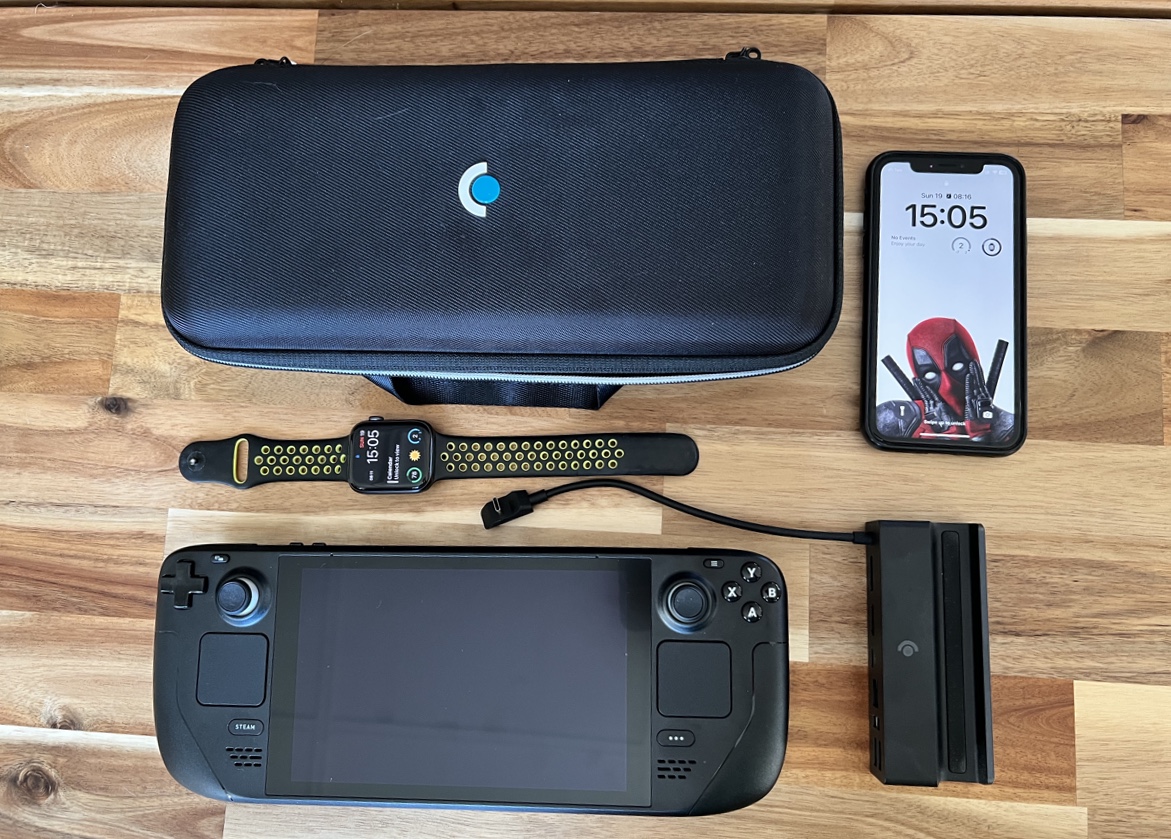
So it really is rather big, like you wouldn’t believe that a portable device can be that big. I mean, it’s not fat, but it is long. Valve did need to pack a lot of things inside, so I guess the size is justified. You certainly cannot put it in your pocket, and so a backpack is probably the only way to take out with you (it will occupy even more space being in the case). And now, a couple of months later, I got used to it so I barely remember that it looked big to me first.
The weight might not seem like much, but it is noticable, and for instance if you’ll be playing lying on your back and holding it above, your wrists will get numb/tired in about 20 minutes, so you’ll need to change positions (at least some positions for you to change, hehe).
Hardware
I won’t be talking about CPU/GPU characteristics like clock speed, cache size and so on. Quite honestly, these numbers don’t tell me much, the main metric for me is that it is capable of running all my games, and it does that better than my desktop PC (which was a gaming one, when I assembled it some years ago).
Controls
As far as build quality goes, everything seems to be very well done. Buttons and triggers are super nice and pleasant to click/push/trigger. The device feels great in your hands, all the controls are convenient to reach. I reckon, a lot of thought and experimentation went into designing this layout to make it feel that great. Here (page 23) you can take a look at some prototypes Valve went through.
Like some mentioned, the 4 back buttons are somewhat more difficult to reach and are more stiff/harder to press comparing to other buttons, but only at first. I got used to them very fast and really cannot complain. Either way, it is super useful to have 4 additional buttons.
Thumbsticks/joysticks are good, but in addition to just being good they also have “capacitive touch”, meaning that they generate input events when you just touch them without moving or pressing, which adds even more customization capabilities to the Steam Input.
Trackpads
Trackpads (or touchpads) are just outright great. Very nice precision, pleasant feedback (amazing feature on its own), and also they have a sort of inertia when you can kinda throw the mouse pointer in some direction and it will continue moving for some more even though you’ve already lifted your finger. That is so extremely satisfying, you need to try it out yourself, it’s hard to describe with words.
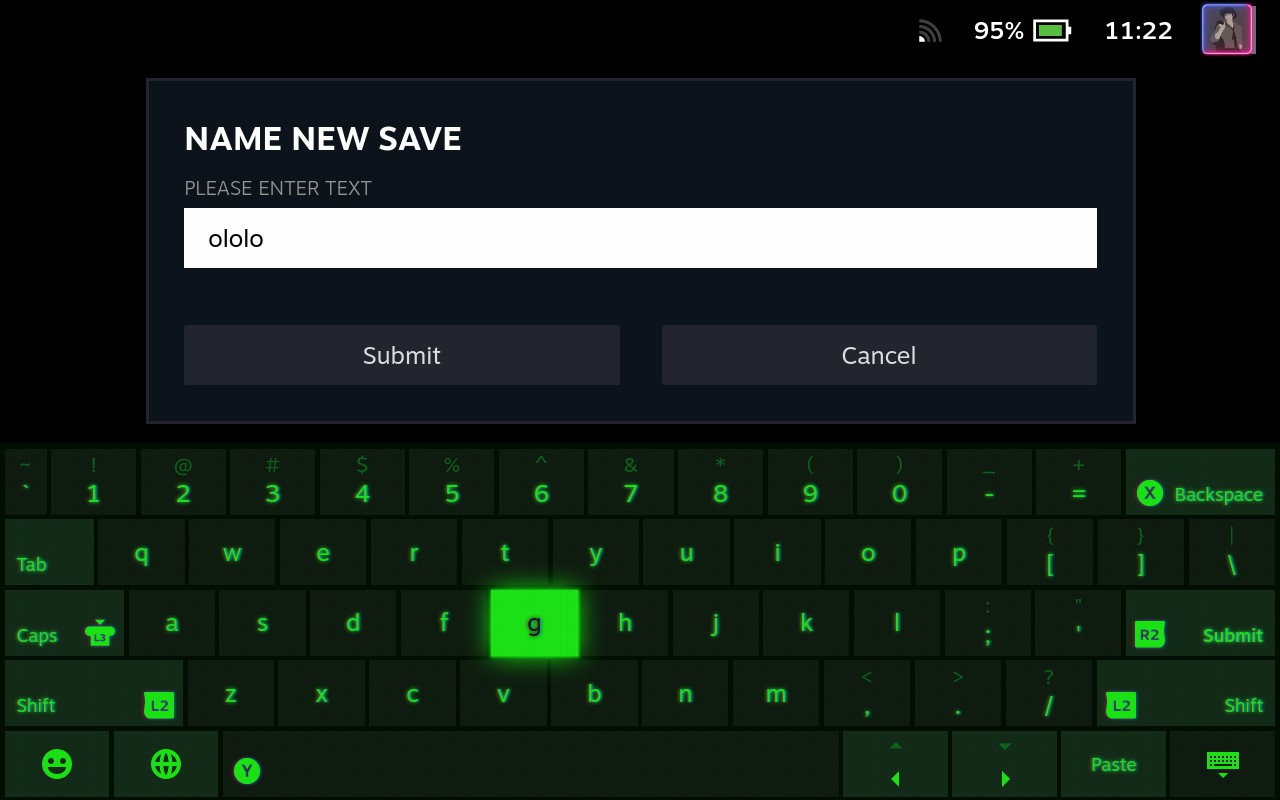
I’ve seen some people writing about how it would be better if Steam Deck did not have trackpads. I, for one, absolutely cannot imagine using Steam Deck without trackpads. For starters, typing on the virtual keyboard without them is ten times slower.
Without trackpads lots of games would take a severe hit in convenience and comfort of playing, as you cannot position the mouse pointer (aim, look around, etc) that precisely with joysticks, not to mention the lack of feedback and inertia movement. And when it comes to Steam Input, trackpads are a huge asset for using virtual menus.
In Desktop mode they are just god-send, you can operate desktop environment without having an actual mouse connected. They don’t entirely compensate the lack of mouse, but it gets very close to it. In addition, there are some nice (and again, extremely satisfying) gestures like circular movement on the left trackpad for scrolling.
Seriously, one needs to be mentally challenged to desire Steam Deck not to have trackpads.
Gyroscope
There is also a gyroscope, which you can use for more precise aiming in first-person shooters or elsewhere.
I’ve tried it, and does indeed seem to let you aiming much more precise than with joysticks/trackpads, which is something console gamers never had (unless there were already gamepads with gyroscopes before?). One just cannot play Counter-Strike with a gamepad on the same level as someone who plays with a keyboard and mouse. However, while you are likely to aim better than an average gamepad player, you are still very unlikely to get as good as a keyboard/mouse player.
I am still getting used to it, as it requires some training, especially when you want your character to shoot while moving. I can certainly say that it is a useful feature, and for instance it would be much harder to play games like Black Mesa having nothing but joysticks/trackpads for aiming. But still, it is pretty much inferior to mouse/keyboard, especially on higher game difficulties, so I’d say that even with gyro-input the aiming in first-person shooter games is not great on Steam Deck (or any other such device, for that matter).
One other thing to mention here is that you won’t be able to use gyroscope in a moving car (being IRL, I mean) and probably also on other means of transportation (buses, trains, plains?). It is just too good in being a gyroscope: all that movement will transform into your input, making the aiming/camera trajectory unpredictable. Might be obvious, but caught me by surprise on my first car trip with Steam Deck.
Speakers and sound
The speakers are loud enough, I never needed to set the level to more than 60-70%. The sound quality is good, at least it is so to my peasant hearing. If anything, perhaps it could have some more bass.
You can also connect headphones/speakers via 3.5 jack or Bluetooth. So far I’ve tried Bluetooth and it works fine with my Bose QuietComfort 35 and Apple AirPods Pro.
Some people complain about sound lagging when using Bluetooth-connected headphones, and yes, there is some latency. It’s not bad, but noticable, especially when I sort gems in stash in Diablo II. Some also complain about problems with microphones on their headsets, but that I haven’t tested yet.
Aside from speakers Steam Deck has its own microphone (“dual microphone array”) too, but I haven’t tested that either.
Screen
The screen isn’t too big, especially given its rather huge bezels. But you will be holding it quite close to your face, so it will be fine.
The resolution is 1280x800 and refresh rate is 60 Hz (meaning maximum 60 FPS in games). Having such not a very big resolution is one of the reasons how the device is capable of running even the most recent games that are rather demanding.
Having a such a not very big screen naturally results in difficulties with reading text. That of course depends on the game, and some games even take care of handling text readability specifically for Steam Deck, but most of the games do not. I found it especially challenging to read text in XCOM 2 and Witcher 3 games.
There is a screen magnifier shortcut, but it isn’t very convenient to use and the magnification isn’t very much helpful either. Well, it isn’t really a disadvantage of Steam Deck, just something inevitable. Besides, making a bigger screen would naturally make the overall device even bigger and also increase the power consumption.
The screen is a touchscreen - something I absolutely did not expect. I would say, it is a very nice capability to have, and in some cases it was really useful, but in general I think it’s rather useless, and the actual touch experience/responsiveness/sensitivity is quite far from iPad’s, so Steam Deck could probably do without having a touchscreen at all (and that would probably also make it a little bit cheaper).
As for the picture quality, some say it is mediocre and suggest installing certain plugins such as Vibrant Deck to control the colors saturation. I personally do not think that the picture quality is mediocre, it looks totally fine to me.
Mouse and keyboard input
Quite naturally, there is no mouse and there is no keyboard.
However, the mouse input is very well covered:
- you can use trackpads;
- you can use joysticks;
- you can use touchscreen;
- you can connect an actual wired/wireless mouse.
For the keyboard though you have only 2 options:
- you can call for on-screen virtual keyboard and type on it using either of the mouse inputs listed above plus arrow keys;
- you can connect an actual wired/wireless keyboard.
The on-screen keyboard I’d like to say some more about:
I saw people criticizing it, and there is some truth to that criticism, especially when it starts to act crazy in Desktop mode by constantly showing/disappearing when some input field gets focused, and it cannot decide where it should trigger on that or not. But I’ve seen a number of virtual keyboard on various devices, and in my opinion this is one among the best.
…As long as you don’t use touchscreen for typing, as it certainly isn’t on the level of iPad/iPhone-like experience. Well, that was is expected, as who has better touchscreens than Apple devices anyway.
Where the virtual keyboard does its best is when you are typing on it using trackpads: it’s a little bit hard to explain, but it’s kind of a “relative” typing, where every coordinate on a trackpad is nearing certain keyboard button, and each trackpad is responsible for its half of the keyboard, so you can type with both hands and somewhat reuse your “keyboard muscle memory”. You won’t get as high typing speed as you have on a physical keyboard, but it will still be very decent and rather convenient too.
And anyway, it’s not often when you need to type some text in a game (depends on the game, of course). So far I mostly needed it only in Desktop mode when a physical keyboard wasn’t nearby.
What’s surprising is that there is no way to input functional keys (F1, F2, F3 and so on), Ctrl and ESC key. This possibility will likely be added later, but how come it hasn’t been already added, neither initially nor after the whole year since the release date? Can it really be that no one needs these keys?
Battery
Long story short and taking the worst case: demanding games can run the battery down from 100% to 0% in about 1.5 hours (or less!). For instance, here’s a screenshot of XCOM 2 running at maximum graphics settings:
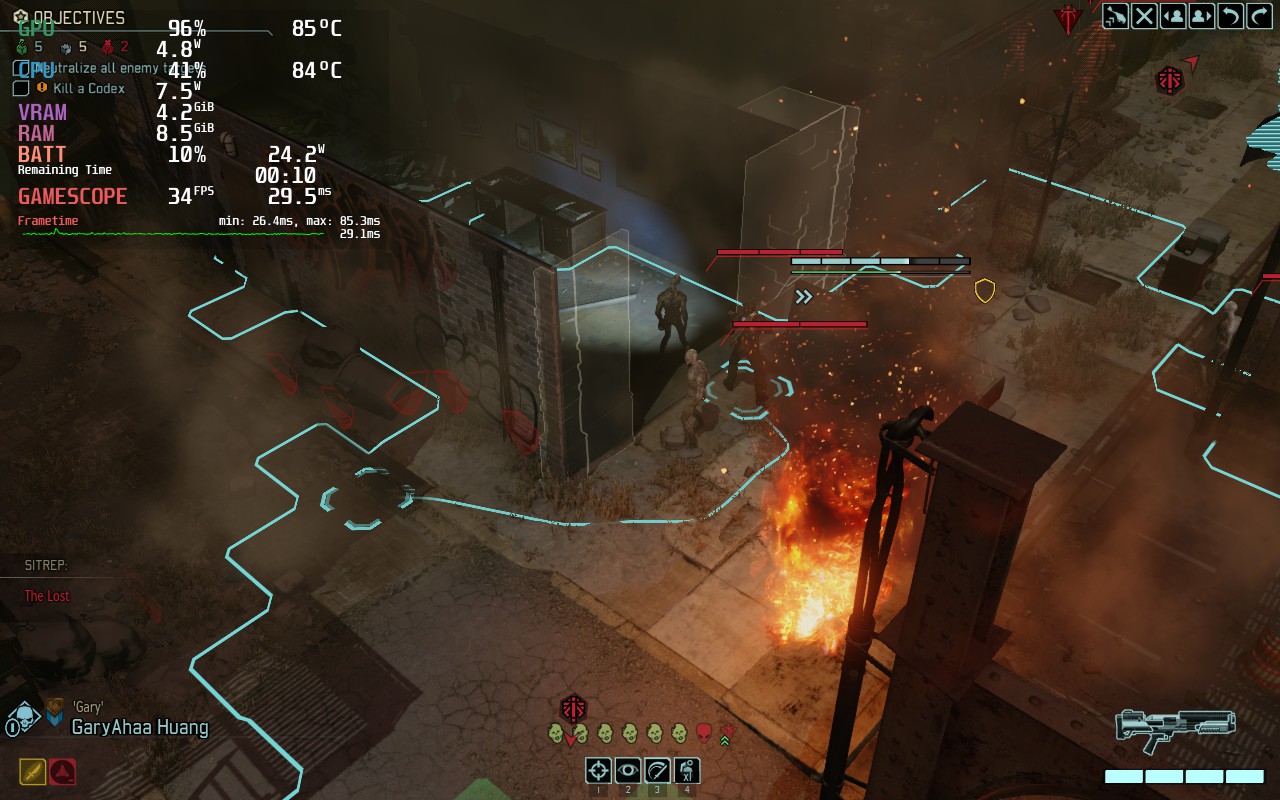
As you can see, the battery is being drained for 24 W in average (can go up to 26 W), and roughly that means losing about 1% of charge per minute, so 100% charged battery would last for about 100 minutes of gameplay. In this particular test I launched the game when Steam Deck was charged to 90%, and 85 minutes (01:25) later the battery was at 3% level.
Admittedly, that’s not a whole lot of play-time, but it is still a good enough result for me. The fact alone that I can play such games not on my desktop gaming PC but on the go is already amazing. Plus I’m using a powerbank, so this doesn’t bother me much.
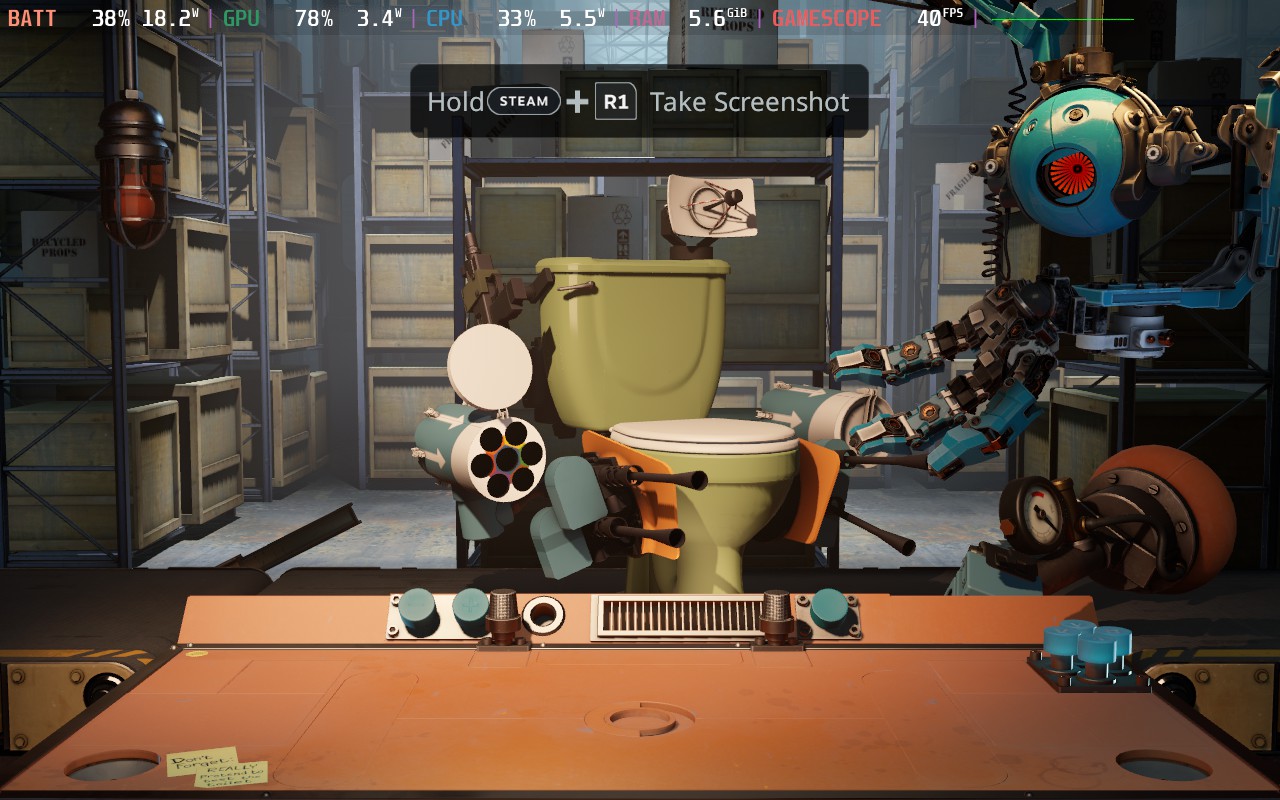
While we are here, these performance metrics in the top-left corner are shown by a special overlay called MangoHud, which is seamlessly integrated into Gaming mode and can be called-up in every game.
Coming back, that 1.5 hours playtime really is one of the worst cases, and in general the battery can easily last for 2-4 hours (or even more) with less demanding games.
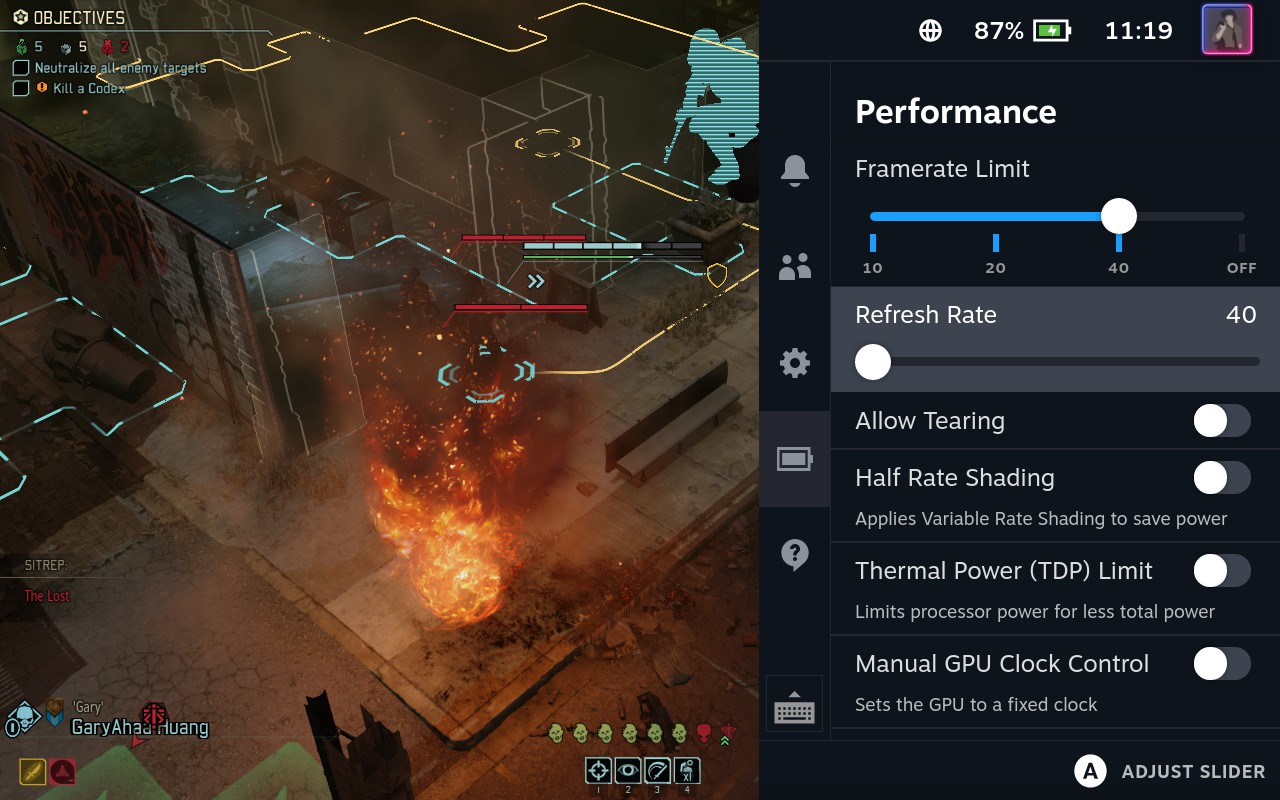
To prolong the battery life you can adjust certain performance settings. First of all, you can lower down the graphics in the game’s own settings. Secondly, there are several performance settings available via the global system overlay that shows up when you press 3-dots button.
One such setting is a FPS limiter: you can cap it at 40 FPS, and that alone brings a significant increase of playtime. Having 40 FPS in a game on a screen of this size is totally fine for me, so I set it globally for all the games. By the way, that is why the MangoHud metrics always show 40 FPS on all my screenshots later in the text.
There are other settings too:
The actual effect of applying these I can’t say anything about, because I haven’t tried anything except the FPS limit, and that already seems to do a good enough job for me.
Lowering the screen brightness helps too, but that would be in expense of your eyes health, so that might not be worth it.
Charging
If you are to use any other charger aside from the original one, do note that you’d need a charger that is capable of outputting at least 40 W. Also, speaking about charging, there is no way to tell the charging level when the screen is off, because the only indicator you have is the moonlight LED near the USB-C port, and it doesn’t have any states really. I did notice though that it turns off eventually, and all the times that happened the battery level reached 100%, so maybe that is the indication.
To charge Steam Deck from 0% to 100% using the original charger, it takes around 2-3 hours. I haven’t measured the exact time, but it really isn’t a fast process. The slowest part is the last 20% (from 80% to 100%).
Using a powerbank
Like I said, the battery can discharge in less than 2 hours while you are playing. And from the sofa where I’m playing on it is not very convenient (and too disruptive) to stand up and go to the charging spot every 2 hours. As for travels, there the charging problem will likely become more of a problem than inconvenience.
So I decided to get a powerbank, one capable of outputting 40 W or more. Having googled for what’s available on the market, I soon enough discovered this beautiful thing - Anker 737 Power Bank. Fucking beautiful, and powerful too. Probably the best powerbank that money could buy as of now.
It has a capacity of 24 000 mAh, which is enough to fully charge Steam Deck from 0% to 100% and then there will be still enough power to charge it for at least 50% - so in total 150% / 1.5 full charges.
As for the output, it can do unfuckingbelievable 140 W, which is an overkill for Steam Deck needs (not in a sense that it’s harmful), because it can draw maximum 45 W. According to the values shown on the powerbank display (don’t know how precise those are), Steam Deck draws about 25 W when it is turned off / in sleep mode:
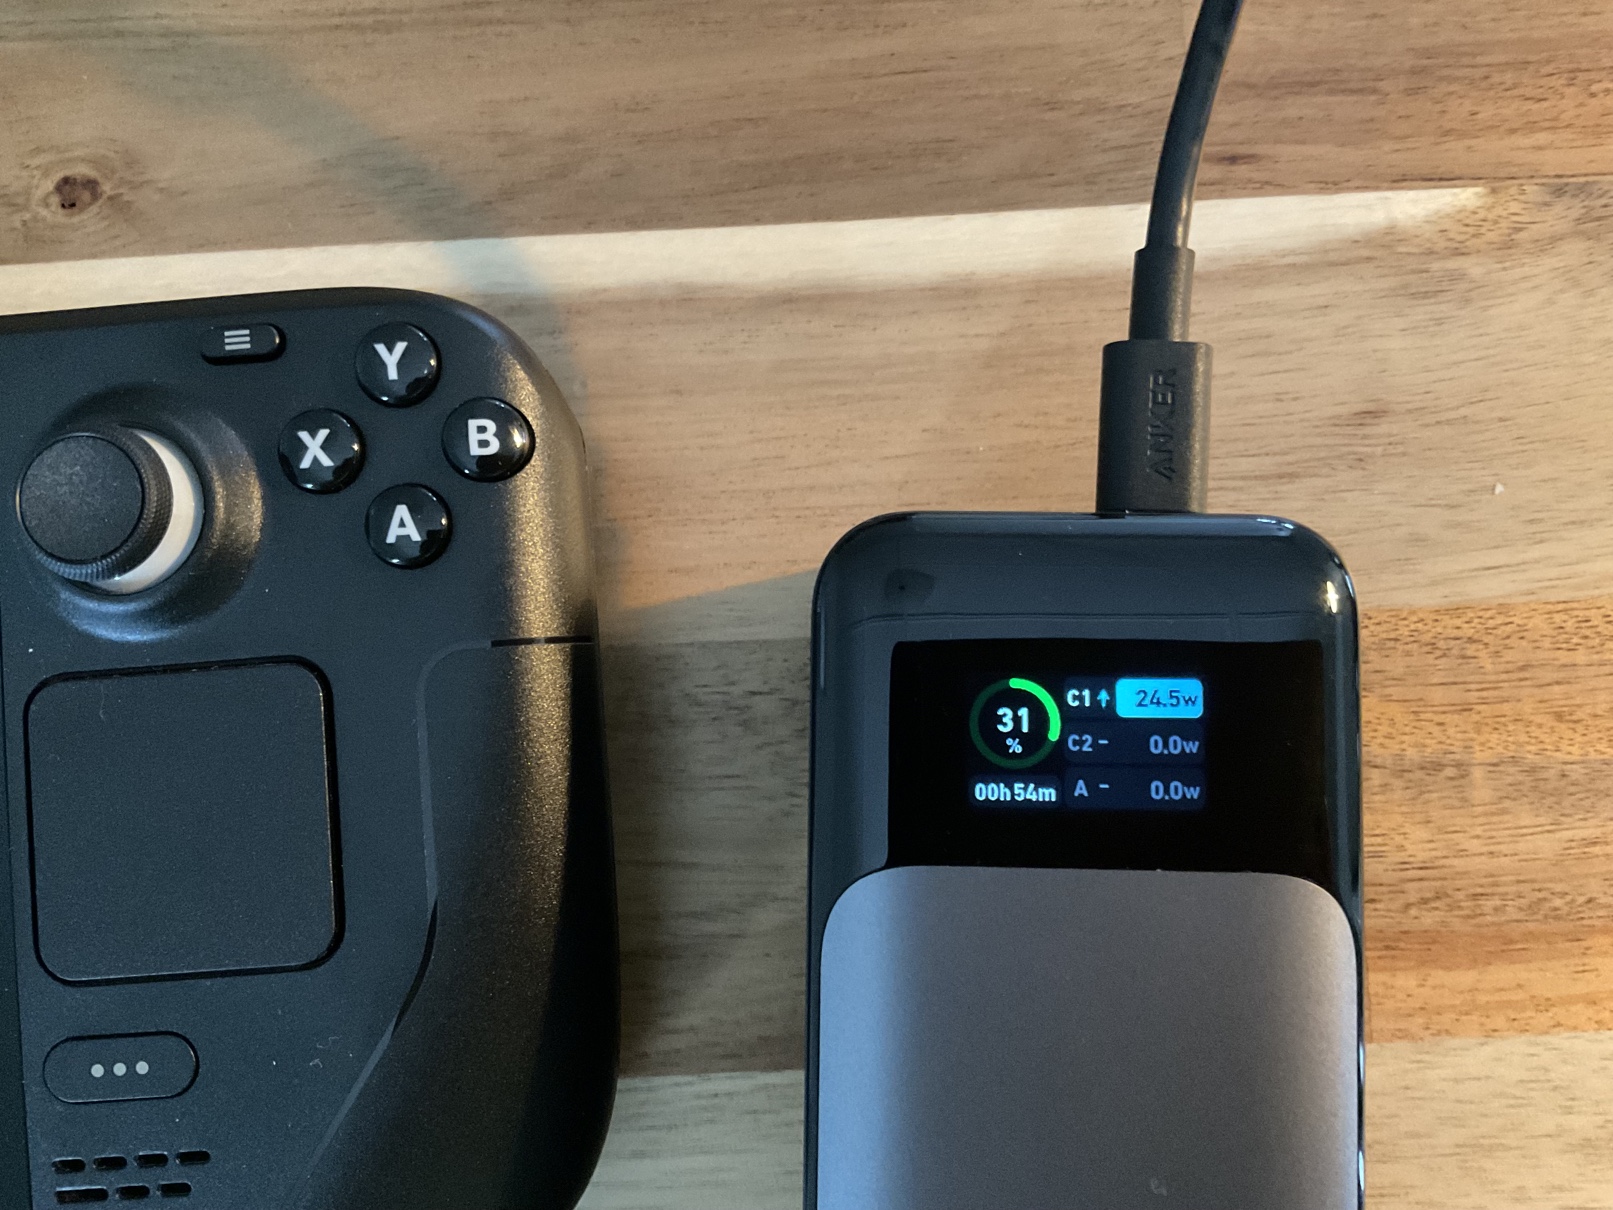
When it is charged to a level above 80%, it starts drawing something like 15 W, and then on the level above 90% it drops to about 5 W.
But when it is being charged while running a game, then consumption goes to about 41 W:
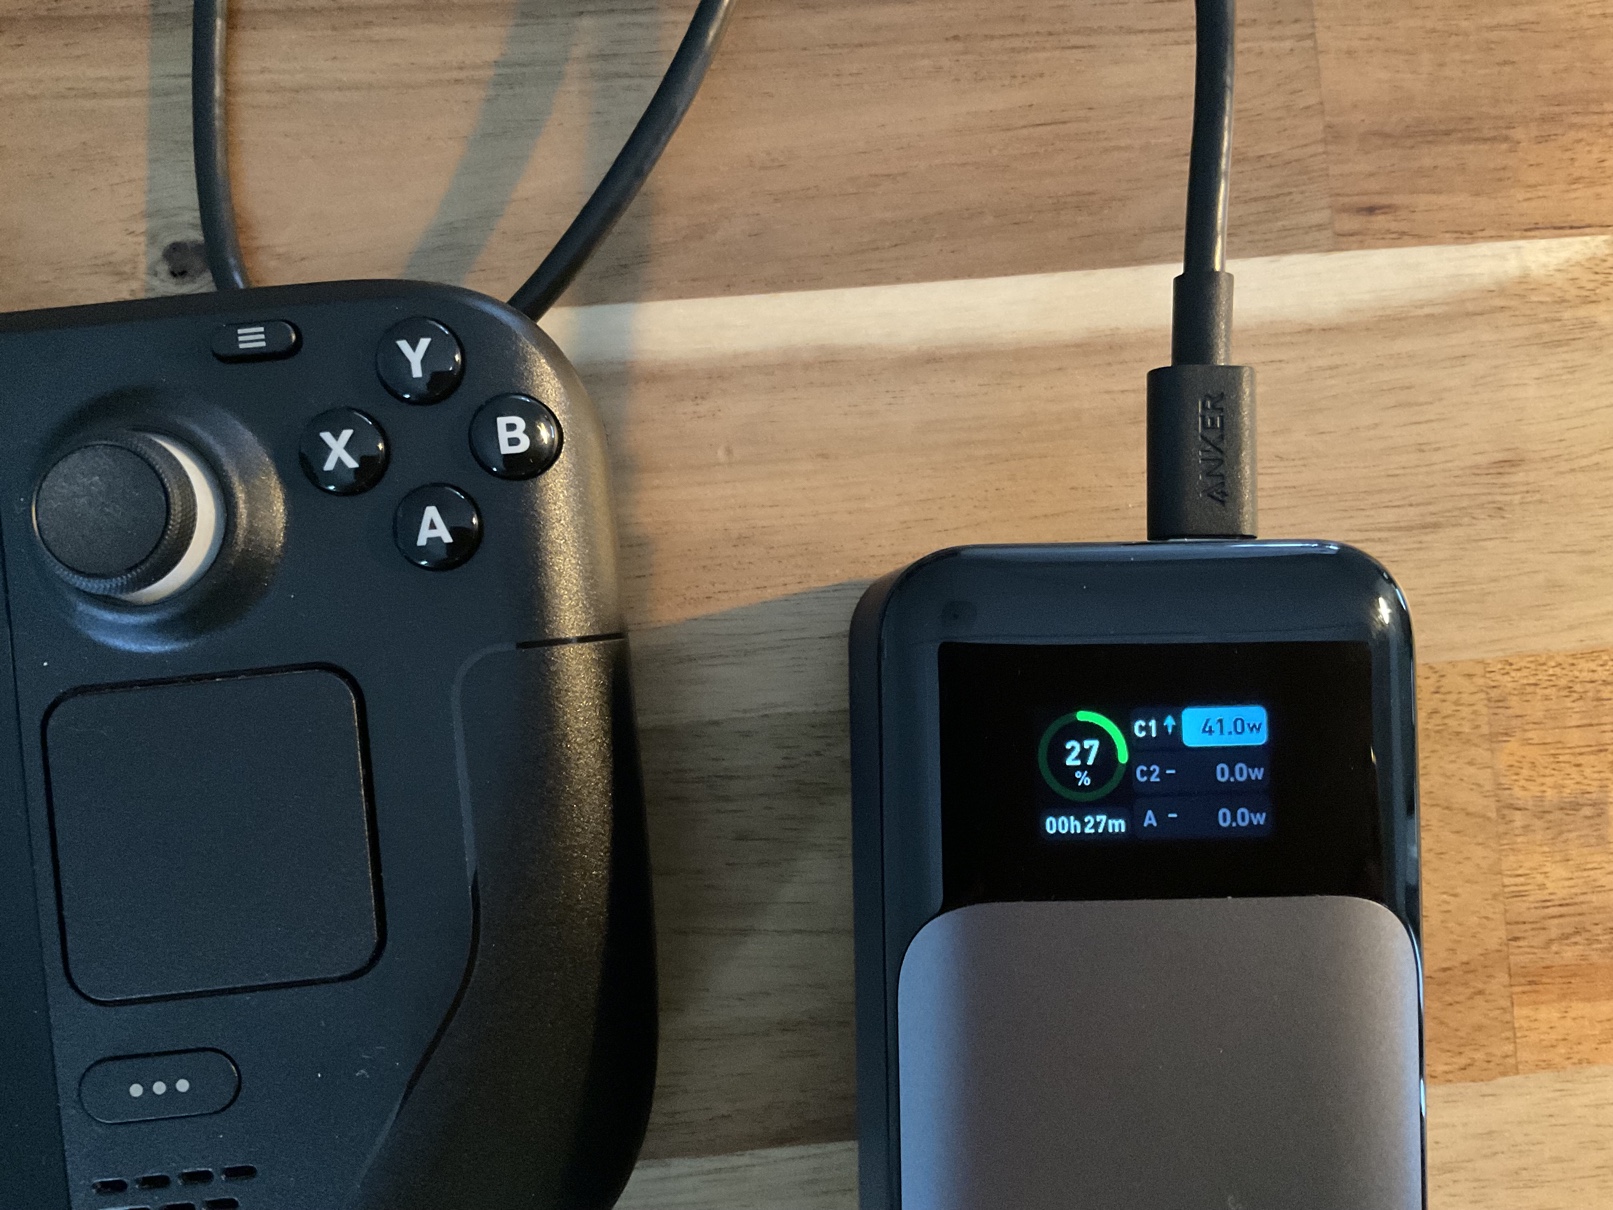
I’ve never seen it drawing 45 W, as specification says it could.
All that power, however, doesn’t go “unpunished”:
- it is quite a heavy and bulky thing, which you cannot just put into your pocket, probably only in a backpack. That’s totally fine for my scenario of playing from sofa, plus you’d need a backpack to carry Steam Deck itself anyway;
- you’d need an equally powerful charger to charge the powerbank fast enough, probably Anker 737 Charger would be the best (and bloody expensive) fit. I use my MacBook Pro’s 87W charger, and that one charges it from 0% to 100% in about 1 hour.
Battery storage mode
Turning on your out-of-the-box Steam Deck for the very first time requires you to have it connected to power, and there is even a dedicated leaflet about that in the box:
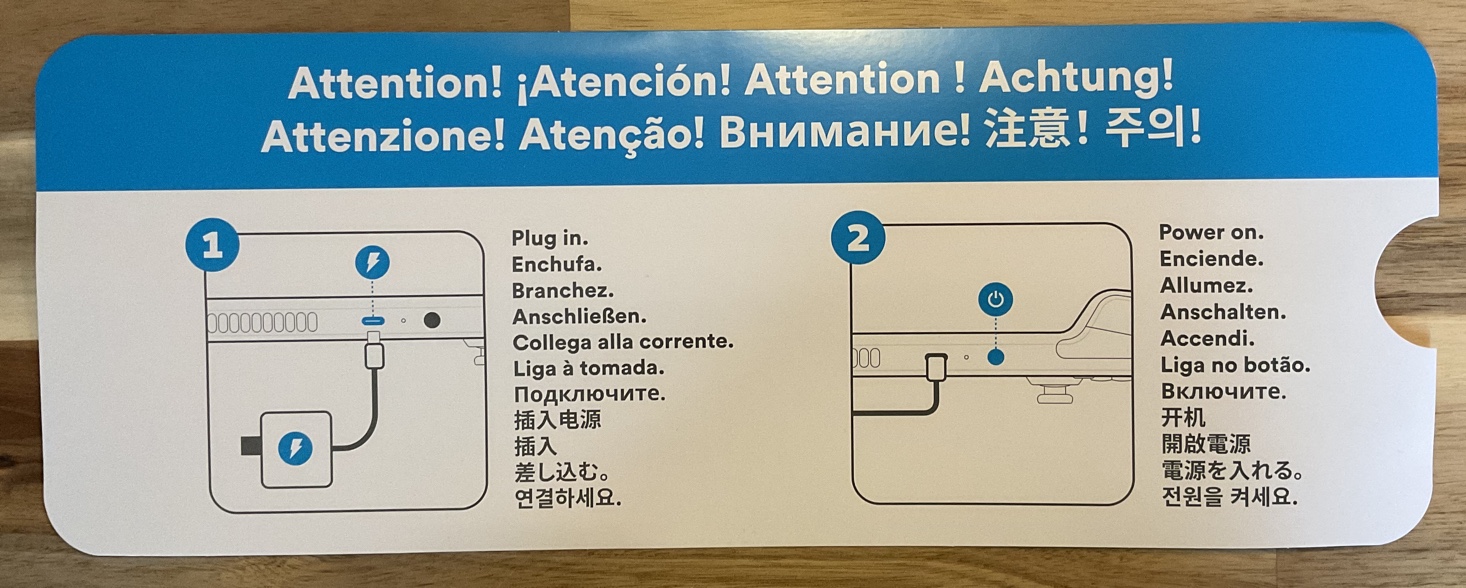
Apparently this is because devices are shipped with so-called “Battery storage mode” enabled, and only connecting it to power will disable it. In other words, you cannot turn on your brand new Steam Deck without connecting a charger.
Here’s a quote from the FAQ (there are no anchors on that page) with some more details and also instructions how to enable Battery storage mode if needed:
If you won't be using your Steam Deck for a while and would like to place it back into storage mode to increase long term battery health, you can use the following steps to do so:
- Power the Steam Deck down normally (choose Shut Down from the Power menu)
- Hold down the Volume+ button and press the power button. The Steam Deck should boot into the BIOS menu
- Using the D-Pad and A to select, navigate to “Setup Utility”
- Navigate to the Power Menu
- Choose Battery storage mode, and confirm
You should see the Steam Deck power off, and the power LED will blink three times to confirm battery storage mode has been activated.
To wake your Steam Deck from storage mode, plug in the provided power supply and power it on normally.
Thermals and cooling
I never had Steam Deck being uncomfortably hot under any load. It is always just warm, no matter how stressful the load is. For instance, I monitored the temperature during a project compilation with all cores being loaded at 100%, and it never went higher than 84°C, while the device body was just warm and not uncomfortable to hold. At the same time, you don’t even reach the hottest spot on the device body, unless you explicitly touch it.
From this video you can learn that Valve engineers gave some serious thought towards device thermals and the way it is cooled. Yet, you can find all sorts of geniuses on the internet who think they know better, suggesting various ideas for “improving” the thermals, which I would certainly not recommend to follow.
For the same reasons (not messing with the original thoroughly designed cooling setup) I don’t think it is such a splendid idea to “upgrade” the SSD, which is also what Valve is advising against. But of course we all know better, they only say that to sell you the most expensive 512 GB model, deceitful bastards.
The fan isn’t as loud as some claim it to be. Being under the maximum workload, it produces a quite okay noize level. Moreover, if you’re playing a game, then you’ll have game sounds and music, which would make the fan noize even less noticable, so for me it is certainly not loud enough to be irritating/annoying.
Yet, when people discovered that Steam Deck units might have different fans, produced by either Delta or Huaying, a new religion has been started immediately, in which it is believed that Huaying fan is better / less noizy. I have a Delta fan (according to the components page) and, like I said, I cannot complain about the fan noize. If you’d like to know more about Delta/Huaying hysteria, here’s a very detailed video about that.
SteamOS
About the OS
SteamOS version 3.x is GNU/Linux distribution based on Arch Linux.
Here’s what neofetch reports for me:
$ neofetch
              .,,,,.                  deck@HOSTNAME
        .,'onNMMMMMNNnn',.            -----------
     .'oNMANKMMMMMMMMMMMNNn'.         OS: SteamOS Holo x86_64
   .'ANMMMMMMMXKNNWWWPFFWNNMNn.       Host: Jupiter 1
  ;NNMMMMMMMMMMNWW'' ,.., 'WMMM,      Kernel: 5.13.0-valve36-1-neptune
 ;NMMMMV+##+VNWWW' .+;'':+, 'WMW,     Uptime: 10 days, 19 hours, 2 mins
,VNNWP+######+WW,  +:    :+, +MMM,    Packages: 924 (pacman), 172 (brew), 12 (flatpak)
'+#############,   +.    ,+' +NMMM    Shell: bash 5.1.16
  '*#########*'     '*,,*' .+NMMMM.   Resolution: 800x1280
     `'*###*'          ,.,;###+WNM,   Terminal: /dev/pts/0
         .,;;,      .;##########+W    CPU: AMD Custom APU 0405 (8) @ 2.800GHz
,',.         ';  ,+##############'    GPU: AMD ATI AMD Custom GPU 0405
 '###+. :,. .,; ,###############'     Memory: 2813MiB / 14818MiB
  '####.. `'' .,###############'
    '#####+++################'
      '*##################*'
         ''*##########*''
              ''''''
Interesting that it detects screen orientation as vertical (800x1280). And I actually saw some bugreports where SteamOS would boot-up having vertical screen orientation.
The username is deck, it has sudo privileges but no password, so you’ll need to set it with passwd.
Desktop/Gaming mode
Steam Deck, or rather SteamOS, has two modes:
- Desktop - usual KDE Plasma desktop environment;
- Gaming - a kind of dedicated/isolated fullscreen environment called Gamescope.
Gaming mode is the default mode that you get on the device start. It has everything you need to play games, it is all about playing games: navigation with gamepad controls, intuitive layout and full Steam Input support. Nothing gives out that this is a GNU/Linux machine. All you see is a nice, intuitive and (not entirely, but mostly) polished gaming device.
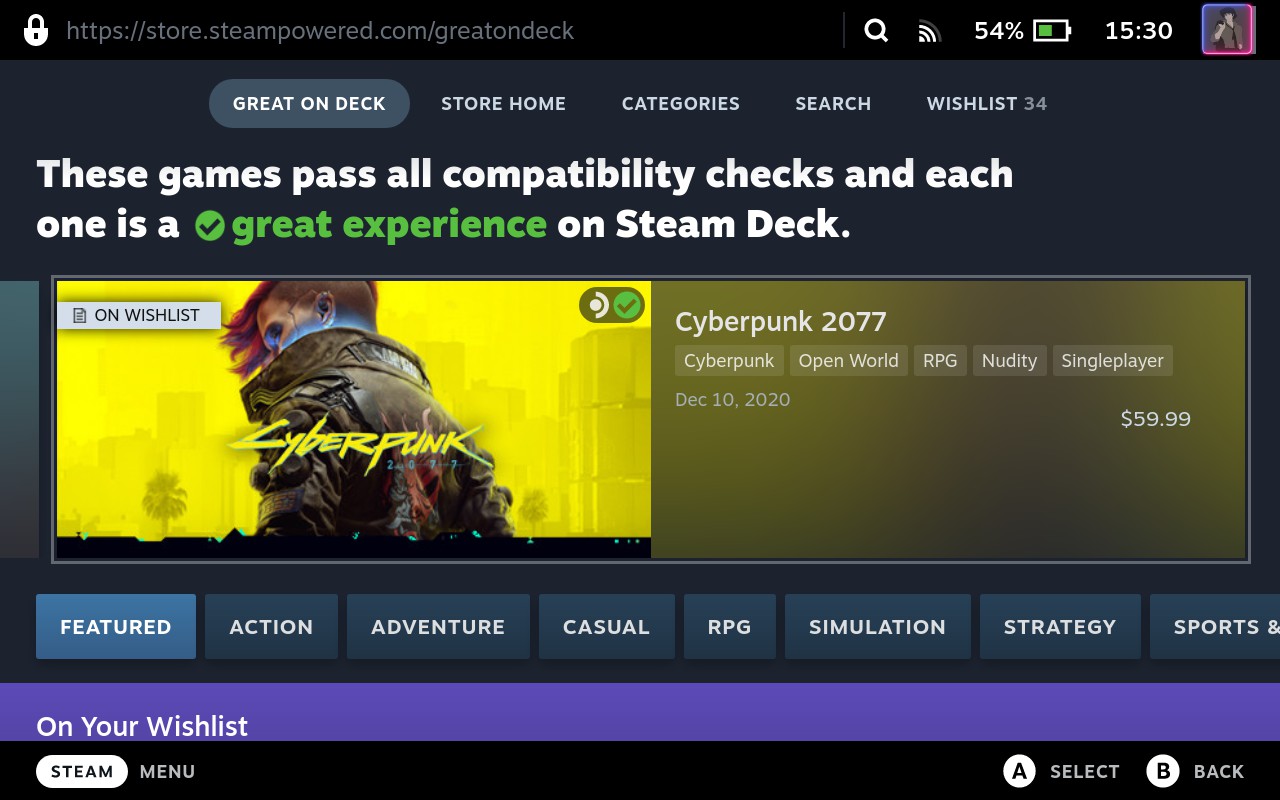
Aside from playing your games, you can buy new ones right there in the store:
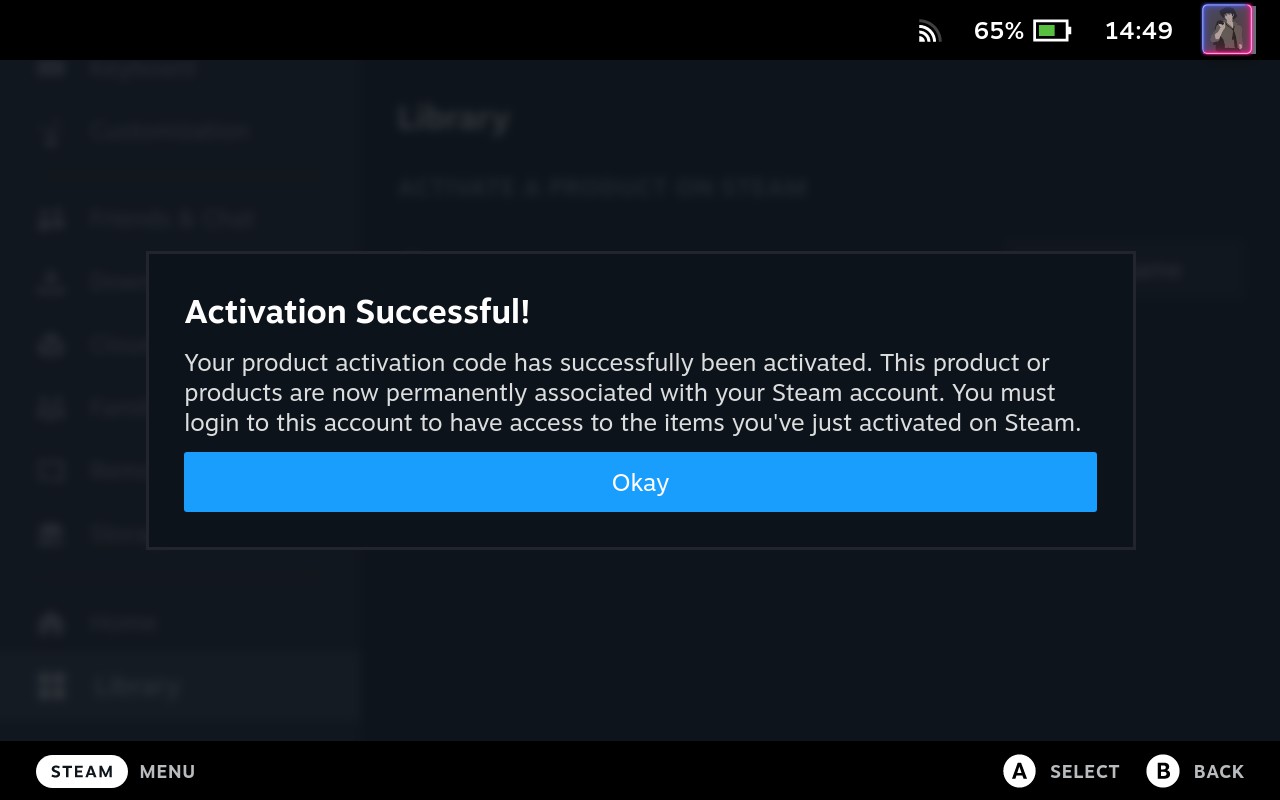
and even redeem Steam keys:

I reckon, the majority of users will never even see the Desktop mode, they probably won’t ever suspect that Steam Deck is not just a gaming device (“video game machine”, as Valve called inside the package).
Looking at other consoles, such a setup is like a breath of fresh air. If I don’t want to know anything about these scary Linux things, then I don’t need to, I can just play games in Gaming mode forever. But if I do, then I can simply switch to Desktop mode and get an actual proper GNU/Linux desktop environment with a freedom of doing everything I’d like to (including fucking up the system entirely).
Here’s a good video with more technical details about Gaming/Desktop modes. Here’s also another interesting overview, with some criticism too, and some of the problems they mentioned have been already fixed in later SteamOS updates.
Proton
With the SteamOS being a GNU/Linux OS, one would think that it’s not a whole lot of games that you can play on it then. But that assumption would be wrong. I did read about Valve working on something based on Wine some years ago, but I certainly didn’t expect that thing to magically run all the Windows-only games.
The thing is called Proton. Being based on Wine, it provides a set of Windows libraries and a Windows-like directory structure for a game (or an application) to find all the required Windows API functions and be able to run like it is Windows environment, while it is actually a GNU/Linux host. In addition, Proton further extends Wine’s capabilities with various improvements specifically for 3D performance in games, and it does it so well that some report better performance in games running on SteamOS through Proton than the same games running in actual Windows environment.
Here’s a good video talking about Proton with much more details.
It’s really unbelievable how good the Proton is. All the Windows-only games that I’ve tried to run so far are running just fine. On a GNU/Linux host! The amount of effort that went into both Proton and Wine to make this happen must have been huge.
I should probably mention that games with convoluted anti-cheat software for playing online or/and additional anti-piracy components will most likely not work, but that would be a limitation of this particular anti-cheat/anti-piracy crap. The same games being “freed” (if you know what I mean) from all this nonsense will most probably run fine (except for obviously not being able to play online on official servers).
There is an unofficial list of Proton-supported games called ProtonDB and there is also an official Valve’s listing called Deck Verified. I find both of these being almost equally useless for me. Like I said, all the games I’ve tried (so far) run just fine on Steam Deck, despite some of them being labeled as “unsupported” in either one or both of these listings, so what is the point of them then.
But to be fair, ProtonDB is not as useless as Deck Verified list, because it has comments on game pages, and there people share actually useful tips, such as CLI launch options or specific Proton versions for getting better compatibility/performance out of a particular game.
Lastly, Proton isn’t an exclusive technology of Steam Deck / SteamOS. If you have a GNU/Linux distribution as your main OS, you can install Steam and Proton on it and get a probably even more powerful (although not portable) gaming station without the need to dual-boot to Windows to play some games or run some Windows-only applications.
How to run an application with Proton
Just like with Wine, you can use Proton for launching Windows applications/games on a GNU/Linux host (such as Steam OS on Steam Deck). It requires setting some more environment variables, but the principle is the same.
To clarify just in case, this is not about launching a game through Steam, but about running it with Proton directly from CLI.
For the sake of experiment, let’s not use Steam’s default Proton, instead I’ll take Proton GE:
$ wget https://github.com/GloriousEggroll/proton-ge-custom/releases/download/GE-Proton8-4/GE-Proton8-4.tar.gz
$ tar -xf ./GE-Proton8-4.tar.gz -C ~/.steam/root/compatibilitytools.d/

$ tree -L 2 ~/.steam/root/compatibilitytools.d/
/home/deck/.steam/root/compatibilitytools.d/
└── GE-Proton8-4
    ├── compatibilitytool.vdf
    ├── filelock.py
    ├── files
    ├── LICENSE
    ├── LICENSE.OFL
    ├── PATENTS.AV1
    ├── proton
    ├── proton_3.7_tracked_files
    ├── protonfixes
    ├── __pycache__
    ├── toolmanifest.vdf
    ├── user_settings.sample.py
    └── version
After that you can restart Steam and this Proton version will become available to choose at the Compatibility tab too, but now we will use it to run a game from bare CLI. With Diablo II Resurrected as an example, a command for running the game will be:
$ STEAM_COMPAT_CLIENT_INSTALL_PATH=/home/deck/.steam/steam \
    STEAM_COMPAT_DATA_PATH=/home/deck/.local/share/Steam/steamapps/compatdata/2718988064 \
    /home/deck/.local/share/Steam/compatibilitytools.d/GE-Proton8-4/proton waitforexitandrun \
    /run/media/mmcblk0p1/games/diablo-2-resurrected/D2R.exe -launch
here:
STEAM_COMPAT_CLIENT_INSTALL_PATH- looks like Proton can’t be used completely independent from Steam, so you need to have Steam client installed in the system;STEAM_COMPAT_DATA_PATH- an equivalent forWINEPREFIXvariable, and2718988064value is my Proton prefix path ID for the game, so yours is likely to be different;- if you don’t yet have a prefix for the game, create it first (with
winecfgfrom your current Proton installation);
- if you don’t yet have a prefix for the game, create it first (with
waitforexitandrunis a verb (command) for Proton script (you can probably replace it withrun);-launch- CLI argument(s) for the game/application.
That is also (almost) the same what Steam itself executes behind the scenes when you launch a game from Steam client. You can get a full command chain with ps when the game is running (ps aux | grep "SteamLaunch AppId="):
$ /home/deck/.local/share/Steam/ubuntu12_32/reaper SteamLaunch AppId=2718988064 \
    -- /home/deck/.local/share/Steam/ubuntu12_32/steam-launch-wrapper \
    -- /home/deck/.local/share/Steam/steamapps/common/SteamLinuxRuntime_sniper/_v2-entry-point --verb=waitforexitandrun \
    -- /home/deck/.local/share/Steam/compatibilitytools.d/GE-Proton8-4/proton waitforexitandrun \
    /run/media/mmcblk0p1/games/diablo-2-resurrected/D2R.exe -launch
Filesystem
Important paths of the system are read-only (that can be disabled, though), but of course there are writable paths too, at the very least because games need to store your saves and settings somewhere. User also needs to be able to store his documents/data and install additional applications and non-Steam games, which wouldn’t be possible if the entire filesystem was read-only.
So the user home folder is writable:
$ cd ~

$ pwd
/home/deck

$ ls -l .
drwxr-xr-x 2 deck deck   4096 Jan 22 21:55 Desktop
drwxr-xr-x 2 deck deck   4096 Jan 27 18:13 Documents
drwxr-xr-x 3 deck deck   4096 Mar 24 18:27 Downloads
drwxr-xr-x 2 deck deck   4096 Jan 22 21:55 Music
drwxr-xr-x 3 deck deck   4096 Mar 24 11:46 Pictures
drwxr-xr-x 2 deck deck   4096 Jan 22 21:55 Public
drwxr-xr-x 2 deck deck   4096 Jan 22 21:55 Templates
drwxr-xr-x 2 deck deck   4096 Jan 22 21:55 Videos
It is also important to note that home folder contents remain untouched between OS updates. I know, it would be crazy if it was otherwise, but I still was somewhat worried about that when I first heard that SteamOS will have read-only parts and will be wiping out “some things” with every system update.
The partitions layout is unusual:
$ sudo fdisk -l

Disk /dev/nvme0n1: 476.94 GiB, 512110190592 bytes, 1000215216 sectors
Disk model: KINGSTON OM3PDP3512B-A01
Units: sectors of 1 * 512 = 512 bytes
Sector size (logical/physical): 512 bytes / 512 bytes
I/O size (minimum/optimal): 512 bytes / 512 bytes
Disklabel type: gpt
Disk identifier: SOME-ID

Device            Start        End   Sectors   Size Type
/dev/nvme0n1p1     2048     133119    131072    64M EFI System
/dev/nvme0n1p2   133120     198655     65536    32M Microsoft basic data
/dev/nvme0n1p3   198656     264191     65536    32M Microsoft basic data
/dev/nvme0n1p4   264192   10749951  10485760     5G Linux root (x86-64)
/dev/nvme0n1p5 10749952   21235711  10485760     5G Linux root (x86-64)
/dev/nvme0n1p6 21235712   21759999    524288   256M Linux variable data
/dev/nvme0n1p7 21760000   22284287    524288   256M Linux variable data
/dev/nvme0n1p8 22284288 1000215175 977930888 466.3G Linux home


Disk /dev/mmcblk0: 476.71 GiB, 511868665856 bytes, 999743488 sectors
Units: sectors of 1 * 512 = 512 bytes
Sector size (logical/physical): 512 bytes / 512 bytes
I/O size (minimum/optimal): 512 bytes / 512 bytes
Disklabel type: gpt
Disk identifier: ANOTHER-ID

Device         Start       End   Sectors   Size Type
/dev/mmcblk0p1  2048 999741439 999739392 476.7G Linux filesystem
As I understood it, system partitions have “doubles” for so-called A/B updates - to be able to rollback to previous working OS version, in case the new version has some breaking bugs or just failed to install correctly.
The /dev/mmcblk0 partition is my SD-card.
Here’s also df output:
$ df -h
Filesystem      Size  Used Avail Use% Mounted on
devtmpfs        7.2G     0  7.2G   0% /dev
tmpfs           7.3G  2.0G  5.4G  27% /dev/shm
tmpfs           2.9G  9.9M  2.9G   1% /run
/dev/nvme0n1p5  5.0G  3.3G  1.5G  69% /
/dev/nvme0n1p7  230M   41M  173M  20% /var
overlay         230M   41M  173M  20% /etc
/dev/nvme0n1p8  466G  378G   89G  82% /home
tmpfs           7.3G  5.5M  7.3G   1% /tmp
/dev/mmcblk0p1  469G  292G  177G  63% /run/media/mmcblk0p1
tmpfs           1.5G  6.5M  1.5G   1% /run/user/1000
So right now I have 89 GB left on system disk and 177 GB on SD-card.
The Steam itself is installed here:
$ tree -d -L 1 /home/deck/.local/share/Steam/
├── appcache
├── bin
├── clientui
├── compatibilitytools.d
├── config
├── controller_base
├── depotcache
├── friends
├── graphics
├── legacycompat
├── linux32
├── linux64
├── logs
├── music
├── package
├── public
├── resource
├── servers
├── steam
├── steamapps
├── steamui
├── tenfoot
├── ubuntu12_32
├── ubuntu12_64
└── userdata
The most interesting folder is /home/deck/.local/share/Steam/steamapps/ - that is where Steam games are installed and also where Proton prefixes are stored (for both Steam and non-Steam games and applications).
Proton prefixes
Each game has a Proton prefix created for it in /home/deck/.local/share/Steam/steamapps/compatdata/STEAM-APP-ID/. Every prefix has its own Windows environment (or an “emulation” of it): system libraries, registry and other usual files and folders like Program Files, Documents and so on.
For Steam games the STEAM-APP-ID value is known, you can get it either from the game’s Steam Store URL or from SteamDB. For non-Steam games the STEAM-APP-ID is not known beforehand and is generated using some hashing function, making it difficult to find the game’s Proton prefix path. If you have just installed the game, then you can sort the list of Proton prefixes by date, and the last one will likely be the one created for this game:
$ ls -ltr /home/deck/.local/share/Steam/steamapps/compatdata/But if you need to find the prefix path days/weeks/months later, when you installed some more games after that one, then it you really are screwed. I would reckon, there must be some dictionary somewhere, because Steam does now which prefix path is for which game, but I couldn’t find where this information is stored.
For example, I needed to find Proton prefix path for Civilization VI. First I tried to parse ~/.local/share/Steam/userdata/YOUR-ACCOUNT-ID/config/shortcuts.vdf (VDF) using this Python library:
import vdf

with open("./shortcuts.vdf", "rb") as f:
    d = vdf.binary_loads(f.read())
    print(vdf.dumps(d, pretty=True))
The file contains some useful information:
...

{
    "appid" "-937784833"
    "AppName" "Civilization VI"
    "Exe" "\"/run/media/mmcblk0p1/games/civilization-vi/Base/Binaries/Win64Steam/CivilizationVI_DX12.exe\""
    "StartDir" "\"/run/media/mmcblk0p1/games/civilization-vi/Base/Binaries/Win64Steam/\""
    "icon" "/home/deck/Pictures/steamgrid/civilization-vi/icon.ico"
    "ShortcutPath" ""
    "LaunchOptions" ""
    "IsHidden" "0"
    "AllowDesktopConfig" "1"
    "AllowOverlay" "1"
    "OpenVR" "0"
    "Devkit" "0"
    "DevkitGameID" ""
    "DevkitOverrideAppID" "0"
    "LastPlayTime" "1680625818"
    "FlatpakAppID" ""
    "tags"
    {
    }
}

...
but -937784833 value is not a real ID, at least it is not what I could use to find the game prefix in compatdata.
Then I found a suggestion to create a Desktop shortcut for the game in Steam, and I did, but again, the ID provided there is not the one from compatdata:
$ less /home/deck/Desktop/Civilization\ VI.desktop

[Desktop Entry]
Name=Civilization VI
Comment=Play this game on Steam
Exec=steam steam://rungameid/14418988885323284480
Icon=steam_icon_14418988885323284480
Terminal=false
Type=Application
Categories=Game;
So what I had to do is to check every motherfucking single folder inside compatdata until I found the one that contained ./pfx/drive_c/users/steamuser/Documents/My\ Games/Sid\ Meier's\ Civilization\ VI, so the Proton prefix path for Civilization IV in my case was /home/deck/.local/share/Steam/steamapps/compatdata/3357182463/.
Out of curiosity, I tried searching for the 3357182463 value in files:
$ grep --include=\*.{vdf,json,txt} -irn ~/.local/share/ -e "3357182463"but that didn’t result in anything useful. Then, following someone’s good advice, I launched the game and looked for its ID in the ps output:
$ ps aux | grep 3357182463
deck      120827  0.0  0.0  28116  5556 ?        S    12:50   0:00 /home/deck/.local/share/Steam/ubuntu12_32/reaper SteamLaunch AppId=3357182463 -- /home/deck/.local/share/Steam/ubuntu12_32/steam-launch-wrapper -- /home/deck/.local/share/Steam/steamapps/common/SteamLinuxRuntime_soldier/_v2-entry-point --verb=waitforexitandrun -- /home/deck/.local/share/Steam/steamapps/common/Proton - Experimental/proton waitforexitandrun /run/media/mmcblk0p1/games/civilization-vi/Base/Binaries/Win64Steam/CivilizationVI_DX12.exe
And there it fucking was! So there is at least one alternative to going through all the folders inside compatdata - you can launch the game and grep for steam-launch-wrapper or "SteamLaunch AppId=":
$ ps aux | grep "SteamLaunch AppId="Of course, an even better alternative would be to get the hashing function that generates these IDs for non-Steam games (if those aren’t just random values), but sadly I haven’t found it yet. Well, I found this answer and made the following script out of it:
import pathlib
import binascii
import pycrc.algorithms


def getSteamShortcutID(executablePath, applicationName, bigPicture=False):
    exeAndName = "".join((executablePath, applicationName))
    if not bigPicture:
        generatedID = binascii.crc32(str.encode(exeAndName)) | 0x80000000
        return generatedID
    else:
        algorithm = pycrc.algorithms.Crc(
            width=32,
            poly=0x04C11DB7,
            reflect_in=True,
            xor_in=0xffffffff,
            reflect_out=True,
            xor_out=0xffffffff
        )
        top32 = algorithm.bit_by_bit(exeAndName) | 0x80000000
        full64 = (top32 << 32) | 0x02000000
        return str(full64)
But I still couldn’t get the 3357182463 value:
# that prints 3368690363
print(
    getSteamShortcutID(
        "\"/run/media/mmcblk0p1/games/civilization-vi/Base/Binaries/Win64Steam/CivilizationVI_DX12.exe\"",
        "Civilization VI"
    )
)
# that prints 3878048937
print(
    getSteamShortcutID(
        "/run/media/mmcblk0p1/games/civilization-vi/Base/Binaries/Win64Steam/CivilizationVI_DX12.exe",
        "Civilization VI"
    )
)
Then I realized that the moment when prefix was created I was running the game installer, not the game yet, so of course the values were different, so I tried these instead:
# that prints 2946059079
print(
    getSteamShortcutID(
        "\"/home/deck/Downloads/civilization-vi/installer/civ6-setup.exe\"",
        "civ6-setup.exe"
    )
)
# that prints 3987467170
print(
    getSteamShortcutID(
        "/home/deck/Downloads/civilization-vi/installer/civ6-setup.exe",
        "civ6-setup.exe"
    )
)
but still didn’t get that value. Just to make sure that I didn’t have different paths back then, I’ve added a new non-Steam game (DirectX installer) and immediately checked what prefix ID it got in compatdata - it was 3529560334. The record in shortcuts.vdf was as follows:
{
    "appid" "-765406962"
    "AppName" "directx_Jun2010_redist.exe"
    "Exe" "\"/home/deck/Downloads/soft/directx_Jun2010_redist.exe\""
    "StartDir" "/home/deck/Downloads/soft/"
    "icon" ""
    "ShortcutPath" ""
    "LaunchOptions" ""
    "IsHidden" "0"
    "AllowDesktopConfig" "1"
    "AllowOverlay" "1"
    "OpenVR" "0"
    "Devkit" "0"
    "DevkitGameID" ""
    "DevkitOverrideAppID" "0"
    "LastPlayTime" "1680876341"
    "FlatpakAppID" ""
    "tags"
    {
    }
}
But even now I couldn’t get the right value! Look:
# that prints 3607144885
print(
    getSteamShortcutID(
        "\"/home/deck/Downloads/soft/directx_Jun2010_redist.exe\"",
        "directx_Jun2010_redist.exe"
    )
)
# that prints 2731245913
print(
    getSteamShortcutID(
        "/home/deck/Downloads/soft/directx_Jun2010_redist.exe",
        "directx_Jun2010_redist.exe"
    )
)
Moreover, I removed it from Steam, removed the prefix folder and added the absolutely same executable as a non-Steam game again. And it got a different ID - this time 3589718663! Fucking hell, I give up. It probably uses more components for generating the hash, maybe a timestamp or something, but I am out of ideas.
So the only way to get the right ID is to grep the ps output. Or write it down right after the prefix is created.
Screenshots
The screenshots you make in Gaming mode are saved to /home/deck/.local/share/Steam/userdata/YOUR-ACCOUNT-ID/760/remote/SOME-OTHER-ID/screenshots/. In particular, the screenshots of the Gaming GUI itself are stored in /home/deck/.local/share/Steam/userdata/YOUR-ACCOUNT-ID/760/remote/7/screenshots/.
For Steam games the SOME-OTHER-ID value matches the Steam App ID, but for non-Steam games it’s rather random, as far as I can tell. For example, I found that Civilization VI got the ID 3357182463, but its screenshots are located under a different ID: /home/deck/.local/share/Steam/userdata/YOUR-ACCOUNT-ID/760/remote/1739263/screenshots/. I have no idea how I could’ve known this ID other then from checking every folder and viewing the screenshots.
Finally, the screenshots you make in Desktop mode with Spectacle are saved to /home/deck/Pictures/.
Controller layouts
I needed to find where controller layouts are saved to, so I could to make backups of the ones I’ve created. In addition to that, one might want to share layouts as files and download layouts shared by other people without using Steam UI.
I started looking for the files named controller_configuration.vdf:
$ find /home/deck/.local/share/ -iname "controller_configuration.vdf"That gave me two places:
/home/deck/.local/share/Steam/userdata/YOUR-ACCOUNT-ID/config/controller_configs/apps/0/ANOTHER-ID/YET-ANOTHER-ID- here, as I understand, everyYET-ANOTHER-IDcontains the layouts that I exported asNew Template;/home/deck/.local/share/Steam/steamapps/workshop/content/DIFFERENT-ID/AND-ANOTHER-ID- here are those that I exported asNew Personal Save.
That second path with personal saves contains a lot of different AND-ANOTHER-ID (and these are not Steam App IDs), so it will be difficult to find layouts for a particular game. In addition, some of the filenames here are not controller_configuration.vdf but SOME-ID-legacy.bin.
Fortunately, there is a file with the mapping for Steam App ID values or game titles: /home/deck/.local/share/Steam/steamapps/common/Steam Controller Configs/YOUR-ACCOUNT-ID/config/configset_controller_neptune.vdf. Aside from that, you can also get the AND-ANOTHER-ID value by openning Layout Details of the selected layout in Gaming mode UI.
That path (/.../Steam Controller Configs/YOUR-ACCOUNT-ID/config/) is also used for saving controller layouts that you create yourself by modifying default templates.
So there you have it. You can now make backup copies of your layouts, upload the files somewhere to share with others and download layouts shared by others.
The backups have proven to be useful very soon. I tried to play Diablo II on TV and switched to the DualSense gamepad layout, which apparently did something rather unexpected, because when I undocked and tried to select my layout again, it was no loger available. Looks like it was gone from the workshop folder, which apparently matters for some reasons. Good thing that I had a backup, and also I still had the layout available in /home/deck/.local/share/Steam/steamapps/common/Steam Controller Configs/YOUR-ACCOUNT-ID/config/diablo ii resurrected/controller_neptune.vdf, so I copied it to workshop (according to the mapping in configset_controller_neptune.vdf):
$ cp \
    "/home/deck/.local/share/Steam/steamapps/common/Steam Controller Configs/YOUR-ACCOUNT-ID/config/diablo ii resurrected/controller_neptune.vdf" \
    /home/deck/.local/share/Steam/steamapps/workshop/content/DIFFERENT-ID/ANOTHER-DIFFERENT-ID/LONG-ID_legacy.bin
and then I got my layout back, but now I am confused about having more than one path where layouts are. Which one is actually used when I make changes in the layouts that I created? To find out, I did a quick test: edited one command name in the layout and checked which of the files have changed. The one that got this change was /.../Steam Controller Configs/YOUR-ACCOUNT-ID/config/diablo ii resurrected/controller_neptune.vdf, while the one in workshop hasn’t changed. So what is the point of having that one there?
I also thought it’ll be a good idea to put my layouts under version control, since they are just plain text files.
Overriding forced layouts
Don’t know how to call this correctly, but some Steam games “force” their own controller layouts. By “forcing” I mean that you won’t be able to select any other layout: as soon as you choose any, it will pop-up the default one, like its window is “floating” on top of whichever you have actually chosen.
So far I have only seen this behaviour with Black Mesa (here’s also a forum thread about the problem). They provide okay-ish layouts, even with different Action Sets for browsing the menu and actually playing the game, but I wanted to use gyroscope aiming from my own layout for FPS games, and I almost went mad trying to apply my layout while getting the default one forced back every time.
The solution/workaround (found here) is to set 0 to the following variables inside /home/deck/.local/share/Steam/steamapps/common/Black Mesa/steam_input/action_manifest.vdf:
"major_revision_affects_mousekb"    "0"
"major_revision_affects_xinput"     "0"
I suppose, the config path is specific per-game, so if you’ll see this behaviour with some other game aside from Black Mesa, then this game will probably have a similar *.vdf config in its folder.
Backup script
Sooner or later you’d want to backup certain things: savegames, configs, controller layouts, screenshots, a list of installed packages and so on. To do that you’ll need to find the paths to all these things, and once you do, you’ll probably also want to automate the process.
I’ve come up with the following script:
#!/bin/bash

brew --version > /dev/null
if [ $? -ne 0 ]; then
    echo "[ERROR] You haven't activated Homebrew environment" >&2
    exit 1
fi

archName="backup-$(date +%Y%m%d-%H%M%S)"
workingdir="/home/deck/backups/$archName"
mkdir -p $workingdir

pathToSteam="/home/deck/.local/share/Steam"

declare -a thingsToCopy=(
    # files
    "/home/deck/.bash_profile"
    # folders
    #/home/deck/Pictures
)

SECONDS=0

echo "[STATUS] 1/3 Saving a list of installed Homebrew packages
"
brew bundle dump --file $workingdir/home.brewfile

echo "
[STATUS] 2/3 Copying files
"
# copy
for i in "${thingsToCopy[@]}"
do
   echo "- copying [$i]..."
   cp -r "$i" "$workingdir"
done

echo "
[STATUS] 3/3 Packing stuff
"
# scripts
tar -czf $workingdir/scripts.tar.gz /home/deck/bin/*.sh
# pictures
tar -czf $workingdir/pictures.tar.gz /home/deck/Pictures
# screenshots
tar -czf $workingdir/screenshots.tar.gz "${pathToSteam}/userdata/YOUR-ACCOUNT-ID/760"
# Diablo II Resurrected
tar -czf $workingdir/diablo-2-resurrected.tar.gz \
    "${pathToSteam}/steamapps/compatdata/STEAM-APP-ID/pfx/drive_c/users/steamuser/Documents/Diablo II Resurrected/Save/" \
    "${pathToSteam}/steamapps/common/Steam Controller Configs/YOUR-ACCOUNT-ID/config/diablo ii resurrected/controller_neptune.vdf"
# Space Rangers
tar -czf $workingdir/space-rangers.tar.gz \
    "${pathToSteam}/steamapps/compatdata/214730/pfx/drive_c/users/steamuser/Documents/spacerangershd/" \
    "${pathToSteam}/steamapps/common/Steam Controller Configs/YOUR-ACCOUNT-ID/config/214730/controller_neptune.vdf"

duration=$SECONDS
echo "---

Total time: $(($duration / 60 / 60)) hours, $(($duration / 60 % 60)) minutes and $(($duration % 60)) seconds"
Note that paths to savegames, settings and other things within the game’s Proton profix might change on the next Proton update, like it happened for me with Diablo II and Proton 8.
Shader cache
This video will most probably tell about shaders and pre-compiled shader cache better than me.
But here’s also my (much less detailed) interpretation. A shader is a visual effect, such as lighting/shadows/materials applied to an object in a game. But it’s not a static file/asset which could be distributed together with other assets/resources of the game. It is actually a set of commands to be executed/compiled on a GPU on the target device, and the result of this execution will be different for different GPUs.
The compilation of shaders naturally takes some computing time, and it happens when you are actually playing the game (or on its launch), which results in freezes/stutters in the game, for example when you enter a new area/location. Once compiled, shaders are cached locally on disk, so the next time you enter this same area/location you won’t get freezes/stutters.
Another thing to say about shader cache is that it occupies quite a lot of space on your system disk (yes, it has to be on system disk, and it is not advisable to symlink this location to SD card). You can check for yourself how much exactly:
$ du -hs /home/deck/.steam/steam/steamapps/shadercache/To see the cache size per game, add the game’s Steam App ID to that path. By the way, that’s how you can check that your non-Steam game do actually produce shader cache too. For instance my Diablo II Resurrected has generated 132 MB of caches over a month of playing.
Pre-caching updates
Since all the Steam Decks on the planet have the same GPU, wouldn’t it be a great idea to pre-compile shaders for games just once and distribute this pre-compiled cache across all the Steam Decks over the internet in a form of Steam game updates, so those devices wouldn’t need to waste their computing power on compiling the same shaders themselves.
The idea sounds great, but I can’t say how useful it really is, because I have been playing quite a number of non-Steam games, which obviously do not benefit from distributed pre-compiled shader cache, and I didn’t experience any noticable issues due to the lack of pre-compiled shaders. It’s fine for me to let shaders compile during my playtime for the first time, I don’t even notice when it happens, and once they are compiled I still get the cache and will benefit from having it going forward.
What I can say about the idea of distributing pre-compiled cache is that it is rather annoying to be constantly receiving those pre-caching updates. I mean, what is this madness with Skyrim, as I get an “update” for it every couple of days (or even several times per day):
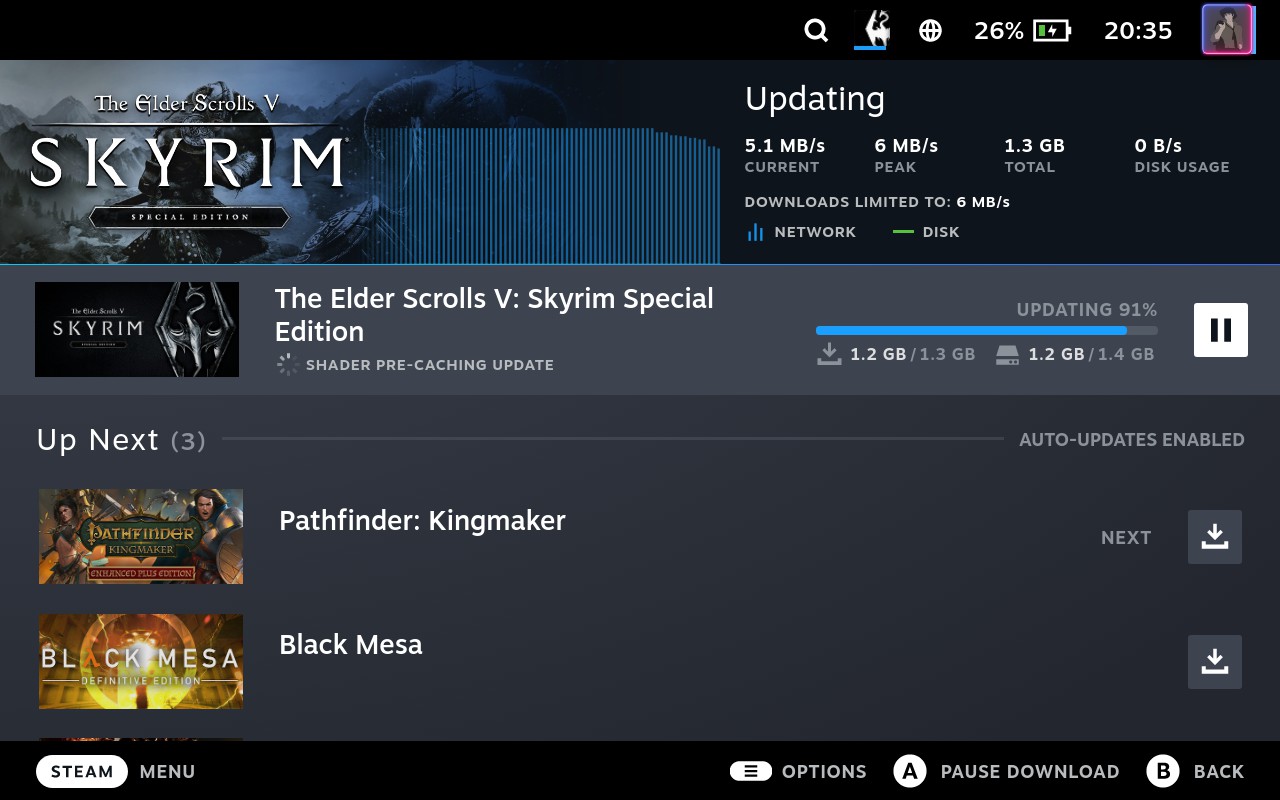
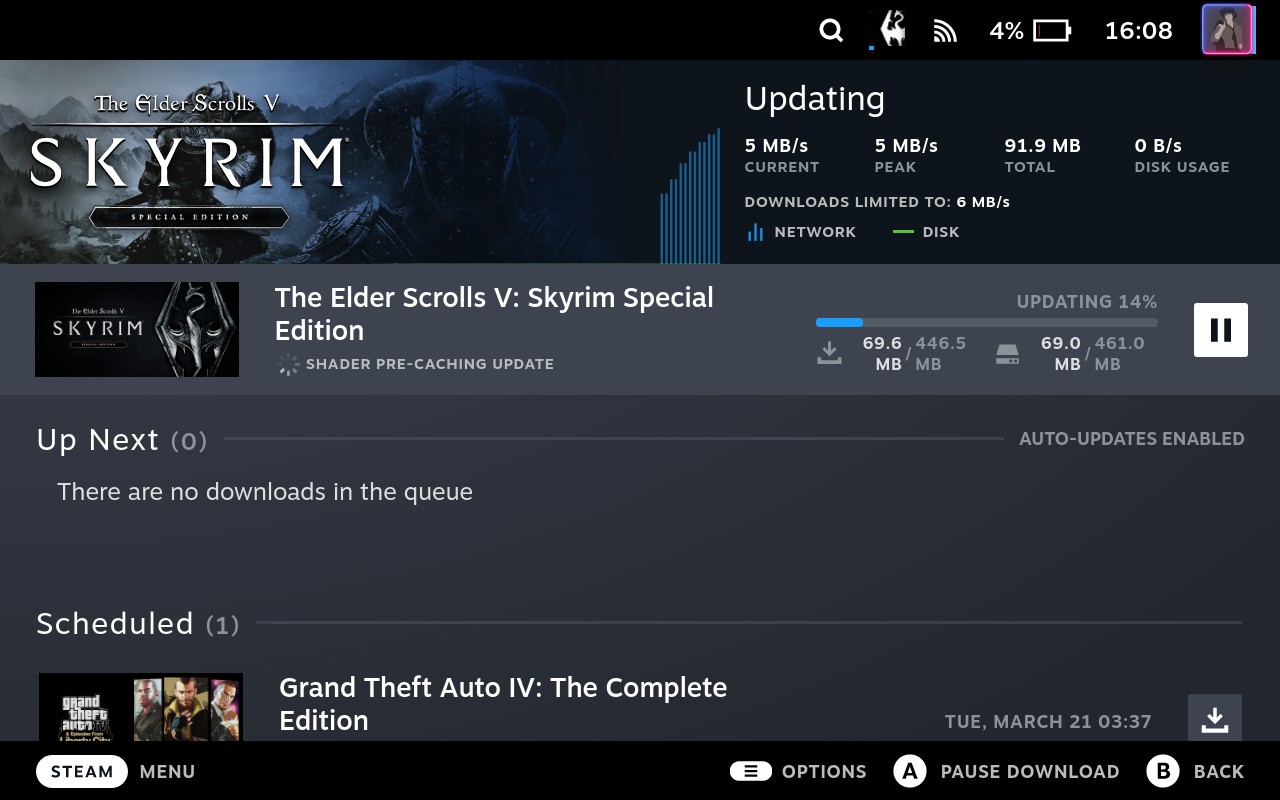
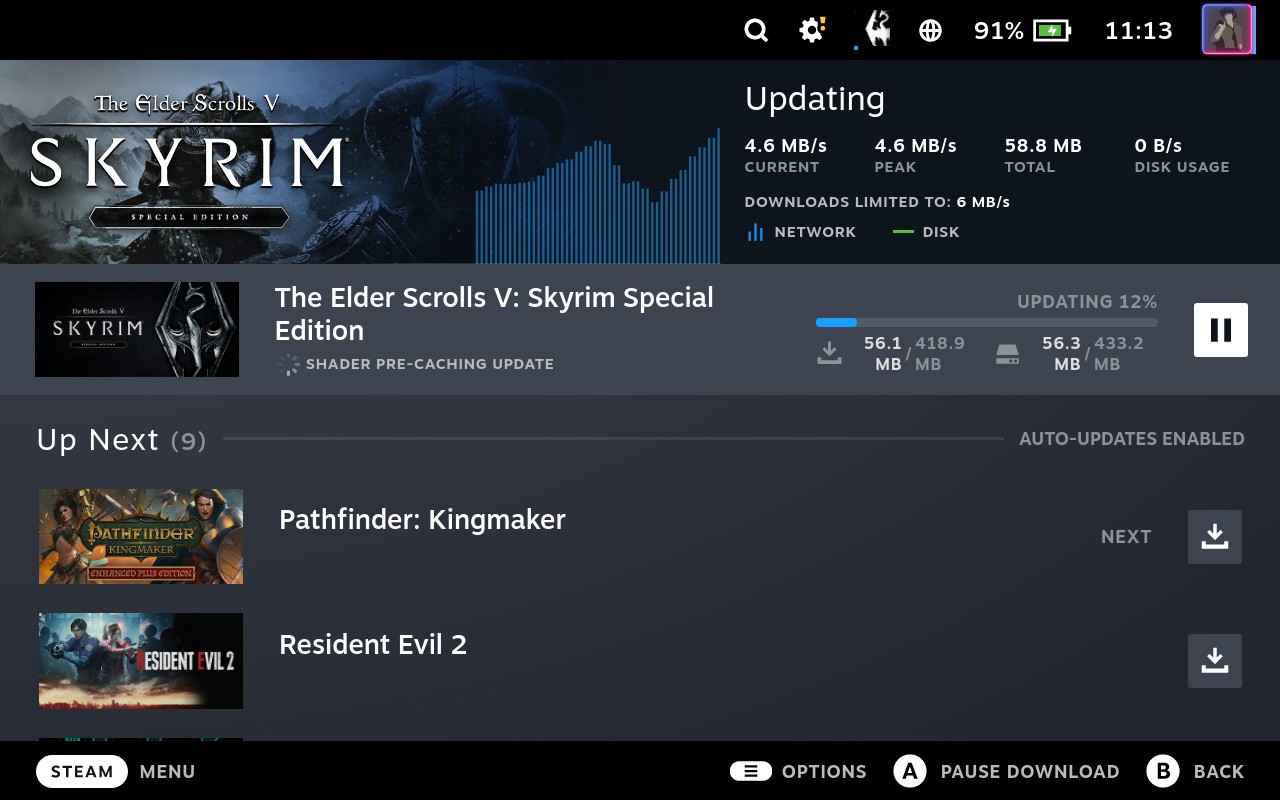
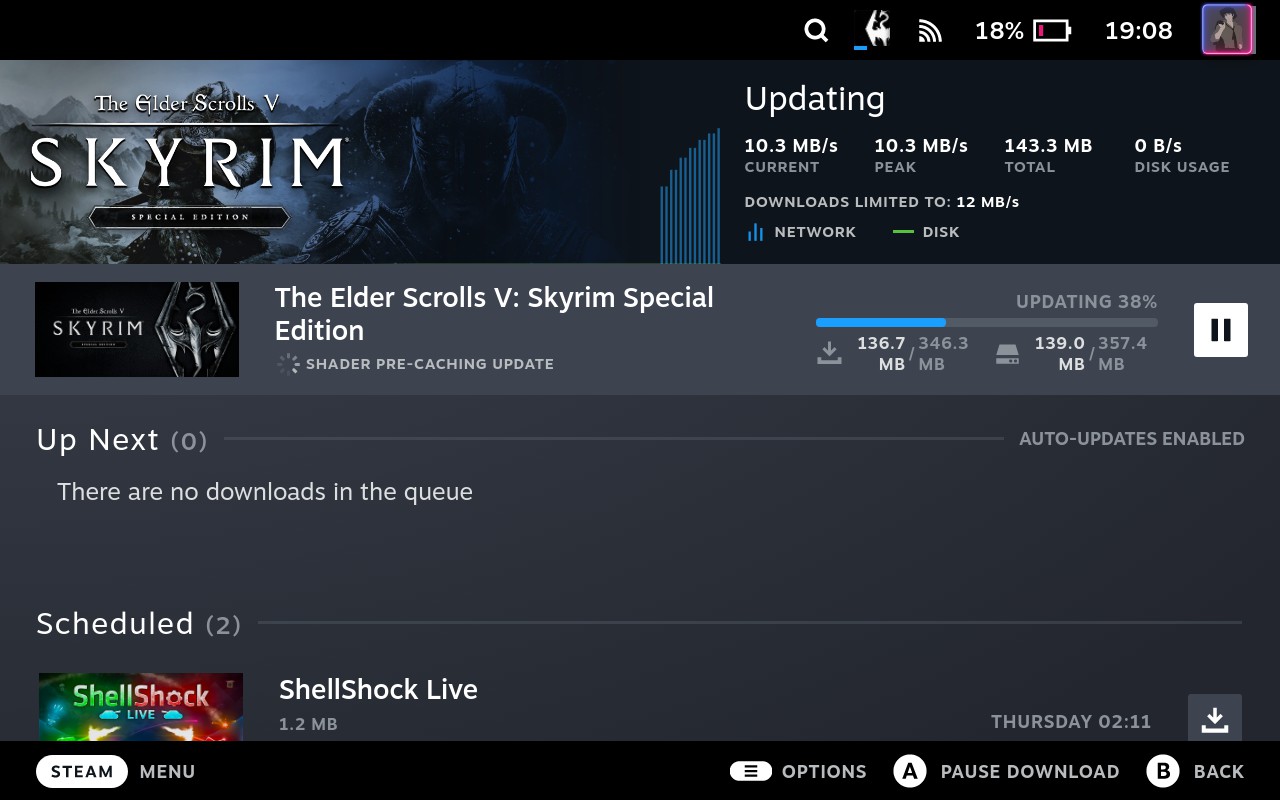
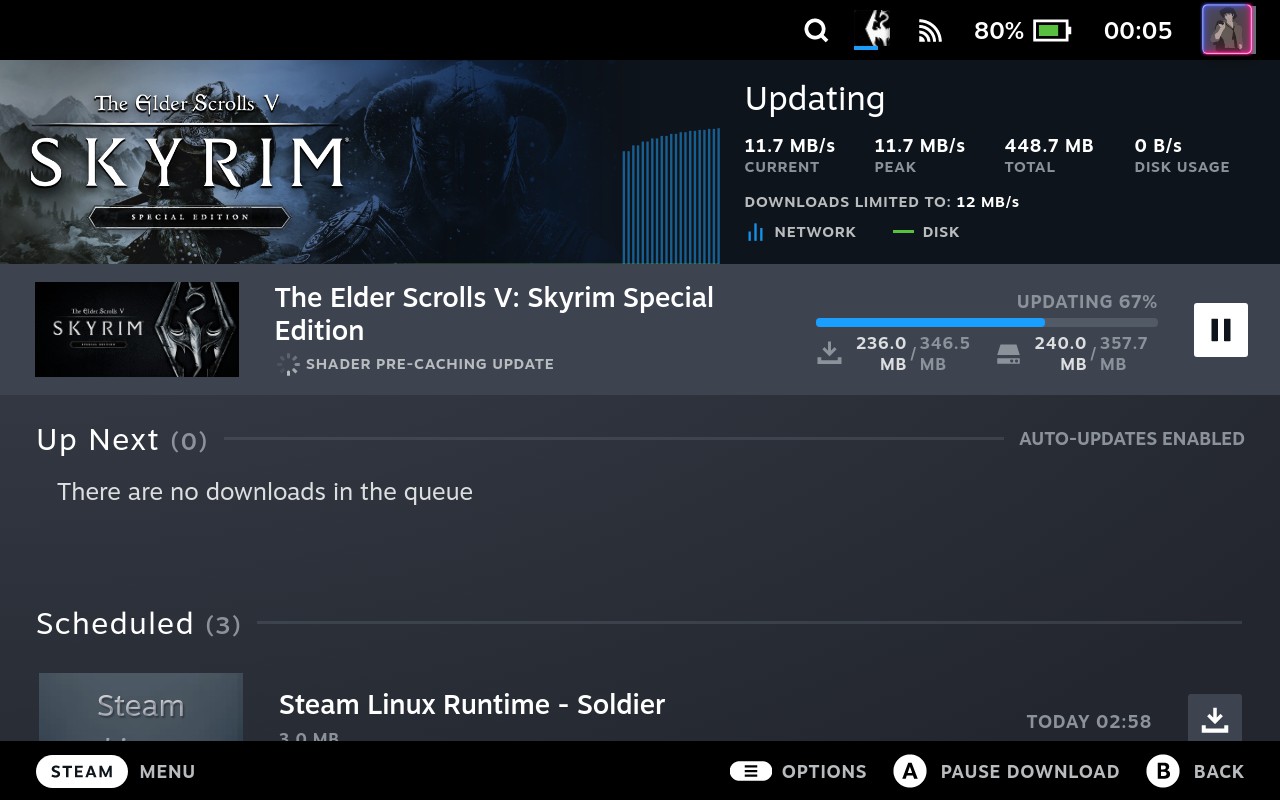
And every time I get these I have the same version of SteamOS, same drivers, same game version, same everything (except for maybe Proton Experimental version?). So what is it so new about shaders in this game (which has been released several years ago) that I need to get updates for it every week?
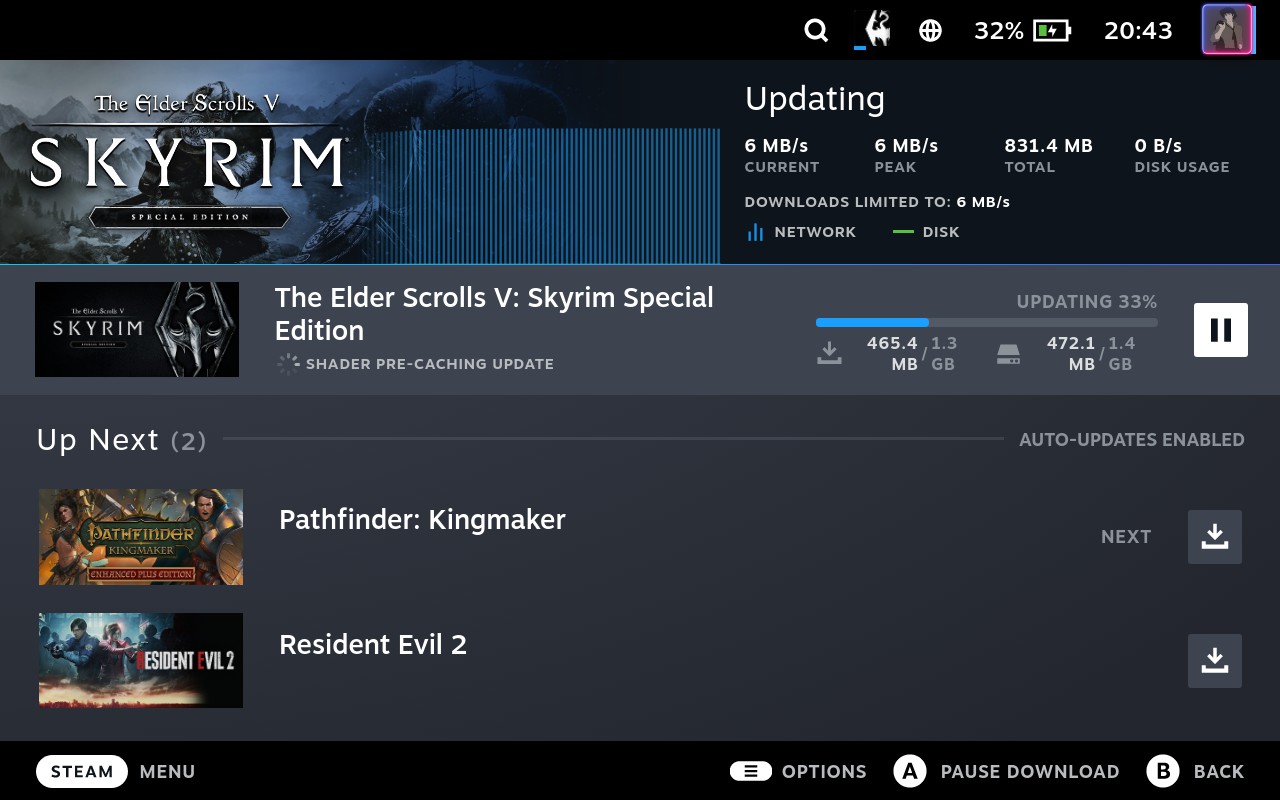
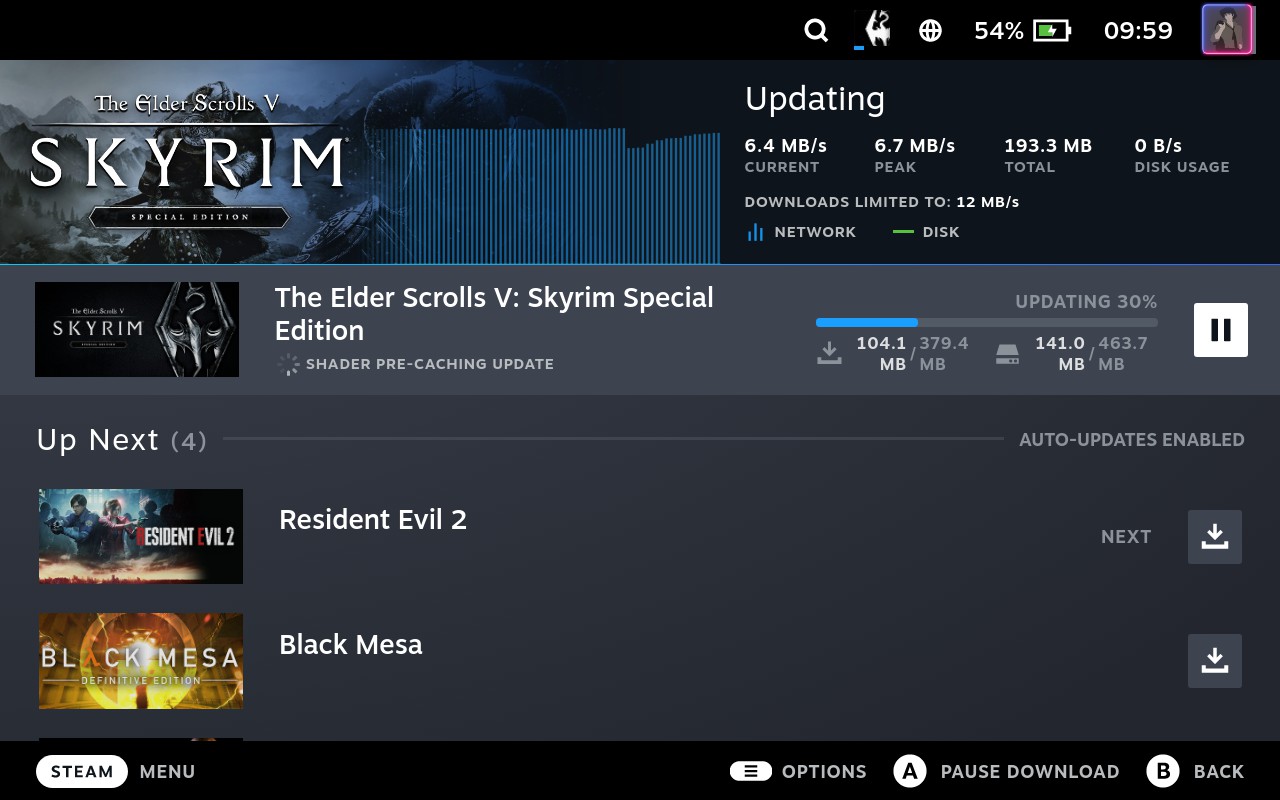
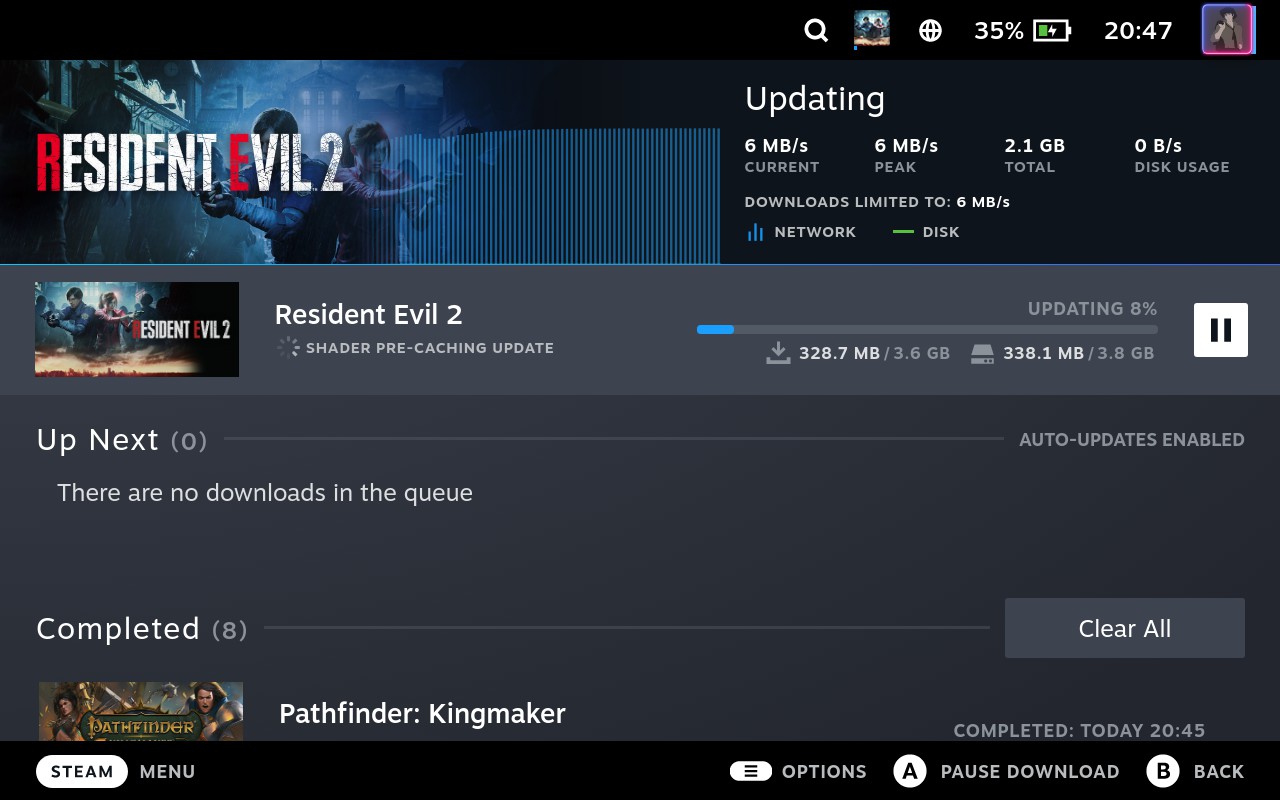
Some games shader updates are obscenely big, so the lads with metered internet connection are screwed:
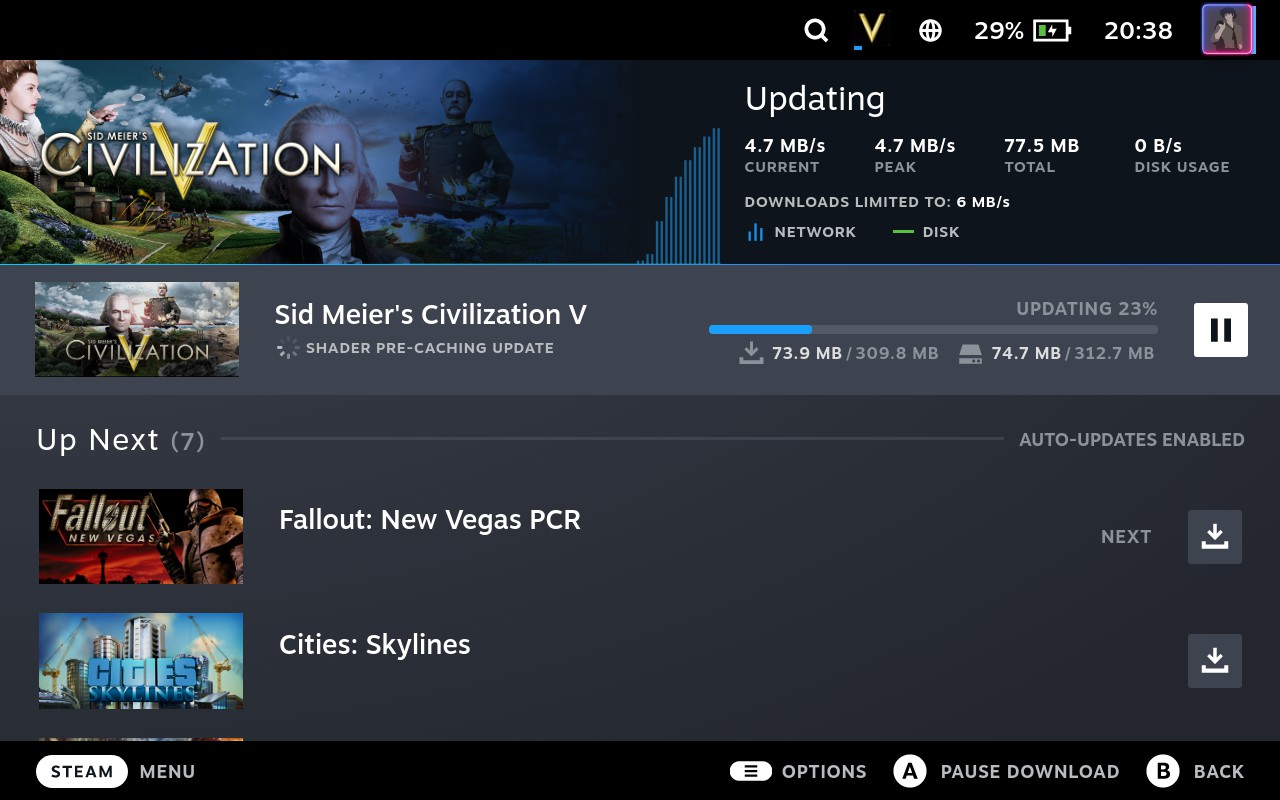
And some updates are just hilarious: what could be possibly new about Civilization V shaders, as the game was released in 2010 and I installed it more than a month ago:
Yeah, as far as I can tell, for me this distributed shader cache doesn’t seem to bring more value than it brings annoyance:
So I personally would like to be able to disable this feature of “pre-caching updates”, and at some point I discovered that one can in fact do that in Steam settings in Desktop mode:
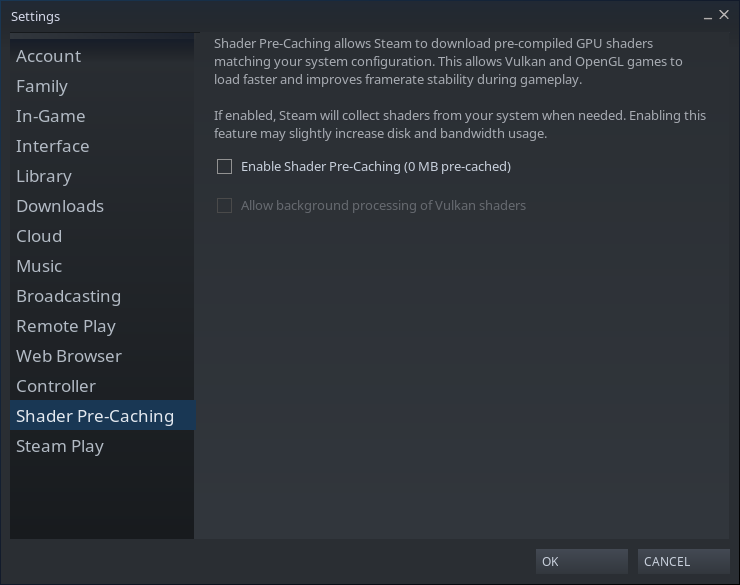
After I unchecked that checkbox, there were no more fekkin pre-caching updates every bloody day anymore.
Sleep, suspend and resume
I did not expect this to work (didn’t even know that Steam Deck will have this feature), but it does. You can press the power button while playing a game, and Steam Deck will go to sleep (you can also connect it to charger meanwhile). Then, some time later, you press the power button again, Steam Deck wakes up, and you can continue playing your game from where you left it.
Very convenient and useful feature. I imagine, it was very hard to properly implement too.
Some games, however, do have certain issues related to that. For instance, XCOM 2 being resumed like this gets echoing/lagging effect for any sounds in the game, which you can only get rid of by restarting the game, which renders the whole sleep functionality somewhat useless - it’s no joy to continue playing with the sound beeing messed up like this. On the bright side, so far XCOM 2 is the only game in which I got this behaviour, so it could be that it’s actually the game’s fault.
SSH access
You would most definitely want to establish SSH connection to your Steam Deck. The procedure is nothing special, all the steps are the same as with any other GNU/Linux host.
Generate a key on the machine from which you’ll be connecting to Steam Deck:
$ cd ~/.ssh
$ ssh-keygen -t ed25519 -a 100 -C "YOUR-NAME@YOUR-MACHINE"
Call it whatever you like, for example steamdeck, no need to set a password. Add a new section to ~/.ssh/config:
Host steamdeck
HostName 192.168.1.10
IdentityFile ~/.ssh/steamdeck
User deck
The 192.168.1.10 IP address is just an example, you of course need to set yours there. And for it to persist between Steam Deck reboots you’ll need to reserve it in your router DHCP settings with your Steam Deck’s MAC address. By the way, if you’d want to be able to connect to it via either Ethernet or Wi-Fi, then obviously you’ll need to reserve 2 IP addresses (one per MAC address) and to have 2 sections in ~/.ssh/config, for example:
Host steamdeck
HostName 192.168.1.10
IdentityFile ~/.ssh/steamdeck
User deck

Host steamdeck-wifi
HostName 192.168.1.11
IdentityFile ~/.ssh/steamdeck
User deck
Switch to Desktop mode on your Steam Deck. Add the contents of ~/.ssh/steamdeck.pub file from your machine (public SSH key) to ~/.ssh/authorized_keys file on Steam Deck. Since you don’t have a connection established to your Steam Deck yet, you can save the key as a text file and transfer it to Steam Deck on SD-card. Alternatively, if you have a web-server, just put the file there and fetch it on Steam Deck with cURL:
$ curl -O 192.168.1.111/key
$ cat ./key >> ~/.ssh/authorized_keys
$ rm ./key
$ echo "And also remove the file from web-server"
Check that SSH service settings on Steam Deck do not allow using passwords, so SSH key is the only way to authenticate a connection:
$ sudo nano /etc/ssh/sshd_configPasswordAuthentication no
PermitEmptyPasswords no
ChallengeResponseAuthentication noAnd then you can finally start the SSH service on Steam Deck:
$ sudo systemctl start sshd.serviceNow you can connect to your Steam Deck via SSH from your machine (replace steamdeck with whatever you called it in your ~/.ssh/config):
$ ssh steamdeckSurely enough, now you can also transfer files to/from it using any SFTP client (FileZilla, Transmit, Cyberduck, etc), which is probably the main reason why you wanted to establish SSH access to your Steam Deck in the first place.
It’s probably also worth to mention that it doesn’t matter whether your Steam Deck is in Desktop or Gaming mode - you can still connect to it, as long as SSH service is running.
The SSH service will be running until the next system reboot (switching Desktop/Gaming mode doesn’t count), because the service isn’t set to auto-start. I would recommend to keep it that way, and ideally you’d also stop the service once you’ve done everything you needed to do over SSH. Yes, it is inconvenient, and next time you’ll need to connect via SSH you’ll have to open Terminal/Konsole and start the service again, but I think it’s a good security precaution.
Monitoring the temperature
You can monitor (watch) the device temperature and other metrics with sensors command:
$ watch sensors
I used it to see how compiling C++ sources goes, and here’s what sensors were reporting during 100% load on all 4/8 CPU cores:
amdgpu-pci-0400
Adapter: PCI adapter
vddgfx:       15.00 mV
vddnb:       669.00 mV
edge:         +83.0°C
slowPPT:      16.17 W  (cap =  15.00 W)
fastPPT:      16.17 W  (cap =  15.00 W)

BAT1-acpi-0
Adapter: ACPI interface
in0:           8.75 V
curr1:       706.00 mA

jupiter-isa-0000
Adapter: ISA adapter
PD Contract Voltage:  15.00 V
System Fan:          5674 RPM
Battery Temp:         +33.0°C
PD Contract Current:   3.00 A

nvme-pci-0100
Adapter: PCI adapter
Composite:    +49.9°C  (low  =  -0.1°C, high = +84.8°C)
                       (crit = +94.8°C)

acpitz-acpi-0
Adapter: ACPI interface
temp1:        +84.0°C  (crit = +105.0°C)
So it never went higher than 84°C temperature. For comparison, my MacBook Pro (15-inch, 2018) during compilation of the same project becomes so damn hot (about 99°C) that you can’t touch it.
If you only need the temperature, then there is also this:
$ awk '{printf "%.1f\n", $1/1000}' /sys/class/thermal/thermal_zone*/temp | sort -r | head -1
42.0
which is more convenient for reporting the temperature to Home Assistant, should you ever need that:
$ jq -nc --argjson msg $(awk '{printf "%.1f\n", $1/1000}' /sys/class/thermal/thermal_zone*/temp | sort -r | head -1) '{"temperature":$msg}' \
    | curl -X POST -H "Content-Type: application/json" -d @- -k https://YOUR-HOME-ASSISTANT-HOST:AND-PORT/api/webhook/monitoring-steam-deck-temperature
Disabling file indexer
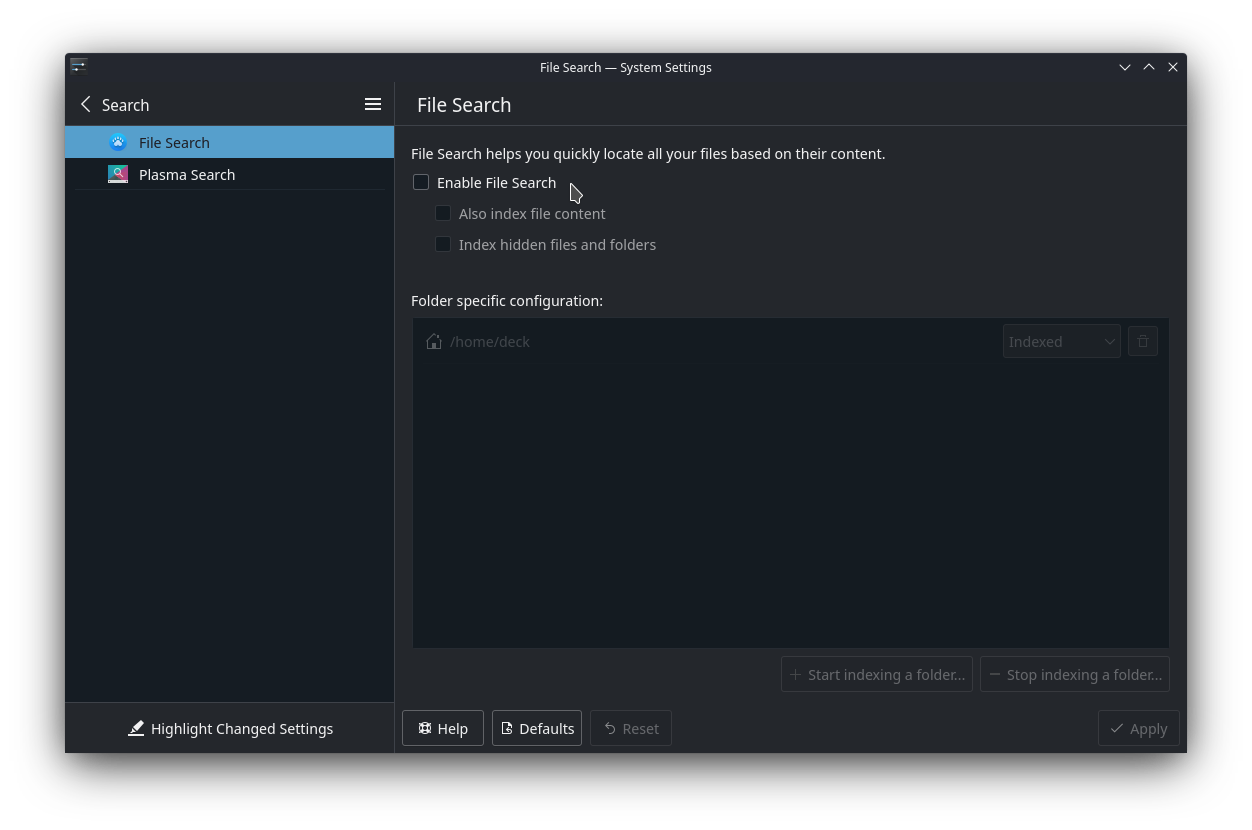
At some point I noticed that a process called /usr/lib/baloo_file_extractor loads the CPU (at least one of the cores) to almost 100%. I googled for it, and that process turned out to be Baloo file indexer.
Well, I don’t usually rely on system indexers, so I don’t need a useless process wasting my CPU time and the battery charge along with it. Plus I saw some people reporting how extensively it performs read/write disk operations, which probably can reduce the SSD / SD card resource.
First I disabled it in system settings:
And then I also disabled its service just in case:
$ sudo balooctl disable
Disabling and stopping the File Indexer

$ sudo balooctl status
Baloo is currently disabled. To enable, please run balooctl enable
Firewall
It would be really great to have a firewall like Little Snitch to block outgoing network connections to Take Two, Ubisoft, EA and other spying scumbags, and in general to have control over my network traffic.
But sadly that’s a common problem concerning all GNU/Linux distributions - there just isn’t one. Setting up iptables rules is no joy at all, as it’s nowhere close to the convenience of Little Snitch.
NextDNS
For now I have only set-up NextDNS (the link is referral) with some blacklists. Here’s a related feature request with instructions for installing a client, but I did it via systemd-resolved instead:
$ sudo nano /etc/systemd/resolved.conf

[Resolve]
DNS=45.90.28.0#deviceName-profileID.dns.nextdns.io
DNS=2a07:a8c0::#deviceName-profileID.dns.nextdns.io
DNS=45.90.30.0#deviceName-profileID.dns.nextdns.io
DNS=2a07:a8c1::#deviceName-profileID.dns.nextdns.io
DNSOverTLS=yes

$ sudo systemctl daemon-reload
$ sudo systemctl restart systemd-resolved
That is most certainly not a replacement for a proper firewall, but at least it is something to more or less restrict anal probing.
Steam Input
It is great when a game has a gamepad support, you can just launch the game and play. But many games don’t have it, they only support playing with mouse and keyboard, so you would have really hard time playing those games on Steam Deck without physical mouse and keyboard connected.
You would, but you will not - you will have great time, thanks to Steam Input. Shortly saying, it’s an ability to customize inputs (of which Steam Deck has a fucking lot) in a so-called “controller layout” for the purposes of a particular game. In other words, it is possible to assign “regular” keyboard/mouse/etc inputs to Steam Deck buttons/joysticks/trackpads/etc:
Here’s a very detailed guide about controller layouts.
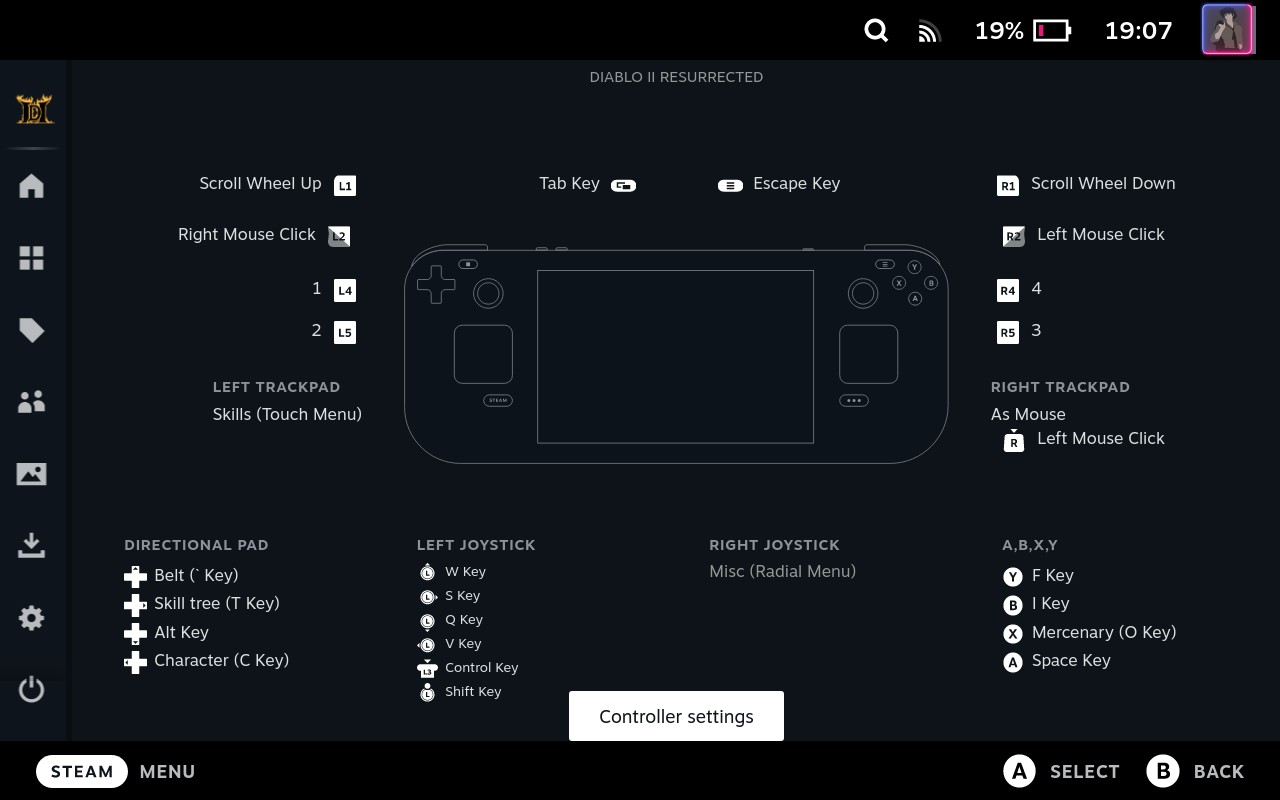
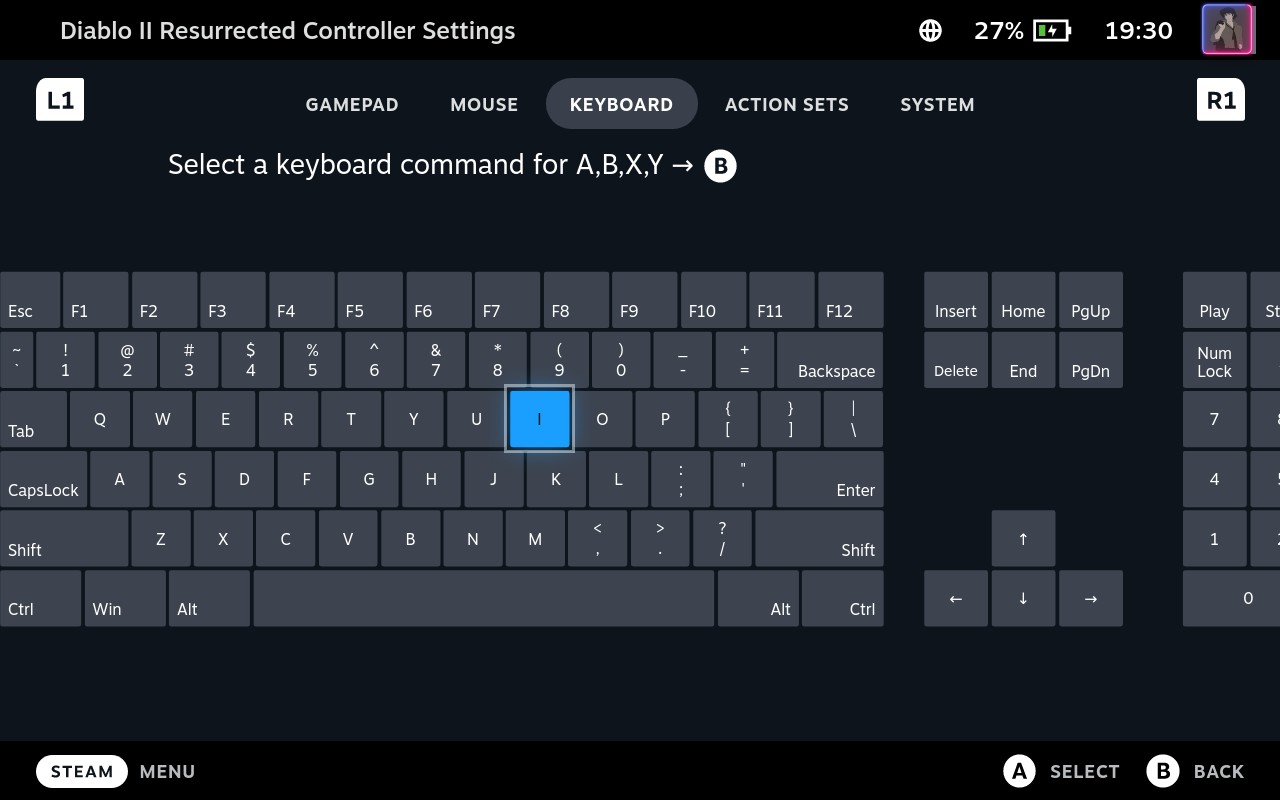
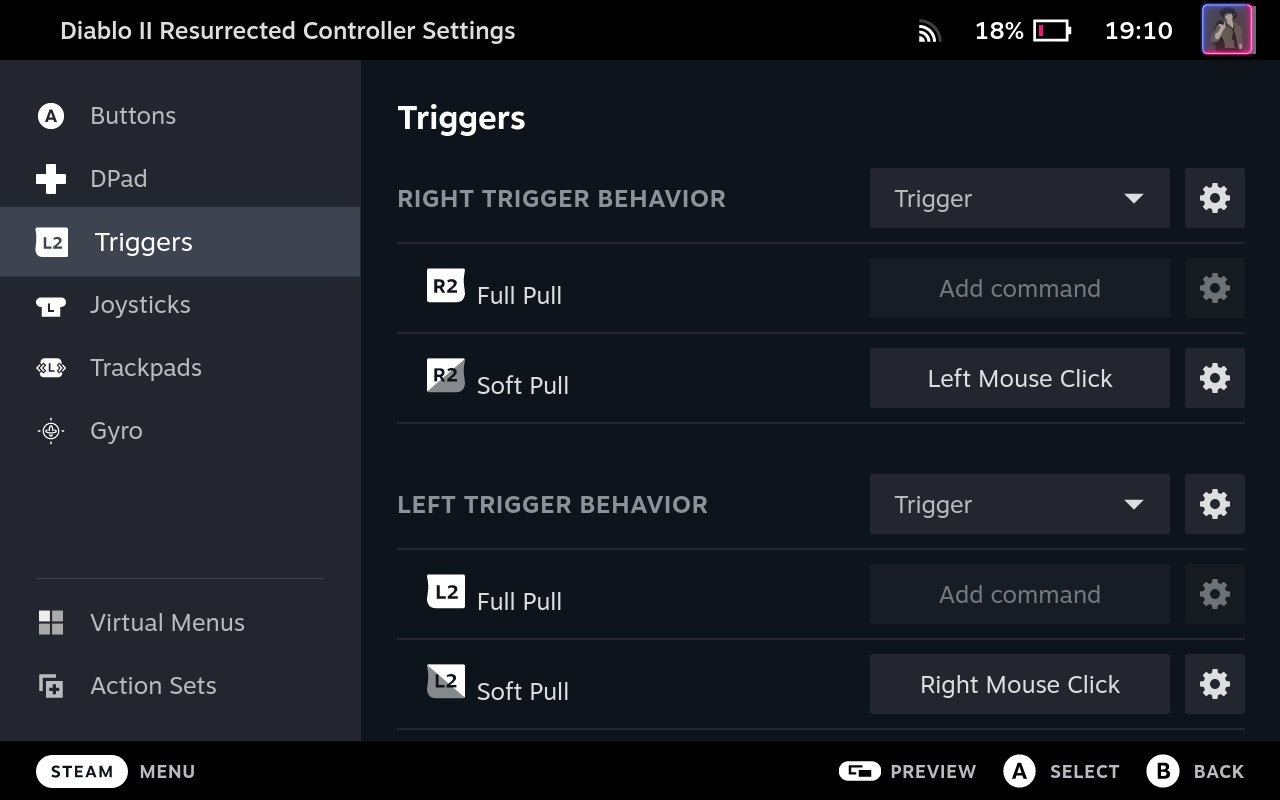
For example, here’s how I made my own layout for playing Diablo II Resurrected. First, buttons:
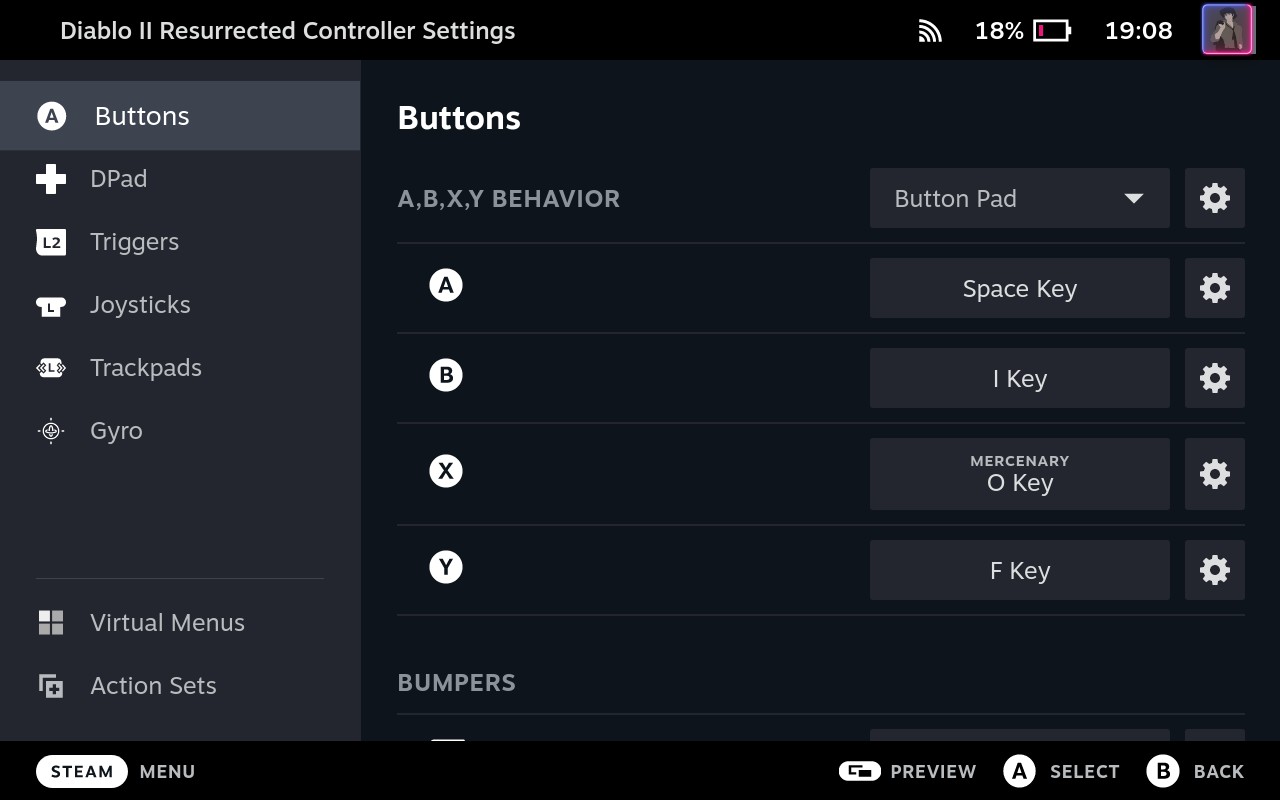
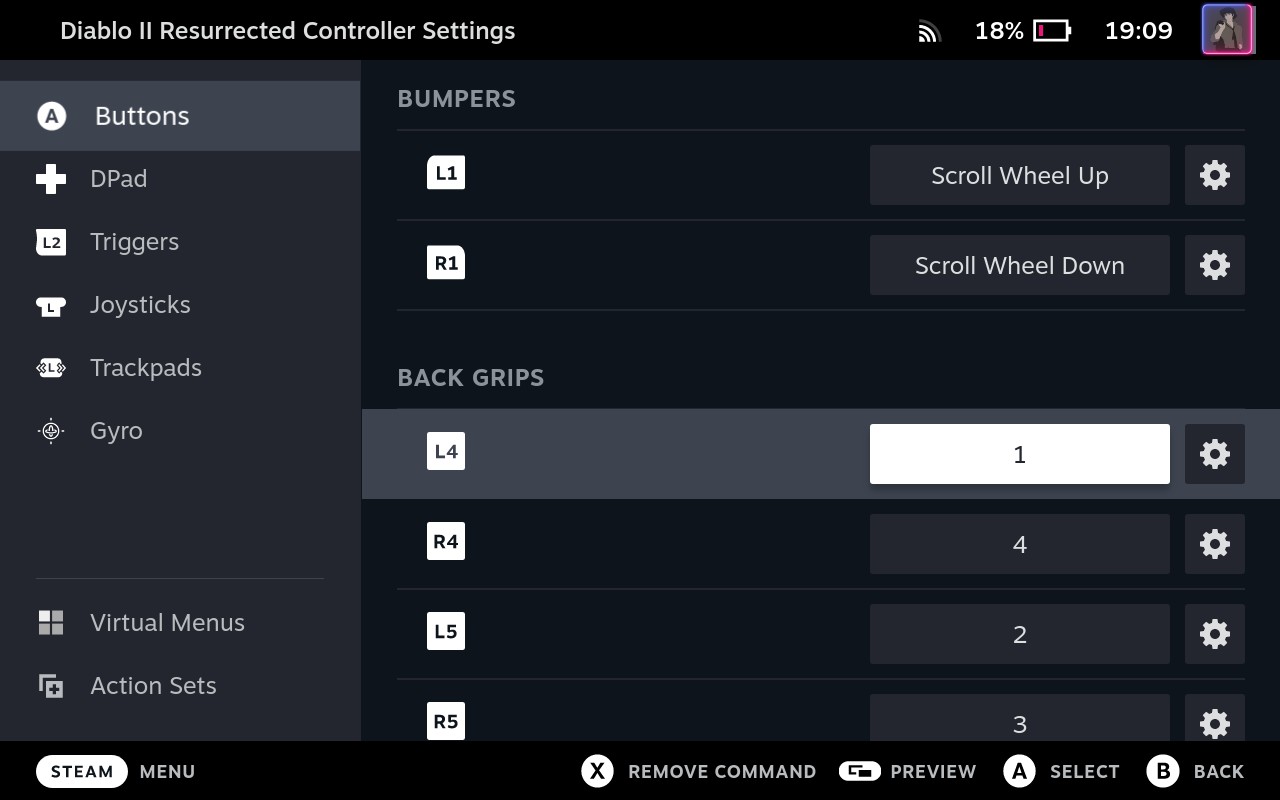
Bumpers are cycling active skills and back grips are convenient for drinking potions from the belt:
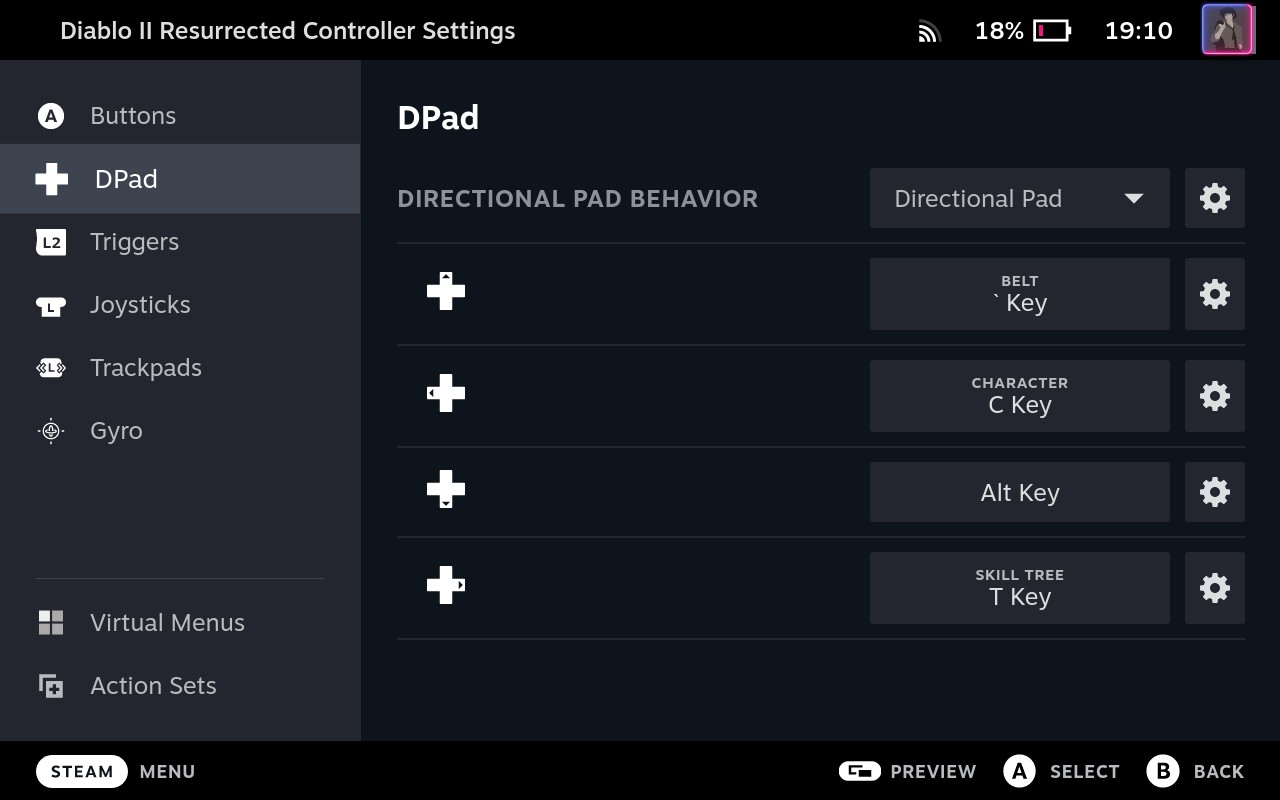
DPad:
Triggers are responsible for mouse clicks:
Left joystick provides 4 more key bindings and right joystick shows a virtual menu:
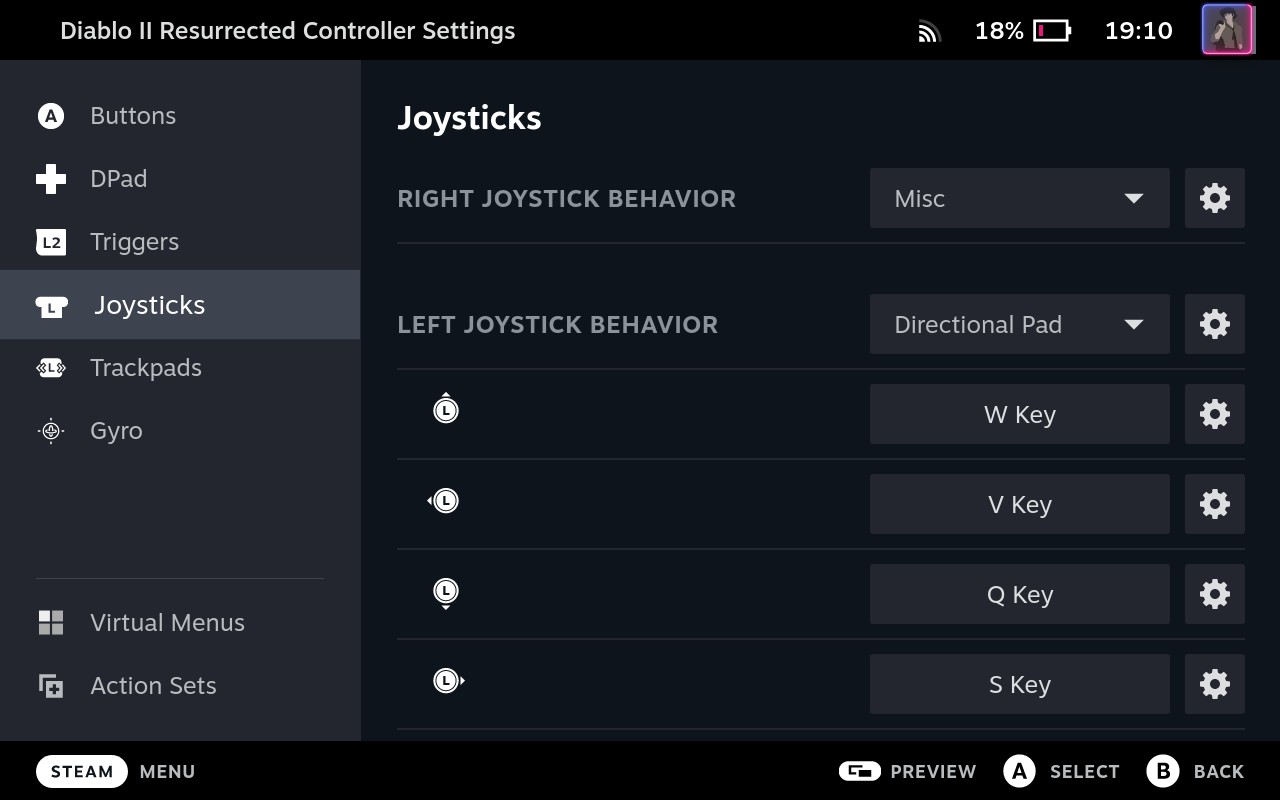
…actually, left joystick provides 6 more bindings:

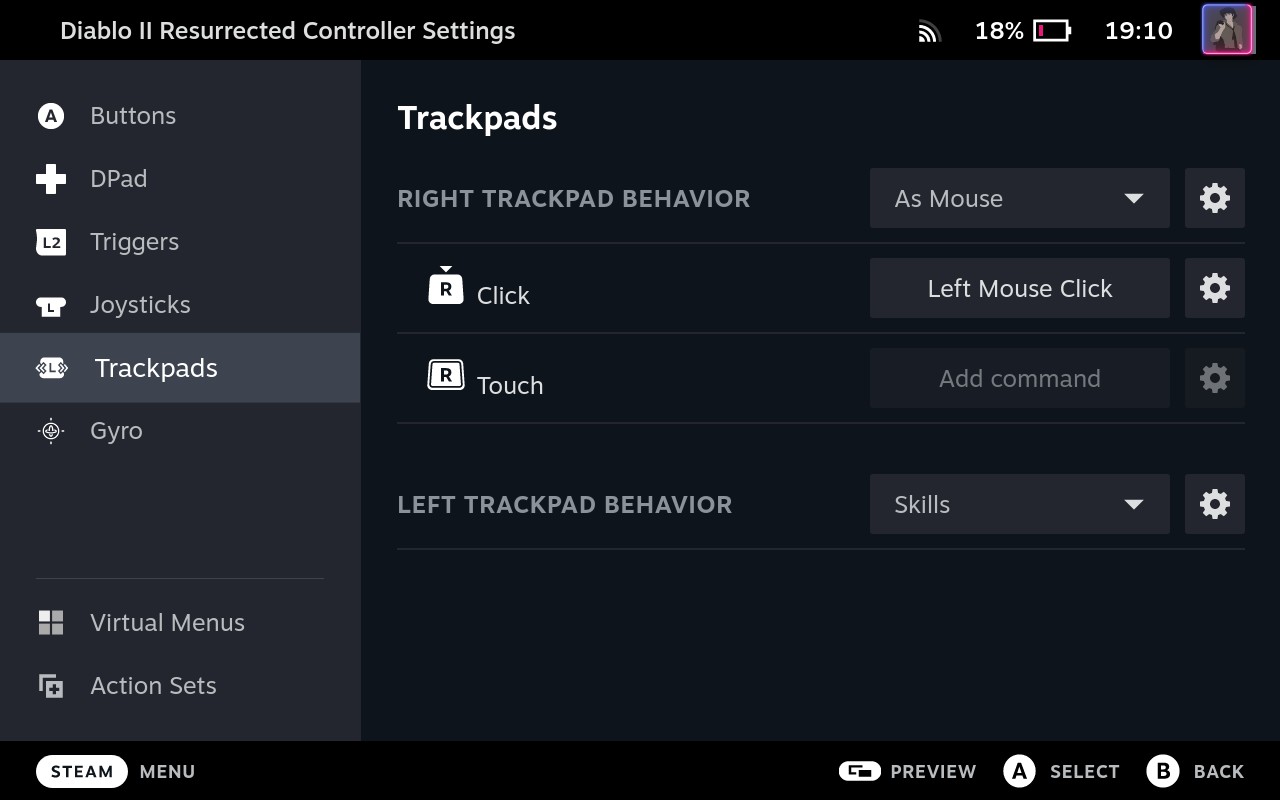
Right trackpad controls the mouse movement and left trackpad shows another virtual menu:
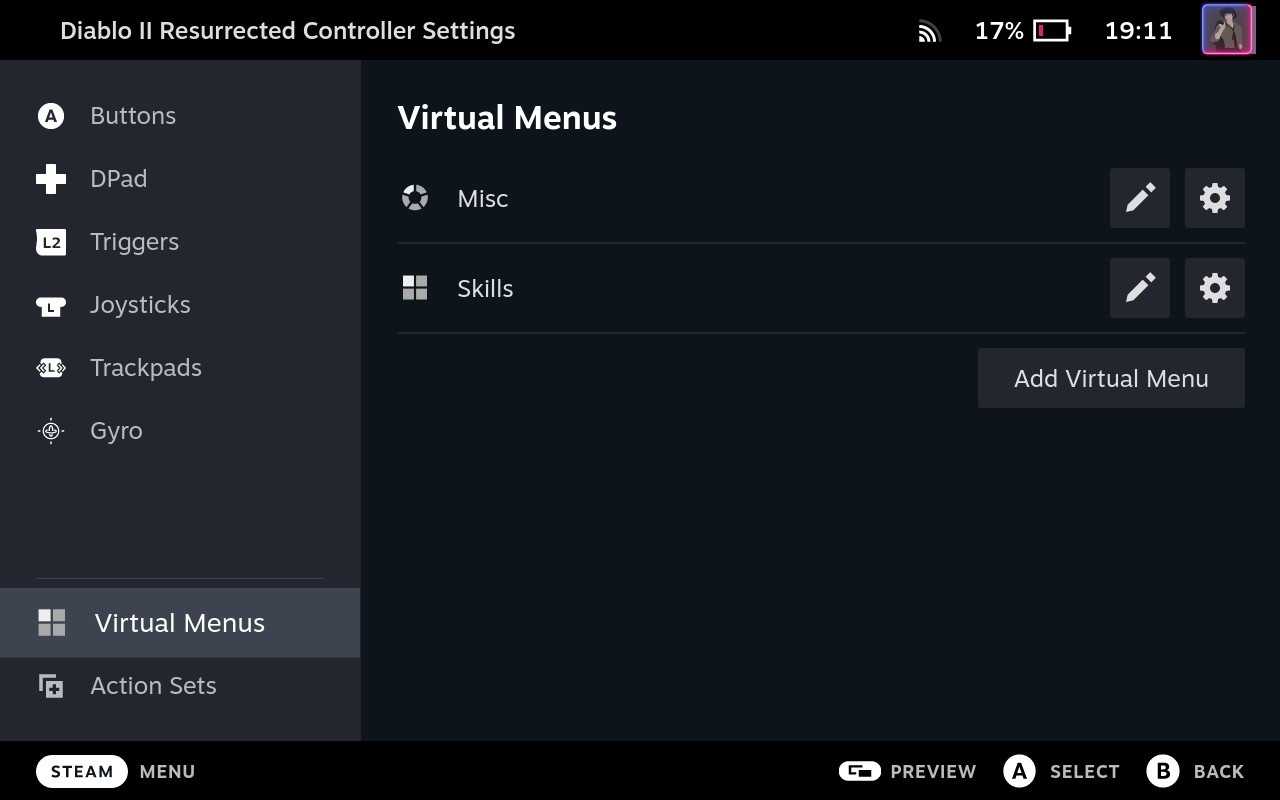
Virtual menus
When I first saw virtual menus, I couldn’t believe that mere mortals were allowed to have these:
Basically, you can compose lists of commands and call-up these lists in-game via special overlays, like so:
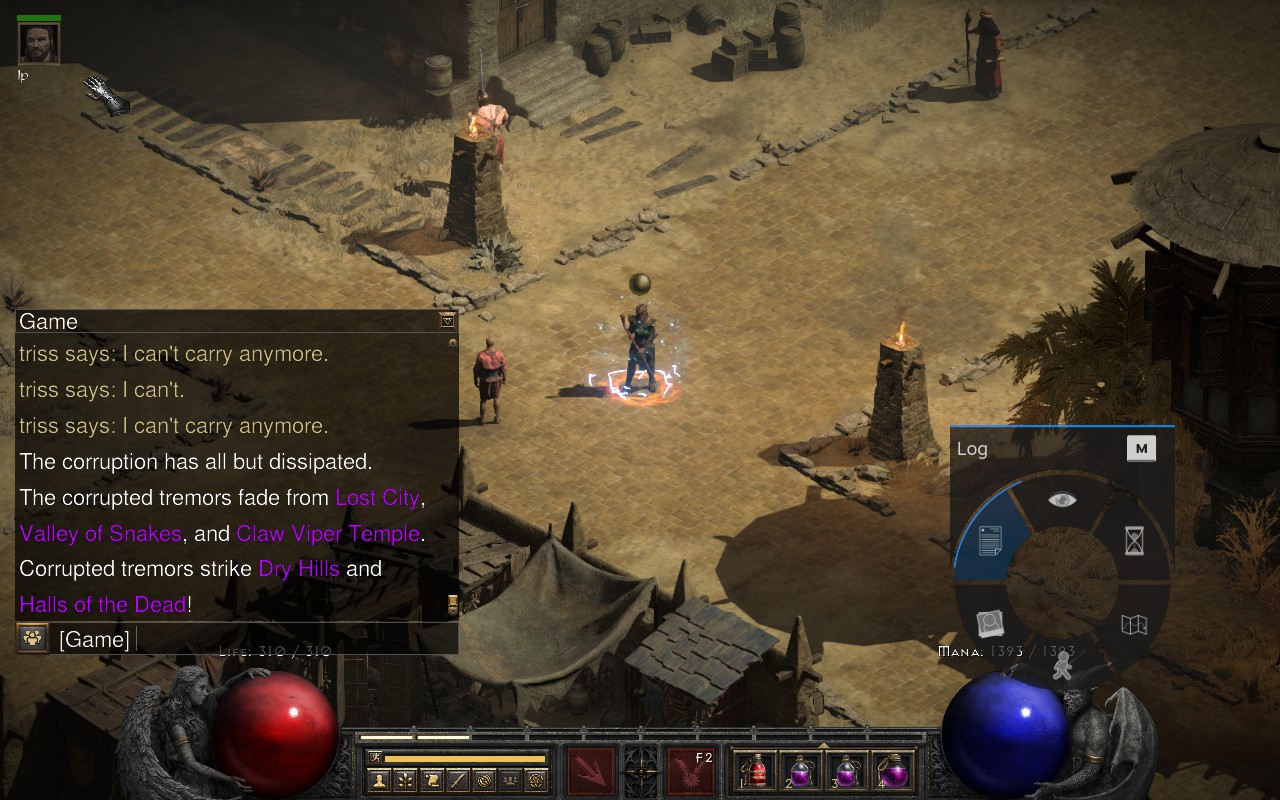
This radial menu shows up when I touch the right joystick. In that menu I have 6 more buttons for various things that I don’t need all that often:
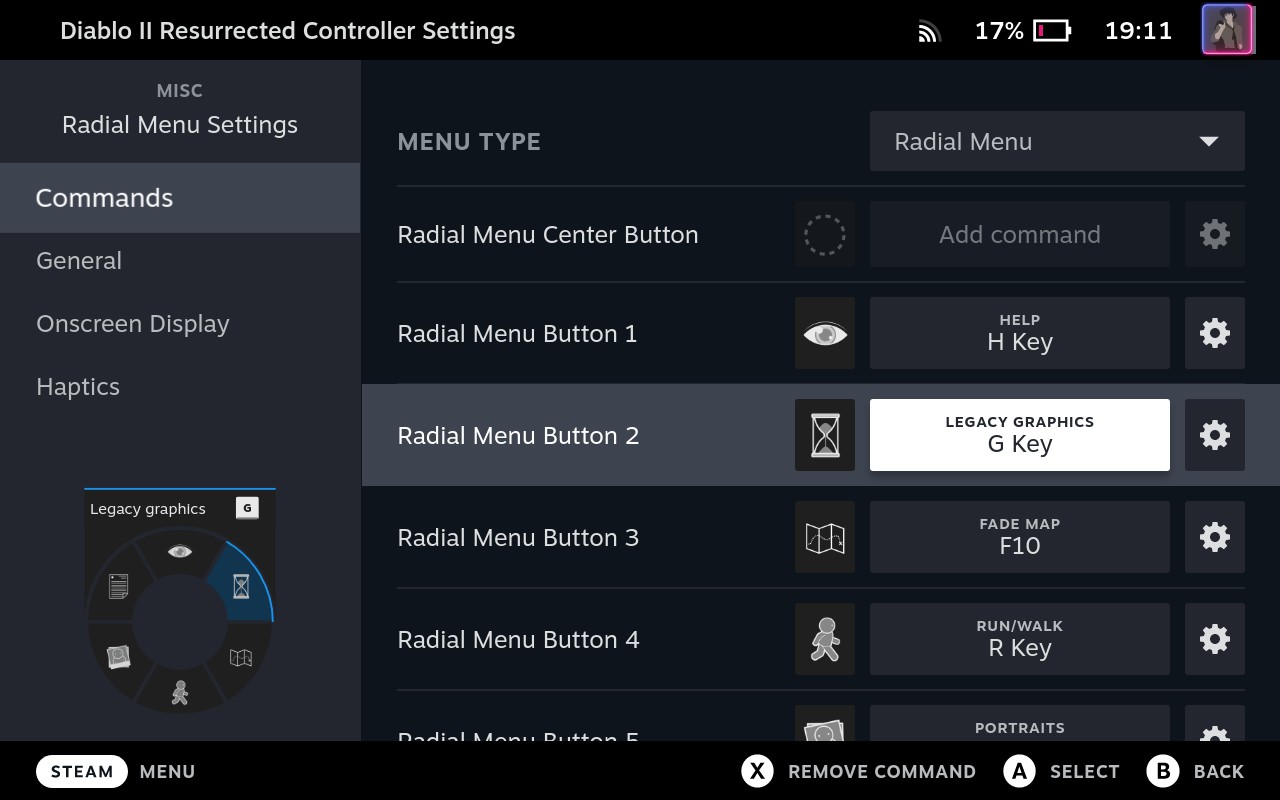
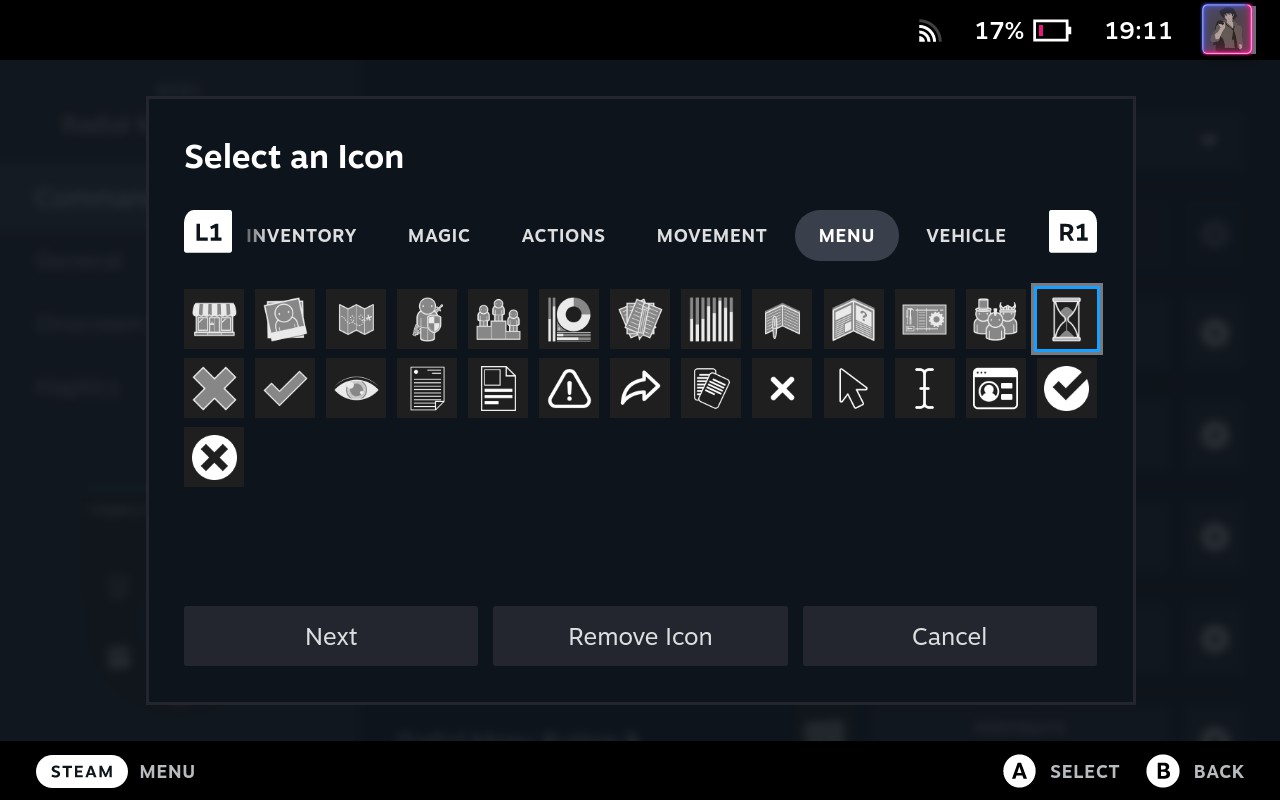
Every menu item can have an icon (and with colors too):
Another type of menu you can create is a touch menu. This one shows up when I put my finger on the left trackpad:
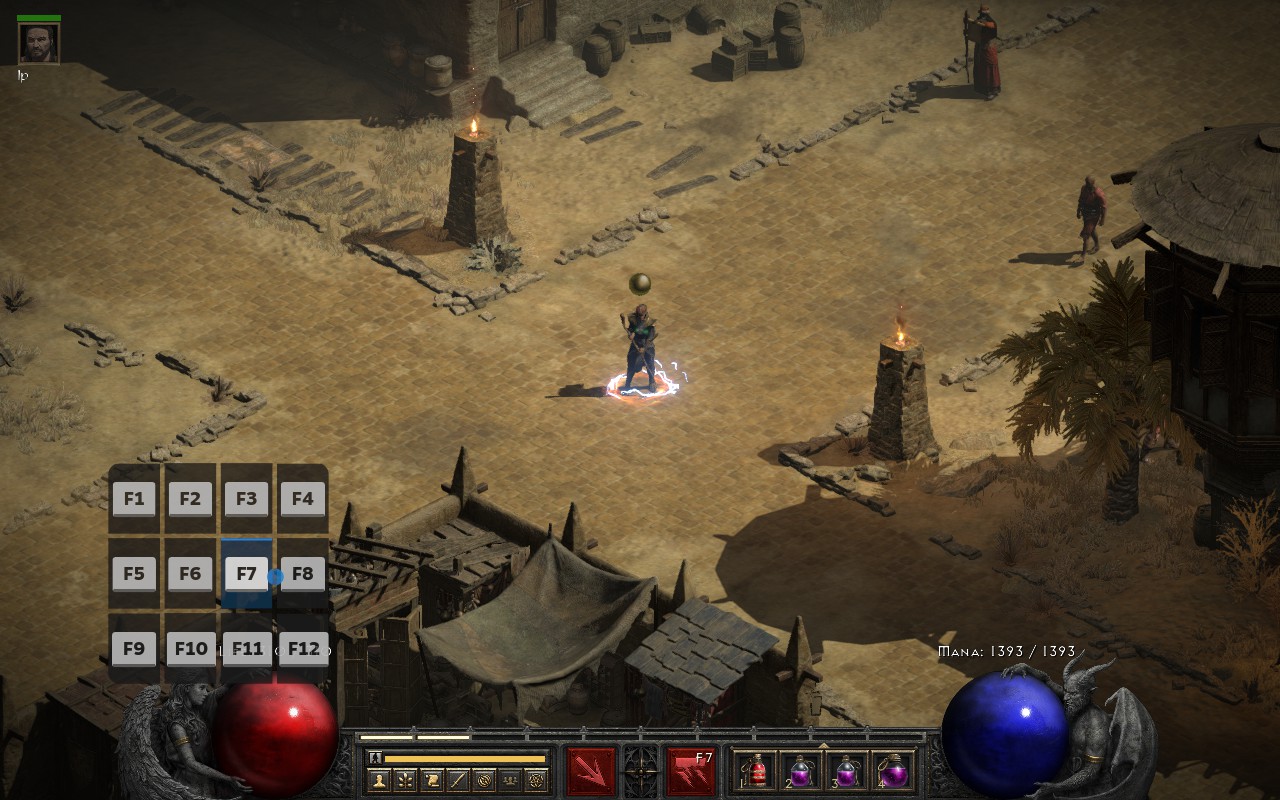
As you can guess, this one gives me F1-F12 keys to assign to my character skills:
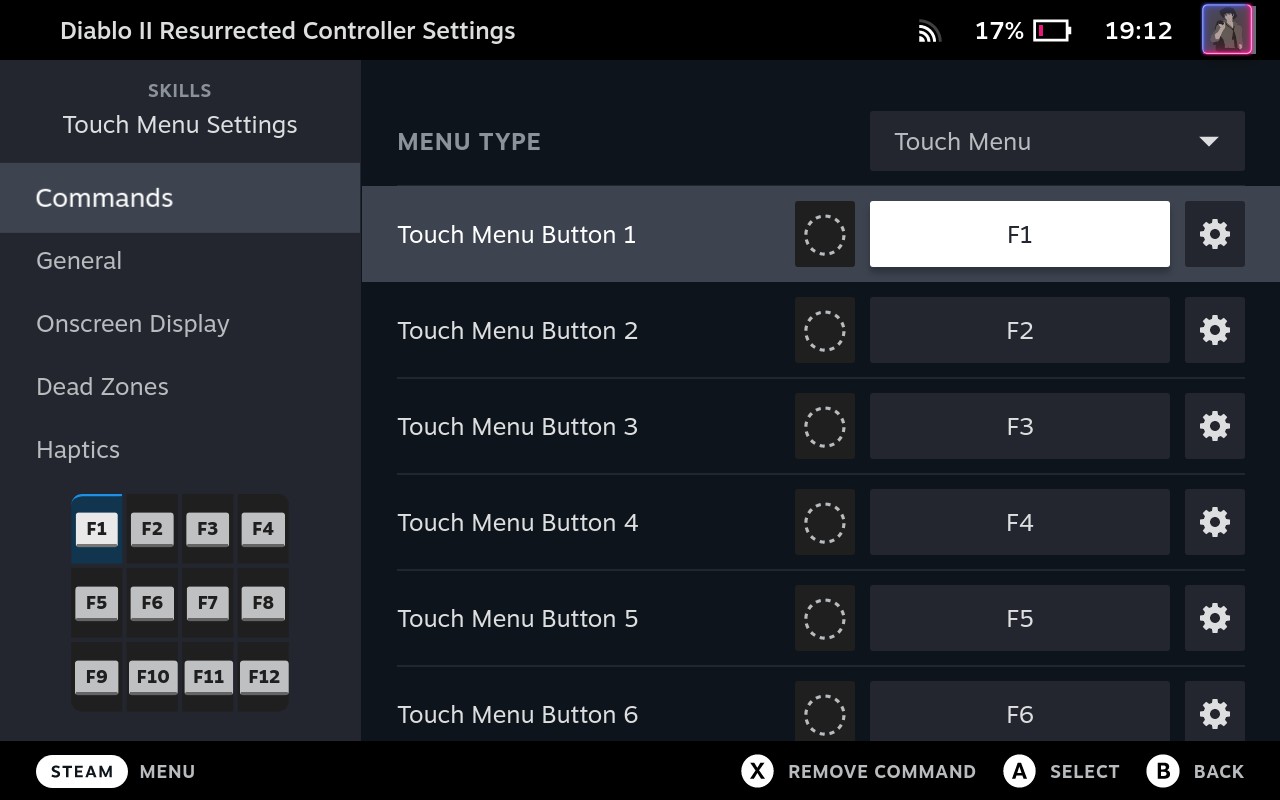
By default the game has only F1-F8 keys bound, but you can bind more in the game settings:
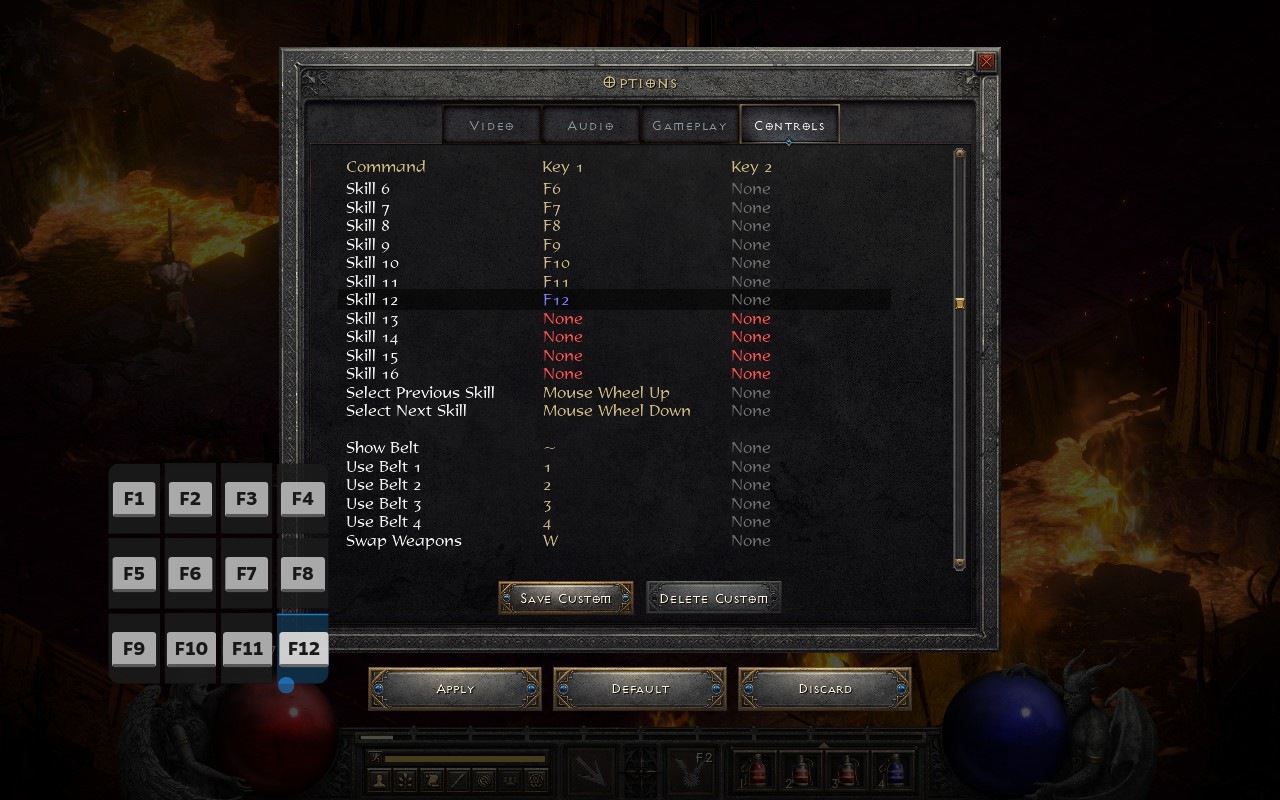
Absolutely fantastic feature.
Action Sets
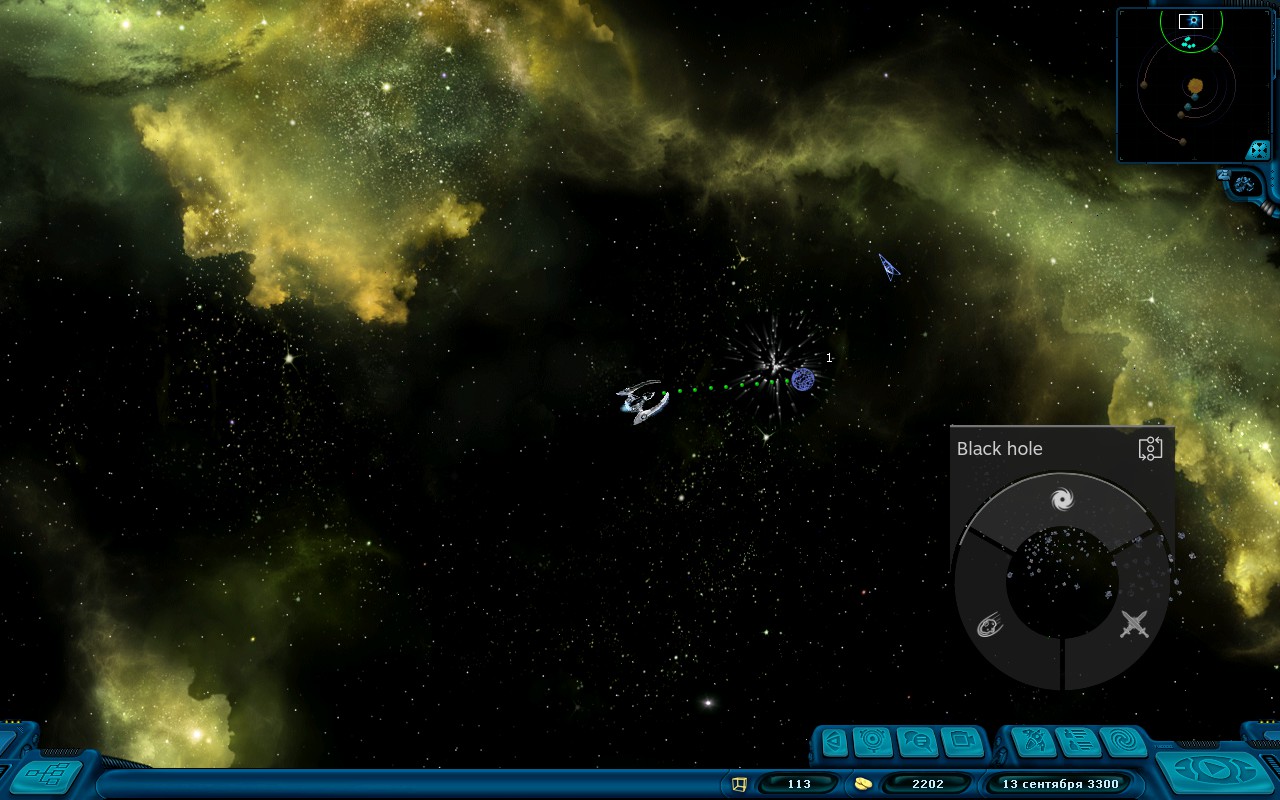
When you run out of buttons, you can start creating so-called Action Sets - a kinda different variations within the same layout, each having it’s own collection of bindings and virtual menus. This was incredibly useful when I was making a controller layout for Space Rangers, because I needed different bindings for different game modes (space flights, black holes and planetary battles):
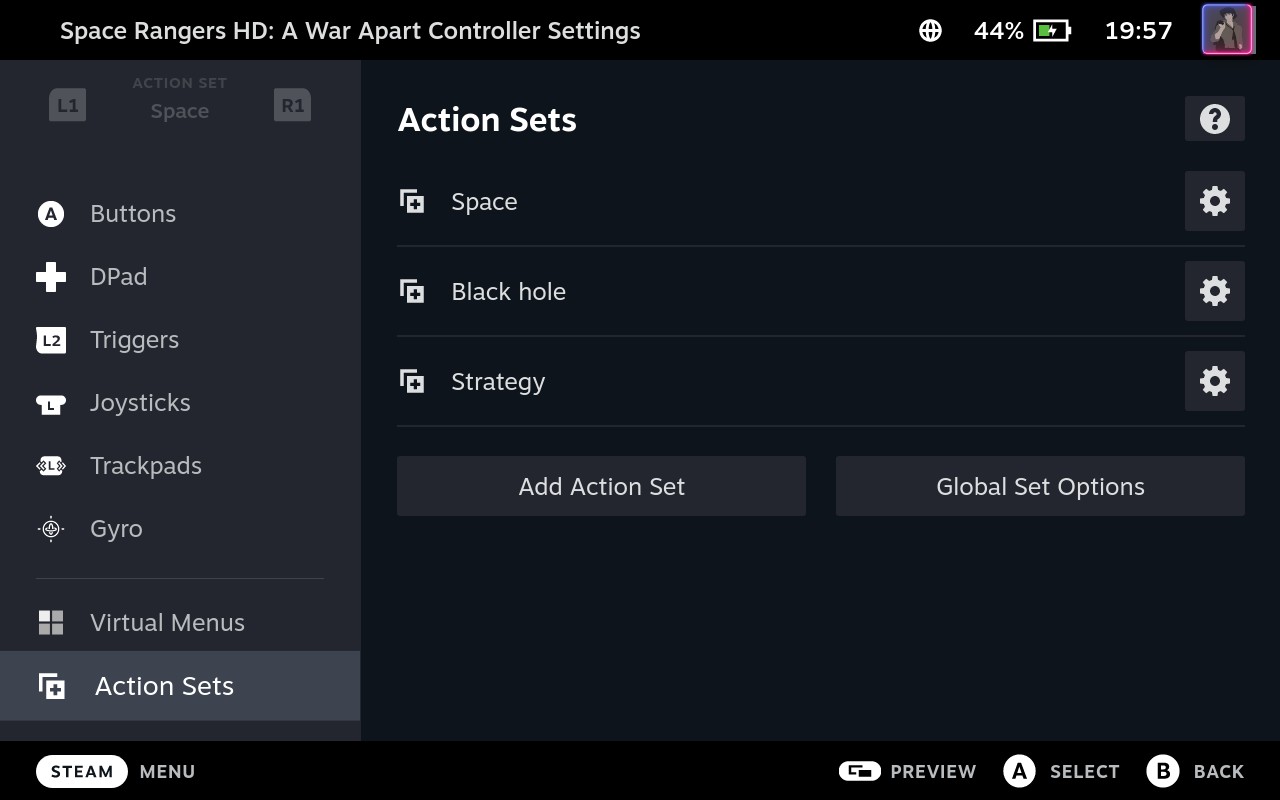
For instance, in the Space set the A button is bound to Spacebar key, while in Black hole set the same button is bound to Arrow Up/↑ key. Switching between sets is done via a virtual menu bound to right joystick touch event:
And even that is not all, as there are also layers in Actions Set, there are sub-commands, controls can have different behaviours, it is possible to adjust sensitivity, feedback strength and… I jizzed in my pants.
Community layouts
Aside from “official” layouts provided by game developers, a game might also have so-called community layouts - those created by regular players like yourself, who did bother to create a custom layout and share it with everyone.
Community layouts are tied to the game’s Steam App ID, so they are only discoverable for Steam games. But there will be a more detailed section about that later, with Civilization VI as an example of using a community layout for pirated game added as a non-Steam game.
Games from Steam Store
Finally, we get to talk about games.
There is not that much interesting to tell about about games available in Steam Store, as you just (purchase and) install them and play. You will also get some additional convenience things:
- there will be a Proton version pre-set;
- you will be getting pre-compiled shader cache (which I would rather not);
- you will have a collection of official/community layouts available to choose from;
- the game will have all the graphical assets (poster, background, logo, icon, etc) already set;
- the playtime statistics will be recorded (unless you are playing without internet connection);
- achievements will work (syncing next time you get online, if you are playing without internet connection);
- Steam Cloud savegames syncing will work (in games that support that);
- the game you play will be visible to your friends;
- the games will be listed among Games on Storage tab in Settings, so you will be able to see the space they occupy and will be able to move them to/from SD card in Gaming mode;
- probably some other smaller conveniences.
Again, I’d like to note that the (ongoing) effort of making lots of Windows-only games to just work out of the box in a GNU/Linux environment must have been incredibly tremendous. A lot of games really do just work! And not only that, some games actually have a native GNU/Linux build, so you don’t need Proton for running them, but hilariously enough you can get a better performance if you run a Windows version of that game through Proton instead of running its native GNU/Linux build.
Below I’d like to leave some comments about a couple of games in particular.
Aperture Desk Job
That is likely the first game you’ll install and play on Steam Deck, because it’s more or less a tutorial for Steam Deck. It get’s you familiar with the available controls and introduces you to the gyro-based aiming.
The game is not very demanding and should run on full battery for about 2.5 hours (although you’ll finish it faster than that):
Witcher 3
Just as I was unpacking my Steam Deck, Witcher 3 got the next-gen update. I first tried to launch it on my desktop PC with NVIDIA 1660 SUPER card, and the performance was total shit even with all the graphics settings set to absolute minimum.
So I didn’t expect it to even launch on Steam Deck, and was already considering installing the pre-next-gen version, but decided to try the next-gen anyway and… not only in launches (the DirectX 12 variant), but it runs so much better than on my PC, I could play it just fine.
I absolutely did not expect Steam Deck hardware to be that powerful. I mean, yeah, I assembled my PC about 8 years ago (from the top components for that time), and the only upgrade I had was a couple of years ago - got 1660 SUPER card and added more RAM to raise it to 16 GB for playing Half-Life Alyx - but still, it’s not the weakest PC in the world, and yet Steam Deck outperforms it so easily.
Of course, the game draws a lot of power and runs the battery from 100% to 0% in less than two hours, but that’s fine:
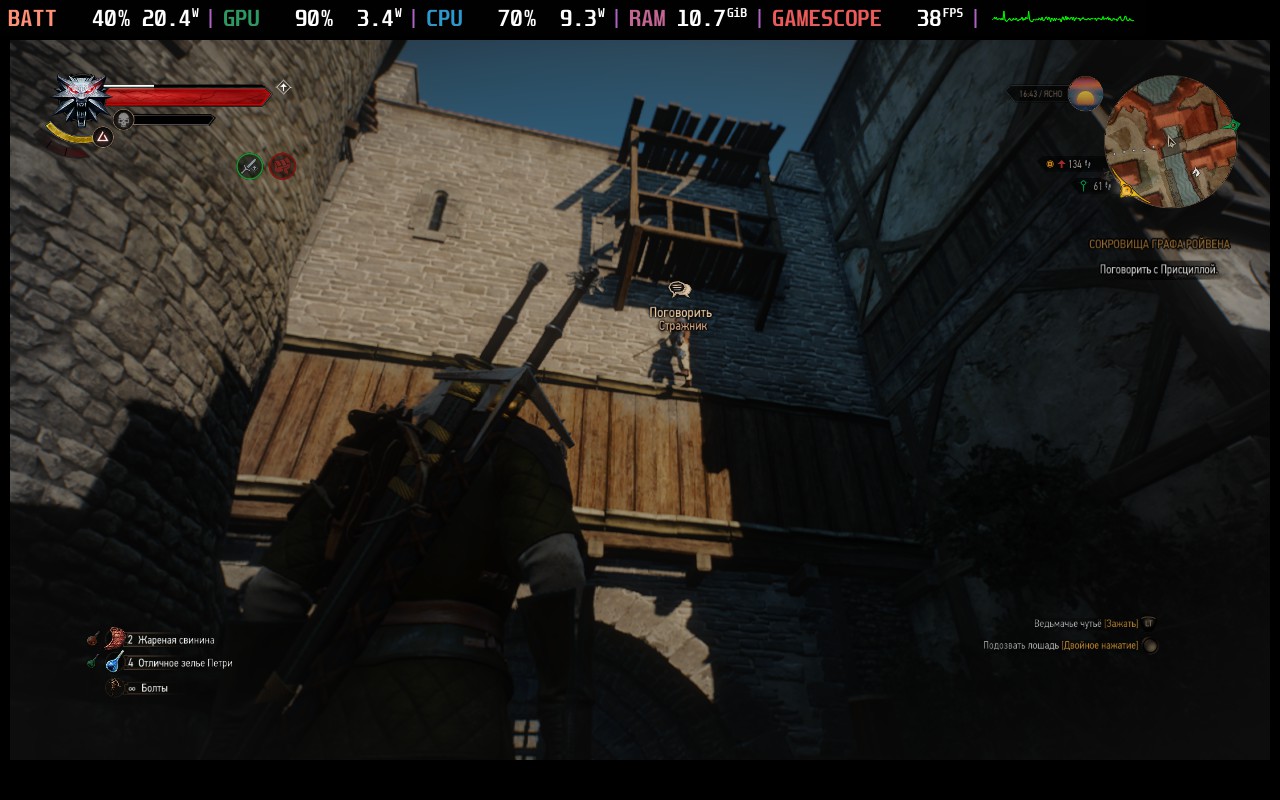
What’s not fine is that sometimes it crashes everything into something that seems like a system reboot or at least a Gamescope relaunch.
But anyway, great experience overall, and I’ve finally finished the game for 100%:
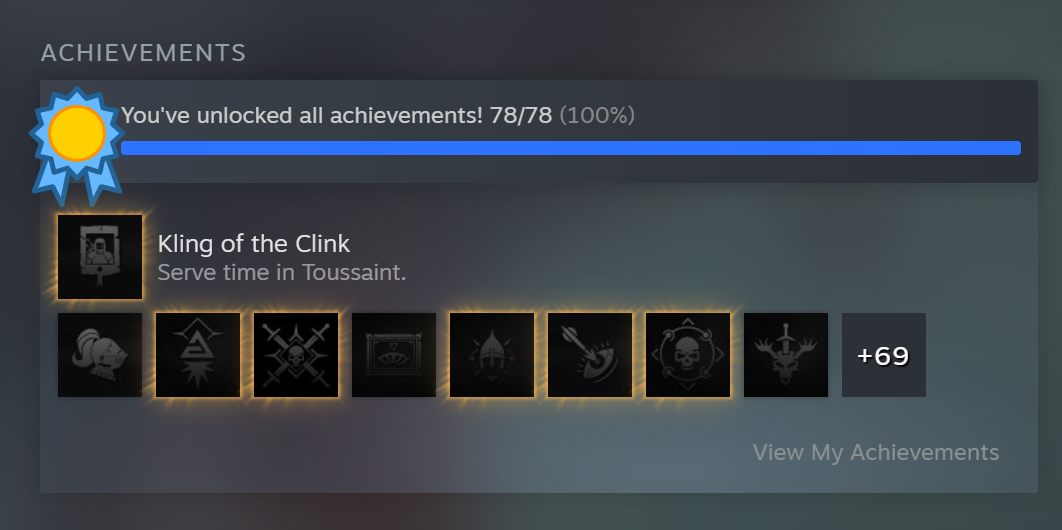
By the way, here’s a comparison of Witcher 3 running on Steam Deck versus Nintendo Switch.
Black Mesa
Yet again, on my desktop computer Black Mesa doesn’t run all that good even with medium graphics settings, but on Steam Deck it flies like a butterfly with all settings on maximum, except for anisotropic filtering being at 4x and dynamic lightning being at minimum (otherwise for some reason it makes flashlight to be useless with anything but crowbar):
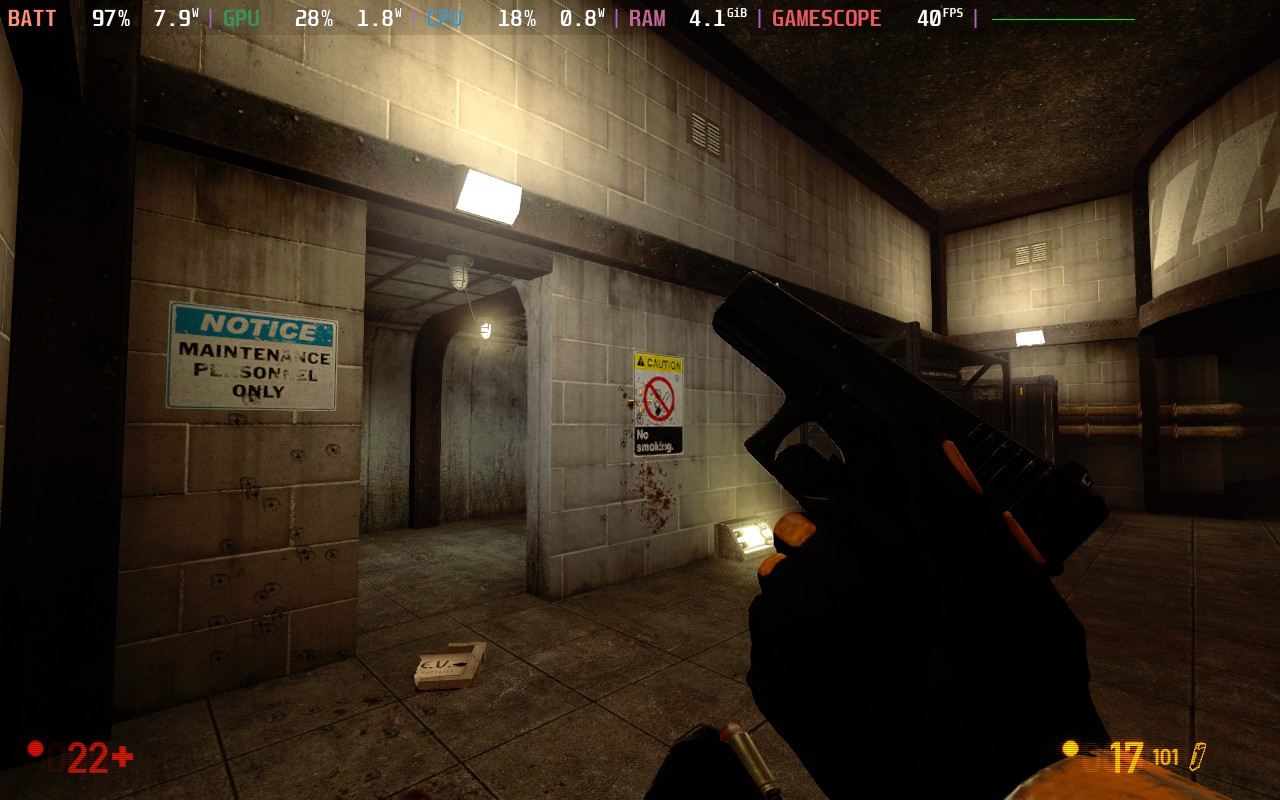
With FPS limit set to 40 the power consumption is 8 W, so the battery should last for about 4-5 hours? I find it hard to believe. But it could be that the current scene just isn’t very intense, and it will probably draw more power in a more dynamic scene.
You might say, of course I get better performance on Steam Deck - it only needs to render for 1280x800 resolution, while on desktop I have a proper 4K display with 3840x2160 resolution, so the comparison is not fair. Well, I connected it to the same display, and here are the metrics (without FPS limit):
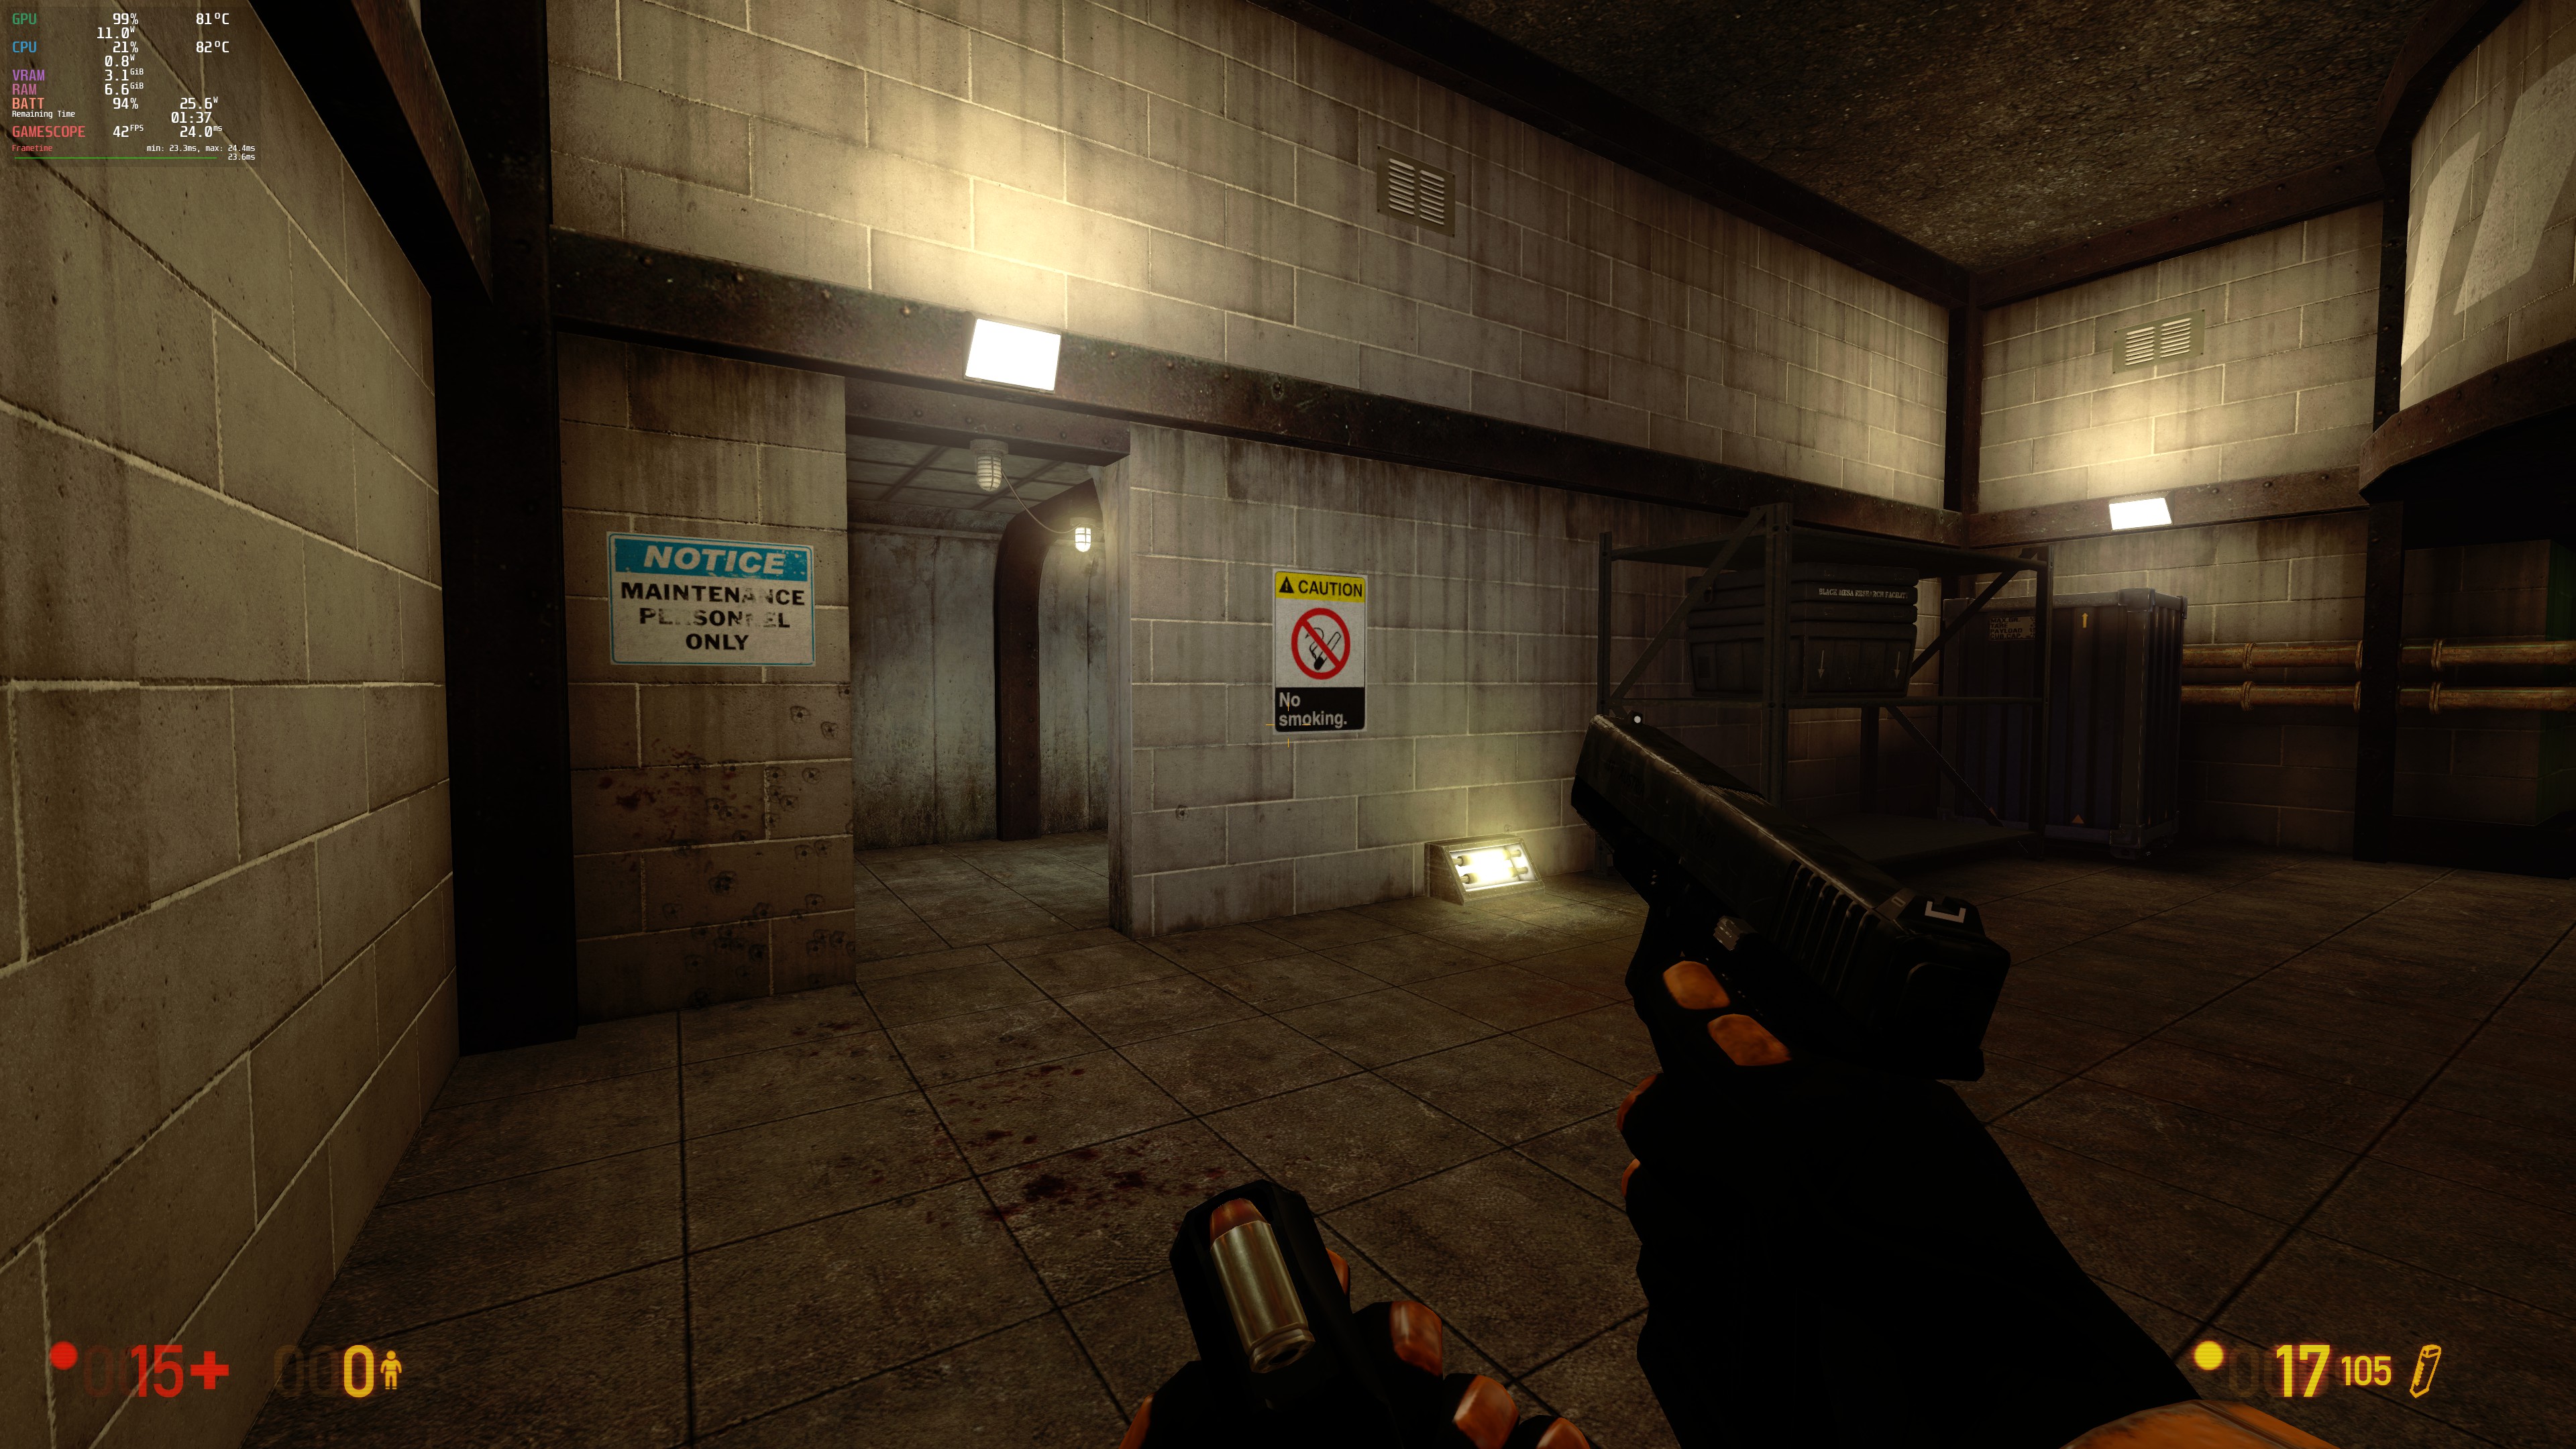
Yes, now it will run down the battery in less than 2 hours, but what’s important is that it still outperforms my desktop PC. Fucking monster of a device.
Also, that’s where I’ve realized the power of aiming using gyroscope input - without it you simply don’t have a chance to shoot a headcrab mid-air. It still takes some practice to get used to it, but it certainly gives you more precise aiming than with a joystick or trackpad.
DooM 3 BFG
There are two reasons why I’m writing about DooM 3 BFG here.
First one is that it also includes the original DooM and Doom II (with some achievements too), which I of course played again 30 years after their initial release. Very enjoyable experience with Steam Deck controls.
The FPS counter never goes higher than 35 FPS and as far as I know that is by design:
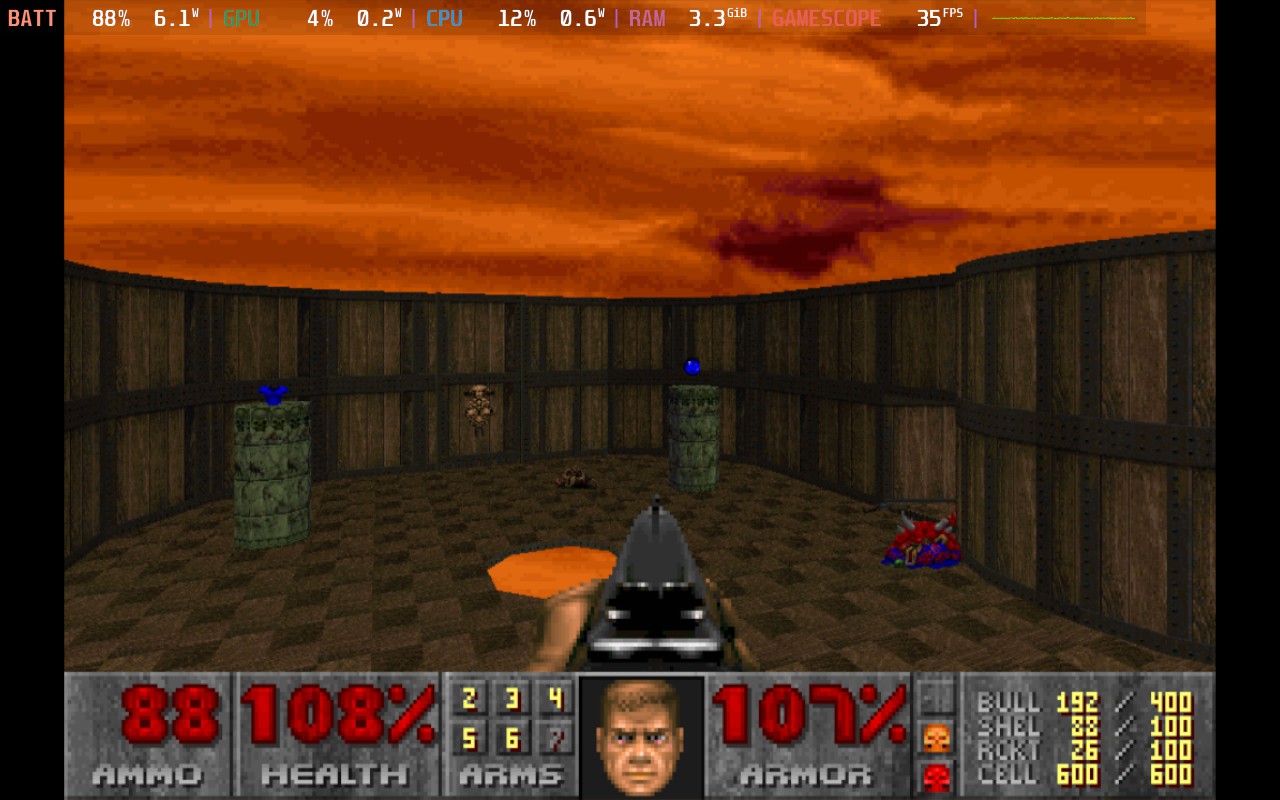
The DooM 3 runs just fine and should easily live from the battery for about 5 hours:
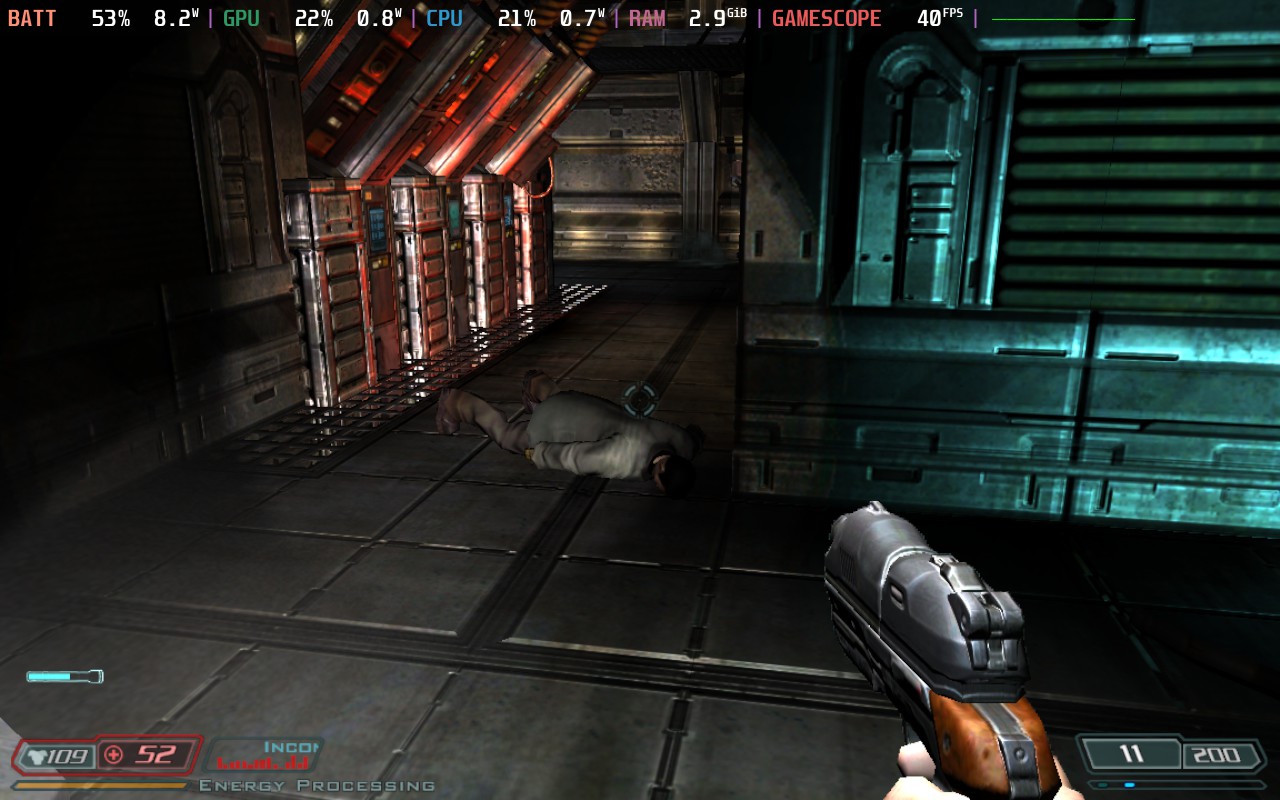
Only issue is that if you set antialiasing, then you’ll only get the crosshair on screen in game and the rest will be a black void. The GUI still renders fine, so you can go back to settings and revert it.
Second reason to talk about DooM 3 was that while going through the game settings I got to the 3D tab:
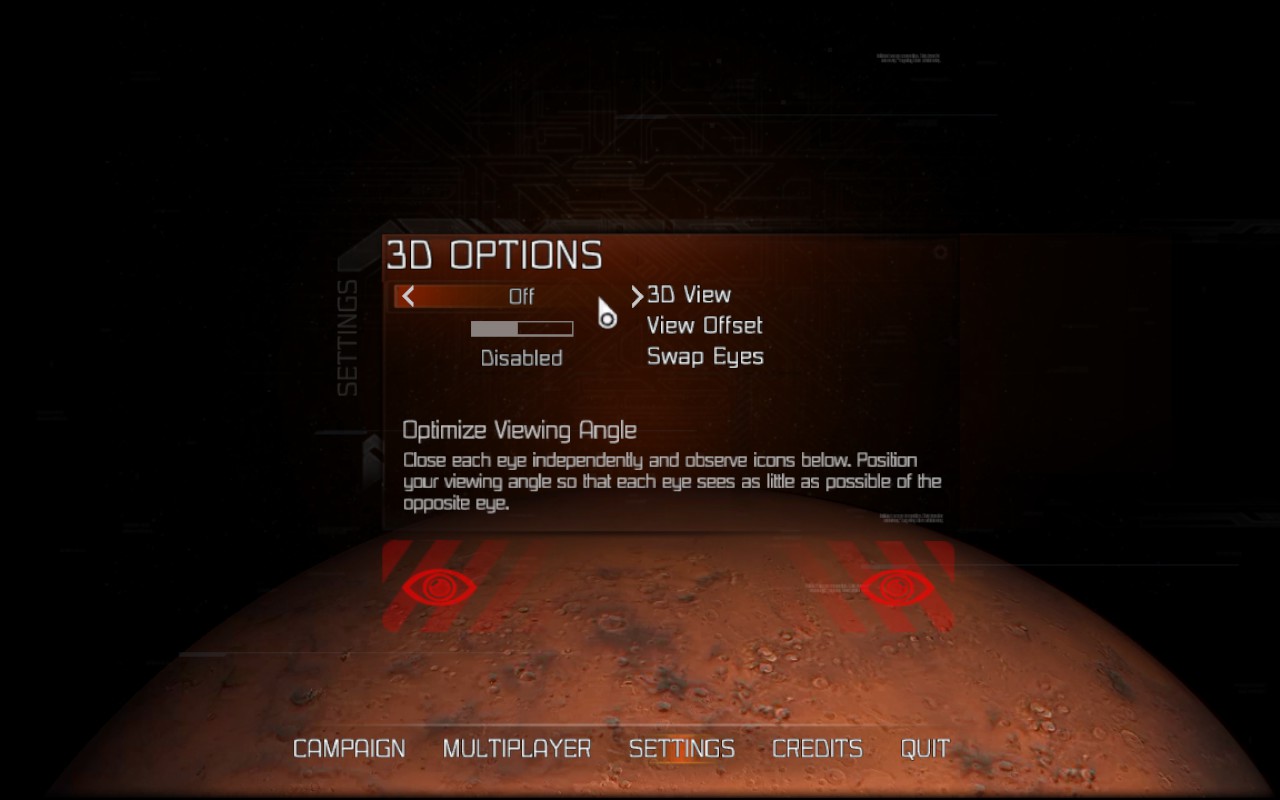
And I’ve changed one setting there, thinking it is about graphics performance in 3D, but turns out this is for VR, and after the game restart I got black screen for the graphics. I could still hear the GUI sounds, but nothing rendered, and so there was no way to change that setting back.
So I looked up where DooM 3 keeps its configs, and it was this path: /home/deck/.local/share/Steam/steamapps/compatdata/208200/pfx/drive_c/users/steamuser/Saved Games/id Software/DOOM 3 BFG/base/. Switched to Desktop, found the config there, renamed it to a different name, launched the game, it generated a new config, I compared old one and new one with diff, and it turned out that I’ve changed the r_vidMode, so I just needed to return it to default value (set r_vidMode "0") in the config.
Isn’t it great. I have the freedom to break a game and I can fix it myself. Very refreshing experience.
Civilization V
The Civilization V game seems to have a native GNU/Linux build, because the startup intros are different and also there is no fucking launcher like there is on Windows, which is great.
The game runs with no issues:
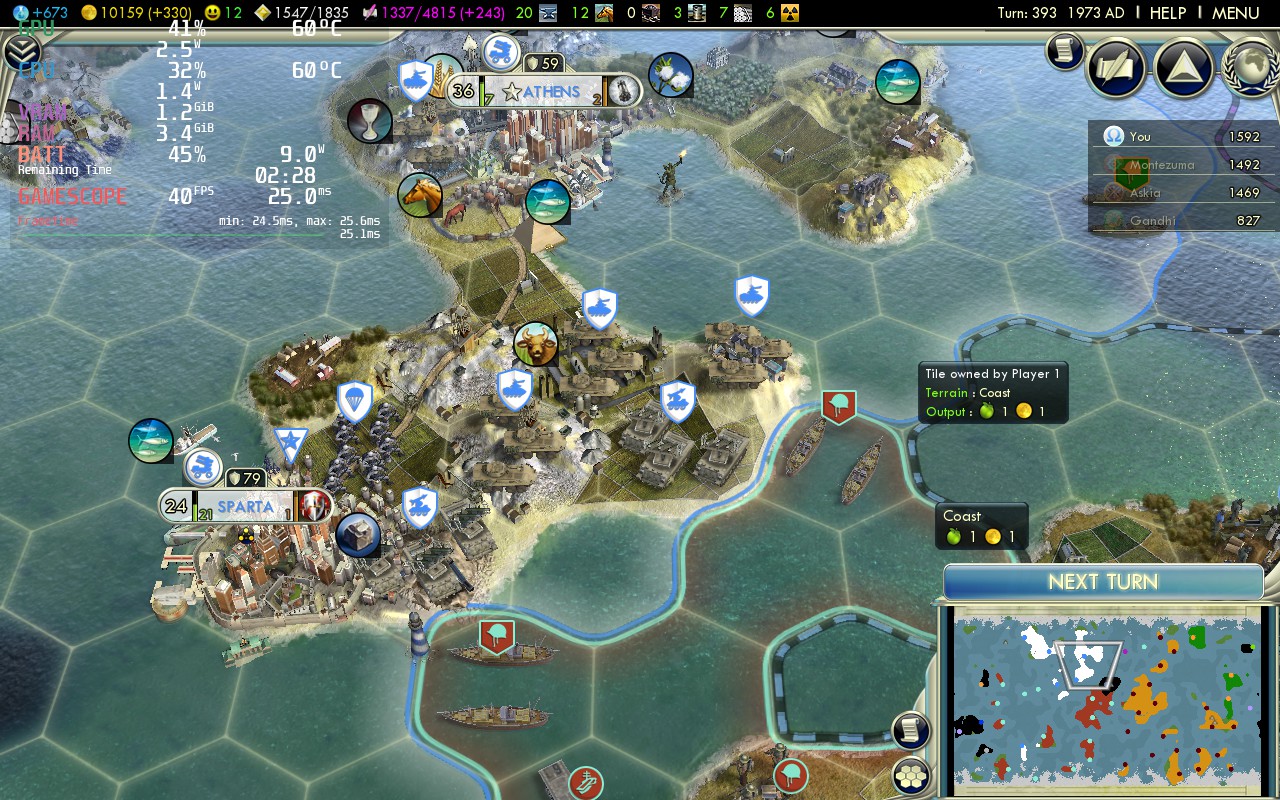
The text is a bit too small, but it’s hard to blame the game for that, as it was released in 2010 when no one thought about how text will look like on a portable device 12 years later.
There is even an official controller layout.
I purchased this before I knew that it has a launcher, a bazillion of DLCs and a spying EULA, similar to the one in Civilization VI, so even though it is a great game, I would actually not bought it if I knew all that beforehand.
Space Rangers
The moment I learned about Steam Deck existence, my first thought was “I wonder if I can play Space Rangers on it”.
And OH MY GOD it works. It works! Right from the Steam Store, no tinkering / fiddling / fucking about required, just install and play. I was the happiest person on the planet at that moment. Да, Космические рейнджеры работают на Steam Deck!
The main picture in the beginning of the article is not an original photo - I cheated and placed a screenshot on top of a photo for better looks. But here’s a different one, this time unedited:
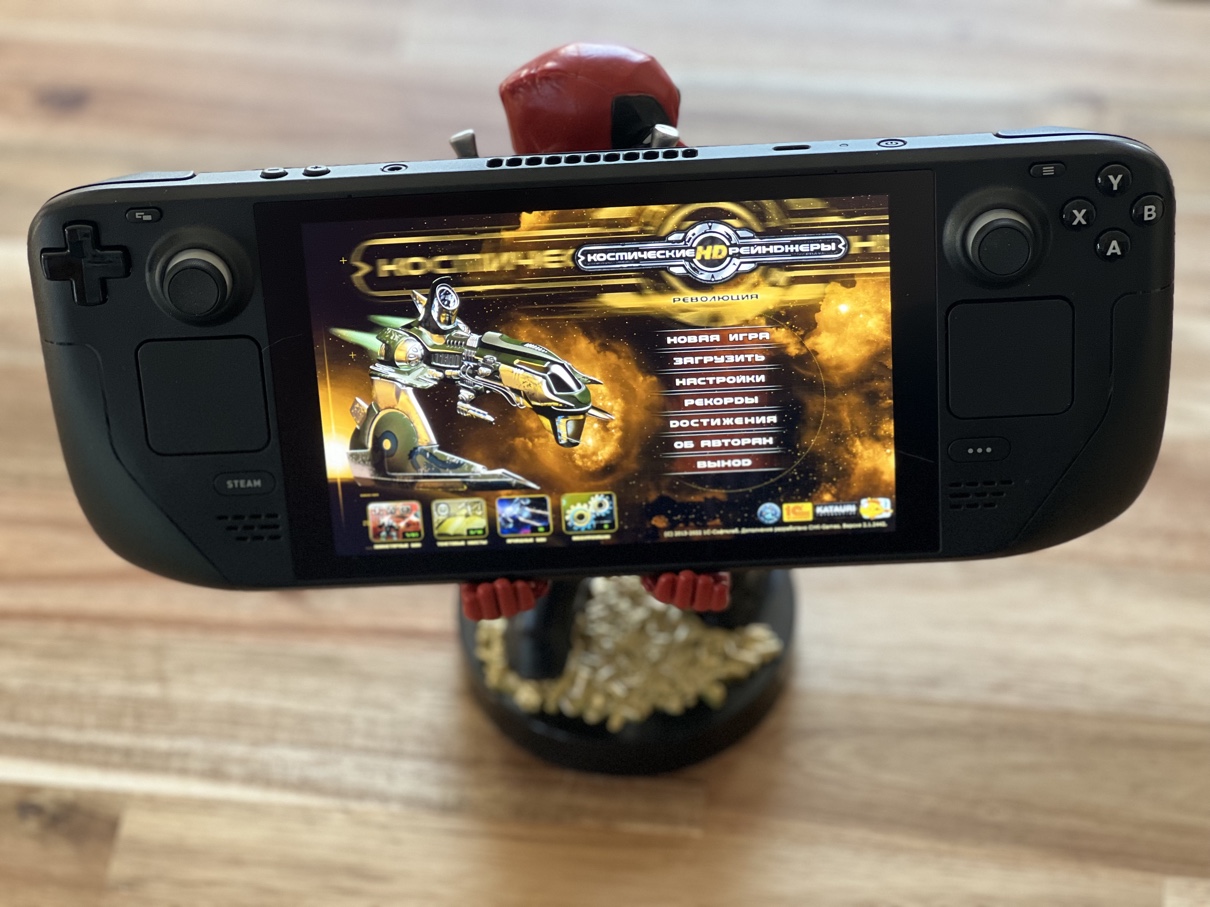
Why it is a semi-miracle that this game runs on Steam Deck: it was released in 2013, the development was done in Delphi plus additional components built with Visual C++ 2010 and also MinGW, and the target OS was Windows XP. Yet, it just runs out of the box in 2023 on a custom hardware under GNU/Linux:
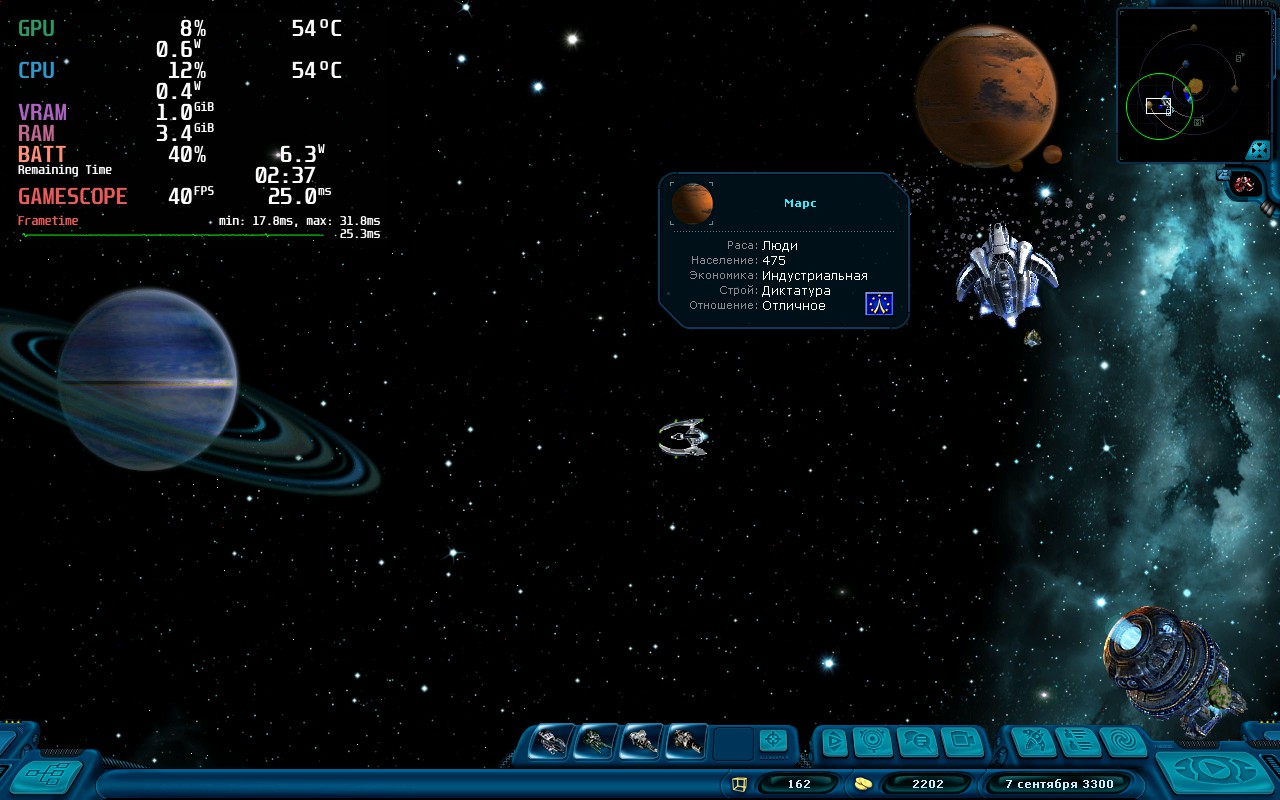
MangoHud says I’ll be able to play the best game in the world for more than 6 hours on one battery charge.
СЛЁЗЫ НА ОЧКАХ, СТРАННЫЕ ОЧКИ, А МОЖЕТ СЛЁЗЫ НА ЛИЦЕ.
The screen resolution set to auto in settings, and if you set it to 1280x800 explicitly, then it will tell you that it detected Wine and will force software rendering, and some other issues will probably emerge too. So I reverted that change, and the resolution most probably is set to 1280x800 anyway.
There are some pre-made community controller layouts available, but I’ve created my own anyway.
Installing non-Steam stuff
As Steam Deck is a “regular” PC, can do absolutely anything with it, including installation of whatever games, applications, tools, etc. You can wipe the entire SteamOS and install any other GNU/Linux distribution or even Windows, although I see no point in doing so.
For clarification, everything in this section obviously is done in Desktop mode. Once installed, games/applications can be added to Steam as “non-Steam game” entities, and then you’ll be able to run them in Gaming mode too.
Applications
While this is mostly about “regular” applications for Desktop mode, you can of course launch them in Gaming mode too. However, this might not always be a great idea because of a very specific windowing system that is used inside Gamescope.
For instance, you can add a web-browser and run it in Gaming mode. And at first I tried to do that with Firefox, but the resolution/scaling was too small for comfortable browsing, and certain things like uMatrix popups were not showing up at all, giving me just a blinking screen and some other glitches.
But in general, many applications will work without problems. You can just as well add Konsole application, and that will give you a proper shell without the need to switch to Desktop mode. You’ll be able to check/kill running processes with htop:
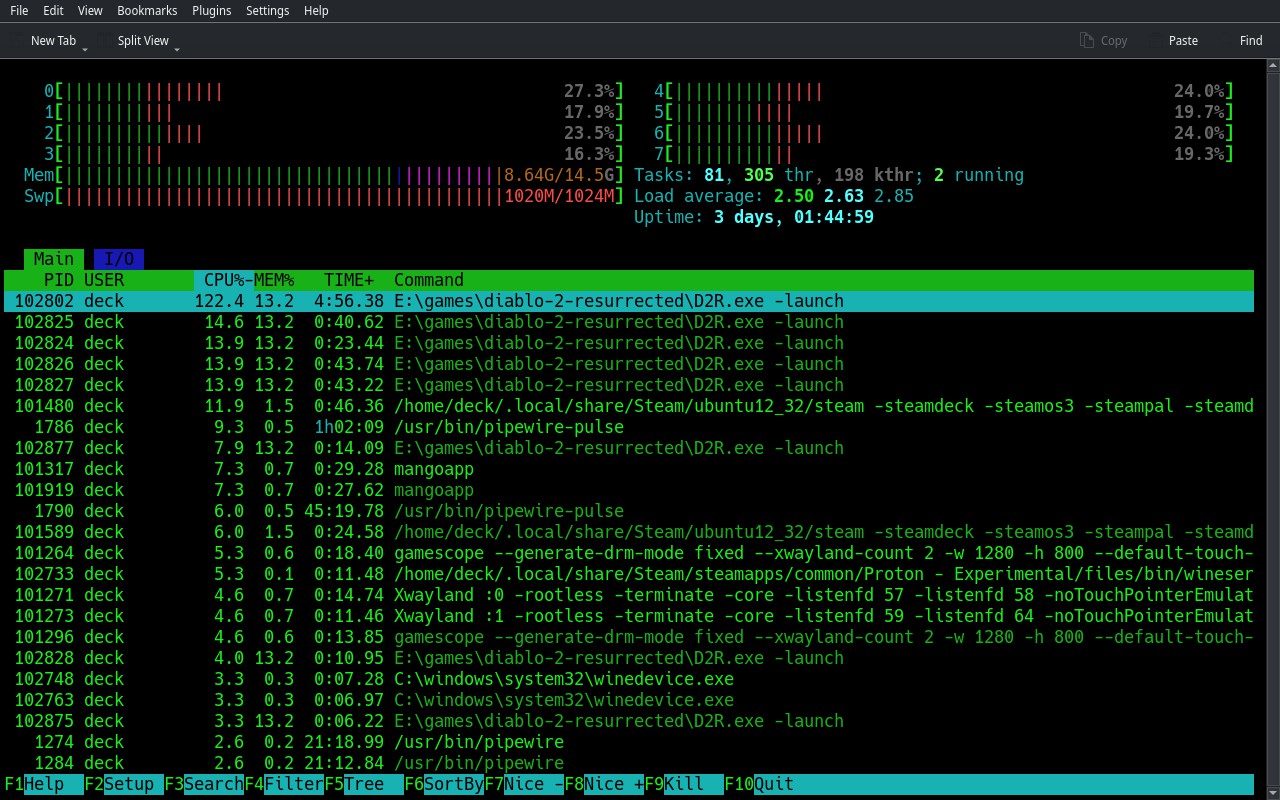
work with files in Midnight Commander (once you install it):
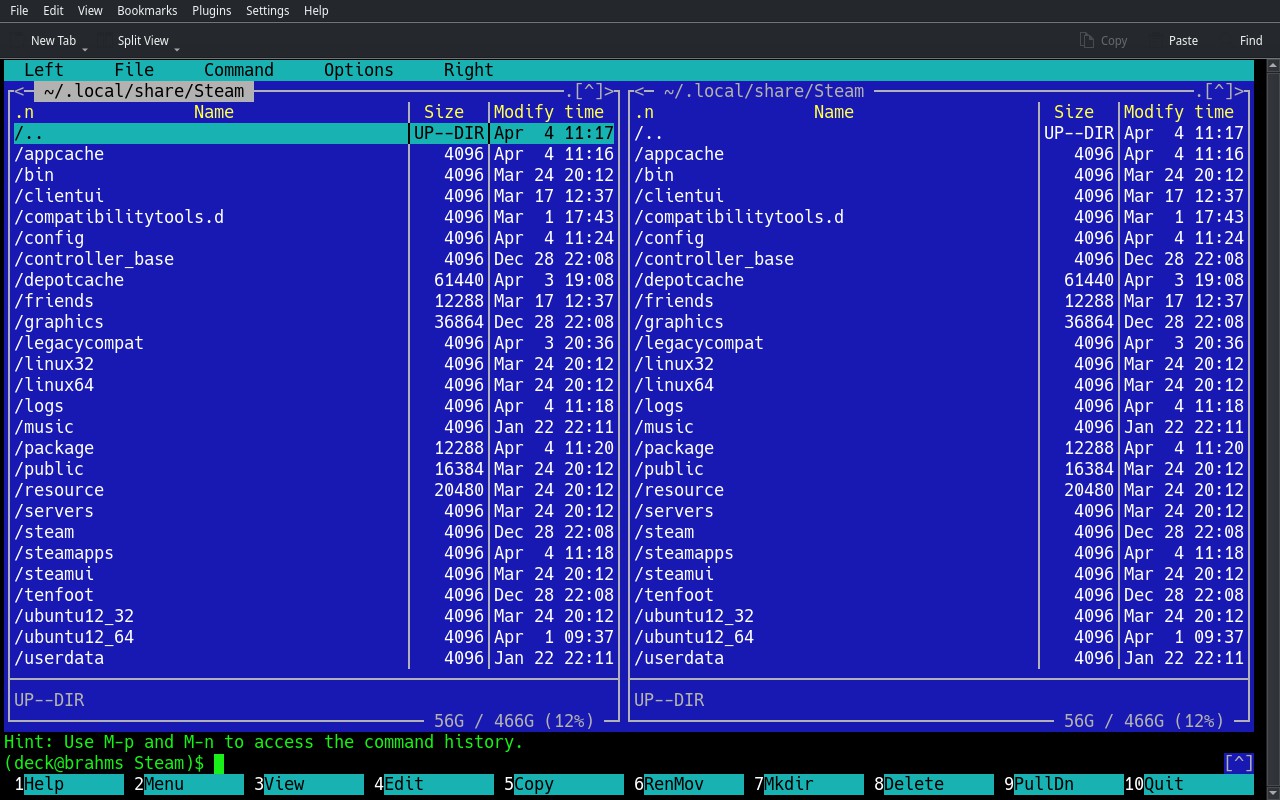
and do whatever you’d like using any other CLI tool. I’d recommend to set the following launch options for it:
LD_PRELOAD="" %command% --fullscreenSetting LD_PRELOAD to an empty string gets rid of numerous “cannot be preloaded (wrong ELF class)” errors/warnings, and --fullscreen speaks for itself.
Now let’s talk about how you can install additional applications yourself.
Usually, additional software on a GNU/Linux OS is installed via a package manager. The SteamOS, being an Arch-based GNU/Linux distribution, uses pacman package manager.
As I mentioned, what’s special SteamOS is that parts of it are read-only, and to be able to install something with pacman you’ll need to disable read-only mode (don’t do it yet, read some more below first), install what you need and enable read-only mode back:
$ sudo steamos-readonly disable
$ pacman -S PACKAGE-NAME
$ sudo steamos-readonly enable
Another peculiarity is that those read-only parts will get overwritten on the next OS update, so the stuff you’ll install will not persist and you’ll need to install it again.
And actually I would advise against installing anything (with a rare exception) using pacman system-wide. I think it would be better not to “pollute” the original system environment by getting in front of the default tools in PATH, adding/replacing certain libraries and other things like that. The reason is that Valve engineers (and external developers involved in the process) must have spent a lot of time and effort making a GNU/Linux based gaming system that “just works” for an average user out-of-the-box. That is a very complex task on its own, and so system environment is unlikely to anticipate what users might do by installing additional system-wide software or/and changing the default environment setup.
I can name two other less/non intrusive ways of installing additional software:
- Using Flatpak - a way of distributing “self-contained” applications on GNU/Linux distributions, where every applications comes as a “container”, in which it “contains” the executable itself, application resources and required dependencies;
- Using a different package manager - one that can install packages into an “isolated” path, where they won’t “contaminate” system environment;
- that also enables a 3rd-way of installing additional software - by first installing the build tools and then compiling that software from sources. Sounds like a lot of fun, doesn’t it.
Flatpak
The Flatpak way of installing new applications is easy. There is already a Discover application/store pre-installed, in which you can browse for games and applications and install them in one click.
I was sceptical about it at first, as it is not a “true way” or installing software on GNU/Linux systems. But very soon I started to appreciate the convenience and non-disruptiveness (towards system environment), so perhaps Flatpak isn’t the worst thing out there. Snap definitely is.
Flatpak applications get installed into /var/lib/flatpak/app/ and user’s data/preferences/settings/etc are saved in /home/deck/.var/app/, both of which do not get wiped on system updates.
To start a Flatpak application you can simply launch it from the Application Launcher. To add it to Steam (to be able to launch it in Gaming mode), do the usual Add a game → Add a Non-Steam Game and it will be in the list, no need to browse for the executable.
To start a Flatpak application from CLI, execute the following:
$ flatpak run io.mpv.Mpv --helpUngoogled Chromium
Like I mentioned earlier, running Firefox in Gaming mode wasn’t a great experience, but at some point (and probably a couple of updates) later I tried to install Ungoogled Chromium, and that one works much better without any blinking or other glitches.
One minor issue though is that out of the box it doesn’t use all the available screen width:
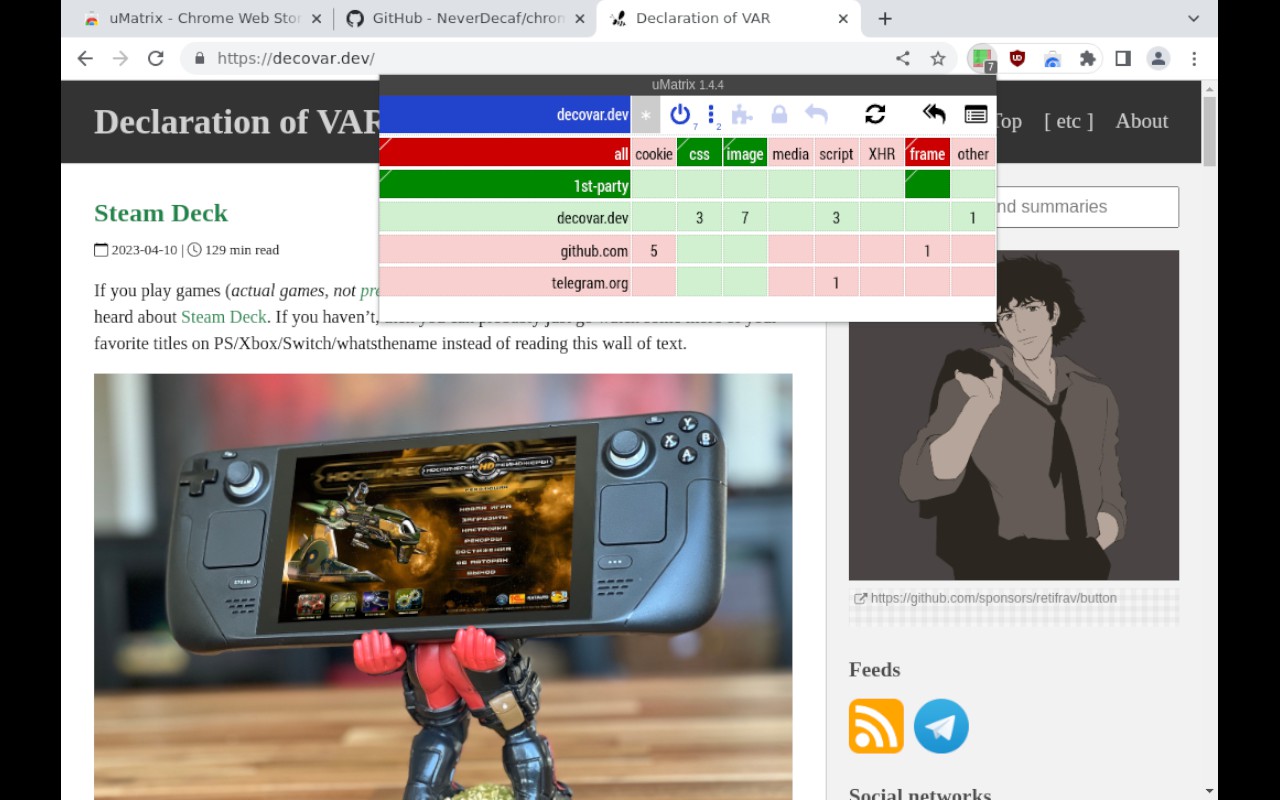
Fortunately, that can be easily fixed by adding the following launch options:
--window-size=1280,800 --force-device-scale-factor=1.0 --device-scale-factor=1.0And then it starts to use the entire screen as it should:
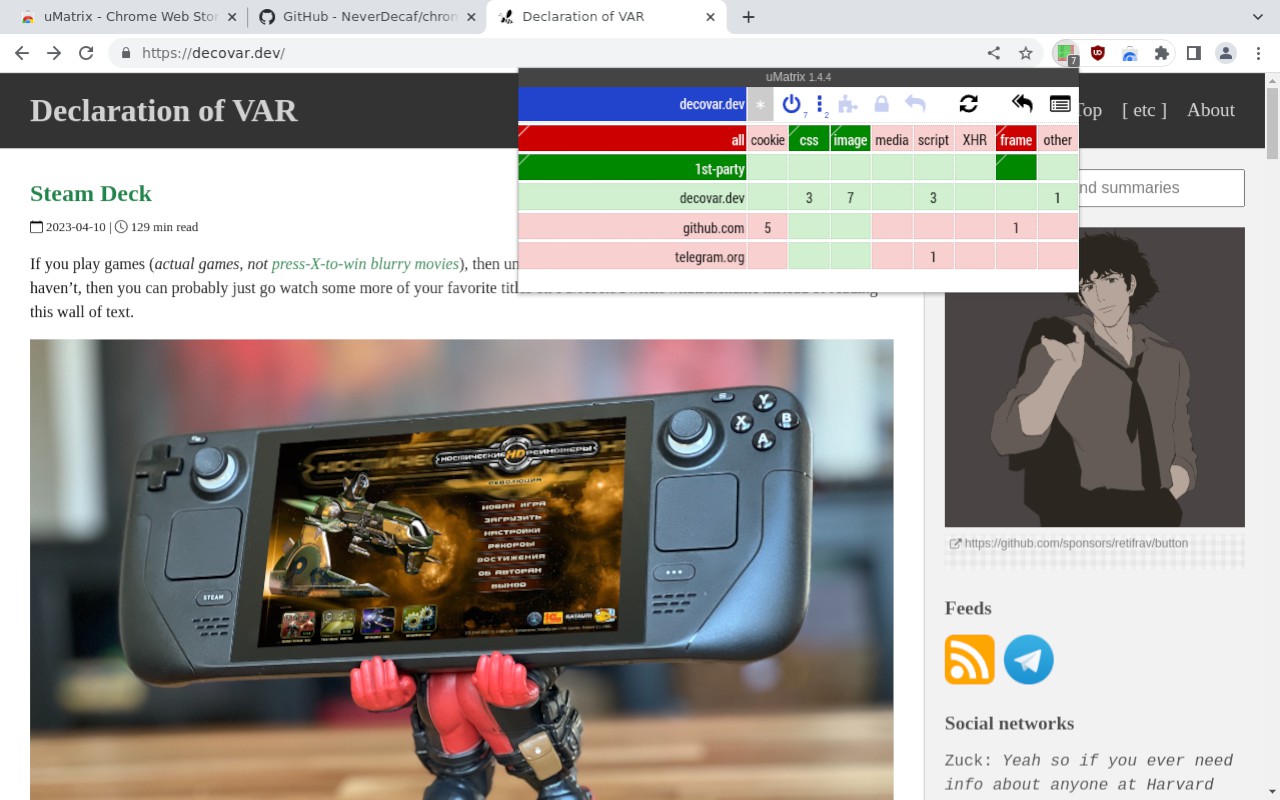
Kodi
Surely enough, very soon I wanted to get a media player to watch TV shows / movies without leaving the Gaming mode, and the best candidate for that is of course Kodi. It is designed to run fullscreen and provides a nice GUI, which is very suitable for gamepad controls (it even has Steam Deck controls bindings out of the box).
I haven’t even tried building it from sources and installed the Flatpak version right away. There is one problem with it though: while it gets hardware acceleration for playback in Desktop mode, once you launch it in Gaming mode you’ll notice how videos aren’t playing smoothly, and that is because the playback isn’t utilizing hardware acceleration there.
From this helpful thread on Kodi forum, I got to know that it requires --env=LIBVA_DRIVER_NAME=radeonsi to be added to launch options:
run --branch=stable --arch=x86_64 --env=LIBVA_DRIVER_NAME=radeonsi --command=kodi tv.kodi.KodiAnd then hardware acceleration becomes available:
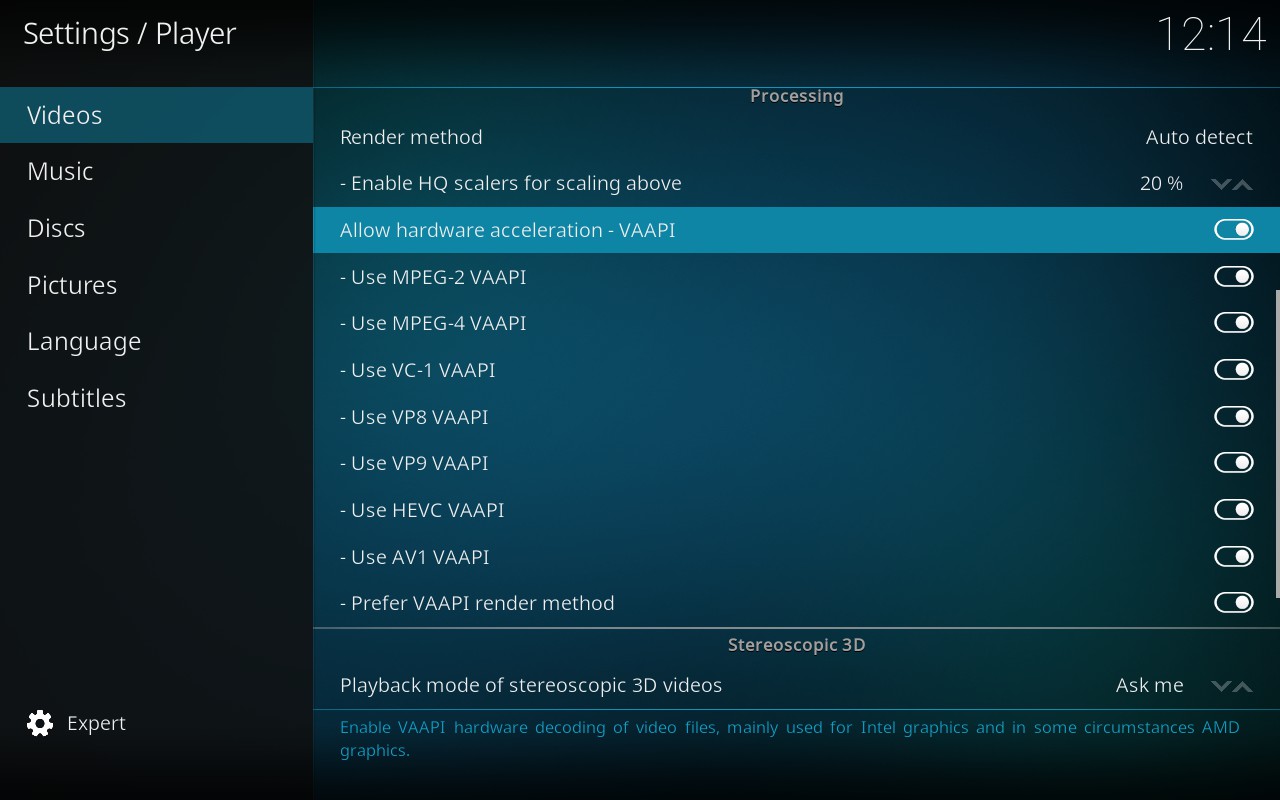
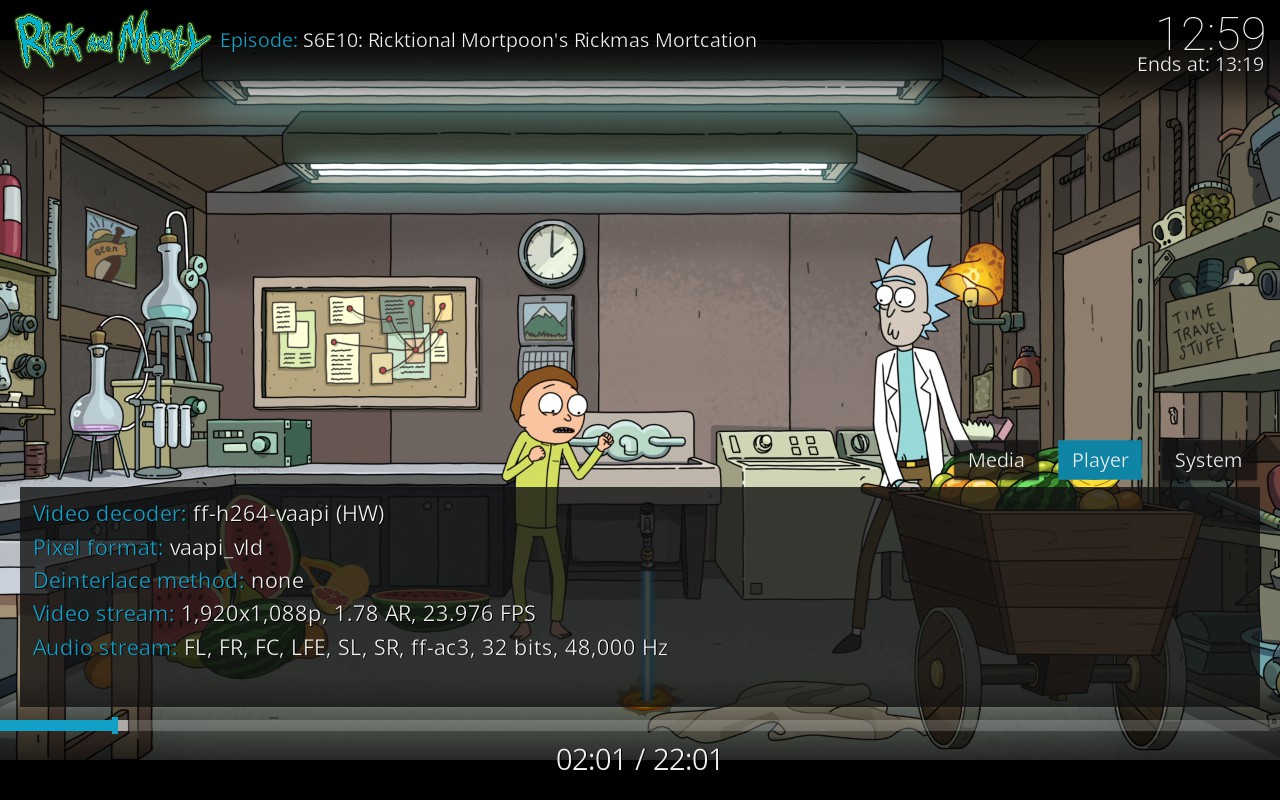
So far I’ve encountered only two problems:
- there is no UI sounds in the main menu;
- it couldn’t connect to my FTPS share (SFTP and SMB work fine).
mpv
Kodi is great, but it’s not a very lightweight player. For Desktop mode, in my opinion, mpv player is a much better option.
It can be installed with pacman, but like I said, I would like to install as minimum system-wide packages as possible, and mpv has quite a lot of dependencies.
Homebrew offers a formula for mpv, so I tried using that one first:
$ brew install mpvIt does work playing audio in terminal/CLI mode, but it cannot initialize/create a window:
$ mpv https://files.decovar.dev/public/etc/radio.m3u8 --force-window

Error opening/initializing the VO window.
I checked its capabilities, and looks like it isn’t built with all the required features / platform specifics:
$ mpv --vo=help
Available video outputs:
  libmpv           render API for libmpv
  gpu              Shader-based GPU Renderer
  null             Null video output
  image            Write video frames to image files
  tct              true-color terminals

$ mpv --gpu-context=help
GPU contexts (APIs):
    auto (autodetect)

$ mpv --hwdec=help
Valid values (with alternative full names):
  v4l2m2m-copy (h263_v4l2m2m-v4l2m2m-copy)
  v4l2m2m-copy (h264_v4l2m2m-v4l2m2m-copy)
  v4l2m2m-copy (hevc_v4l2m2m-v4l2m2m-copy)
  v4l2m2m-copy (mpeg4_v4l2m2m-v4l2m2m-copy)
  v4l2m2m-copy (mpeg1_v4l2m2m-v4l2m2m-copy)
  v4l2m2m-copy (mpeg2_v4l2m2m-v4l2m2m-copy)
  v4l2m2m-copy (vc1_v4l2m2m-v4l2m2m-copy)
  v4l2m2m-copy (vp8_v4l2m2m-v4l2m2m-copy)
  v4l2m2m-copy (vp9_v4l2m2m-v4l2m2m-copy)
  auto (yes '')
  no
  auto-safe
  auto-copy
  auto-copy-safe
So I deleted the Homebrew version and installed the Flatpack version. That one lists much more capabilities:
$ flatpak run io.mpv.Mpv --vo=help
Available video outputs:
  libmpv           render API for libmpv
  gpu              Shader-based GPU Renderer
  gpu-next         Video output based on libplacebo
  vdpau            VDPAU with X11
  wlshm            Wayland SHM video output (software scaling)
  xv               X11/Xv
  sdl              SDL 2.0 Renderer
  dmabuf-wayland   Wayland dmabuf video output
  vaapi            VA API with X11
  x11              X11 (software scaling)
  null             Null video output
  image            Write video frames to image files
  tct              true-color terminals
  drm              Direct Rendering Manager (software scaling)
  sixel            terminal graphics using sixels

$ flatpak run io.mpv.Mpv --gpu-context=help
GPU contexts (APIs):
    auto (autodetect)
    wayland (opengl)
    x11egl (opengl)
    drm (opengl)
    waylandvk (vulkan)
    x11vk (vulkan)
    displayvk (vulkan)

$ flatpak run io.mpv.Mpv --hwdec=help
Valid values (with alternative full names):
  nvdec (h263-nvdec)
  nvdec (h263p-nvdec)
  nvdec (h264-nvdec)
  nvdec (hevc-nvdec)
  nvdec (mjpeg-nvdec)
  nvdec (mpeg1video-nvdec)
  nvdec (mpeg2video-nvdec)
  nvdec (mpeg4-nvdec)
  nvdec (vc1-nvdec)
  nvdec (vp8-nvdec)
  nvdec (vp9-nvdec)
  nvdec (wmv3-nvdec)
  nvdec (av1-nvdec)
  vaapi (h263-vaapi)
  vaapi (h263p-vaapi)
  vaapi (h264-vaapi)
  vaapi (hevc-vaapi)
  vaapi (mjpeg-vaapi)
  vaapi (mpeg2video-vaapi)
  vaapi (mpeg4-vaapi)
  vaapi (vc1-vaapi)
  vaapi (vp8-vaapi)
  vaapi (vp9-vaapi)
  vaapi (wmv3-vaapi)
  vaapi (av1-vaapi)
  vdpau (h263-vdpau)
  vdpau (h263p-vdpau)
  vdpau (h264-vdpau)
  vdpau (hevc-vdpau)
  vdpau (mpeg1video-vdpau)
  vdpau (mpeg2video-vdpau)
  vdpau (mpeg4-vdpau)
  vdpau (vc1-vdpau)
  vdpau (vp9-vdpau)
  vdpau (wmv3-vdpau)
  vdpau (av1-vdpau)
  nvdec-copy (h263-nvdec-copy)
  nvdec-copy (h263p-nvdec-copy)
  nvdec-copy (h264-nvdec-copy)
  nvdec-copy (hevc-nvdec-copy)
  nvdec-copy (mjpeg-nvdec-copy)
  nvdec-copy (mpeg1video-nvdec-copy)
  nvdec-copy (mpeg2video-nvdec-copy)
  nvdec-copy (mpeg4-nvdec-copy)
  nvdec-copy (vc1-nvdec-copy)
  nvdec-copy (vp8-nvdec-copy)
  nvdec-copy (vp9-nvdec-copy)
  nvdec-copy (wmv3-nvdec-copy)
  nvdec-copy (av1-nvdec-copy)
  vaapi-copy (h263-vaapi-copy)
  vaapi-copy (h263p-vaapi-copy)
  vaapi-copy (h264-vaapi-copy)
  vaapi-copy (hevc-vaapi-copy)
  vaapi-copy (mjpeg-vaapi-copy)
  vaapi-copy (mpeg2video-vaapi-copy)
  vaapi-copy (mpeg4-vaapi-copy)
  vaapi-copy (vc1-vaapi-copy)
  vaapi-copy (vp8-vaapi-copy)
  vaapi-copy (vp9-vaapi-copy)
  vaapi-copy (wmv3-vaapi-copy)
  vaapi-copy (av1-vaapi-copy)
  vdpau-copy (h263-vdpau-copy)
  vdpau-copy (h263p-vdpau-copy)
  vdpau-copy (h264-vdpau-copy)
  vdpau-copy (hevc-vdpau-copy)
  vdpau-copy (mpeg1video-vdpau-copy)
  vdpau-copy (mpeg2video-vdpau-copy)
  vdpau-copy (mpeg4-vdpau-copy)
  vdpau-copy (vc1-vdpau-copy)
  vdpau-copy (vp9-vdpau-copy)
  vdpau-copy (wmv3-vdpau-copy)
  vdpau-copy (av1-vdpau-copy)
  cuda (av1_cuvid-cuda)
  cuda (h264_cuvid-cuda)
  cuda (hevc_cuvid-cuda)
  cuda (mjpeg_cuvid-cuda)
  cuda (mpeg1_cuvid-cuda)
  cuda (mpeg2_cuvid-cuda)
  cuda (mpeg4_cuvid-cuda)
  cuda (vc1_cuvid-cuda)
  cuda (vp8_cuvid-cuda)
  cuda (vp9_cuvid-cuda)
  v4l2m2m-copy (h263_v4l2m2m-v4l2m2m-copy)
  v4l2m2m-copy (h264_v4l2m2m-v4l2m2m-copy)
  v4l2m2m-copy (hevc_v4l2m2m-v4l2m2m-copy)
  v4l2m2m-copy (mpeg4_v4l2m2m-v4l2m2m-copy)
  v4l2m2m-copy (mpeg1_v4l2m2m-v4l2m2m-copy)
  v4l2m2m-copy (mpeg2_v4l2m2m-v4l2m2m-copy)
  v4l2m2m-copy (vc1_v4l2m2m-v4l2m2m-copy)
  v4l2m2m-copy (vp8_v4l2m2m-v4l2m2m-copy)
  v4l2m2m-copy (vp9_v4l2m2m-v4l2m2m-copy)
  cuda-copy (av1_cuvid-cuda-copy)
  cuda-copy (h264_cuvid-cuda-copy)
  cuda-copy (hevc_cuvid-cuda-copy)
  cuda-copy (mjpeg_cuvid-cuda-copy)
  cuda-copy (mpeg1_cuvid-cuda-copy)
  cuda-copy (mpeg2_cuvid-cuda-copy)
  cuda-copy (mpeg4_cuvid-cuda-copy)
  cuda-copy (vc1_cuvid-cuda-copy)
  cuda-copy (vp8_cuvid-cuda-copy)
  cuda-copy (vp9_cuvid-cuda-copy)
  auto (yes '')
  no
  auto-safe
  auto-copy
  auto-copy-safe
And it works fine too:
$ flatpak run io.mpv.Mpv https://files.decovar.dev/public/etc/radio.m3u8 --force-windowI started to really like Flatpak distributions. I in general like a lot when stuff just works out of the box.
The audio files without a cover art (such as my radio playlist) will have black void in the application window, so one might want to use some default image instead (that will also require setting --vid=1 instead of --force-window):
$ flatpak run io.mpv.Mpv https://files.decovar.dev/public/etc/radio.m3u8 \
    --external-file=https://files.decovar.dev/public/etc/mpv.png \
    --vid=1
I added it to Steam too, because I wanted to use mpv in Gaming mode for listening to radio playlist as a background music for some games. Steam adds all the launch options for opening mpv application window on its own, and I also added my options for openning my radio playlist and setting a default image:
"run" "--branch=stable" "--arch=x86_64" "--command=mpv" "--file-forwarding" "io.mpv.Mpv" "--player-operation-mode=pseudo-gui" ~/Music/radio.m3u8 "--external-file=/home/deck/Pictures/mpv.png" "--vid=1" "--" "@@u" "@@"That runs fine in Gaming mode:

While we are on the topic, here are also my mpv configs:
$ less ~/.var/app/io.mpv.Mpv/config/mpv/mpv.conf

force-window=yes
vid=1
keep-open=yes

osd-duration=3000
osd-font="Verdana"
osd-font-size=26
osd-color="#FFF766"
osd-border-size=1
osd-bar-align-y=0.9

sub-font="Verdana"
sub-font-size=32
sub-color="#FFFF00"

save-position-on-quit=yes

screenshot-format=jpg
$ less ~/.var/app/io.mpv.Mpv/config/mpv/script-opts/osc.conf
visibility=auto$ less ~/.var/app/io.mpv.Mpv/config/mpv/input.conf
ENTER cycle fullscreen
i show-progress
TAB script-binding stats/display-stats
LEFT seek -1
RIGHT seek 1
AXIS_UP add volume 2
AXIS_DOWN add volume -2
UP add volume 2
DOWN add volume -2
ALT+RIGHT frame-step
ALT+LEFT frame-back-step
p show_text ${playlist}
CTRL+RIGHT playlist-next
CTRL+LEFT playlist-prev
a show_text ${track-list}
CTRL+a cycle audio
CTRL+h cycle sub
ESC quit
CTRL+r playlist-shuffleAnd here’s a my controller layout to work with (most of) the keybindings.
Launching mpv together with something else
This isn’t something specific to mpv or Flatpak in general, as it applies to any other application/game.
While you can just launch mpv, press Steam button, go to Library and launch another application/game to run in parallel (so you’d have mpv playing music in background), in some cases you might want to launch both the player and the game with one click. I don’t think it’s a good idea to hack this super mega launch of several applications into one Steam entry, but it is still good to know that something like this is possible.
Since launch options are more or less a command line prompt, the basic shell operations seem to work the same way there, and so you can simply separate different applications launches with &, for example:
/usr/bin/flatpak run --branch=stable --arch=x86_64 --command=mpv --file-forwarding io.mpv.Mpv --player-operation-mode=pseudo-gui ~/Music/radio.m3u8 --external-file=/home/deck/Pictures/mpv.png --vid=1 & %command%
Here the %command% refers to the “host” Steam entry in which I am editing the launch options. So, for instance, if I want to launch mpv together with Konsole, then I would do the following in the Konsole’s launch options:
/usr/bin/flatpak run --branch=stable --arch=x86_64 --command=mpv --file-forwarding io.mpv.Mpv --player-operation-mode=pseudo-gui ~/Music/radio.m3u8 --external-file=/home/deck/Pictures/mpv.png --vid=1 & sleep 1 && LD_PRELOAD="" %command% --fullscreen
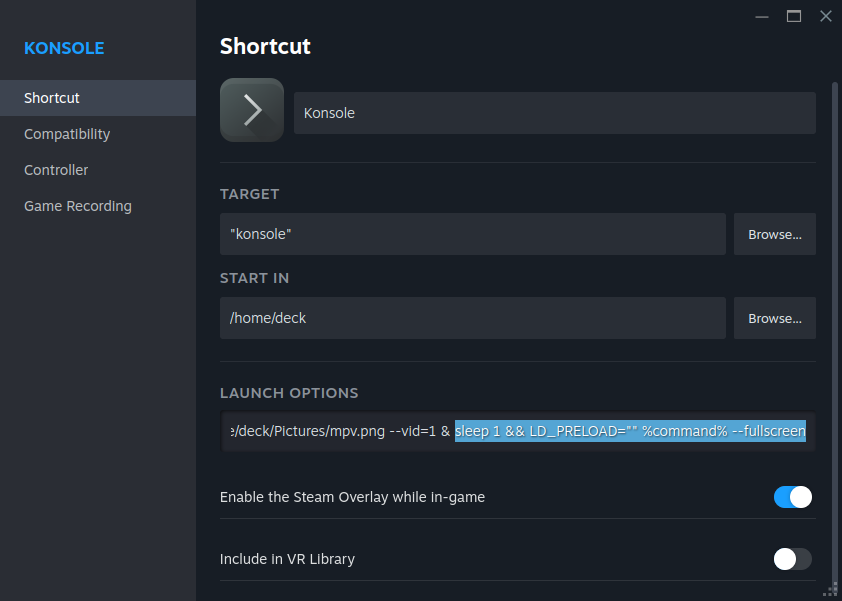
The (optional) sleep 1 && part holds the launching process for a second so Konsole window would end up in the foreground, otherwise I’d need to switch to it via Steam button.
Aside from being unnatural, this hack also has a downside: when you exit from one application/game (not via its Steam menu), the other one will keep running, and you won’t be able to close it in Gaming mode (unless you kill its process from shell). To close both applications you’ll need to press Steam button and select Exit game.
OBS Studio
I wanted to record the screen to demonstrate how virtual menus work in games, so I installed OBS Studio (also via Flatpak, as again that was the most convenient way).
Hardware acceleration is available out of the box:
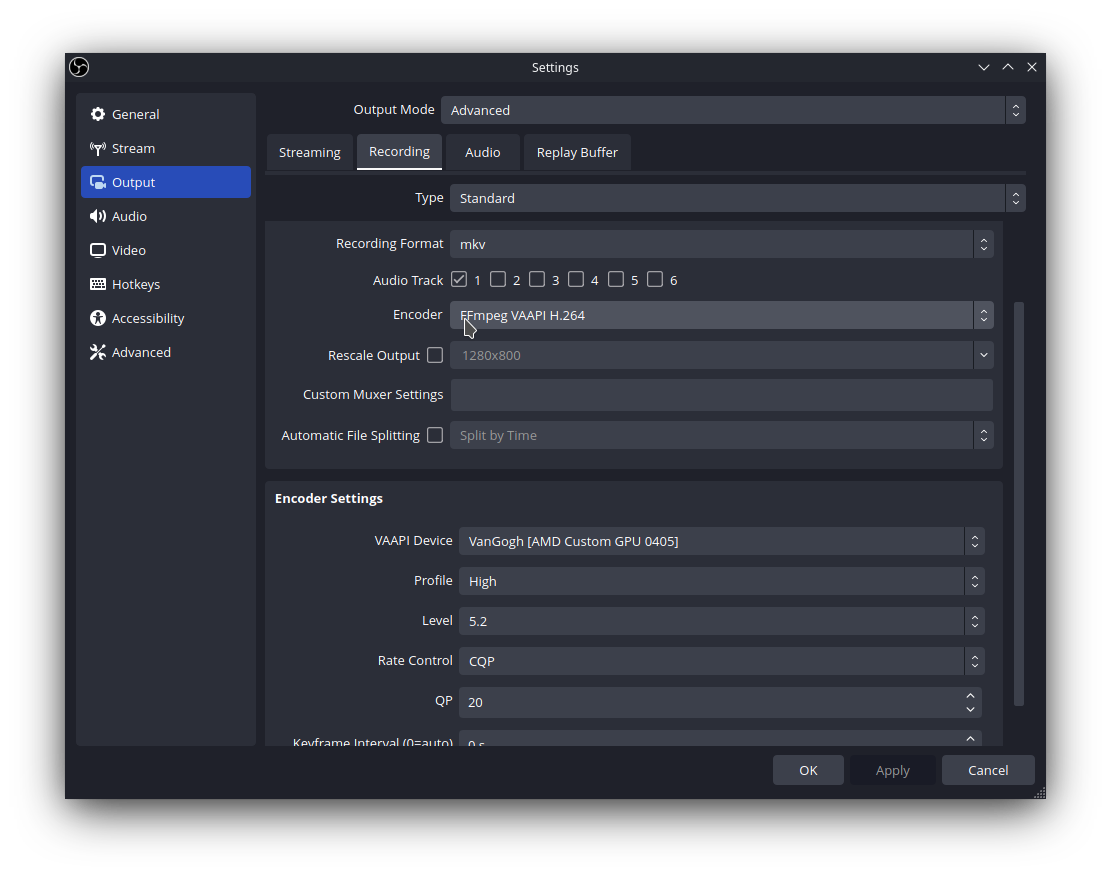
And it works in Desktop mode, you can record either the entire screen or a specific game window. Here’s an example:
If video doesn't play in your browser, you can download it here.
It seems to add some performance penalty (in addition to the absence of 40 FPS limit), but in general the recording works fine.
Since it is not Gaming mode, Steam Input isn’t fully implemented here (or what’s the reason), in particular there are no virtual menus, and to record those one would need to start screen recording in Gaming mode. So I added OBS Studio as a non-Steam game, launched it in Gaming mode and started screen recording. But unfortunately it doesn’t support screen recording there, at least current version doesn’t. It does capture UI and game sounds, it even captures the game-stylized mouse pointer, but the rest is just black void:
If video doesn't play in your browser, you can download it here.
There is a workaround instruction how to make screen recording work in Gaming mode, but it involves installing some system-wide packages and from 3rd-party repositories too, so I didn’t do it.
Homebrew
Originally there was a section here about installing development tools and libraries via Homebrew package manager, including the process of installing GCC and building stuff from sources. But the final article ended up being way too long, so I decided to move development stuff into a separate article (and also added there a new section about building Qt).
Games
First thing to mention is that non-Steam games will not have these convenience things that I listed earlier, and so:
- you will need to manually set the Proton version (maybe even download a new one);
- you will not be geting pre-compiled shader cache (oh fuck yes);
- you will not have official / community layouts (there will be some more details about that);
- you will need to set set all the graphical assets (poster, background, logo, icon, etc) manually, otherwise your library entries will be just faceless gray rectangles;
- the playtime statistics will not be recorded;
- there will be no achievements;
- there will be no Steam Cloud savegames syncing;
- these games will not be listed among Games on Storage tab in Settings, they will fall into Other category, so you won’t be able to see the space they occupy and won’t be able to move them to/from SD card in Gaming mode (you will of course be able to do that in Desktop mode or via SSH/Konsole);
- your friends will not see the game you are playing.
It’s all obvious and not very important (at least for me it’s not), but I thought I’ll post this list anyway.
Second thing to mention is that this article has the #piracy tag, and some of the games below one indeed might not want to pay for. There will be a reasoning provided for each case, but the most common reasons to pirate a game are:
- it relies on the Defensive Regulatory Magicon too much, especially when these defensive mechanisms actually hurt the game’s performance;
- it forces to use an additional launcher instead of just directly starting the game;
- it requires to accept additional 3rd-party EULAs;
- it forces creating accounts in various services (which I never wanted to use and never will be);
- it requires internet connection even when it makes no sense and is redundant for the actual gameplay;
- it tries to suck money from you by introducing more and more (tiny) DLCs, bringing the total price way too high.
I mean, what the fuck is this shit:
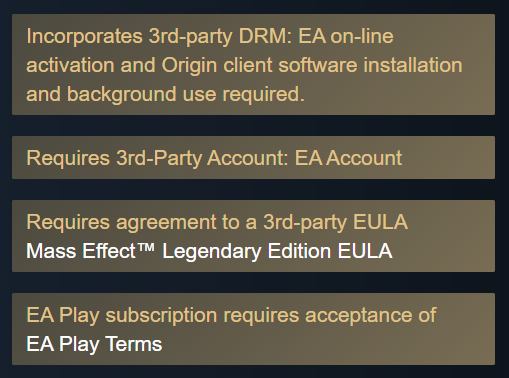
Isn’t it a little bit too fucking much? That is a great example of a game which I will never pay a single cent for, not even when it gets a 99% discount. By the way, this game is available on RuTracker under ID 6065973.
And yes, in vast majority of cases the pirated versions of the same games have no launchers, they are not tied to online services, they don’t force creating accounts in all sorts of retarded services, they don’t require internet connection for no reason (such as when playing an offline single-player kind of game) and they run with better performance due to the absence of DRM/anti-tamper crap.
Of course, all that isn’t related to Steam Deck at all, this is just my thoughts/rant on the subject in general.
And mainly this section is not about how to pirate a game, it is about how one can install/add a non-Steam game having an installer or a “portable” distribution. This also covers perfectly fine cases of installing a game purchased on GOG or on a physical disk in an “offline” store.
Civilization VI
I’ll start with Civilization VI and will describe the process step by step, so this section will be rather long. But thanks to that sections for other games will be shorter, as all these steps remain the same for every game.
Civilization VI game is sold in Steam Store, and since I liked the Civilization V a lot, I wanted to try this one too. However, I discovered that it contains even more DLCs, making the the total price more than 200 USD. Fuck this, I am not paying that much.
Moreover, instead of buying the game and its DLCs one by one you can buy a bundle, but there are several bundles, and you need to know the difference between them, so you don’t waste your money on buying the wrong one, as it will end up being worse than the other. In the particular case of Civilization VI there are two bundles at the moment: Sid Meier’s Civilization VI Platinum Edition and Sid Meier’s Civilization VI Anthology. Do they expect me to compary those item by item? The fuck I will, I have a better use for my time.
In addition, it requires accepting a EULA, which in turn refers to Take-Two privacy policy, where they say that they can collect a lot of your data, including “name, user name, gamertag, postal and email address, phone number, unique IDs, mobile device ID, platform ID, gaming service ID, advertising ID and IP address”. Well, Take Two, how about you go fuck yourselves, isn’t it a bit too fucking much of data? I just want to play a bloody game, why does it need to spy on me and send all of this back to you?
Also, looking at reviews in Steam, there is a number of problems from performance issues to not being able to save games, which developers do not fix, and yet it is still expected that you pay for the game (and its gazillion of DLCs).
As a last drop, the game has a launcher. So yeah, I am not paying for this. Instead you can find it on RuTracker, the thread ID is 5335537: this one contains all the DLCs released at the moment and runs without a launcher (and hopefully also doesn’t send your data to Take Two or whomever).
Okay, we got ourselves a Windows installer of a game. Now, how does one install it on SteamOS? You could probably start by watching this video tutorial, it covers the general process very well. And I will provide my instructions below for the particular case of installing Civilization VI.
Switch to Desktop mode, transfer the installer somewhere, for example I’ve put mine to ~/Downloads/:
$ ls -L1 ~/Downloads/civilization-vi/installer/ | sort -V
civ6-setup.exe
civ6-setup-1.bin
civ6-setup-2.bin
civ6-setup-3.bin
civ6-setup-4.bin
civ6-setup-5.bin
civ6-setup-6.bin
civ6-setup-7.bin
civ6-setup-8.bin
civ6-setup-9.bin
civ6-setup-10.bin
Open Steam, click on Add a game, then Add a Non-Steam Game and Browse. Find the civ6-setup.exe file (choose All files in the file type dropdown):
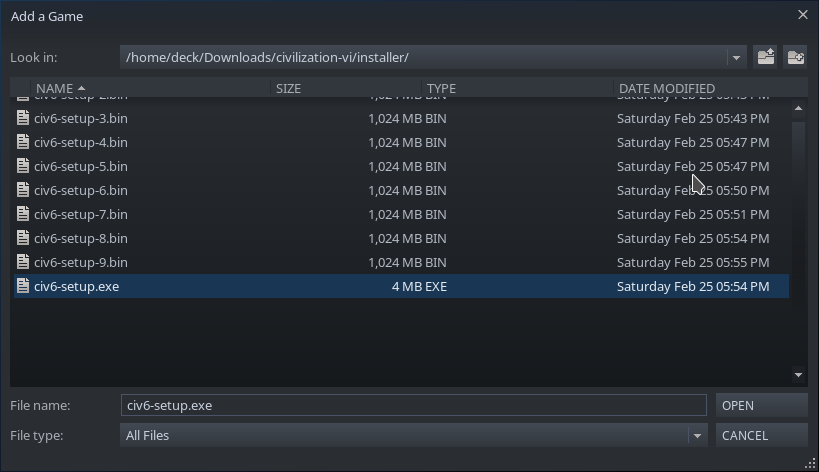
Open it, and new entry will get added to the list:
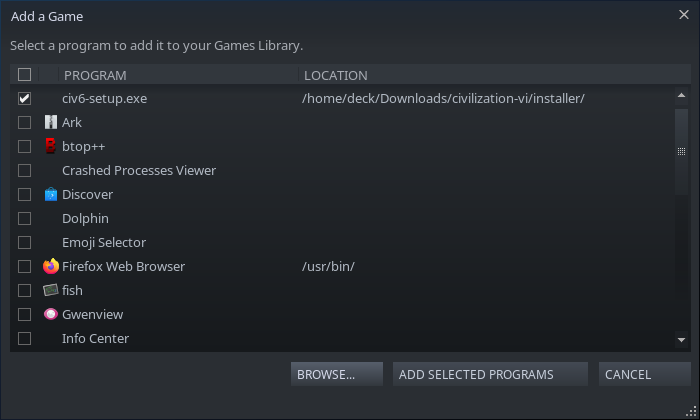
Click on Add selected programs. It will get added to the list of games in your library. Select it and open Properties:
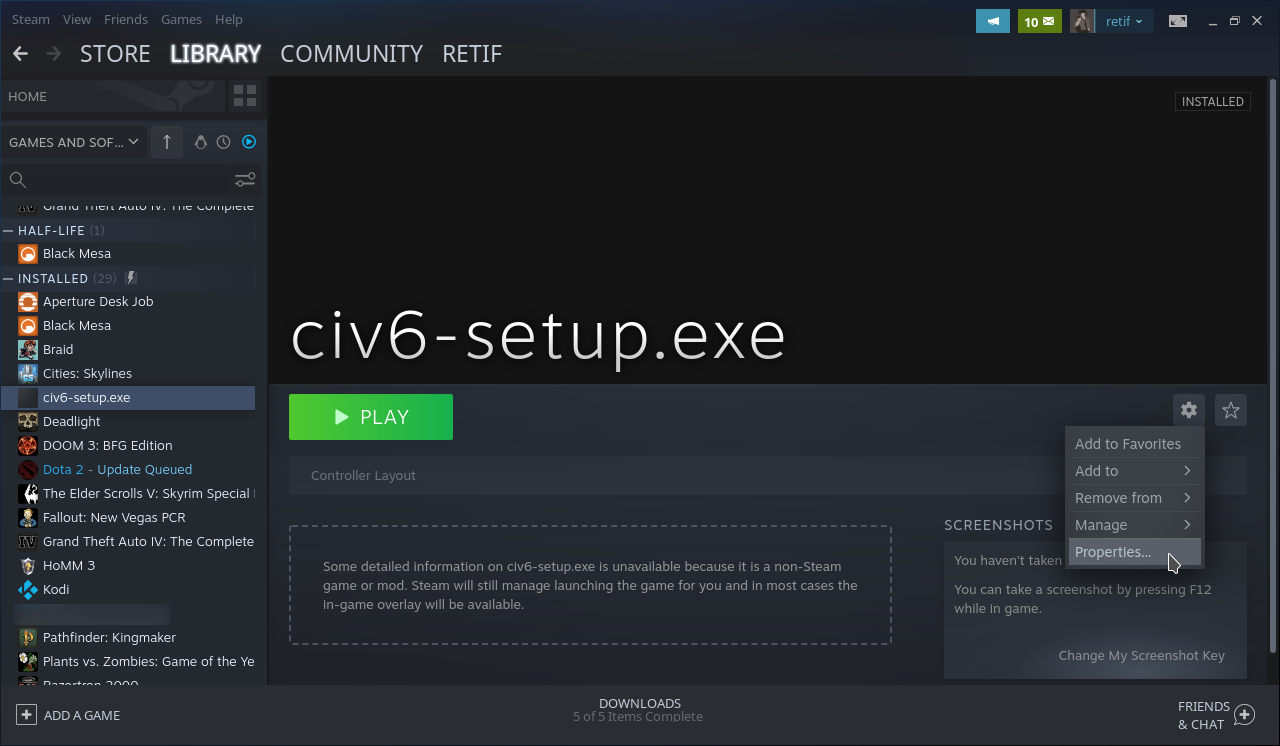
In Shortcut section set the SteamAppId environment variable in the launch options:
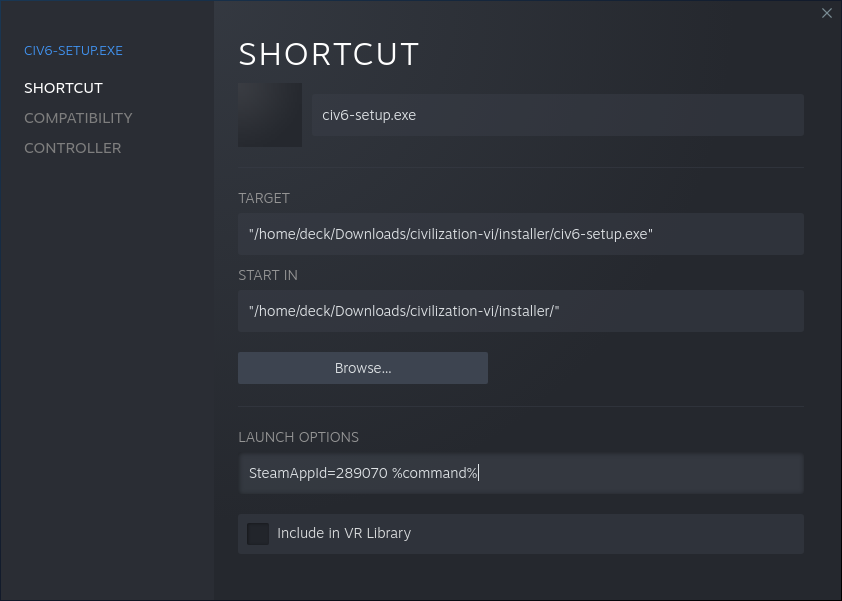
SteamAppId=289070 %command%That should (but it doesn’t) assign this library entry/shortcut the ID of the Steam Store version of the game. The most useful thing about this (if it actually worked) is discovering the community controller layouts for this game.
The 289070 value is the Steam App ID of Civilization VI. The %command% value is a substitute for the TARGET value, so what’s happenning here is you are setting an environment variable for a command just like you’d do that in shell/terminal.
You might see others saying that you also need to set SteamGameId variable:
SteamGameId=289070 SteamAppId=289070 %command%But when I did that, the game started running somewhere offscreen, as I could hear the game sounds of the intro playing and then the main menu music, but on the screen I only saw an infinite Steam loading animation:

So I did not set SteamGameId. And later I also stopped setting SteamAppId, as it doesn’t seem to affect anything, but more on that later.
Next, in Compatibility section check the box and select Proton Experimental:
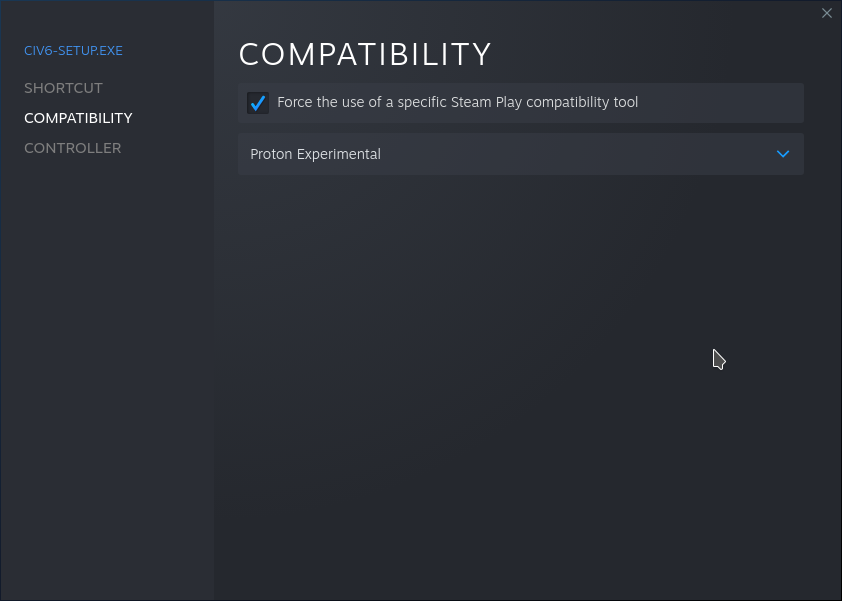
The installer is ready to launch now:
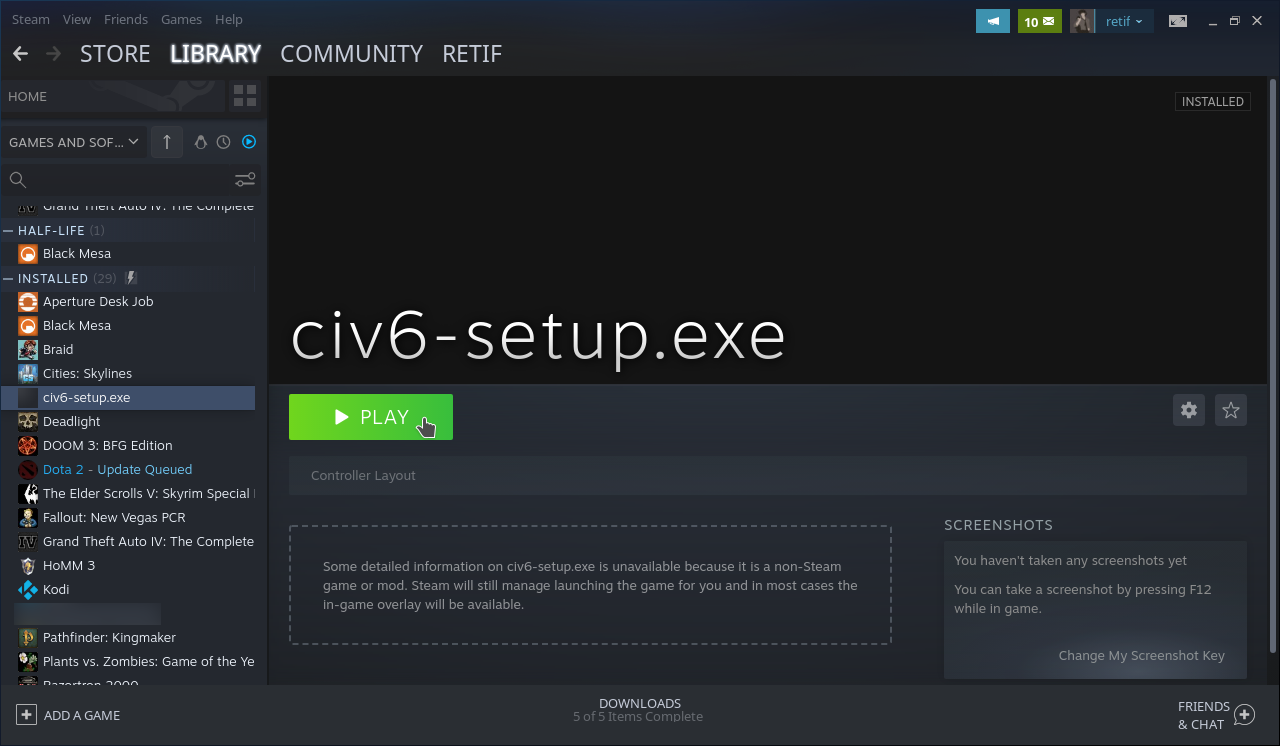
First time I saw this, it felt like magic - a Windows game installer launches on a GNU/Linux host:
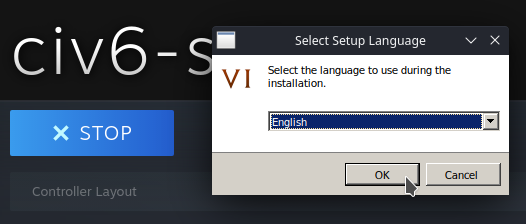

By default it wants to install on disk D:, which I’ve no idea where that really is, as disk C: is for the system drive and disk E: is for the SD card. I chose to install it on SD card:
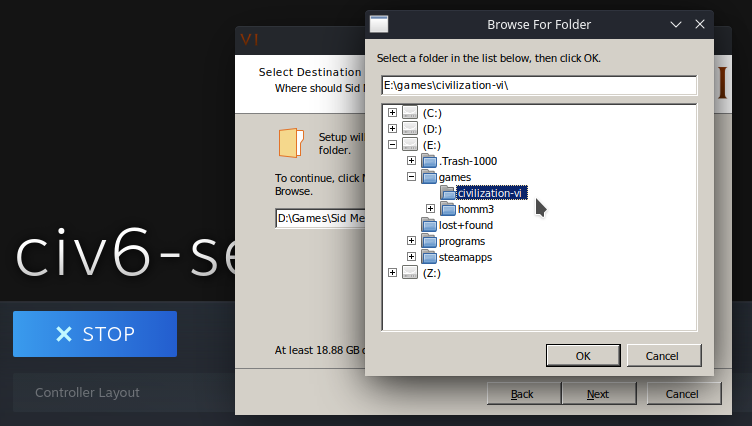
Some manuals tell to set STEAM_COMPAT_MOUNTS variable in launch options:
STEAM_COMPAT_MOUNTS=/run/media/mmcblkOp1/ %command%Which is supposed to enable SD card path discovery. But I did not need to do that, all the installers I’ve been launching always had the SD card path (disk E:) available to choose in the disks tree. It might be that in earlier versions of SteamOS/Proton it was indeed required, but apparently not anymore.
The rest of the installation is trivial:
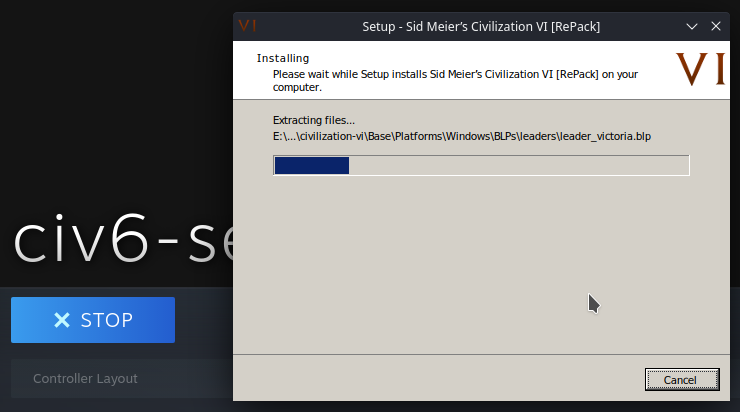
It took some time to unpack and on the last step it also suggested to enable some NTFS compression, but it’s probably safer not to do that:
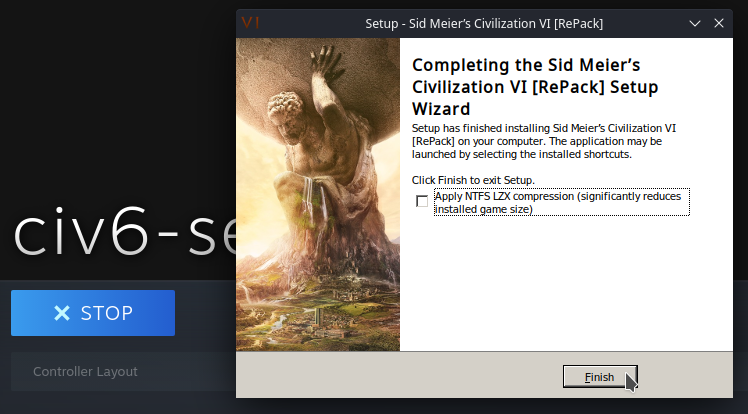
Once the game is installed, open Properties again and replace the installer’s .exe with the .exe of the actual game. To find where it is installed, go to the installation path and try to find what might be looking as a game executable:
$ ls -L1 /run/media/mmcblk0p1/games/civilization-vi/Base/Binaries/Win64Steam/ | grep .exe
CivilizationVI_DX12.exe
CivilizationVI.exe
Let’s try the DirectX 12 version, change the TARGET and START IN values accordingly:
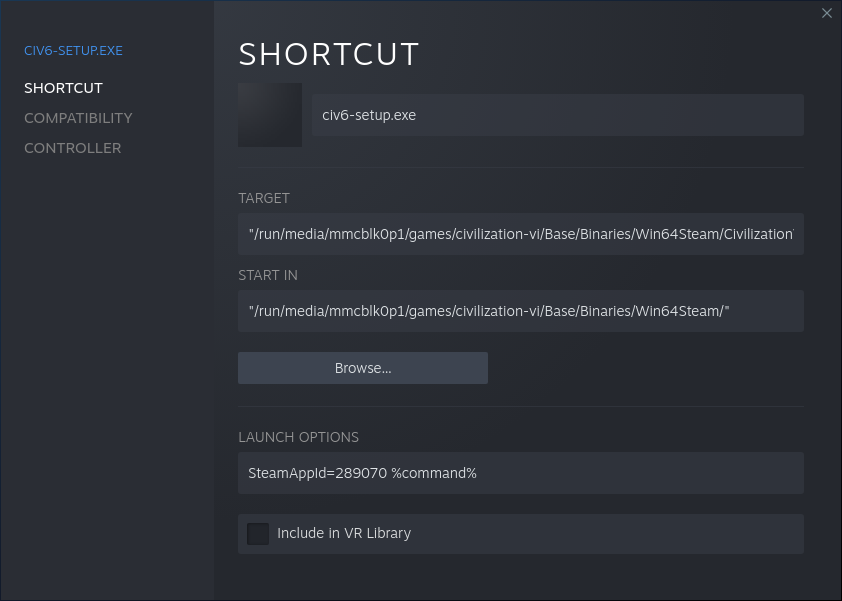
It didn’t fit on the screenshot, but the last part of the path in TARGET is CivilizationVI_DX12.exe.
As an intermediate summary, what we did:
- Added the game’s installer as a non-Steam game and installed the game;
- After the game was installed, replaced the installer’s
.exewith the installed game’s.exewithin the same entry/shortcut properties.
Why we did that within the same shortcut? Because when a game is added to Steam, a Proton prefix is created for it, and that is where the game’s Windows environment is located, even though the game files are installed where you told the installer to install them to. And so if you will install a game using one prefix and then will try to launch it by adding its .exe as a new non-Steam game, that will end up having a different Proton prefix created for it and so the game will likely not work, especially if the installer did something else aside from just unpacking the game files (for example, it could’ve added some keys to the registry), which you obviously will not have in a different prefix environment.
Now the game can be launched. In most cases it will just work, because, as I understood it, recent Proton versions already contain required DirectX and Visual C++ runtime libraries. If the game doesn’t launch, you’ll probably get errors about missing DLLs, and then you will need to install DirectX or/and Visual C++ runtime by opening the game Properties again and replacing the TARGET executable with the package installer, installing it and replacing the TARGET back to the game executable - all that still within the same entry/shortcut, so everything is installed inside the same Proton prefix.
Civilization VI did not require any of that, it launched and ran without problems:
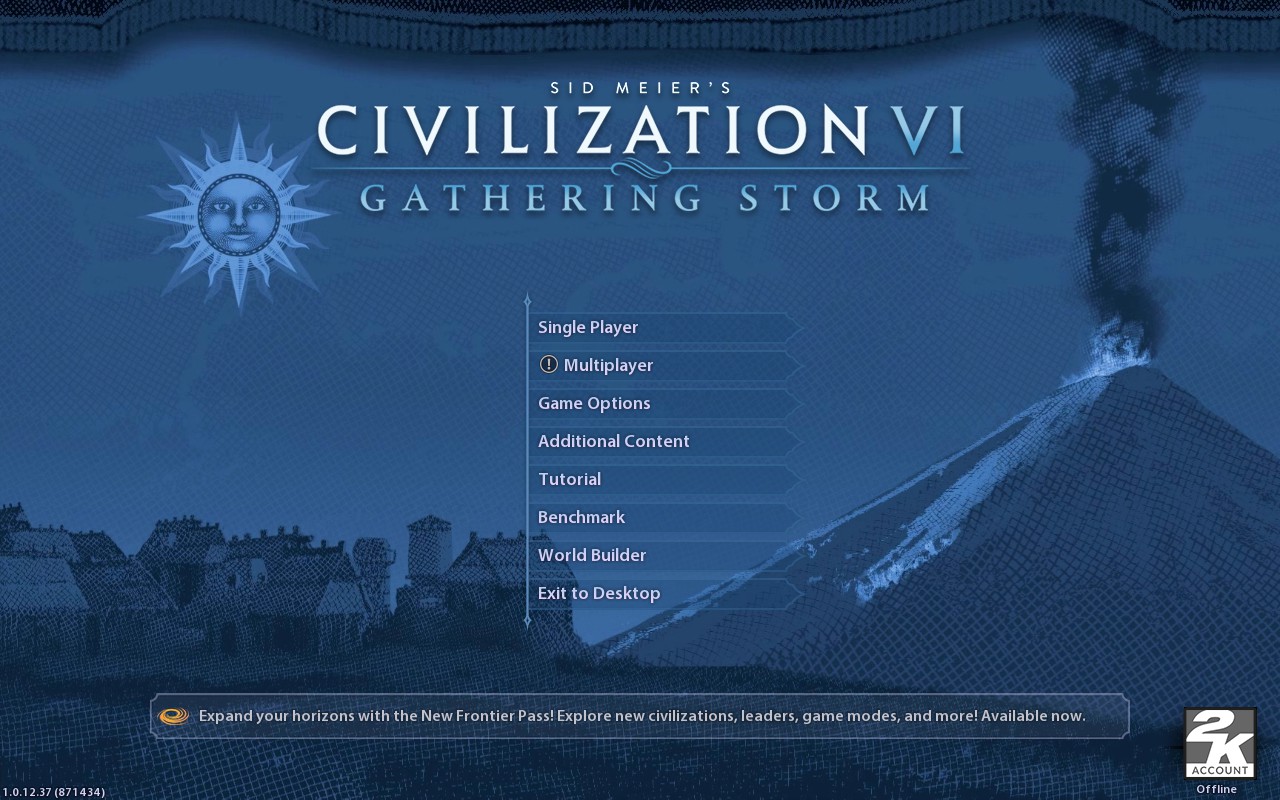
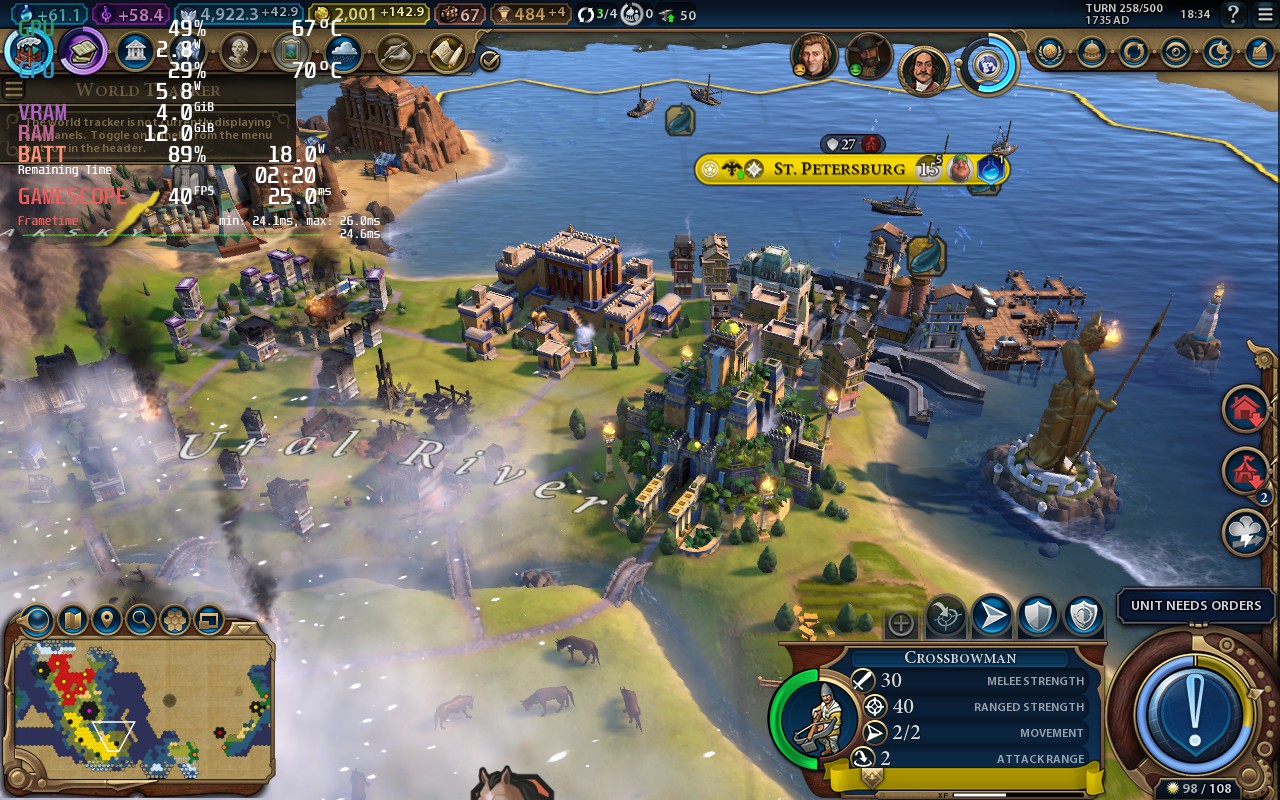
Posters, backgrounds, logos, icons
Now when the game is running, you can rename it from the ugly civ6-setup.exe and set posters, backgrounds, logos, icons using images from SteamGridDB.
Here’s how it looks now in my library in Desktop mode:
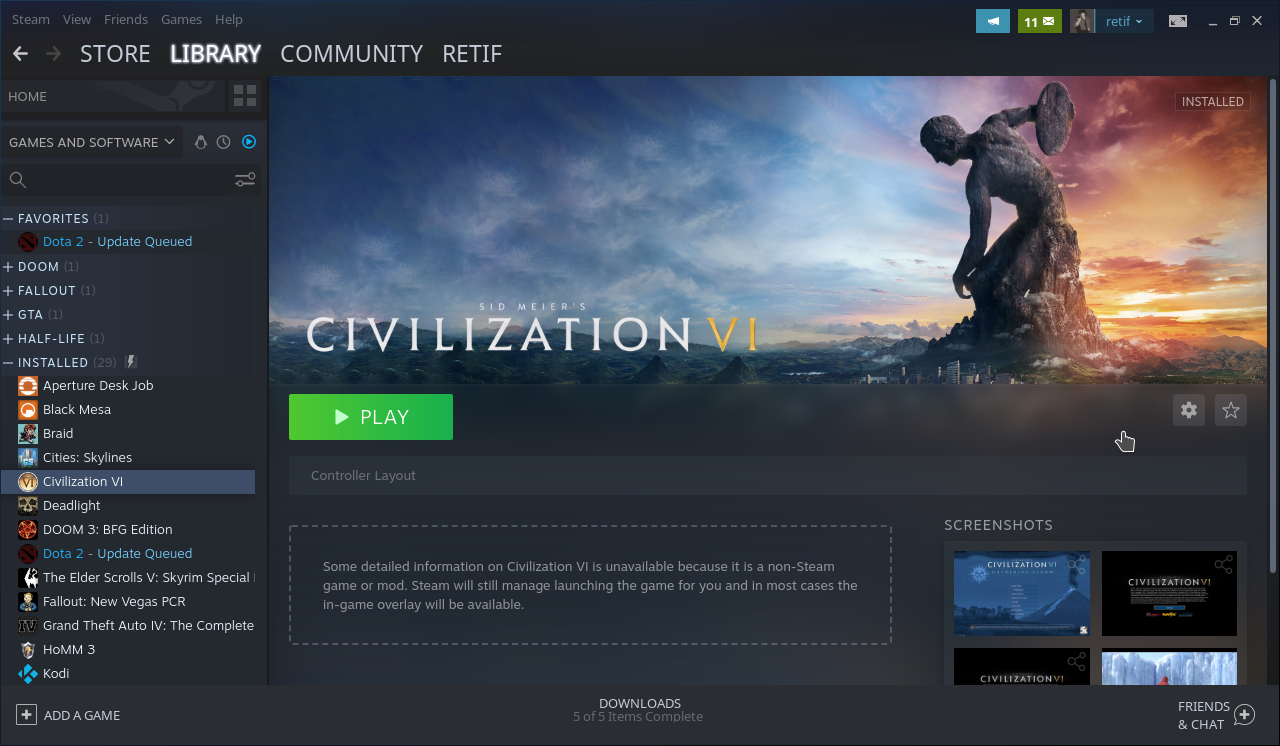
and in Gaming mode:
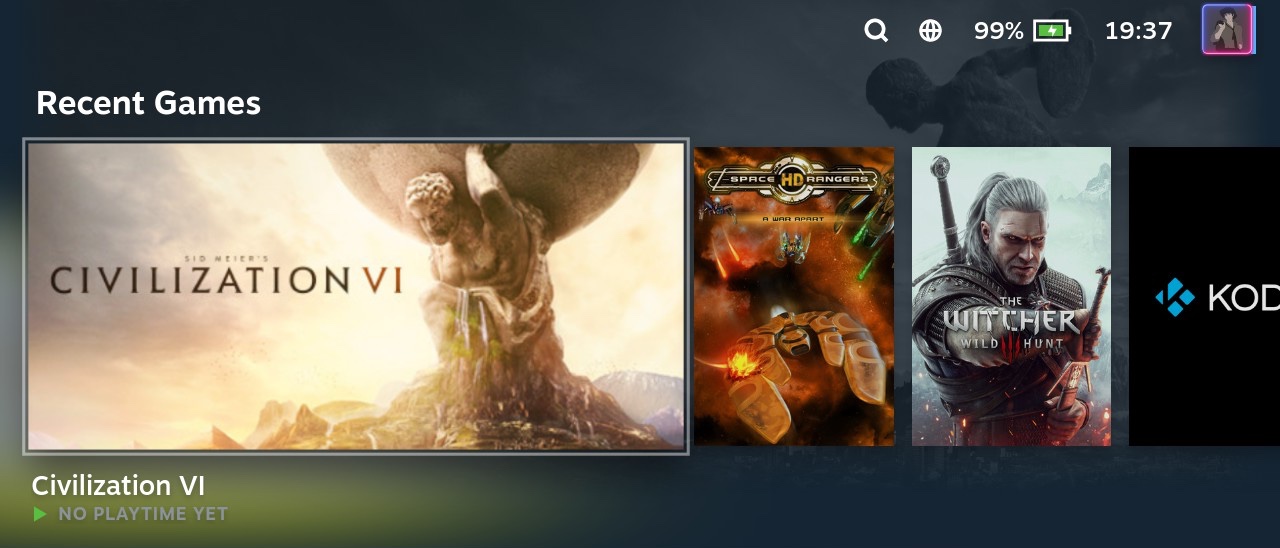
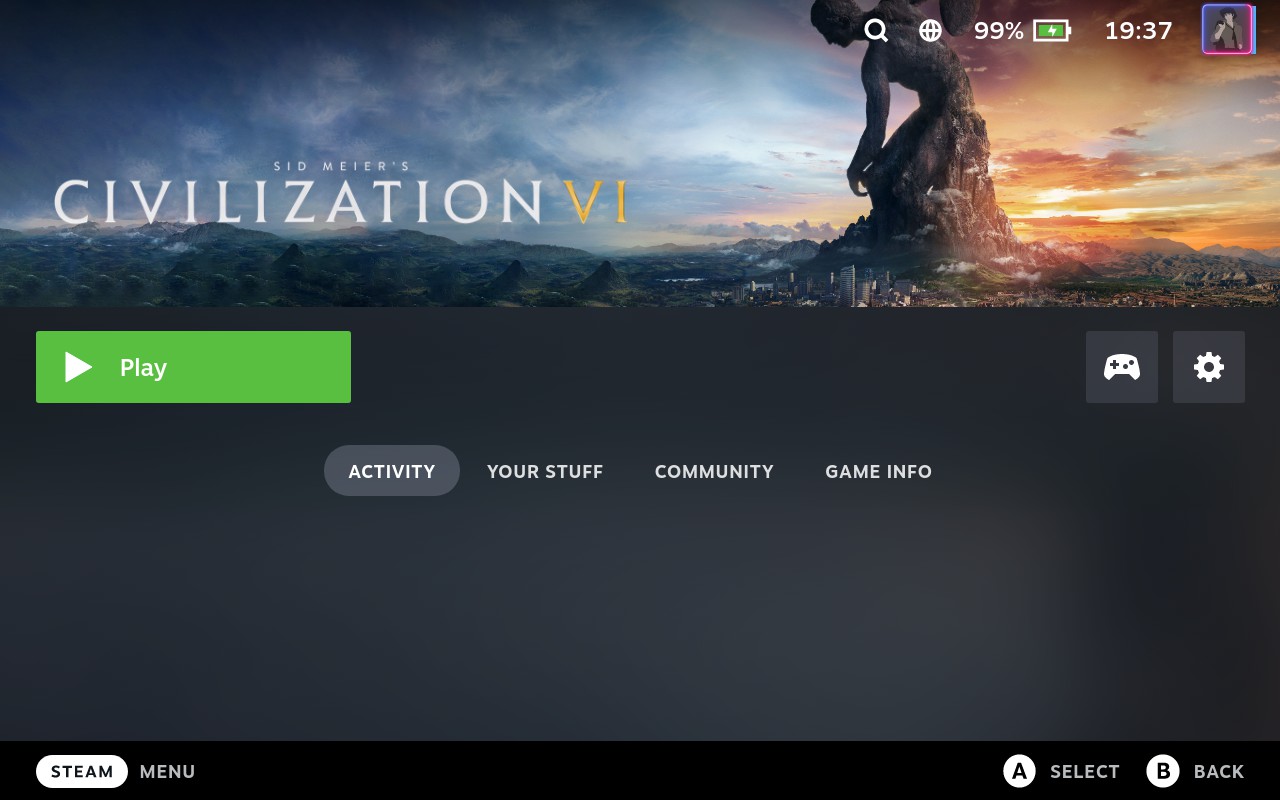
To set vertical and horizontal posters for the gallery, in Desktop mode go to HOME screen and there you’ll be able to set them under Recent games section by running a game that you ran before and then this one again:
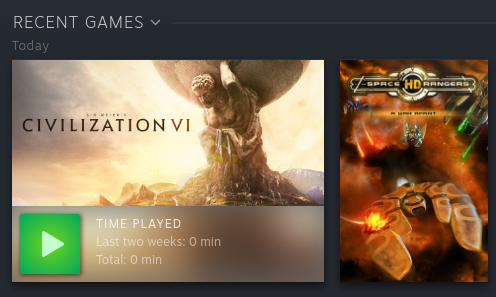
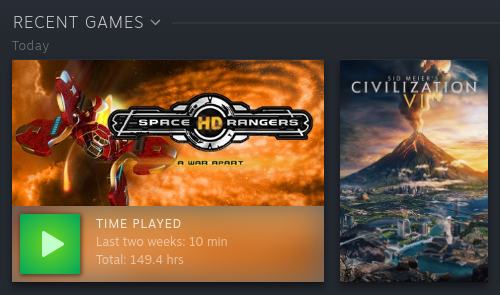
Community controller layout
As Civilization VI is available in Steam Store, it already has pre-made community controller layouts, but since you installed is as a non-Steam game, you won’t get them on Community Layouts tab:
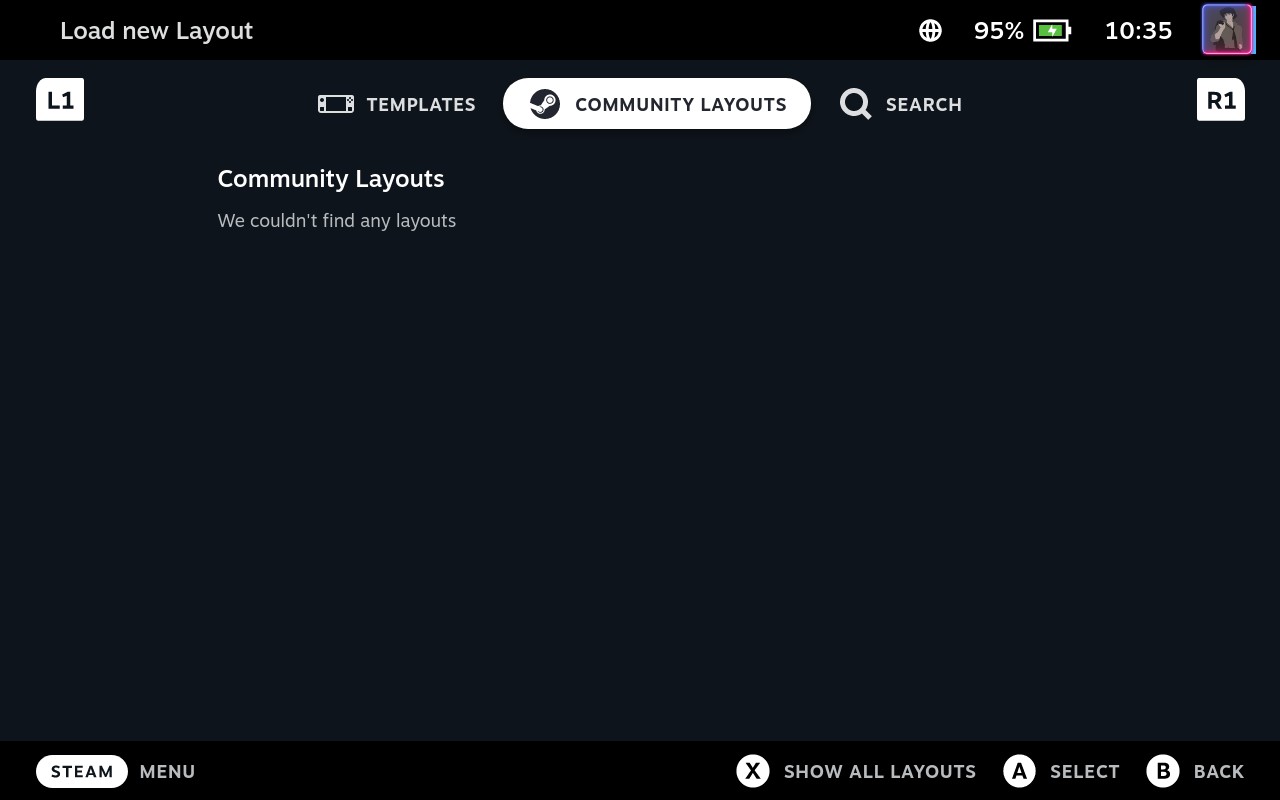
But you can “fake” the Steam App ID for the game, and then Steam will pull up the community layouts based on the provided ID. Like I said earlier, first I tried to do that by setting SteamAppId environment variable in the launch options:
SteamAppId=289070 %command%But that didn’t have any effect. The other way, which actually works, is to rename the game from Civilization VI to 289070, like this:
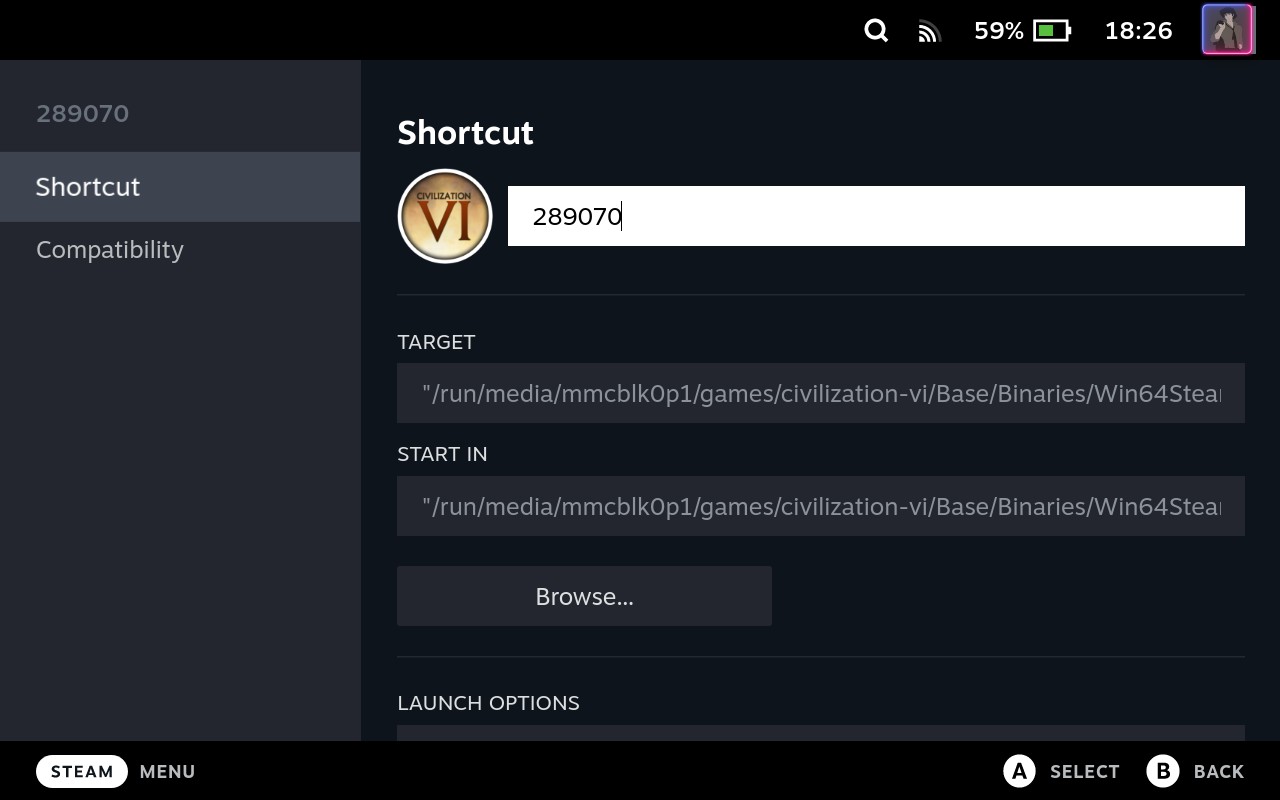
Or you can also rename the game to how it is titled in Steam Store (Sid Meier’s Civilization® VI), that should also work.
Anyway, after renaming the game community layouts did show up:
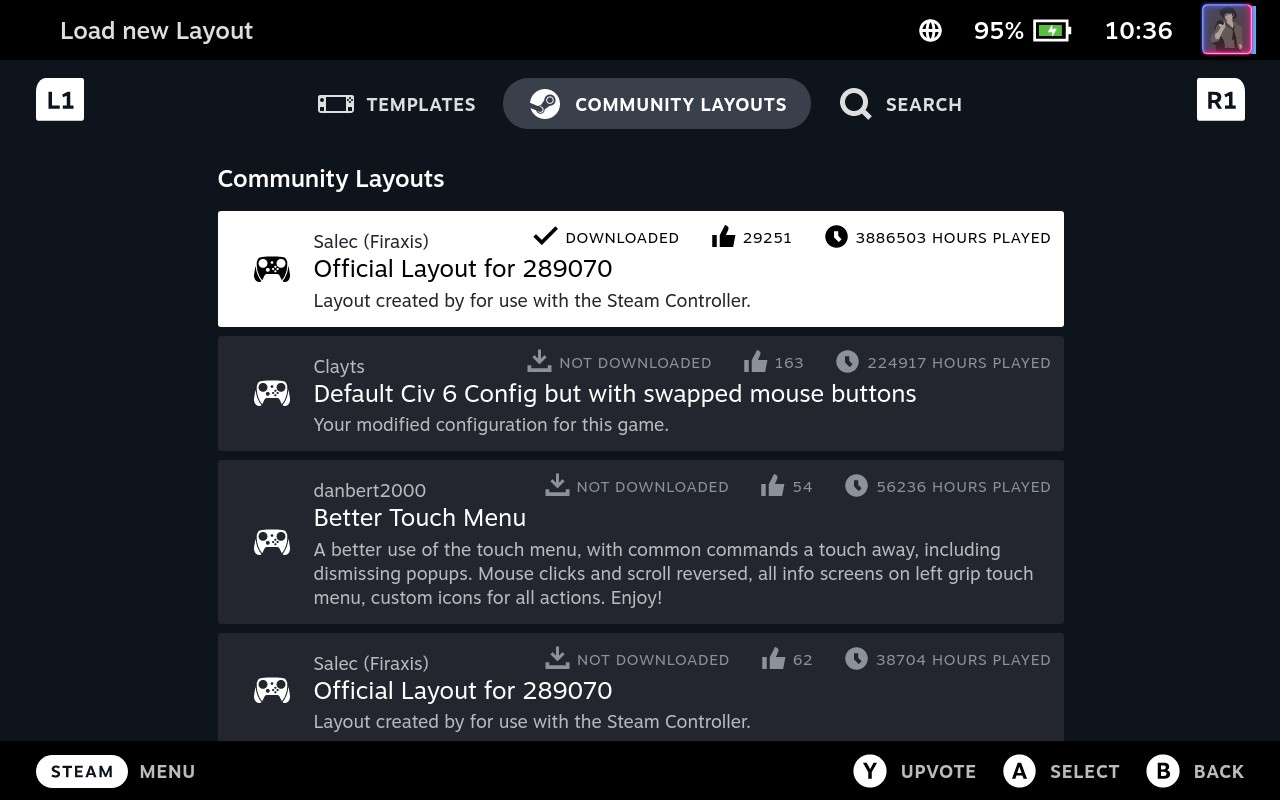
Now the task is to save a selected layout somehow, so it would remain available after the game is renamed back. First I tried to export it as New Template:
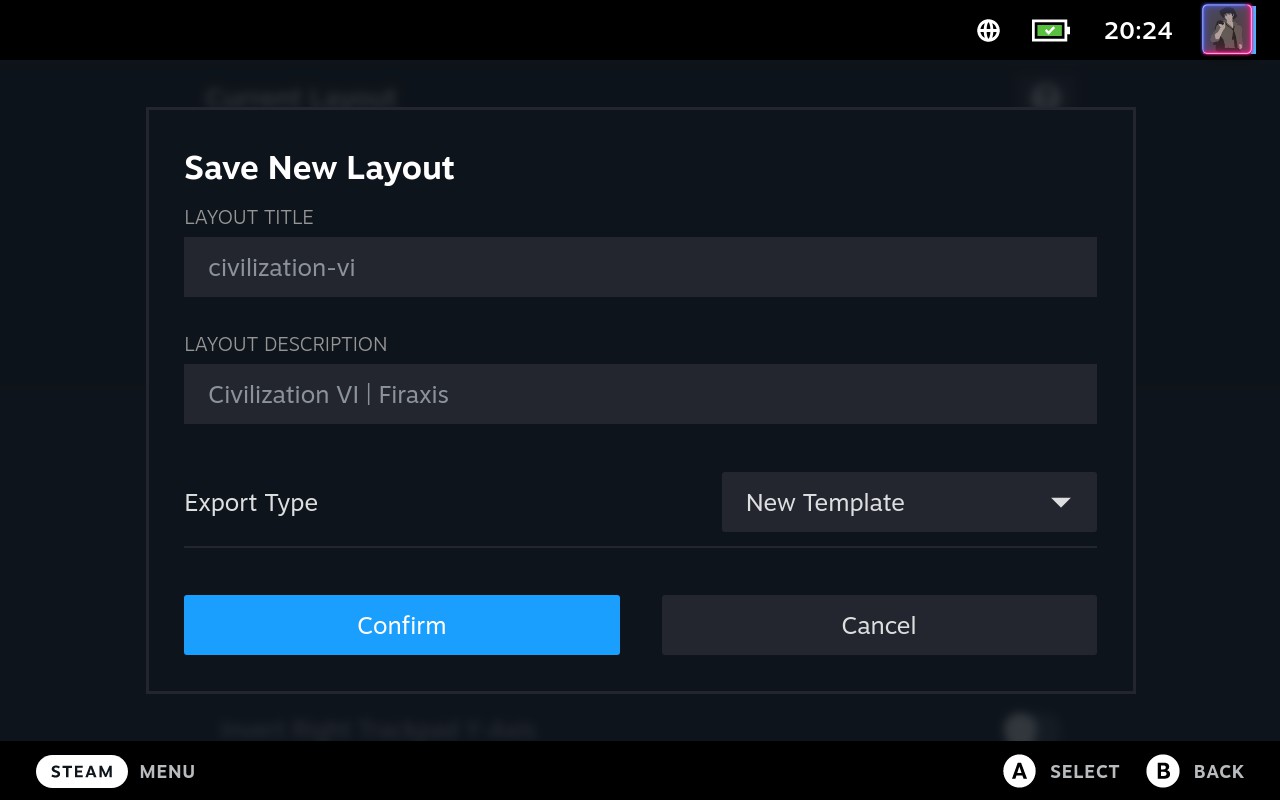
And that worked: after I renamed the game back, I still had this layout in my list of templates. But first of all, this is not a clean way to do this, because soon enough you’ll “spam” your templates list with layouts that are not really templates, as they are only suitable for particular games. Secondly, for me this worked only once, I could never succeed doing the same for other games, their layouts never showed up in the list of templates, even though I did everything the same way.
That lead to me a different way, which is actually a cleaner one and probably is the correct/intended way of saving layouts. You still need to export it, but not as New Template, you should choose the New Personal Save option:
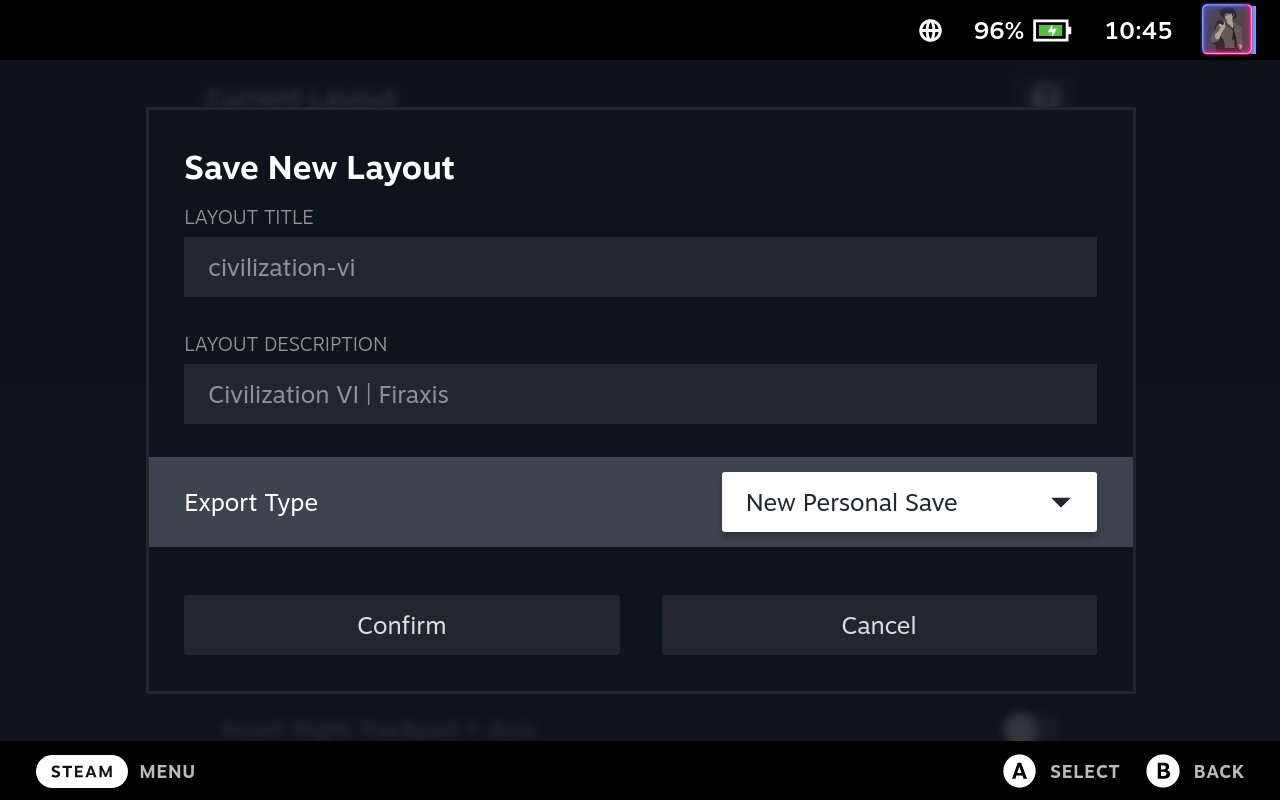
But here comes the tricky part. Do not rename the game back just yet. First go to the Your Layouts tab:
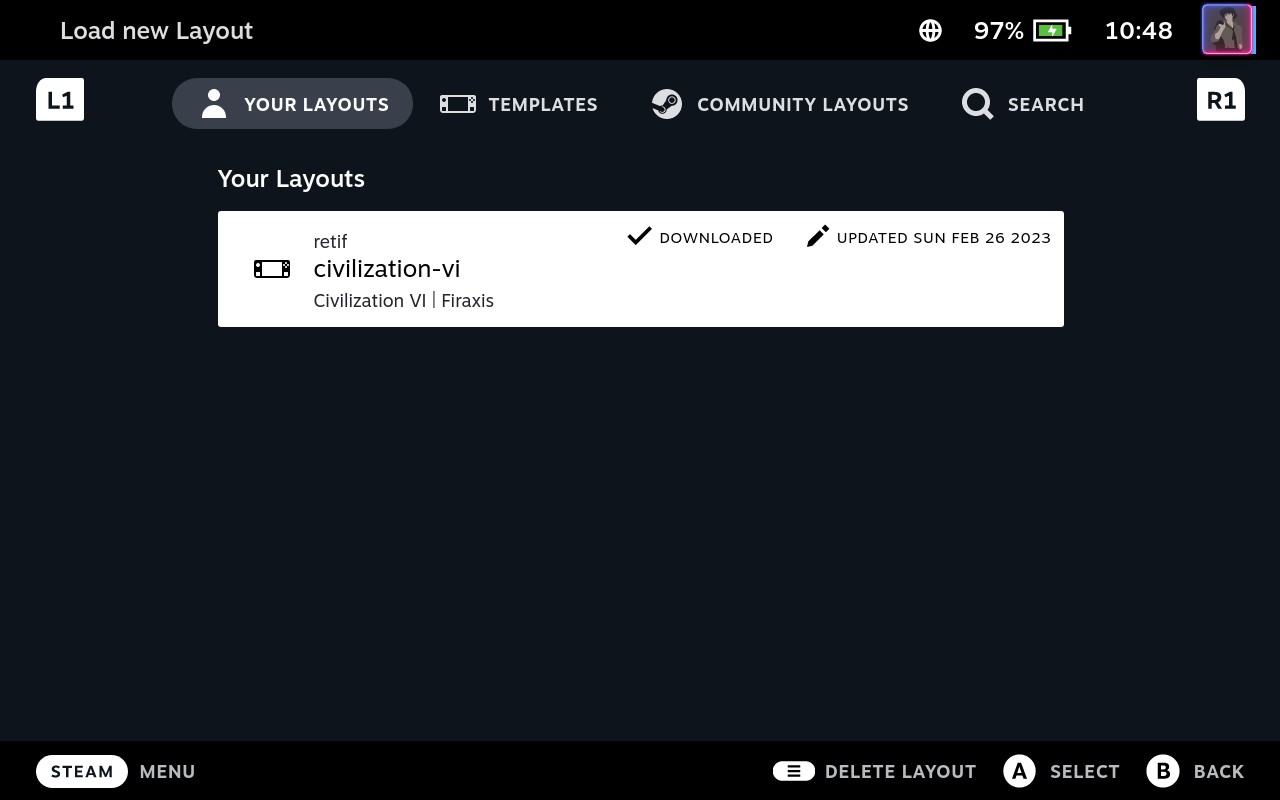
and select, download and apply this layout. Now you can rename the game back:
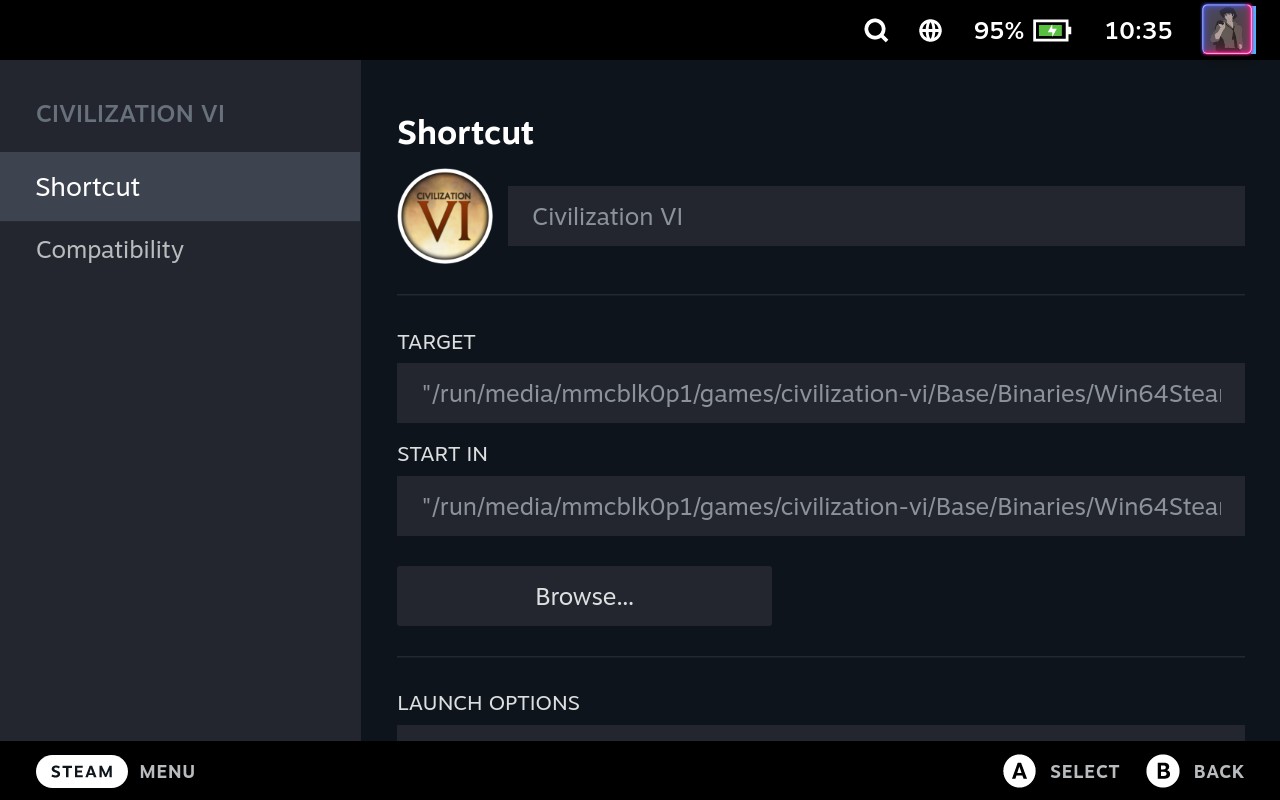
and then this layout will still be available on Your Layouts tab, and you’ll be able to select it:
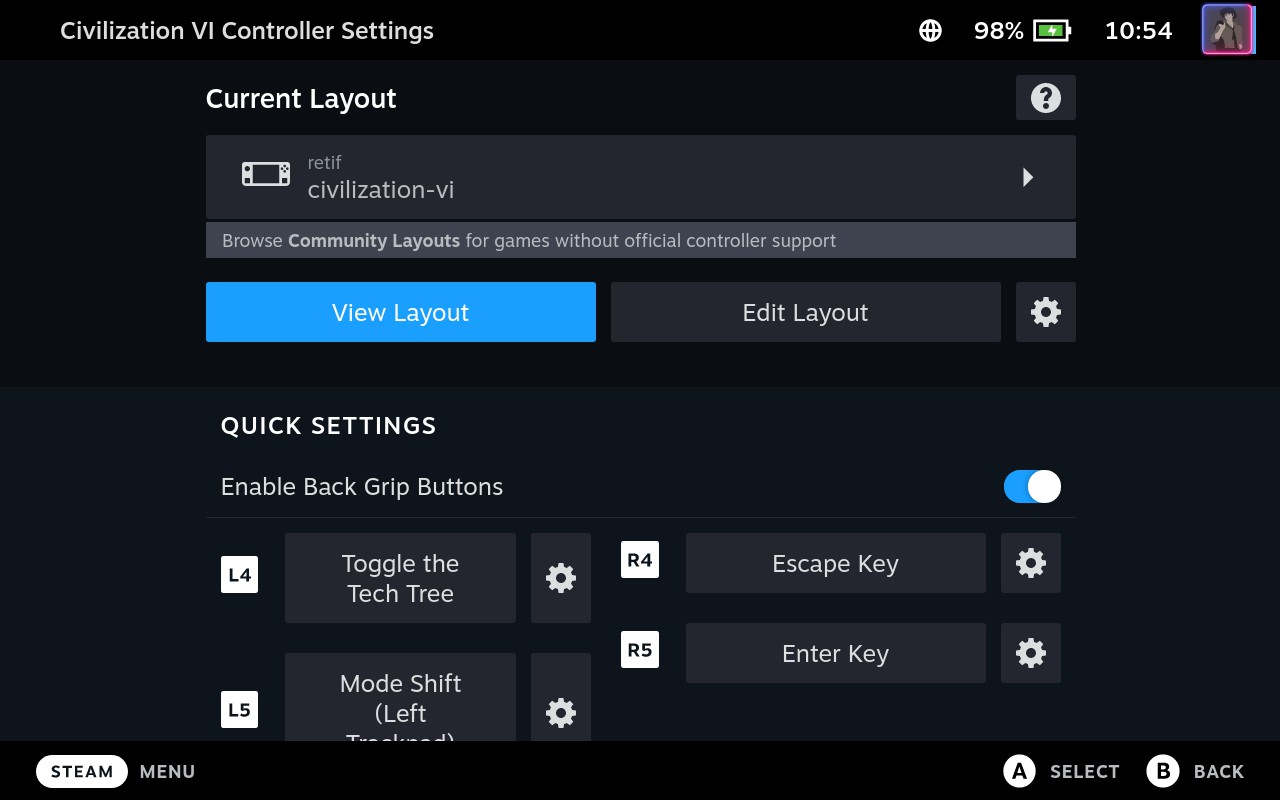
Congratulations, you are all set to enjoy a non-Steam game that you have installed and customized yourself. And like I said, these steps are the same for any other game or application, so you have everything you need to grow your game library on your own.
Removing a non-Steam game
I played Civilization VI for a couple of days and came to a conclusion that I don’t like it. The game mechanics and UI are far too overloaded with stuff comparing to Civilization V, plus the graphics are all childish. What a waste of money it would be, if I purchased it.
Before doing anything, find out what Steam App ID it got, if you don’t know it yet.
First remove the game from Steam library (Manage → Remove from your library):
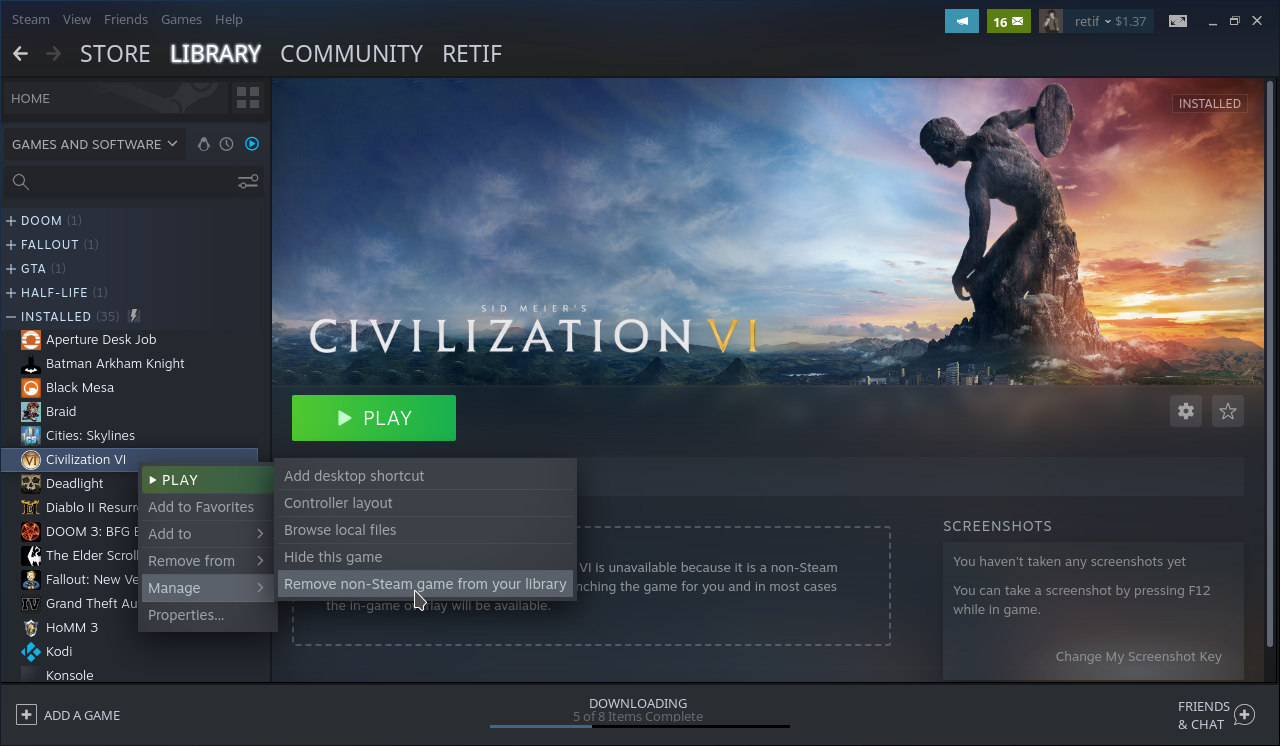
Then delete the game files from where you installed them to:
$ rm -r /run/media/mmcblk0p1/games/civilization-vi Then, knowing the Steam App ID, delete its Proton prefix (after backing up your savegames/configs/etc) and shader cache. In my case, Civilization VI got the ID 3357182463, so:
$ rm -r /home/deck/.local/share/Steam/steamapps/compatdata/3357182463
$ rm -r /home/deck/.local/share/Steam/steamapps/shadercache/3357182463
If you would also like to remove the game screenshots, then the ID that you found for the prefix path won’t be of use, as screenshots path uses a different ID of unknown origin. And actually, do not remove screenshots files manually, because /home/deck/.local/share/Steam/userdata/YOUR-ACCOUNT-ID/760/screenshots.vdf will still contain references to them, so your Media gallery will have empty items like this:

So the only way to properly remove screenshots is to remove them one by one (due to the lack of bulk operations) in Media gallery.
Batman Arkham Knight
I was never going to play Batman Arkham Knight, as I’ve never been fan of the series. But I stumbled upon this video and got curious.
Trying to install and launch it, I’ve encountered some problems which I didn’t have with Civilization VI, so this section will be a kind of additional set of instructions for cases when non-Steam games/applications don’t work out of the box.
The game is also available in Steam, but it has this Denuvo shit, requiring you to be online even for a single-player offline gameplay. It also has a lot of DLC which double its price, and of course there is 3rd-party EULA, so I am not paying for this one either. You can find it on RuTracker by the ID 5325528 (don’t download it from there, read first).
The installations steps are the same as with Civilization VI. Unfortunately, the “installer” turned out to be a wretched crap made by some idiot, because, beside retarded design and logos, it uses a cyrillic encoding Windows-1251, which results in unreadable garbage in the UI (look at the buttons and text labels):
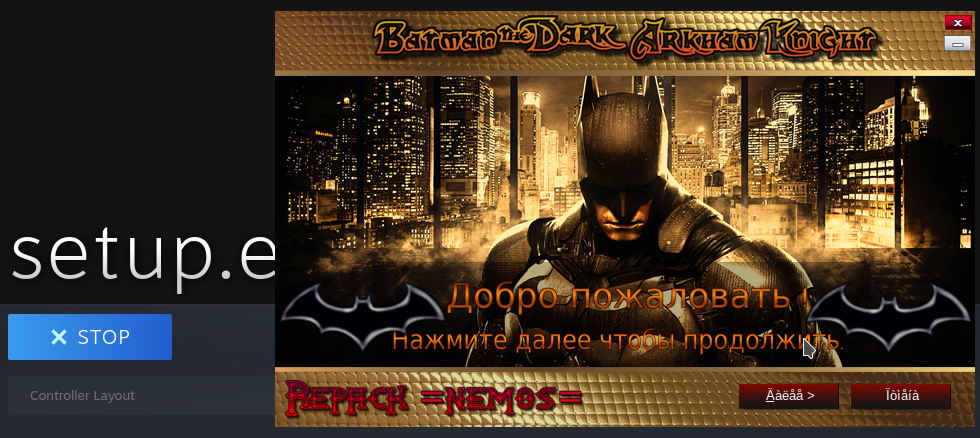
Fortunately, you can set the encoding via LANG environment variable in the launch options:
LANG=ru_RU.CP1251 %command%And then UI labels get normal russian letters which one can actually read/translate:


After the installation is done, I changed the TARGET from the installer .exe to the installed game .exe and tried to launch the game, but it didn’t launch and didn’t show any error dialogs.
Figuring out why a game does not launch
That’s how I got familiar with various techniques of figuring out why a game does not launch. None of these are specific to this particular game, so you can apply them to any other game or application.
Verify that the executable is not corrupted
If you have a native GNU/Linux game, and it crashes with Segmentation fault right on launch, then aside from many other reasons why, it could be that the executable got corrupted somehow. For example, once I downloaded a game from my seedbox using a FTP/SFTP client, which was set to transfer files without extension as ASCII, while those were actually binaries, and that resulted in a corrupted segfaulting executable.
As a symptom of a corrupted executable, ldd command will exit with a non-zero code (by the way, using ldd you can also check for potentially missing runtime dependencies), and file command will output something like missing section headers at 41318600. So if possible, compare the checksums of your downloaded file and the original one with sha1sum, and if they are different, then re-download the original file with a proper client.
Check the logs
The first thing you should check is the game’s own logs, which might be written to a file in the game installation folder or somewhere inside the prefix. I didn’t find any for this game, though.
Secondly, you can check Proton logs. They are disabled by default, so go to /home/deck/.local/share/Steam/steamapps/common/Proton - Experimental/ (or whichever version is used to run the game) and rename user_settings.sample.py to user_settings.py. Or set PROTON_LOG=1 environment variable in the game launch options (by the way, here are some more Proton options).
Having enabled the logs, you will get them written to /home/deck/steam-SOME-ID.log. Sadly, I didn’t find any useful output there relevant to my problem.
Redirect the output
Another thing one can try is to redirect the game output:
%command% > /tmp/batman.logIf the file will be empty, then it might be because errors are printed to stderr and not stdout, so you will need to redirect it too:
%command% > /tmp/batman.log 2>&1After that I got some information written to file:
$ less /tmp/batman.log

ERROR: ld.so: object '/home/deck/.local/share/Steam/ubuntu12_64/gameoverlayrenderer.so' from LD_PRELOAD cannot be preloaded (wrong ELF class: ELFCLASS64): ignored.
ERROR: ld.so: object '/home/deck/.local/share/Steam/ubuntu12_32/gameoverlayrenderer.so' from LD_PRELOAD cannot be preloaded (wrong ELF class: ELFCLASS32): ignored.
ERROR: ld.so: object '/home/deck/.local/share/Steam/ubuntu12_32/gameoverlayrenderer.so' from LD_PRELOAD cannot be preloaded (wrong ELF class: ELFCLASS32): ignored.
ERROR: ld.so: object '/home/deck/.local/share/Steam/ubuntu12_32/gameoverlayrenderer.so' from LD_PRELOAD cannot be preloaded (wrong ELF class: ELFCLASS32): ignored.
fsync: up and running.
wine: RLIMIT_NICE is <= 20, unable to use setpriority safely
I thought these are actual errors, so I started googling them. Found this thread where they recommend to add LD_PRELOAD="libpthread.so.0 libGL.so.1":
LD_PRELOAD="libpthread.so.0 libGL.so.1" %command% > /tmp/batman.log 2>&1But actually I noticed that just setting LD_PRELOAD to an empty string gives the same effect (if not a better one):
LD_PRELOAD="" %command% > /tmp/batman.log 2>&1That got rid of most of the errors, as the output got shorter:
fsync: up and running.
wine: RLIMIT_NICE is <= 20, unable to use setpriority safely
[S_API FAIL] SteamAPI_Init() failed; connect to global user failed.
But the game still wasn’t launching. Then just in case I checked the Civilization VI output:
ERROR: ld.so: object '/home/deck/.local/share/Steam/ubuntu12_64/gameoverlayrenderer.so' from LD_PRELOAD cannot be preloaded (wrong ELF class: ELFCLASS64): ignored.
ERROR: ld.so: object '/home/deck/.local/share/Steam/ubuntu12_32/gameoverlayrenderer.so' from LD_PRELOAD cannot be preloaded (wrong ELF class: ELFCLASS32): ignored.
ERROR: ld.so: object '/home/deck/.local/share/Steam/ubuntu12_32/gameoverlayrenderer.so' from LD_PRELOAD cannot be preloaded (wrong ELF class: ELFCLASS32): ignored.
ERROR: ld.so: object '/home/deck/.local/share/Steam/ubuntu12_32/gameoverlayrenderer.so' from LD_PRELOAD cannot be preloaded (wrong ELF class: ELFCLASS32): ignored.
fsync: up and running.
wine: RLIMIT_NICE is <= 20, unable to use setpriority safely
[S_API FAIL] SteamAPI_Init() failed; connect to global user failed.Fossilize INFO: Overriding serialization path: "/home/deck/.local/share/Steam/steamapps/shadercache/3357182463/fozpipelinesv6/steamapprun_pipeline_cache".
pid 40728 != 40727, skipping destruction (fork without exec?)
Same errors, but the game works fine. So apparently these are not actual errors, and there is probably no need to set LD_PRELOAD.
By that moment I was out of ideas where else I can find logs / error messages, so scientific approach came to an end, and it was time for shamanic rituals.
Try installing potentially missing runtimes and frameworks
It could be that the game/application is missing some runtime dependencies, and I did try to install DirectX, Visual C++ runtime and .NET Framework, having downloaded them from Microsoft’s website, and I tried the versions that were available around 2015 too (probably should’ve tried even older ones?), and I also tried installing PhysX, but none of those helped.
I tried using different Proton versions, and even installed Proton GE (speaking of which, there is no need to involve 3rd-party installers/helpers like ProtonUp-Qt, which you’ll often see being recommended), but that didn’t help either.
Try a different OpenGL driver
Not sure if this will ever help with anything, but if you are completely out of other options, you might try to switch OpenGL driver by setting MESA_LOADER_DRIVER_OVERRIDE environment variable. For example:
MESA_LOADER_DRIVER_OVERRIDE=radeonsi %command% > /tmp/batman.log 2>&1
or:
MESA_LOADER_DRIVER_OVERRIDE=zink %command% > /tmp/batman.log 2>&1
You might have just gotten a shitty release
And yet people are reporting that the game runs on Steam Deck, so the only remaining reason why mine doesn’t is that I’ve downloaded a crap of a version. Which wouldn’t be a big surprise, given its horrendous “installer”.
And only then I discovered that this game is actually available on GOG! I searched on RuTracker some more and found that version under the ID 5976829. That one installs and runs just fine, zero fucking about required.
Of course, now that I know that the game is available on GOG without Denuvo crap, I have no arguments against paying for it. And so if I’ll like it, I will certainly pay for it.
Heroes of Might and Magic 3
Soon after Steam Deck was first announced, some meme-channel published this video:
If video doesn't play in your browser, you can download it here.
I strongly suspect that a lot of people found this video especially funny because it is so true - who wouldn’t like to play HoMM 3 on a portable device no matter where you are.
And then after Steam Deck was released, this turned out to be no joke at all, as HoMM 3 runs on it even better than how it was shown on the video:
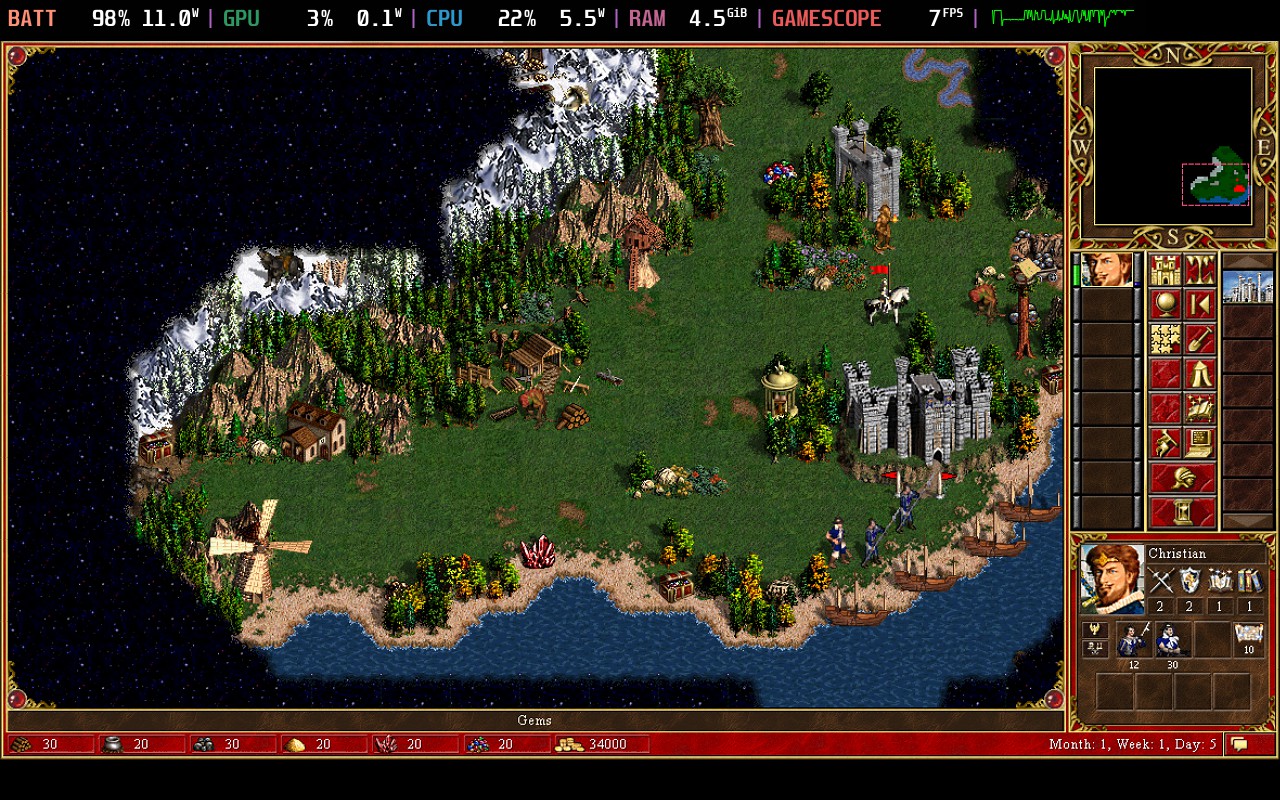
Steam Store has a version of HoMM 3, but it’s a cripple of a game comparing to a proper complete edition on GOG, which is the one I bought. I also installed the HD mod on top.
The steps are all the same as I described in Civilization VI section. One additional step is that after running the game installer I also ran the HD mod installer (within the same shortcut/prefix, of course) and only after that changed the TARGET to the game executable.
Here it is in my library:
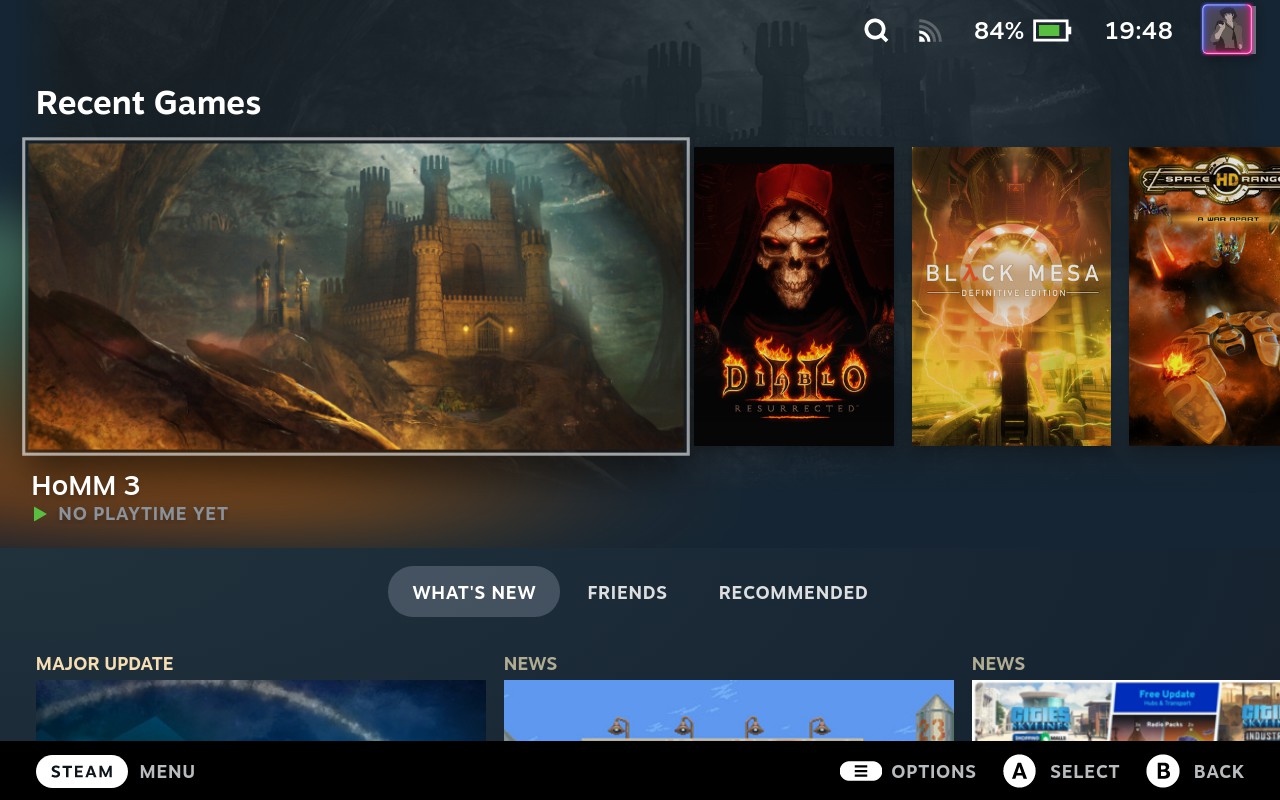
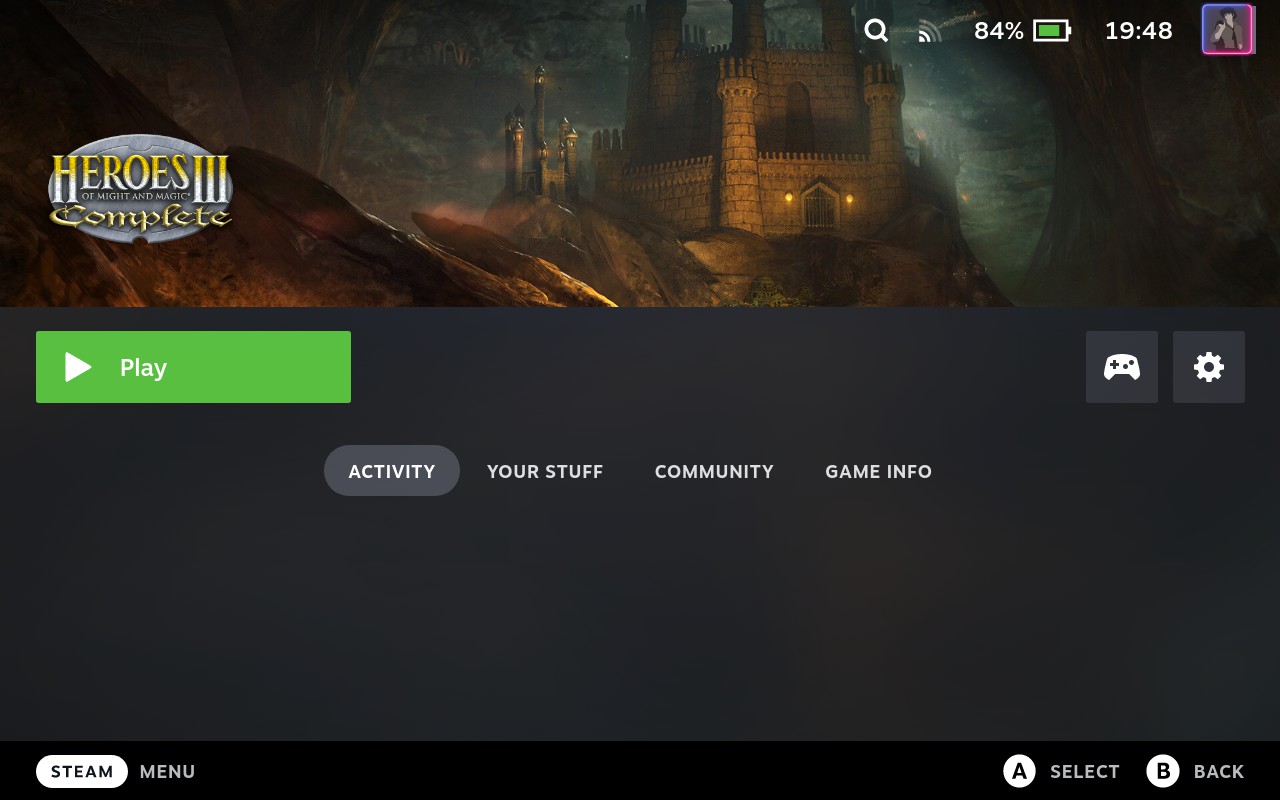
I didn’t find a better background on SteamGridDB and was too lazy to make my own.
Diablo II Resurrected
The next game in line was Diablo II Resurrected.
I wanted to get that one for a long time, and I would gladly pay the full price for it, but luckily I read the reviews before buying. As it turned out, you cannot play the game without internet, even if you want to play alone, not on Ladder, offline. That is an outrageous limitation. By the way, there is no local multiplayer either.
I also remembered all the retarted shit that Blizzard has been pulling over the past years with firing people, renaming characters in games, censoring nice-looking characters into ugly crocodiles (in some cases quite literally), blocking access for players from certain countries and so on. Thus, it is not soon when Blizzard will see any money from me.
Needless to say, I went to RuTracker and found the game there under the ID 6239713.
When you will be downloading it, make sure that you also download the dot-files, because some SFTP/FTPS clients might skip downloading these files (as it happened in my case):
.product.db- probably not needed, but just in case;.build.info- this one certainly is required, the game won’t launch without it.
This version of the game doesn’t require installation (why aren’t all the games are distributed like that) and does not need Battle.net launcher. It is ready to be added to Steam as usual and run right away. But there is one peculiarity: you need to import the Offline.reg registry file that disables the online stuff (sets Blizzard hosts to 0.0.0.0, by the looks of it).
One way to do that is to launch the RegEdit application and import the registry file there. For that you need to browse for regedit.exe in /home/deck/.local/share/Steam/steamapps/compatdata/THE-GAME-PREFIX-ID-HERE/pfx/drive_c/windows/ and set it as the TARGET executable in the Steam shortcut properties. Although once you do that, it will be changed to a common path inside the Proton folder, which also means that launching it like this will open the default registry and not the one set for the game in its prefix. So you also need to set STEAM_COMPAT_DATA_PATH in the launch options:
STEAM_COMPAT_DATA_PATH=/home/deck/.local/share/Steam/steamapps/compatdata/THE-GAME-PREFIX-ID-HERE/ %command%Be careful to set the path to /.../compatdata/THE-GAME-PREFIX-ID-HERE/ and not to /.../compatdata/THE-GAME-PREFIX-ID-HERE/pfx/ or any other.
Here’s how it looks:
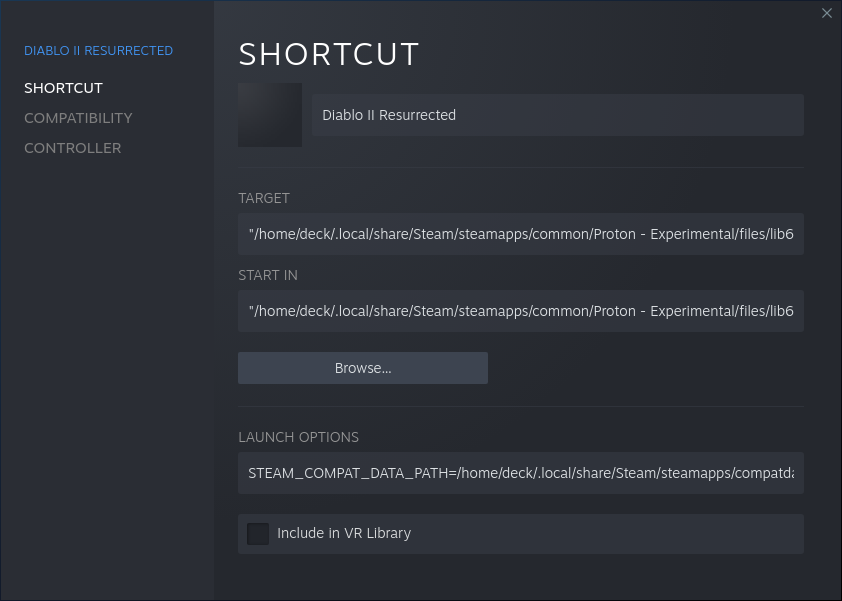
As I understand it, the STEAM_COMPAT_DATA_PATH is the Proton’s equivalent for WINEPREFIX.
Now you can launch it and import the registry file:
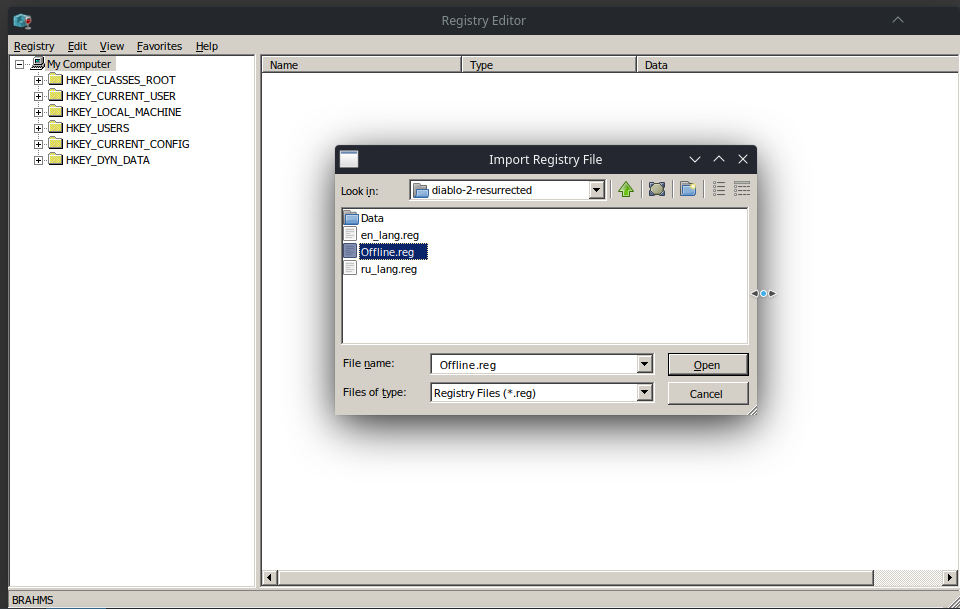
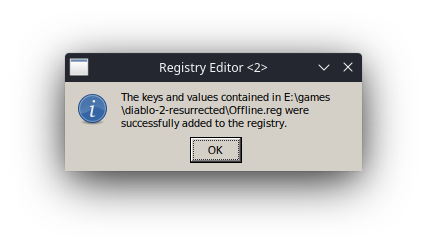
Doing so adds values from that registry file to /home/deck/.local/share/Steam/steamapps/compatdata/THE-GAME-PREFIX-ID-HERE/pfx/user.reg (and probably also something to /.../pfx/system.reg, because that file also got some changes, as it seems). And I imported the values from en_lang.reg file too, just in case.
It will probably also work if you just set the path to a *.reg in launch options instead of %command%. I suspect that based on the file extension you will get a RegEdit import prompt, and it will get imported into the game prefix registry, but I haven’t actually tested that.
Or one can probably just edit the prefix registry in /.../pfx/user.reg directly, for it’s merely a plain-text file.
Anyway, I have successfully imported the registry keys, but the game didn’t launch:
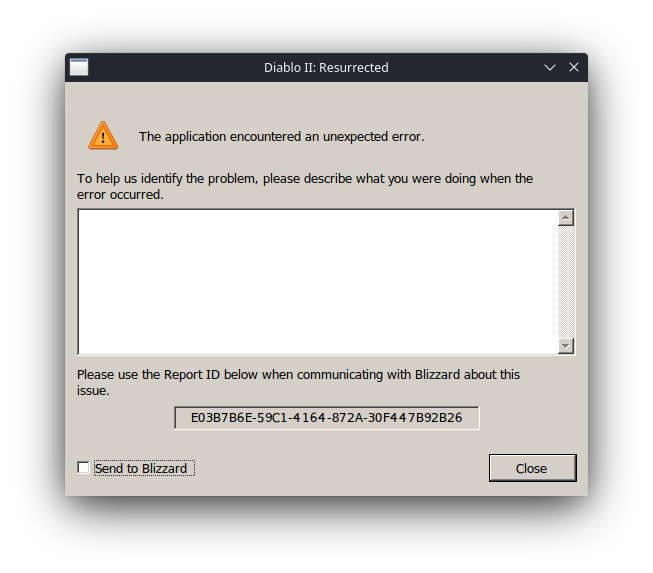
I tried redirecting stdout/stderr outputs to a file, like I did with Batman Arkham Knight, but there were no errors there. Fortunately, there is a log file inside the game folder - blz-log.txt - which is how I found out that my SFTP client did not download .build.info file:
3/5 15:01:17.041 [tact/4] [<>:0]: Unable to stat install path: 'e:/games/diablo-2-resurrected/.build.info'. Error (2): File not foundI’ve downloaded it, and then the game launched and ran fine.
There are some nice pictures on SteamGridDB to make the game look nice in your gallery:
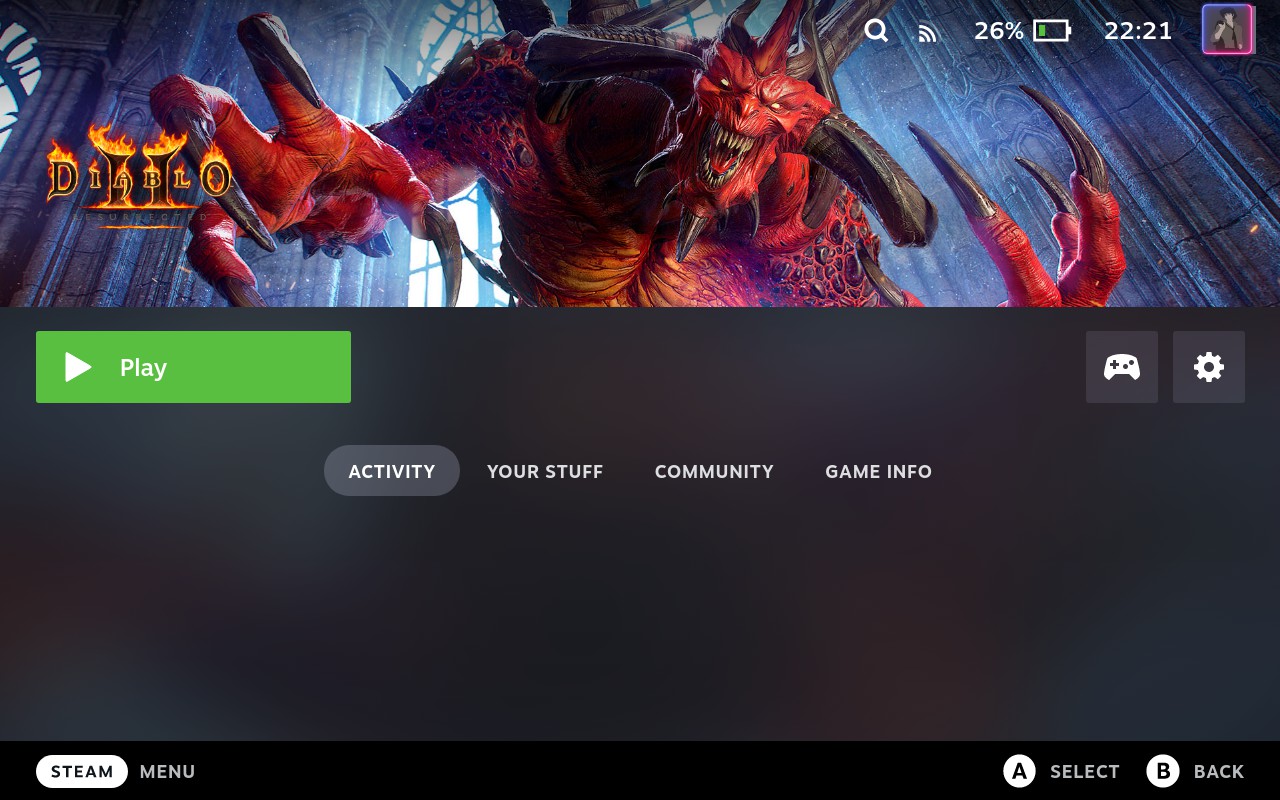
Another great news is that you can import your heroes from the original Diablo II. Although, despite what official documentation says, the actual path is C:\Users\YOUR-USERNAME\Documents\Diablo II Resurrected\Save, so the full path with prefix is /home/deck/.local/share/Steam/steamapps/compatdata/THE-GAME-PREFIX-ID-HERE/pfx/drive_c/users/steamuser/Documents/Diablo\ II\ Resurrected/Save/.
Since the game has never been on Steam, there are no community controller layouts for it, so I’ve created my own. It is used as an example in Steam Input section, and you can download it here.
Savegame path change after Proton update
I have Proton Experimental set for all my games: that way I always get the latest Proton without manually changing the version on the Compatibility tab. It was working fine until Proton 8. I launched the game, and suddenly it walked me through quick display settings tutorial again, like this was the very first time I launched it, and all my characters were gone.
I thought that when Proton changed from 7 to 8 behind the scenes in Proton Experimental, a new prefix was created for the game. So I set Proton 7 explicitly and launched the game again - this time all my characters were back (and settings too). Then I ran ls -ltr to find the new prefix, but there were no new prefixes.
What actually happened, as I found out, is that when run with Proton 7 the game uses one path to find the savegames (and settings):
.../compatdata/THE-GAME-PREFIX-ID-HERE/pfx/drive_c/users/steamuser/Documents/Diablo II Resurrected/Save/and when ran with Proton 8 the absolutely same game uses a different path within the same prefix:
.../compatdata/THE-GAME-PREFIX-ID-HERE/pfx/drive_c/users/steamuser/Saved Games/Diablo II Resurrected/That new path is actually where Blizzard’s documentation points to as well. But how come with Proton 7 this path is different? This is probably because the game sets this path based on an environment variable, and that variable has changed in Proton 8. That would also mean that other games might be affected by this too.
Anyway, to be able to use Proton Experimental (Proton 8, at the moment), the “fix” is to move the contents of .../steamuser/Documents/Diablo II Resurrected/Save/ to .../steamuser/Saved Games/Diablo II Resurrected/. Of course, if I would like to use Proton 7 again, I’d need to move these files back.
One last thing to mention here is that when I wanted to choose a different Proton version on Compatibility tab, there was no dropdown list with Proton version and the checkbox control was disabled. I switched to Desktop mode, and there it was enabled and dropdown list was present. But at some point later the same happened in Desktop mode too (no dropdown list and disabled checkbox control), so I needed to switch to Gaming mode, and there it was all good. Never had this issue before.
Other games
Once I got comfortable with the process of installing non-Steam games, there was no stopping me. The installation was trivial in each case, without any new problems or anything worth mentioning. Here are just some comments and other smaller notes.
Tekken 7 forces 3rd-party EULA and has a trillion of DLCs, entire collection of which brings the full price to the level of a space ship. So RuTracker it is, you can find it there by the ID 5955725 (another example of a great distribution, as there is no installation required). The game runs well, but eats the battery very fast:
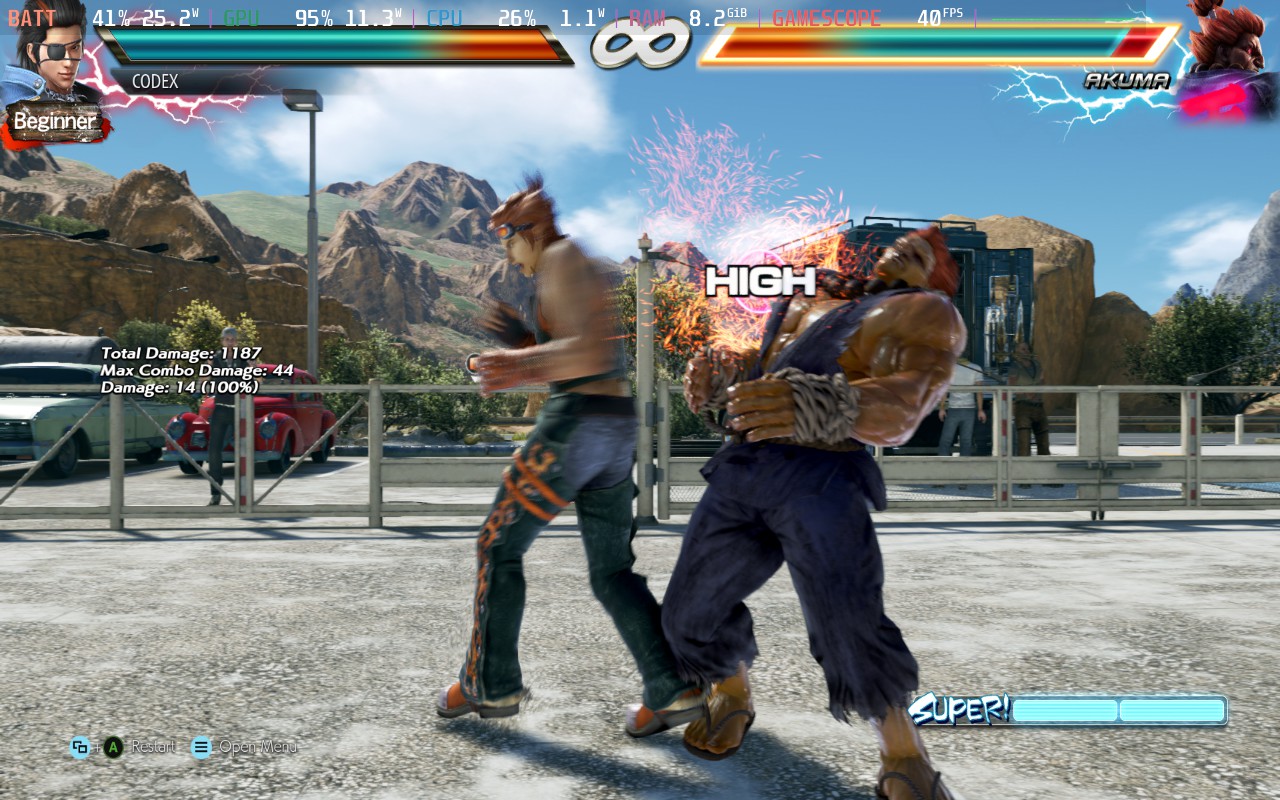
Mortal Kombat 11 also forces 3rd-party EULA, also has a lot of DLCs, plus some of the game content is only available online, so RuTracker ID is 6194626 (once again, no installer). It seems to be considerably better optimized than Tekken 7, as it is draws much less power:

Even without 40 FPS limit it renders at 60 FPS with 22 W consumption, while Tekken devours 25 W already on 40 FPS.
What’s interesting though is that I suddenly discovered that I also have a library entry for the Steam Store version of the game:
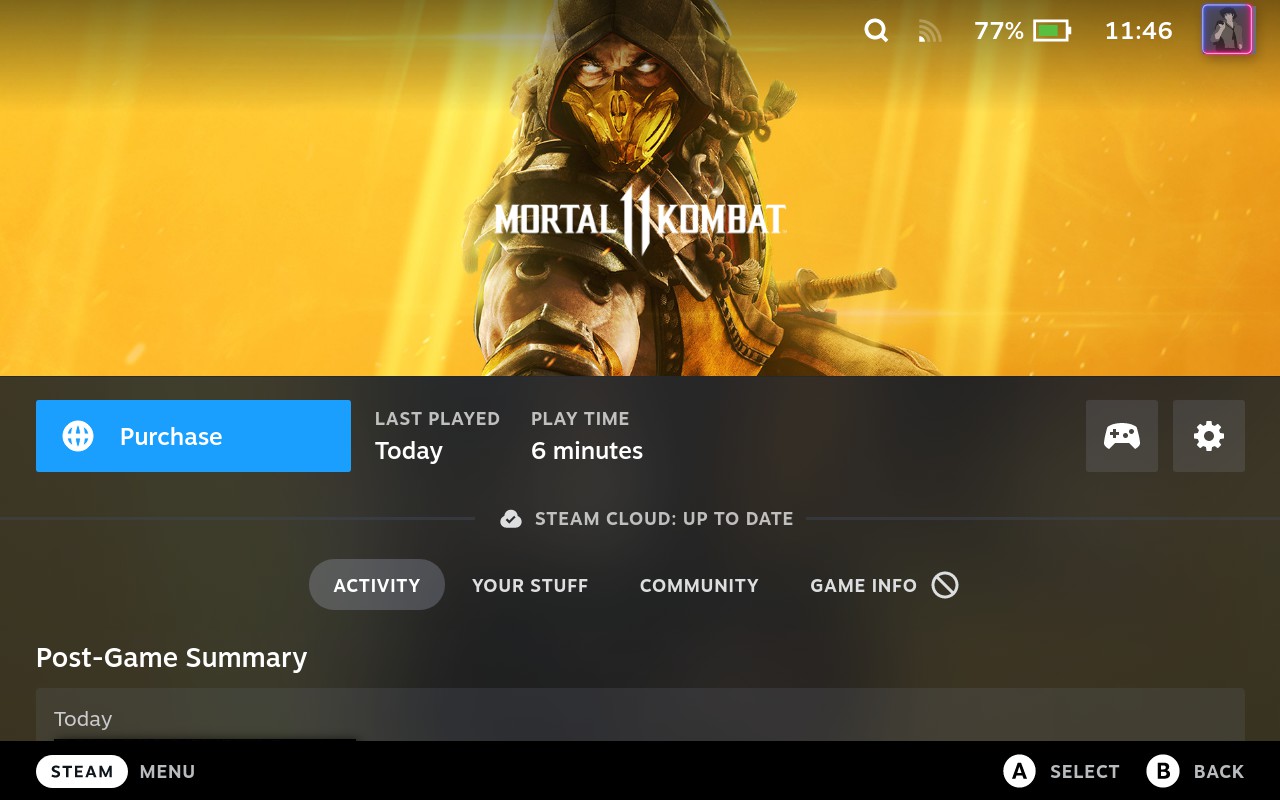
It even counts my playtime and shows screenshots in the post-game summary. Of course, I still need to launch it from a non-Steam shortcut that I created. It also got the “official” Steam App ID assigned, as I can found the screenshots files and other stuff under the ID 976310. Did this happen because of the shortcut name/title match with the game title in store? If so, then apparently one can just rename one’s non-Steam games to their “official” Steam App IDs and still get some of the Steam benefits even for pirated games. And if SteamAppId environment variable was working as it should(?), then the whole thing would be even easier.
One last game to mention is Red Dead Redemption 2. It forces a launcher, requires you to create a fucking Rockstar account, requires accepting 3rd-party EULA and worst of all it requires you to be connected to the internet even for an offline story playthrough. So fuck Rockstar, the RuTracker ID is 5958348 (yet again, no installer). Runs without problems and with a good performance too (and without bloody launcher and completely offline):
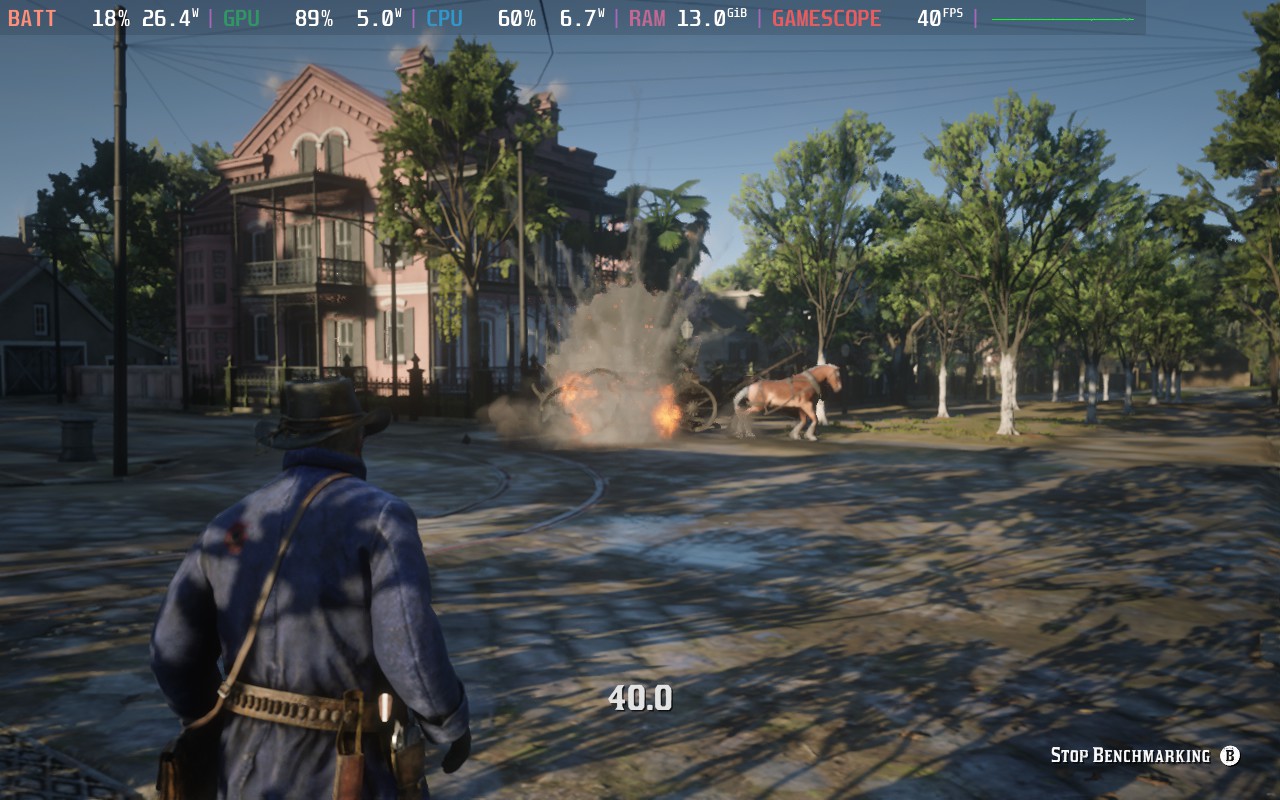
I tried several other (Windows-only) games, and they all install and run with no problems whatsoever, absolutely nothing worth mentioning. Long live Wine, Proton, Valve and all the contributors.
GZDoom
This is not really a game, more like an “engine” for running DooM-like games - so-called WAD files/packages.
The easiest way to get GZDoom is probably to install it via Discover. When it is installed, you can add it to Steam as a non-Steam game, same as before, just select GZDoom from the gallery, no need to manually browse for its executable.
Then you’d need to get the actual games, which are WAD files. Either purchase them, if there is still a way to do that, or get them “elsewhere”, for instance doom wad site:archive.org Google query will most likely give you something.
Once you have the WAD(s), place them to /home/deck/.var/app/org.zdoom.GZDoom/.config/gzdoom/ folder - this is where they will get autodetected on GZDoom launch. Be aware that there are WADs which are full games, and there are WADs which are modifications or extensions to full games, so you only have a modification/extension WAD but don’t have full game WAD, then you won’t be able to launch it.
If you have just one game in that folder, then that’s the one that will launch, and if you have several games, then GZDoom will show you a launcher with a choice. To skip the launcher and start a specific game, the command line would be:
$ /usr/bin/flatpak run --branch=stable --arch=x86_64 \
    --command=gzdoom.sh org.zdoom.GZDoom \
    -iwad doom.wad \
    -file sigil-i-1.21.wad
Here you can also see that I’m launching an extension (-file) for a full game (-iwad).
To do that via Steam you’ll need to modify GZDoom launch options there. The /usr/bin/flatpak will already be in place, and most of the launch options will also be set, so you’ll only need to add -iwad doom.wad -file sigil-i-1.21.wad, like so:
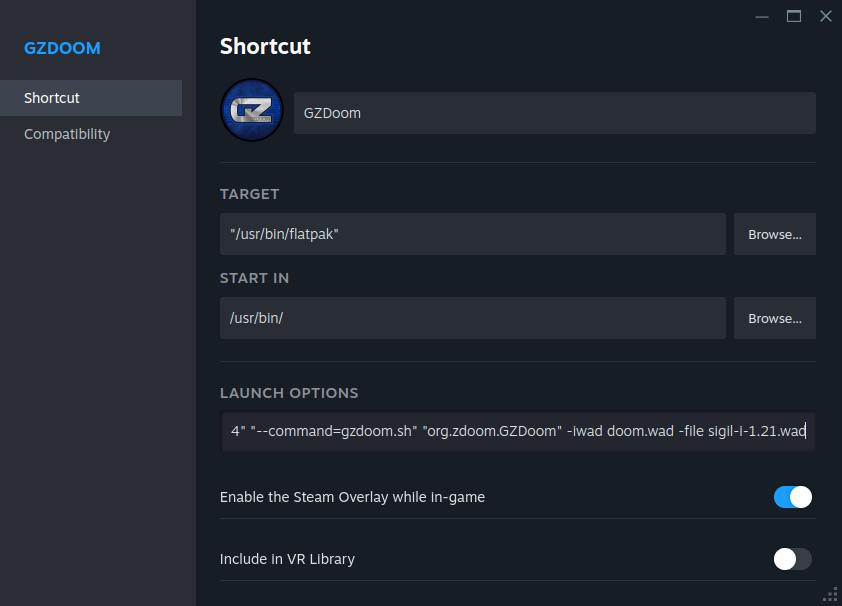
What’s a bit inconvenient is that if you’d like to play a different game via GZDoom, you’ll need to modify the launch options, as you can’t add more than one gallery item (you’ll see that GZDoom is no longer in that list, as it has already been added). You can, however, create a custom Bash script for every game and add those scripts as non-Steam games instead of adding GZDoom itself.
And of course, here’s my controller layout.
Cannot enter text in the input fields
There seems to be something wrong with the keyboard input in text input fields, such as when you need to enter the name of the savegame: it just doesn’t accept anything from the Steam’s on-screen virtual keyboard. Even if you have letters bound to the physical device buttons, pressing them won’t type anything in the text input field. And this is only about typing text when input fields have the focus, as navigating the menu and actually playing the game works fine.
The problem is known, and here are some links to the discussions:
- thread on the official forum, where they basically say that without them having a Steam Deck this problem cannot be fixed, which is understandable, as it’s hard to debug a problem without an actual device;
- question on Reddit, which also lists some other problems;
- the issue with closing the game I can reproduce too, although there is no need to restart, just wait for 10-20 seconds;
- isssue on GitHub, which is mainly about other games, but it still seems relevant, and looks like the actual problem is with SDL, so it might be resolved once GZDoom gets a newer SDL version.
Meanwhile, according to several comments from different places, one workaround is to get a Windows build of GZDoom and run it through Proton instead of running a native Linux build. I was just about to try that when I noticed that GZDoom has its own onscreen keyboard! You just need to mouse click (joystick/trackpad and trigger) near the bottom of the screen, and it will show up:
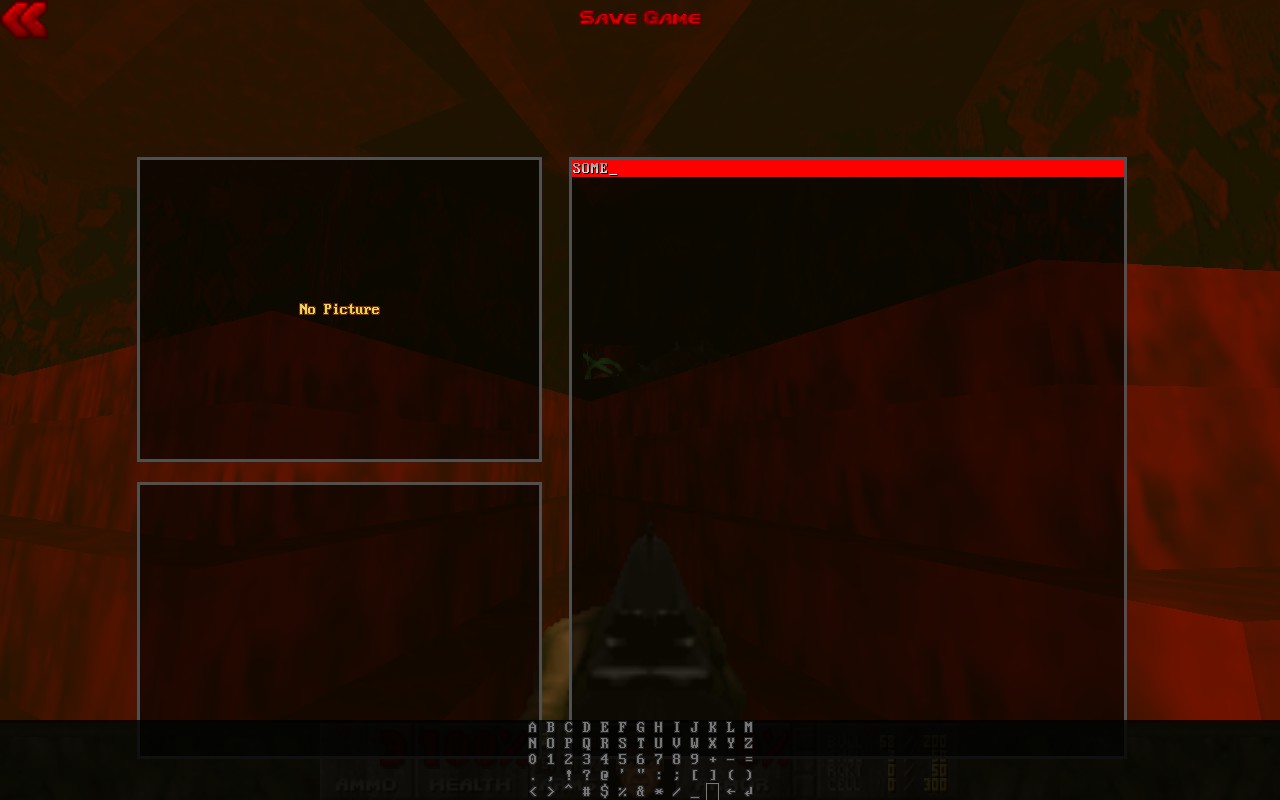
To type with it just click on the letters/symbols and in the end click on the Enter/Return symbol.
simGangster
There was a thread on Steam forums about an old game simGangster. The problem with this one is that it isn’t really a game but a Windows Forms (or MFC?) application (created with Visual Basic, according to Detect It Easy?), and it spawns several windows/modals, which works fine in Desktop mode, but it does not work all that fine in Gaming mode, as after some initial dialog windows and a splash loading screen it just “goes to black”.
The game is running though, because you can hear the intro music playing. Moreover, if you try to record the game, Steam will miraculously capture the game/application content:
If video doesn't play in your browser, you can download it here.
Due to the fact that it shows fine in Desktop mode (and that Steam is capable of capturing the application window on recording), I am guessing that something is wrong with how Gamescope handles those numerous windows/modals of the game. Having googled for a while, I got to this issue, which contained a workaround. Of course, this game has nothing to do with Flatpak, but the problem description looked very similar.
In short, what happens is that the main game/application window loses focus (probably because of those other windows/modals) and the Gamescope windows/layers order gets screwed up, resulting in that black screen being “on top” of the game. From what I understood, this (only?) happens with non-Steam games, as sometimes their child windows do not get the game ID assigned to them, otherwise I reckon this layers ordering would have been sorted out correctly.
To verify that this indeed is the case, you can run the following command (having launched the game and connected to Steam Deck via SSH):
$ xprop -d :0 -root | grep GAMESCOPECTRL_BASELAYER_APPID | cut -d "=" -f 2
 413091, 769, 2179609064
here:
413091- I don’t know what it is, but this layer is always first, so this is correct;769- this is Steam’s(?) “black screen”, and it is not correct, because it is now on top of the game window;2179609064- this is our game/application window (and in case of a non-Steam game that ID is a bit non-trivial to find).
In the original comment there was also a 4th value, but I only got these 3, and I guess only the game ID is what matters anyway. So in my case the correct order of layers/windows should be 413091, 2179609064, 769, which can be set with the following command:
$ xprop -d :0 -root -f GAMESCOPECTRL_BASELAYER_APPID 32co -set GAMESCOPECTRL_BASELAYER_APPID "413091, 2179609064, 769"
Right after I executed that command, the game window appeared on the screen, hallelujah. But not for long, because as it turned out this was not the main game window yet, and when I clicked on the Start button, the game switched to the actual game window, which caused the game to “go black” again, as the layers/windows order became 413091, 769, 2179609064 again. But then I simply executed the same reordering command again and got the game window visible once more, and after that there were no new windows, so the layers/windows order remained correct.
So yes, this is a working workaround, but obviously it is far from being convenient, as one would need to execute that xprop command every time the game is started (and also every time it messes up the layers/windows order during the gameplay). Moreover, I am not sure how would that work if one would try to do this from Konsole running in parallel with the game, as then Konsole’s own window would also get added into the mix. And keeping one more device around just to execute SSH commands to play a game is not a very enjoyable experience.
I imagine, this can be automated with some “daemon” script that would query the layers/windows order (every second?) and auto-correct it if needed, but then there comes the hassle of starting that daemon together with the game and properly shutting it down when the game exits, which is something I am not looking forward to implementing at the moment. Hopefully, the original Gamescope issue gets resolved eventually, so then there would be no need for any of this altogether.
Emulators
That’s something I myself have almost zero interest in, but for many people this is a very big deal, so I have to at least mention it.
So, Steam Deck seems to be a very good fit for running emulators of various gaming consoles (including Nintendo Switch, hehe). It has more than enough computing power for it, controls ergonomics are simply the best, and the installation procedure can be as simple as downloading an emulator from Discover catalog.
Here’s a photo of someone’s collection:
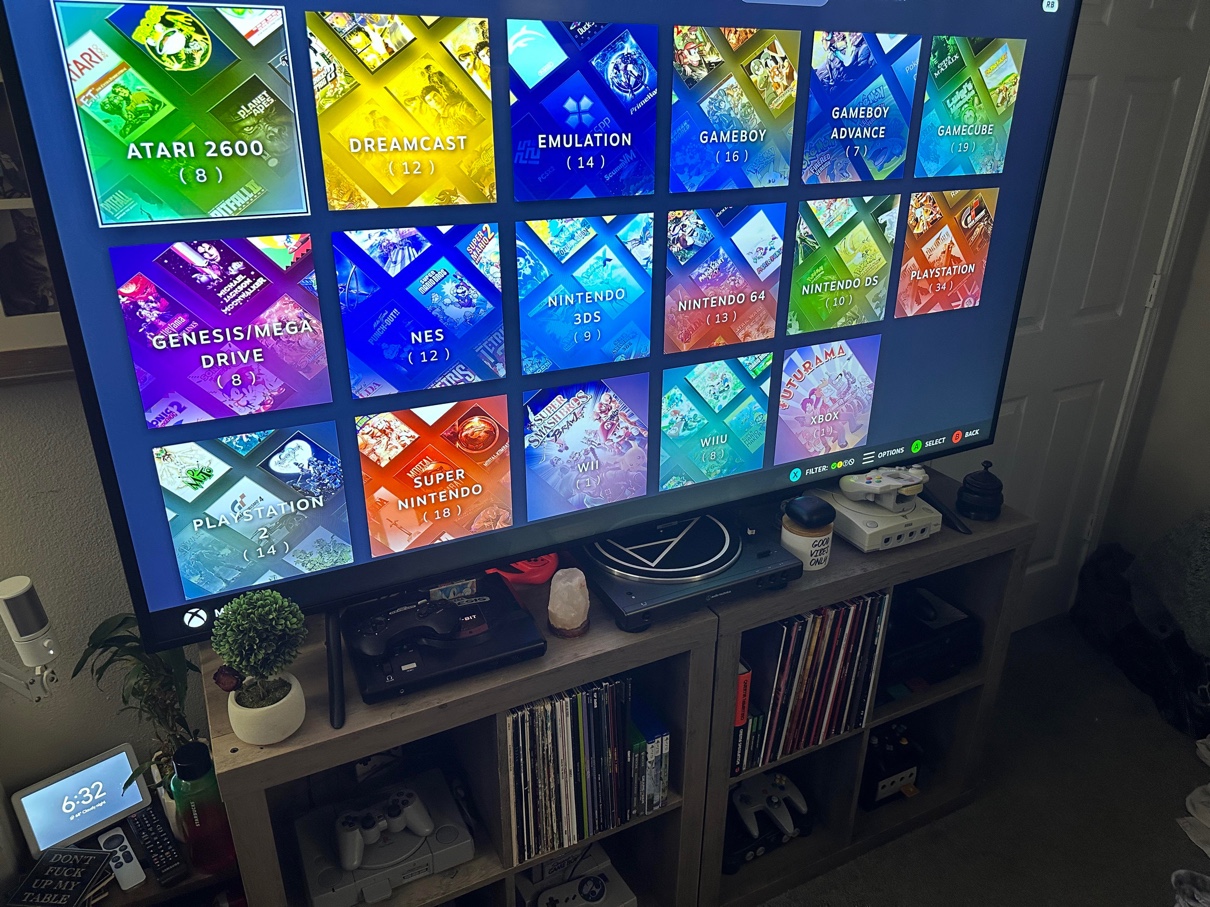
Quite impressive.
Steam Deck specific settings in games
Steam sets a special environment variable when running games (at least, that seems to be the case for all the games from Steam Store), which is SteamDeck=1. And game developers can rely on that variable to set appropriate tailored graphics/performance settings for their games out of the box.
In theory, this is rather convenient for both parties: developers can benchmark their game for running on a very specific target device and tune the game settings for it, and then users can just start playing the game without spending some time in settings first. In practice, however, sometimes developers may set way too pessimistic performance settings, meaning that the game will be underutilizing Steam Deck hardware, and you won’t see all the beauty it can really show.
For example, I got interested in the game Deadzone: Rogue, and to try it out I first installed it as a non-Steam game from “alternative sources”. I played it for a couple of weeks and decided that it is (totally) worth to be purchased, so I bought it in Steam Store. And when I launched the Steam Store version, I immediately noticed that the picture quality was kind of shitty - everything was somewhat blurry and in general it looked definitely worse than what I had in “non-Steam” version.
Naturally, I went to the game settings and there I was very surprised to see that some of the settings were grayed-out, so I couldn’t change anything really important, and also all the fine-tunning picture quality settings were gone:
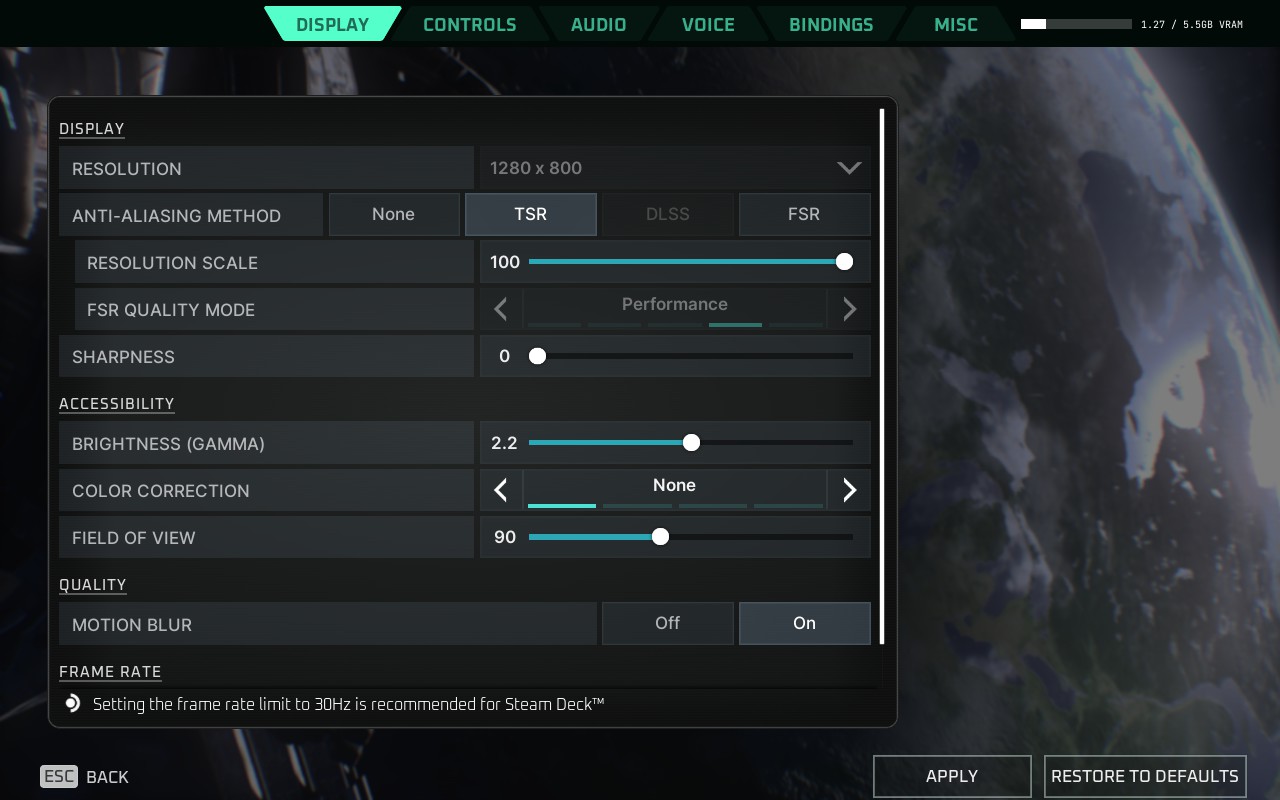
And that is when I learned about that SteamDeck environment variable. So yes, when it is set, aside from game settings being pre-set to a specific Steam Deck profile, you can also expect some of the settings being completely gone or grayed-out and disabled.
To break free from this forced “optimization”, you can modify the game launch options and set the variable value to 0:
SteamDeck=0 %command%
Having done that, I got the proper game settings back:

Problems
Steam Deck surely has problems, because who doesn’t. Almost all of those that I saw myself were software-related (so they can be fixed in later updates), and none of them were serious enough.
GUI issues
With the GUI being web-based, it’s only natural to expect various issues here and there.
For example, here the price label overlaps the country:
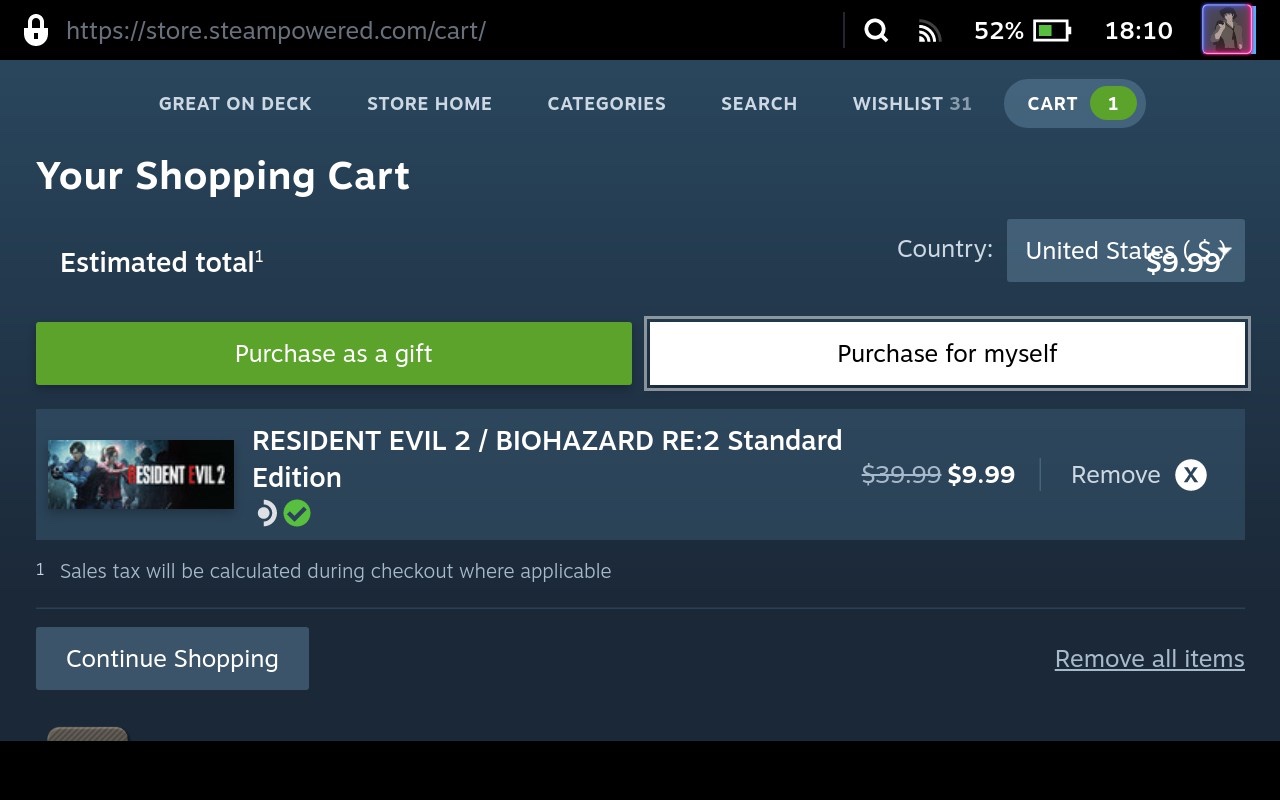
Or here the Friends tab has some problems:

Here’s another error, which I think I got by trying to click on a friend avatar/profile:

Seemingly related to that, here someone’s video about a Remote Play Together issue:
If video doesn't play in your browser, you can download it here.
The Media gallery, where you can view your screenshots, becomes very slow/unresponsive as you scroll it. It slows down and never keeps up, until you exit it and open again. Some really heavy computations are required to scroll a list of pictures, eh.
And there are other minor issues like that.
Crash on keyboard shortcut
Pressing Ctrl + C keyboard combination can crash the Gamescope:
If video doesn't play in your browser, you can download it here.
In fact, this happens if you invoke this combination anywhere, it doesn’t have to be a focused launch options input field or any other input field, it happens even on the Home screen.
However, after it crashes and boots back, pressing this combination won’t cause it to crash anymore:
If video doesn't play in your browser, you can download it here.
…untill you switch to Desktop and back. Then it will happen again.
If you are curious about the keyboard on these videos, it’s the Microsoft Wireless Universal Foldable Keyboard. There will be a section about portable keyboards in the next article.
Pin-lock screen doesn’t appear immediately
The pin-lock screen does not show up immediately after waking up or booting. You have some moments to press/click on stuff before the screen is blocked by the pin prompt.
It is not a very serious issue, because the “window of opportunity” is rather short, but still, it’s not a proper lock-screen then, is it. Plus one might have some a certain type of content being open, which one might not want others to be able to see, but they will be able to, although for a short period of time. Moreover, the sounds from that kind of content will be still heard behind the pin-locking screen, which lowers its usefulness even further.
SD card formatting
Regularly people are posting about their problems with formatting SD cards on Steam Deck. Sometimes, as owners claim, cards get “bricked” and are no longer recognized on any other device/OS.
I mean, I believe that SD card can stop working, but I don’t know how much Steam Deck’s fault is to that. It could be a faulty/fake SD card to begin with, especially looking at how people are hunting for 9000 TB cards on AliExpress for the price of 1.99 USD per kilogram.
With that being said, Valve did ship one or two SteamOS updates that had some fixes exactly related to SD cards formatting.
And I personally have witnessed one issue, although nothing got bricked. When I inserted my brand-new-just-out-of-the-box SD card into my brand-new-just-out-of-the-box Steam Deck and tried to format it in Gaming mode, I got this error:
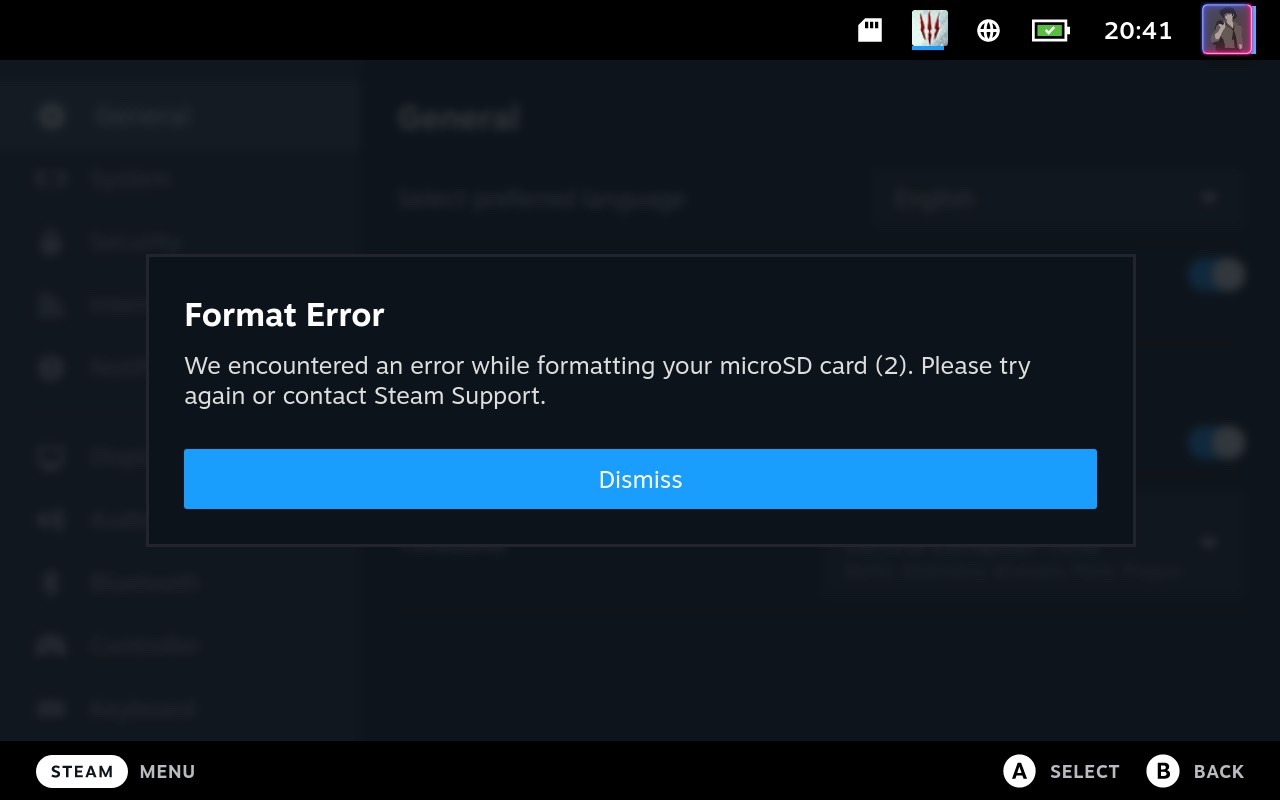
I tried several times, but result was the same. I then switched to Desktop mode and tried formatting it in KDE Partition Manager, but that failed too: couldn’t re-partition, couldn’t do anything. So I got really worried, and was about to try on a different computer, but just in case I rebooted the system and tried again in Gaming mode, and this time it suddenly succeeded, and the card has been working with no issues ever since.
If you do get your SD card messed up, it wouldn’t hurt to try to remove all the partitions, create a new one and try to format the card again. Also I often saw people suggesting to try formatting it with this tool, which might bring it back to life even though every other software failed to recognize it before.
Moving a game to/from SD card
Losing savegames
At some point I moved DooM 3 game to SD card (on Storage tab in Gaming mode), and when I launched it I saw that my savegames were gone. Turns out, due to a bug or something, the moved games can sometimes still expect their prefixes to be on system disk, even though everything (both the game files and its prefix) has been moved to SD card.
It is probably a matter of changing just one line in some of the Steam configs for the game, but I haven’t found which one exactly, and so to resolve this problem I had to move the savegames from prefix folder on SD card to prefix folder on system disk. So I manually moved /run/media/mmcblk0p1/steamapps/compatdata/208200/pfx/drive_c/users/steamuser/Saved Games/id Software/DOOM 3 BFG/base to /home/deck/.local/share/Steam/steamapps/compatdata/208200/pfx/drive_c/users/steamuser/Saved Games/id Software/DOOM 3 BFG/base.
I saw people advising to make a symlink for prefix path instead, but some games do use files from prefixes stored on SD cards. Also, I read somewhere about other negative consequences of symlinking prefixes, but I don’t remember the details.
Content file locked
Sometimes when moving a game to/from SD card in Gaming mode you might get an error saying that “content file locked”.
I got this problem when I first moved a game (GTA IV) from system disk to SD card and then some weeks later I wanted to play it but discovered that Rockstar launcher (motherfucking piece of shit, I would never buy this game if I knew about it) no longer has my Rockstar (let this awful crap burn in hell) account saved, from which I also concluded that the savegames are gone as well. So I figured it’s the same issue as it was with DooM. However, this time instead of moving just the prefix stuff I decided to move the entire game back to system disk, because by then I had more space there.
But the moving operation failed with this “content file locked” error, and I got curious, how does one move a game manually then, as it should be a trivial file moving operation. And indeed it is, but you need to know what exactly is to be moved. Here are the steps for my case of moving GTA IV (Steam App ID 12210) from SD card to system disk:
- Go to Desktop mode and exit Steam (you can’t exit Steam in Gaming mode). This step might not be actually required;
- Using any file manager or just bare
mvmove/run/media/mmcblk0p1/steamapps/common/Grand Theft Auto IVto~/.local/share/Steam/steamapps/common/Grand Theft Auto IV; - Move
/run/media/mmcblk0p1/steamapps/compatdata/12210to~/.local/share/Steam/steamapps/compatdata/12210. If there are some files in that folder already, then probably those are what caused the “content file locked” error in the first place, so remove them (but first back them up somewhere just in case) and then move the folder; - Finally, move
/run/media/mmcblk0p1/steamapps/appmanifest_12210.acfto~/.local/share/Steam/steamapps/appmanifest_12210.acf; - Start (restart, if you haven’t exited it) Steam.
These are probably the same steps that Steam itself performs when you execute this operation in Gaming mode.
On-screen keyboard issues
While I haven’t experienced any problems with on-screen keyboard in Gaming mode, it does have some problems in Desktop mode.
One problem is that sometimes it doesn’t react to trackpads input. I don’t remember if it didn’t react to other input methods too, I only remember the trackpads and that at least touchscreen input still worked. First time it happened the fix was to switch to Gaming mode, change the keyboard skin to a different one and back, then switch back to Desktop mode, and then it was working. But when this happenned again at some point later, only rebooting the device helped.
Another problem I got is that from time to time it starts to show up on me focusing an input field, which shouldn’t happen in Desktop mode. And not just that, it is showing/hiding several times a second, preventing me from doing anything. Fortunately, it calms down after a couple of seconds of this crazy blinking, so I can finally enter some text.
The same behaviour (popping-up on focusing an input field) can also happen in games, and then this would be an overlook by game developers, but here’s a post about this happening in Dota (made by the very same Valve), which makes it rather hilarious.
Content servers unreachable
Sometimes it can fail to download games or other content from Steam servers:
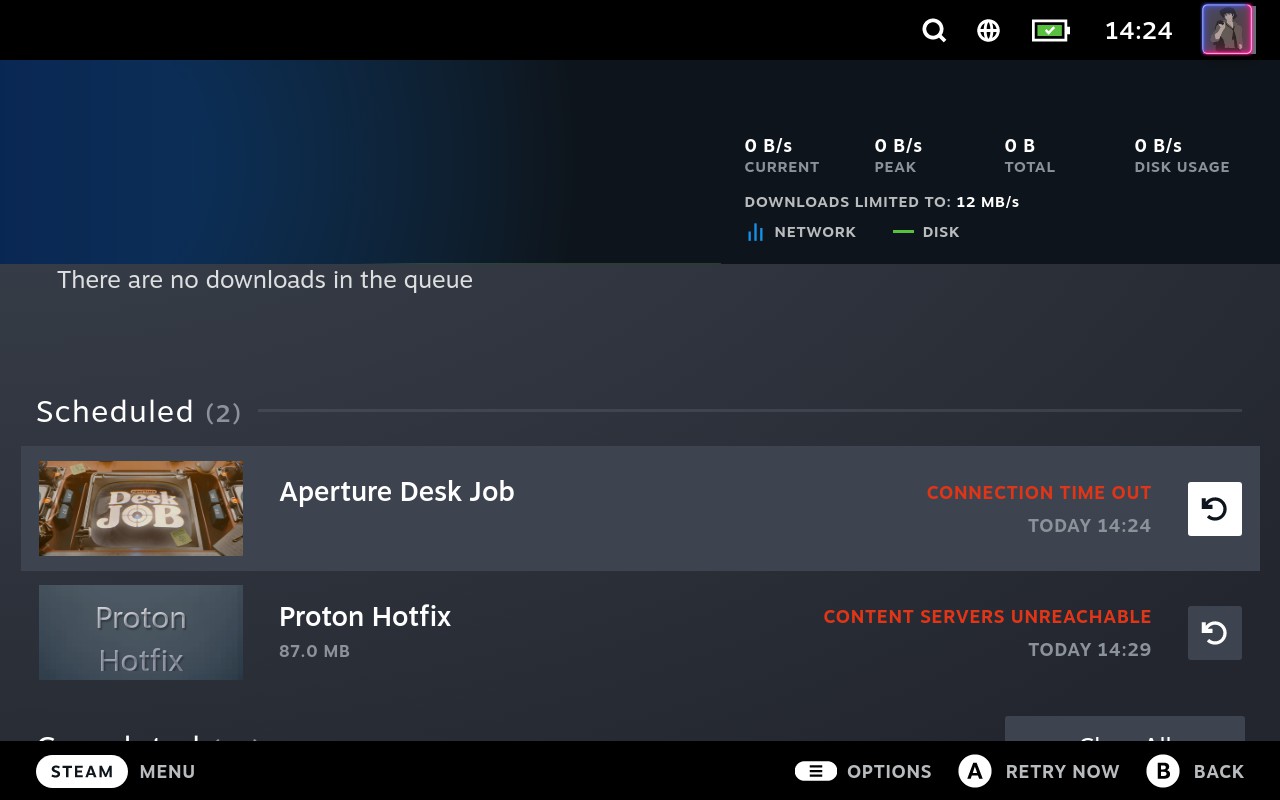
But I do have internet connection at that moment, as I can browse websites, ping servers, but games downloads in Steam UI just fail to start. Tried wired connection, tried Wi-Fi connection, tried rebooting - same result. Although, switching to a different network / ISP (if you have more than one, for example mobile internet shared from your phone) seemed to help once or twice.
Anyway, after some time the issue goes away on its own and games start downloading. Sure, it could be related to Steam servers maintenance, but I’ve been having this problem on different days of the week, not only on Tuesdays (when Steam has its scheduled maintenance, apparently).
One thing that does help is to switch to Desktop mode, open Steam client, open Downloads settings and clear cache:
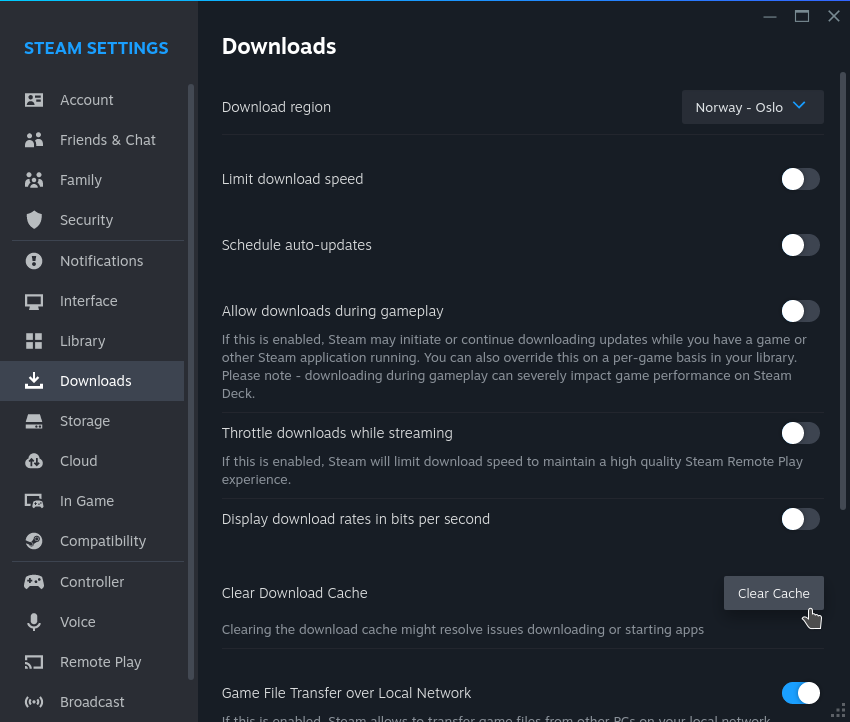
It will restart Steam, and then downloads should start working right away. If not, then another option might be to change the Download region on the same page in settings.
Either way, none of these workaround should be required, so this is definitely a bug.
Charging issues
Slow charger
One time I connected Steam Deck to a charger and suddenly got this warning about “slow charger”:
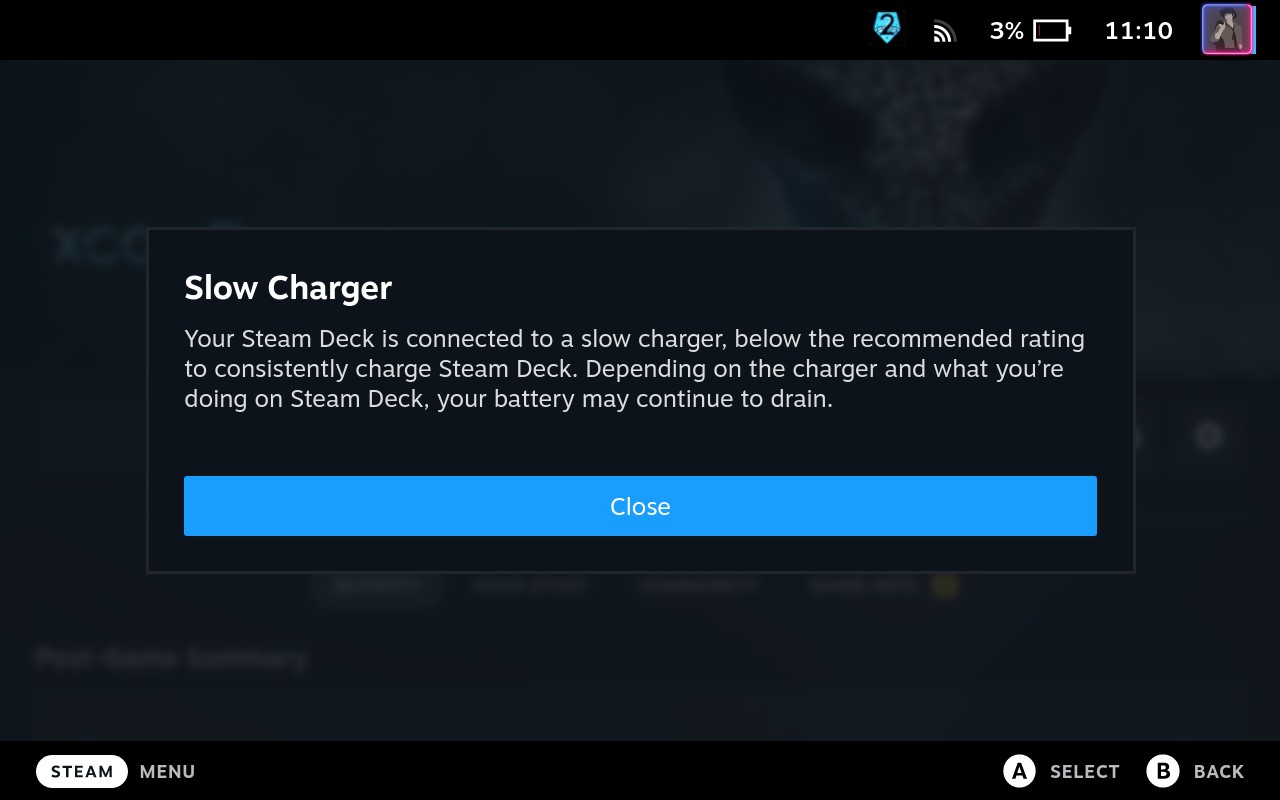
I do not remember for sure whether it was an official charger, Steam Dock, or some other charger, but it was most certainly a charger that could output enough power, as I simply don’t have “weak” chargers in the house. Either way, the issue went away after I connected it to my powerbank for a minute and then connecting back to that charger which it complained about being “slow”. This time it didn’t complain and started charging as usual.
Doesn’t start charging
Once I plugged it in on Steam Dock to charge, and when I returned back an hour later to pick it up and play, I saw that it hasn’t charged for a single percent.
I tried re-plugging it, but charging still didn’t start, and the charging indicator didn’t turn on either. I rebooted the device and replugged again, but it still was not charging, so I got scared quite a bit.
The next thing I was going to try is to put it into a battery storage mode for some time, but then I connected it to powerbank instead, and then it started charging. I waited for a couple of minutes and re-plugged it back to the dock, and this time it started charging there too.
Don’t know what it was and what kind of reviving sorcery does my magic powerbank possess.
Low-powered 200/400 MHz mode
Apparently, under certain conditions Steam Deck can go into a kind of “low-powered” mode by limitting the performance of CPU/GPU to 200/400 MHz respectively. Here’s a post about that with more links to several other posts on the matter.
Fortunately, I did not get this problem, but it does sound like a very serious one. There (allegedly) was a response from Valve in one of the user support tickets where they said that it is because of a “bad thermal module”, so the problem seems to be of hardware origin, which means that the only solution would be to send the device back to Valve and get a replacement (that would suck total ass in my case, as I live outside of the officially supported regions).
Things you can do to cause more problems
A list of things I’ve seen people doing with their Steam Decks, which you probably shouldn’t do with yours.
Software-wise:
- install Decky Loader. As if default web-GUI wasn’t fragile enough, why not throw-in some more web-based stuff into it and wait until it all break on the next update. Installing even more 3rd/4th-party plugins of unknown origin sounds like a grand idea too;
- use CryoUtilities or some other awesome set of optimization tweaks to get that 1% of performance boost in expense of laying a foundation for potential problems that will backfire at some point later. Certainly, some random blokes on the internet know better than Valve and OS maintainers how to optimize the system environment;
- also, don’t forget to report the problems you get because of this to Valve support, they’ll be thrilled to guess what could have caused those;
- install a launcher like Heroic, Lutris or some other. Yo dawg, I heard you like launchers, so I put a launcher inside your launcher, so you could launch more launchers while launching a launcher. Even though they don’t bring anything actually useful on top of what Steam already provides out of the box. But who wouldn’t want to have more web-browsers in their system and to convolute the process of launching games even more.
And regarding the device itself:
- replacing default SSD with a different one of higher capacity I’ve already talked about, but don’t let it stop you;
- installing a fancy colorful backplate will highlight how unique you are and as a bonus might also yet again hurt the thermals of the device;
- speaking about thermals, why not follow a brilliant advice from a random expert on the internet and try to optimize the airflow one way or another. Valve engineers for sure must have missed something;
- you can also try to use some magnet-based accessories - the device fan will be a big fan of that idea.
Finally, you can apply skins/stickers on the device body - that will immediately make your Steam Deck look like a cheap whore from the corner. Adding a protection screen will complete the image of a proud owner from rural suburbs, who probably also keeps his TV remote in a plastic bag. While any of this is unlikely to cause an actual technical problem (unless you’ll be smart enough to put a sticker on top of vent-holes), doing stuff like this probably indicates that you might have certain problems in other departments.
Steam Dock
Steam Deck has just one port - USB-C - and that is absolutely not enough for anything aside from charging, so you will likely want to get a USB hub/dock. Any would work, and Valve itself says so, but there is also an official dock - Steam Dock.
I saw some saying that it’s a luxury addon or that it is even useless, but I do not think so. It is rather expensive (whooping 89 USD (plus tax)), that much is true, but first of all it includes yet another (the same as the one that comes included with Steam Deck) charger capable of outputting 45 W (check the prices on those), and secondly aside from other ports it has HDMI and Display-Port, while many other docking hubs only have HDMI.
It looks rather simple and has no fixed position for the Steam Deck (and I am not sure if I want it to). The cable going over to top is a bit weird but might be convenient at times when you want to pick it up without disconnecting from charger.
Here are some photos:
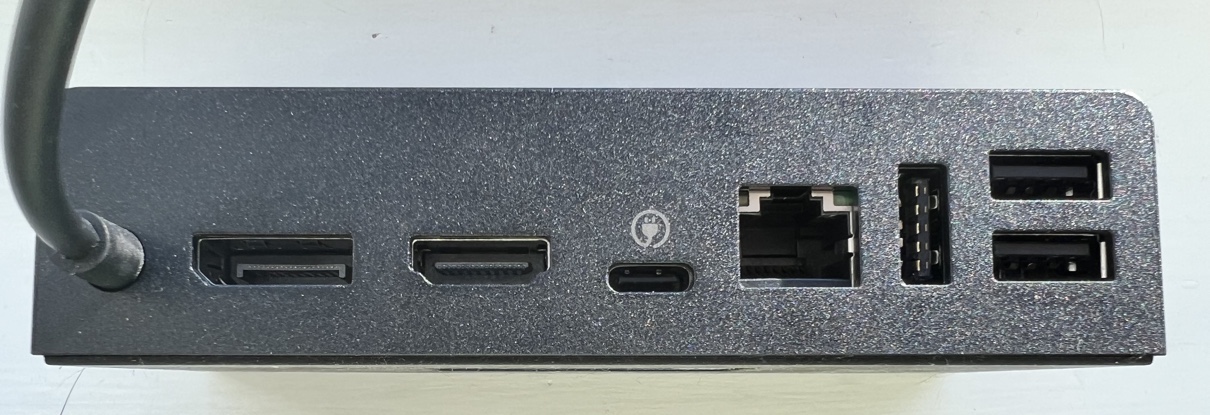
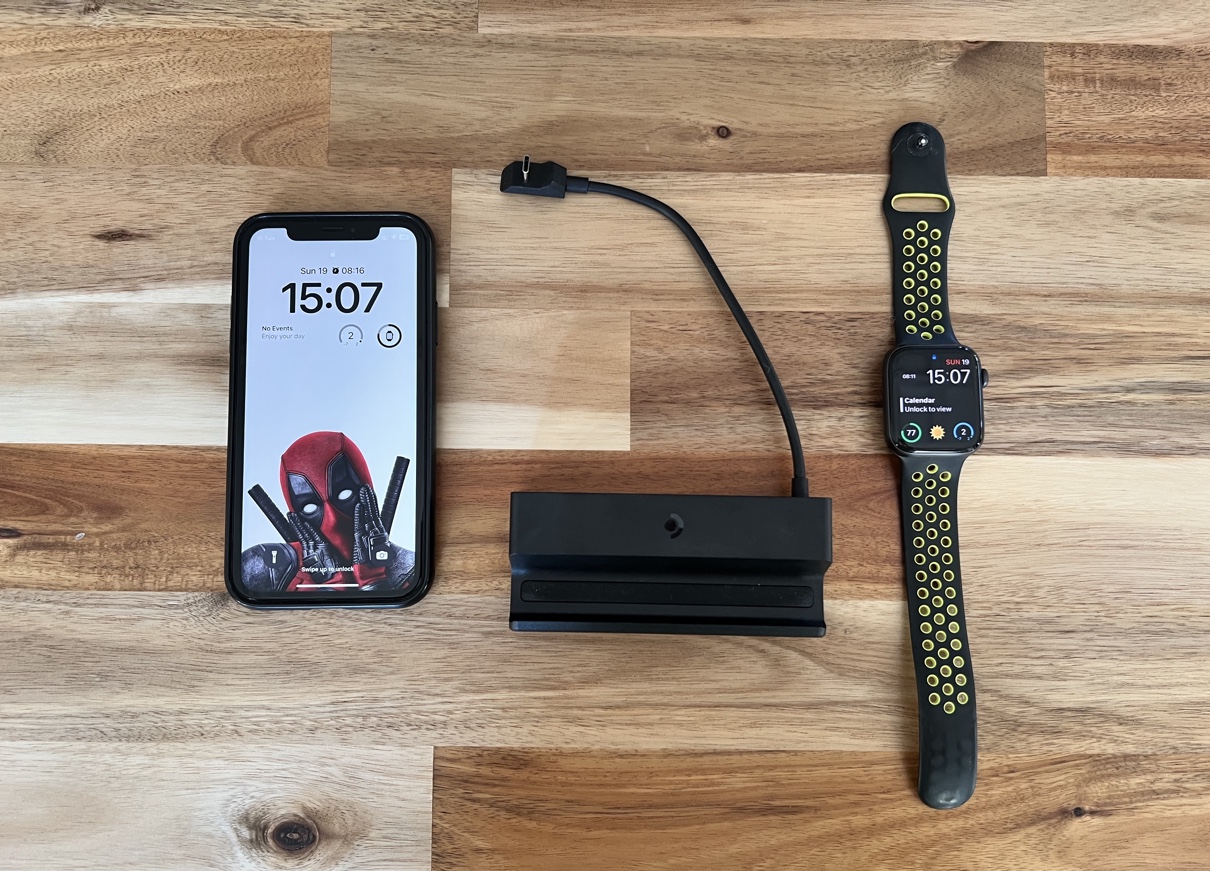
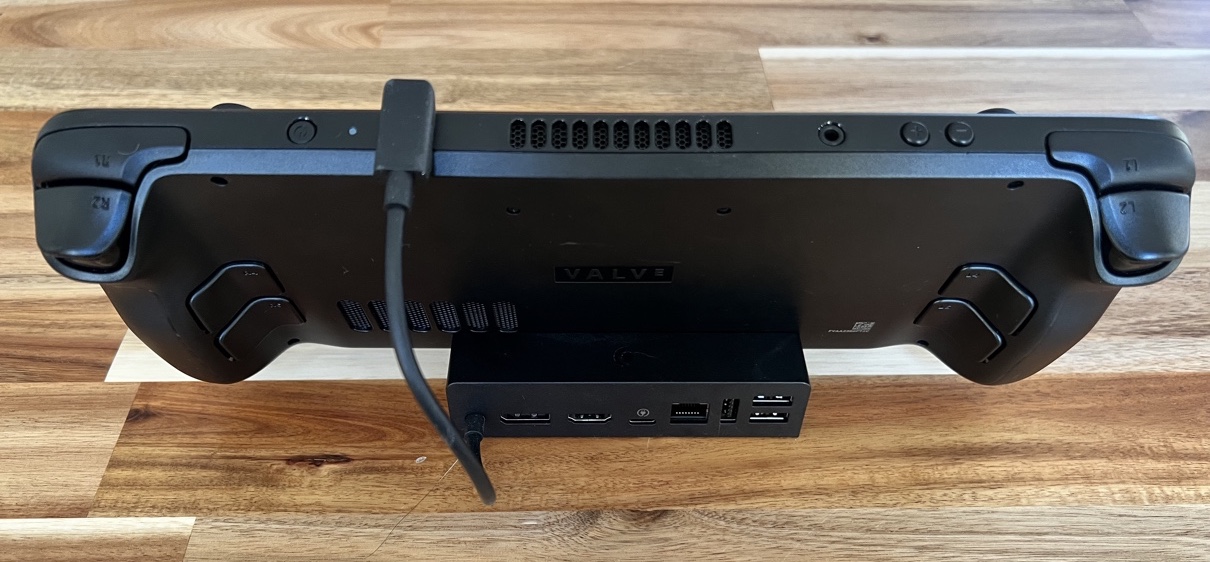
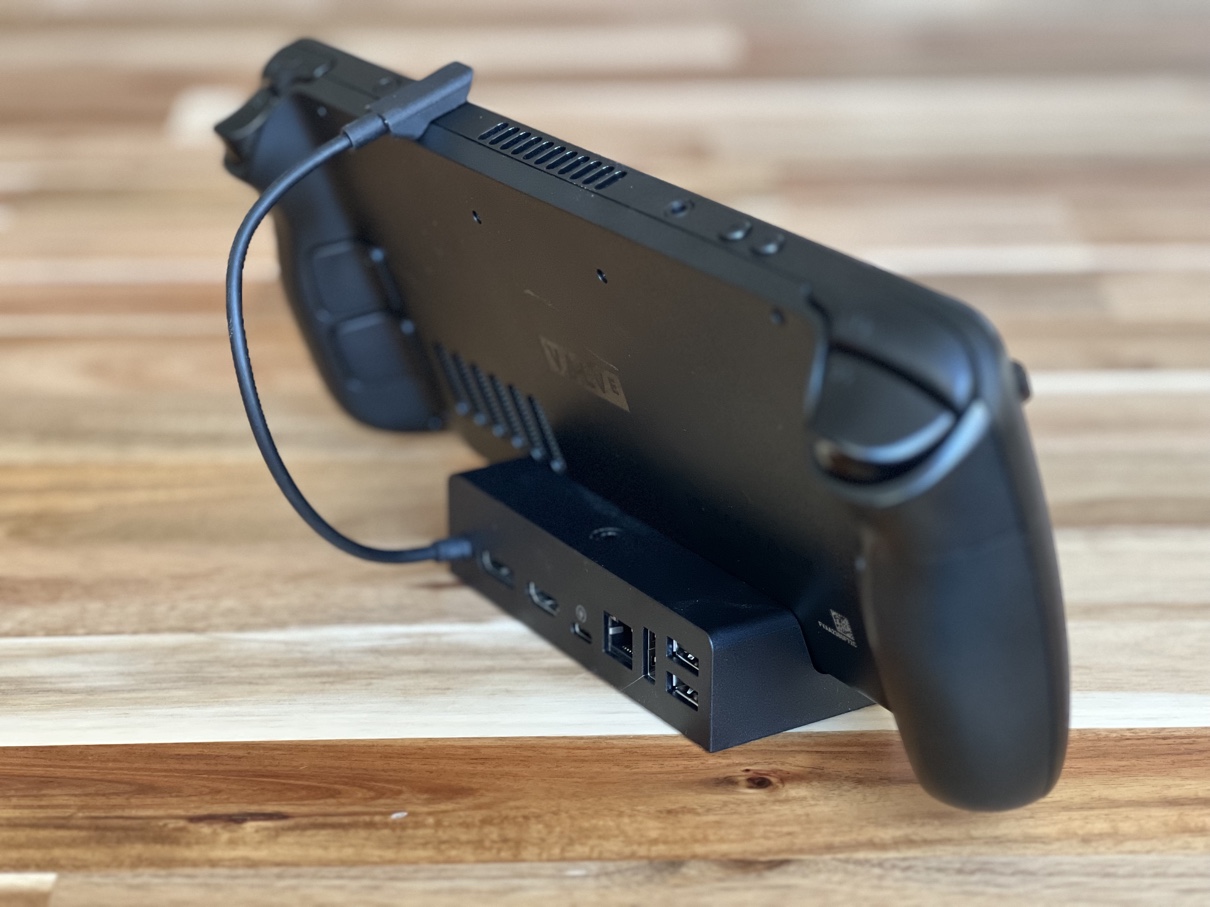
Connecting to external display or TV
I tried connecting it to a PC display and using Steam Deck as a desktop computer, and that works well:
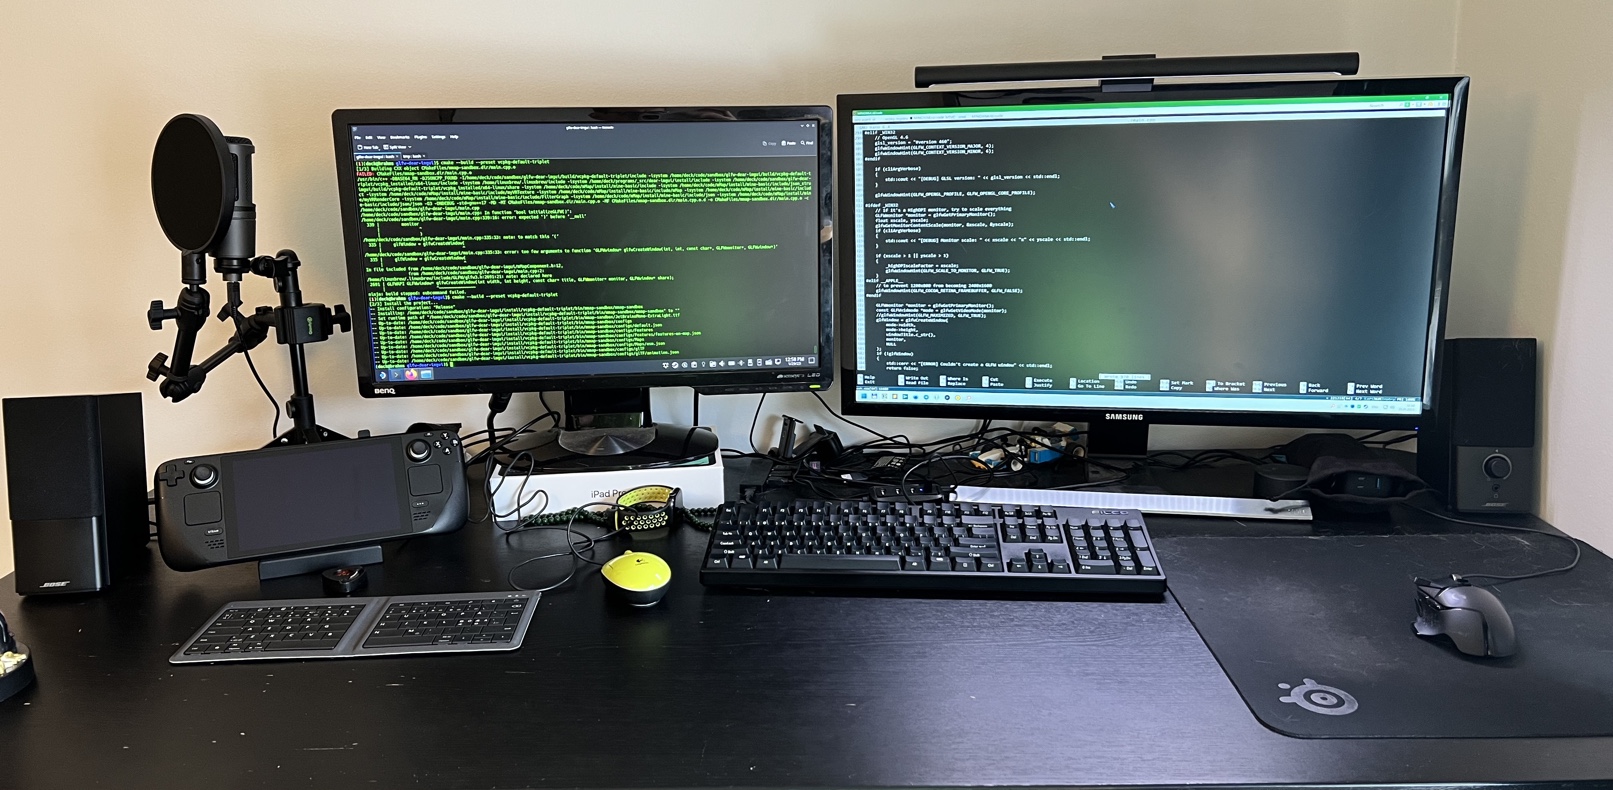
On this photo the Steam Deck is docked with its own mouse/keyboard set and external display, while I am also editing some files on it from my desktop PC via SSH.
The only inconvenience is that I don’t have a spare display, so I would need to switch the cables between Steam Dock and my actual desktop PC (when I need it for work). I could probably invest into a KVM switch, but I haven’t yet.
I also tried using it on a TV, by my TV isn’t very modern, which probably explains why the picture quality was not great: mostly the colors weren’t as nice as they are on the Steam Deck’s own screen or on my PC display.
Moreover, even though I have a DualSense gamepad, it is so much inferior comparing to Steam Deck in terms of available controls (and the touchpad area is just a fucking disgrace), so I don’t see myself playing my games on TV. In particular, Diablo II gameplay instantly drops to a handicapped level, and HoMM 3 and Space Rangers I don’t even want to talk about. Majestic Steam Input and fantastic Steam Deck controls have spoiled me way too fast, I can’t settle for anything even a tiny bit worse.
But for gamepad-supported / console-oriented games, where I don’t really need such advanced controls, the DualSense gamepad should be enough to enjoy playing on TV. I only need to get a better TV.
Showcasing Steam Deck on your Steam profile
If you’d like to showcase Steam Deck as a favorite game on your Steam profile page, you’ll be frustrated to discover that you can’t to select it from the list of games in the showcase widget. But Valve has left a little loophole (might be unintentionally) by not verifying client input on the backend, so it is still possible to do.
All the credits go to this thread, I’m only re-posting the recipe here.
Open your Steam profile page, go to Edit Profile and there to Featured Showcase tab. Add a Favorite Game showcase. Open Web Developer Tools or equivalent in your web-browser, go to Debugger tab, open global.js script and set a breakpoint on the line CGameSelectorOwnedGames.NormalizeGameNames in onSuccess handler of Ajax.Request('https://steamcommunity.com/actions/GetOwnedApps/'.
Click on the showcase widget to select a game for showcasing:
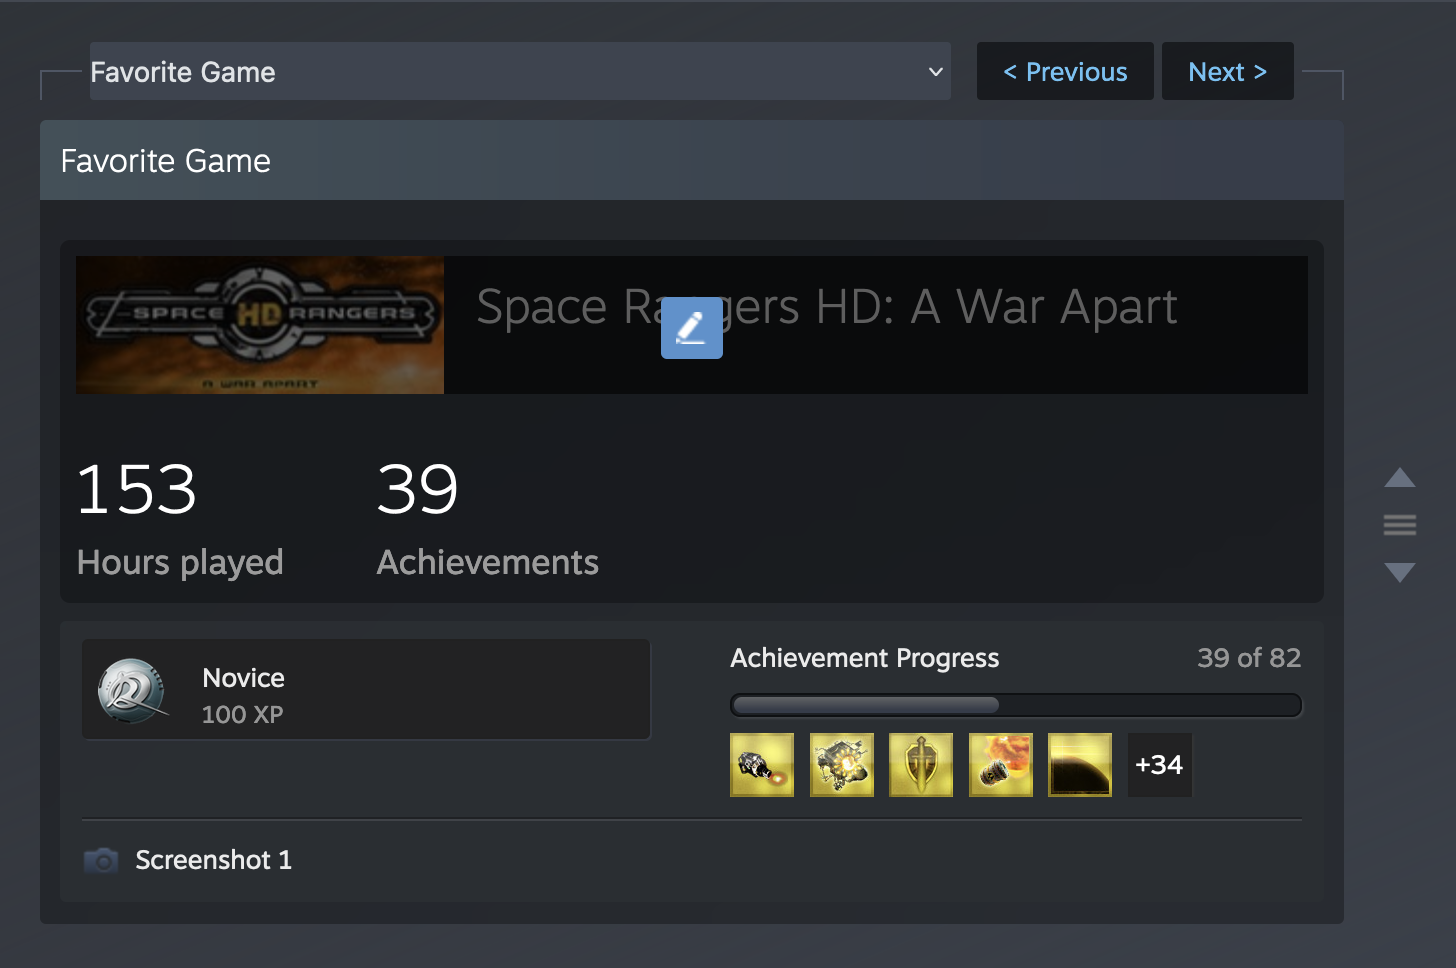
The script execution should stop on that breakpoint:
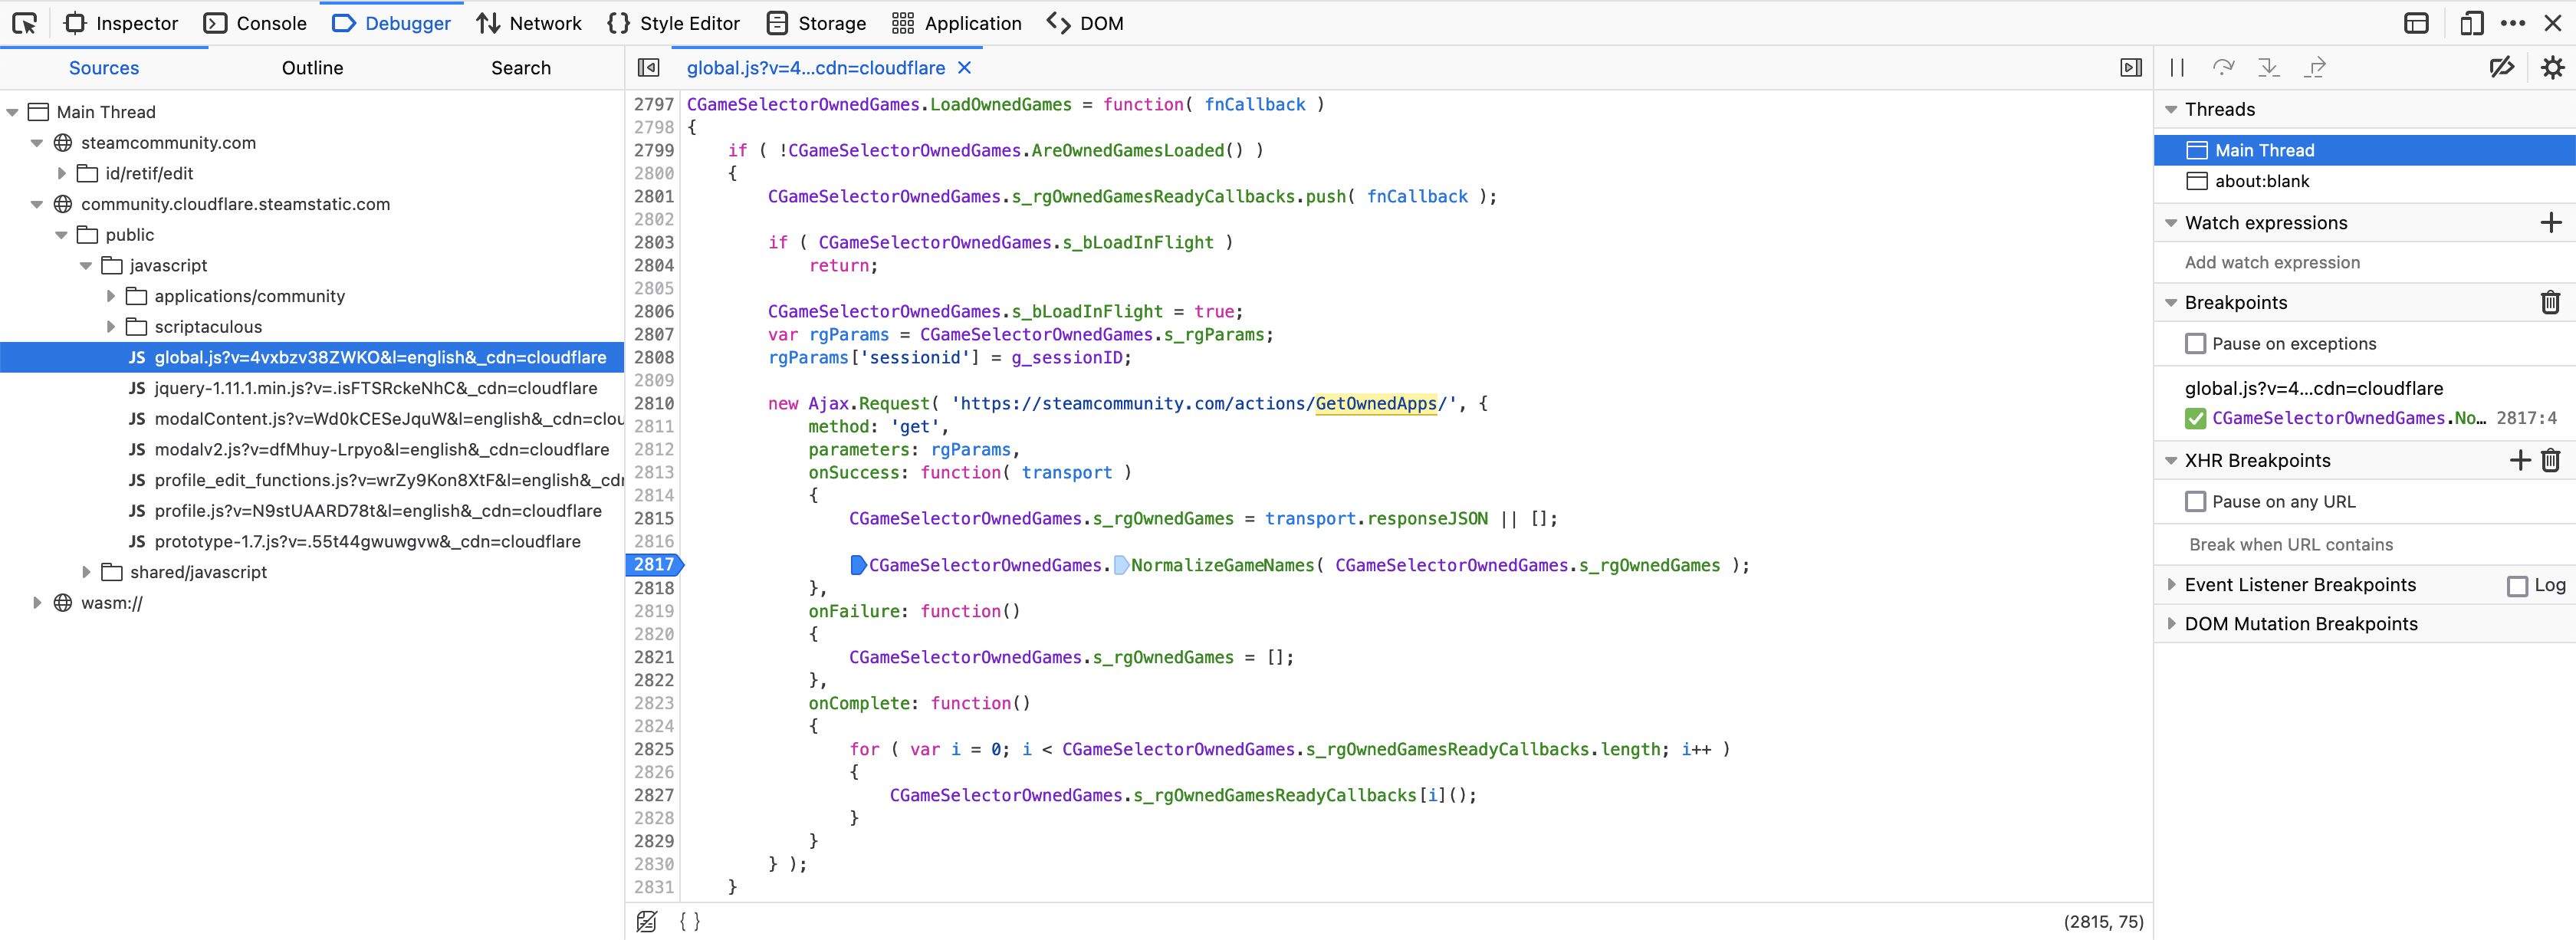
Now go to Console tab and execute:
CGameSelectorOwnedGames.s_rgOwnedGames = [
    {
        "appid": 1675200,
        "name": "Steam Deck",
        "icon": "https://cdn.akamai.steamstatic.com/steamcommunity/public/images/apps/1675200/21a29a1fa319b6f186ff91a647bea354a09fe51e.jpg",
        "logo": "https://cdn.akamai.steamstatic.com/steam/apps/1675200/capsule_184x69.jpg"
    }
];
That operation will replace the contents of s_rgOwnedGames list with just one item - Steam Deck. If anything, setting a different picture for logo (such as this one) won’t persist, as it seems that no properties actually matter except for the appid.
Go back to Debugger tab and resume the script execution. Click on search input field in the showcase and start typing Steam Deck (it will be the only item to find in the list). Select it and save your profile. The result will look like this:
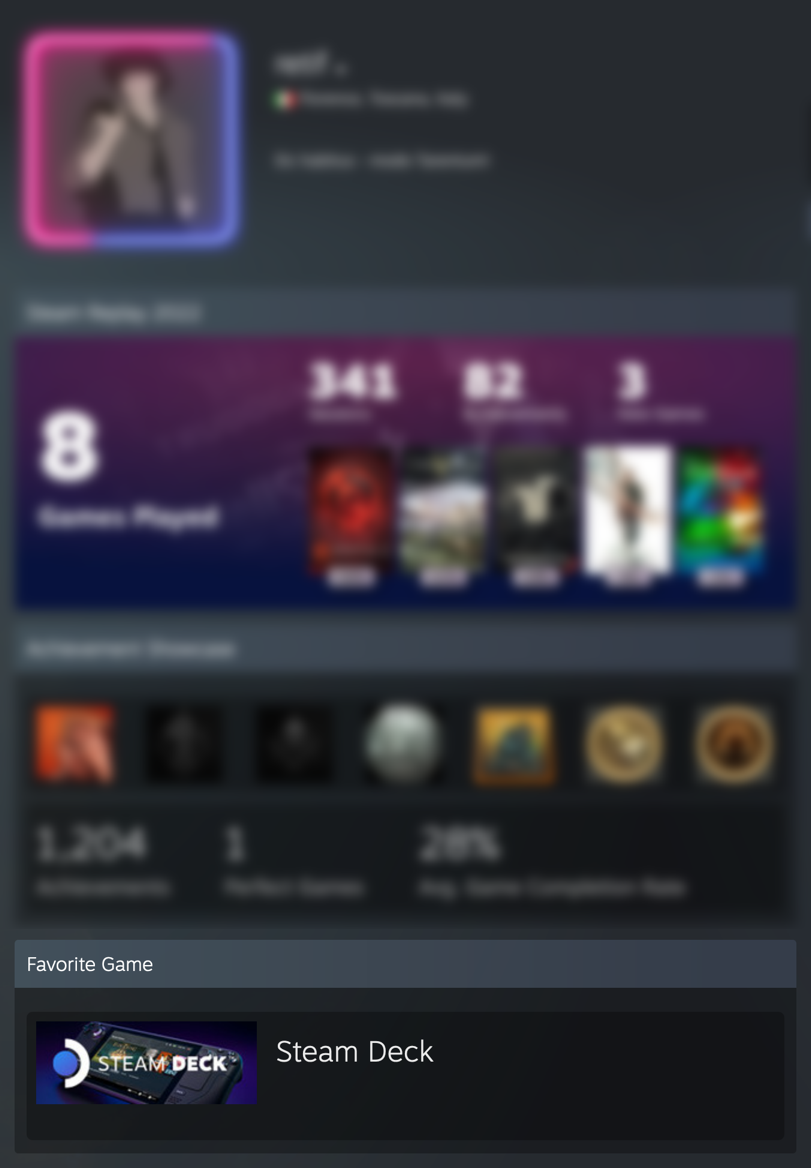
Overall
Never have I ever been so happy about getting something. It’s a pure joy every single day.
For the last several years I’ve been playing on my desktop gaming PC about 1.5 hours a day, and it was mostly Dota and only occasionally some other games. Since I got Steam Deck, I haven’t played on my PC at all, my average gaming time per day is now about 3-4 hours (that’s actually not a good thing), and the variety of games I’m playing got much wider (my Steam wishlist got longer too).
All my favorite games launch and run on Steam Deck with no problems, while 95% of them are Windows-only games. What sorcery is this. And modern games that I’ve tried out so far run with better performance than on my desktop PC.
The feeling of freedom is incredible. You can install Steam games, you can install games that you purchased in other stores, you can pirate games and still launch them without problems. You can download and install whatever applications you’d like and you can fucking build stuff from sources right on the device. It’s a proper PC that is actually yours. To quote one article:
In a time when closed gardens are being built all around us, it’s so refreshing to see a large company pushing for an open approach to its ecosystem.
Amen and hallelujah.
So money can in fact buy happiness! And it’s not very expensive either - just 649/399 USD (plus taxes (plus SD-card (and plus docking station (and probably plus powerbank)))).
But Valve should really try to cover more countries/regions. Of course, they have all the sales numbers, so they like no one else know about the actual demand (in supported countries), but I still think they might be underestimating how badly people want to buy it:

Updates
2023-11-16 | Steam Deck OLED
On 2023-11-16 Valve released one more Steam Deck model - the OLED variant, which was also available in a limited White Edition.
I have neither of OLED variants, so I can’t say anything about it myself, but according to Valve’s own product pages it has the following improvements over the original models (this is not the full list, just the most notable ones):
- much better screen:
- OLED vs LCD, duh;
- 7.4" vs 7.0";
- 90 Hz vs 60 Hz;
- better battery (50 Wh vs 40 Wh) and more efficient power consumption;
- faster Wi-Fi 6E;
- newer Bluetooth 5.3 with one more antenna;
- bigger disk in the top model (1 TB vs 512 GB) for the same price of 649 USD.
A month later, so in December 2023, it also became possible to purchase it in local stores in Norway (the Limited Edition White too). It is still not through Steam, so it is sadly still not officially supported in Norway, and the price is considerably higher as well. But if I didn’t already have mine, I’d buy the top OLED model immediately.
2023-12-20 | Steam Year in Review
One year later, with Steam Year in Review statistics for 2023 being published, I can now support my statement about desktop PC losing to Steam Deck with some numbers:
The year before I got Steam Deck:
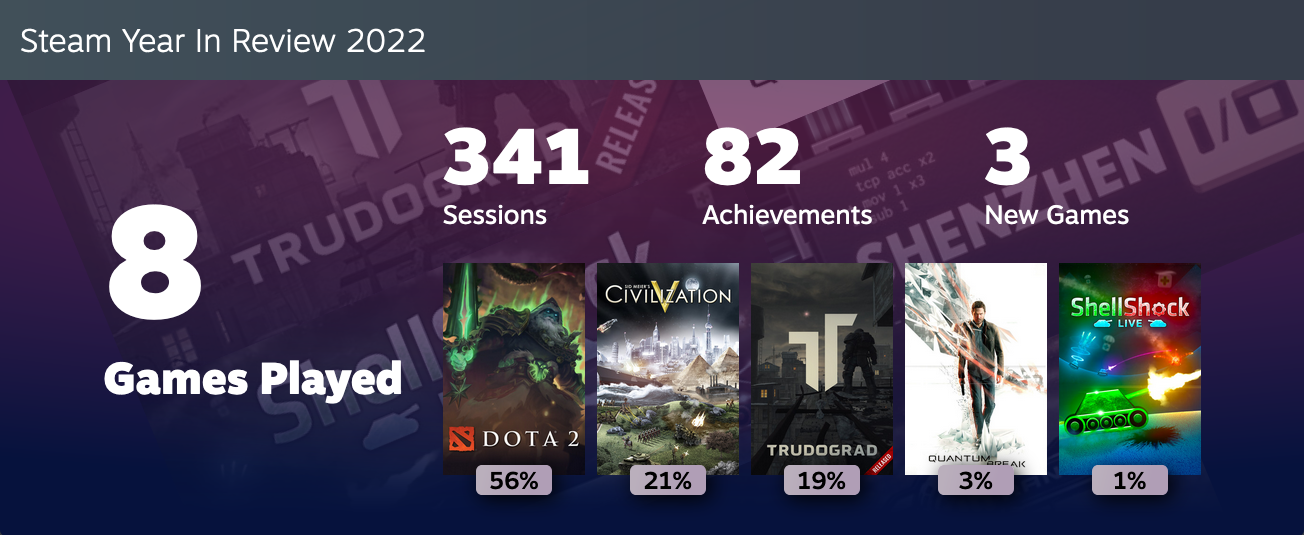
The first year with Steam Deck:

Here’s also platforms distribution chart:
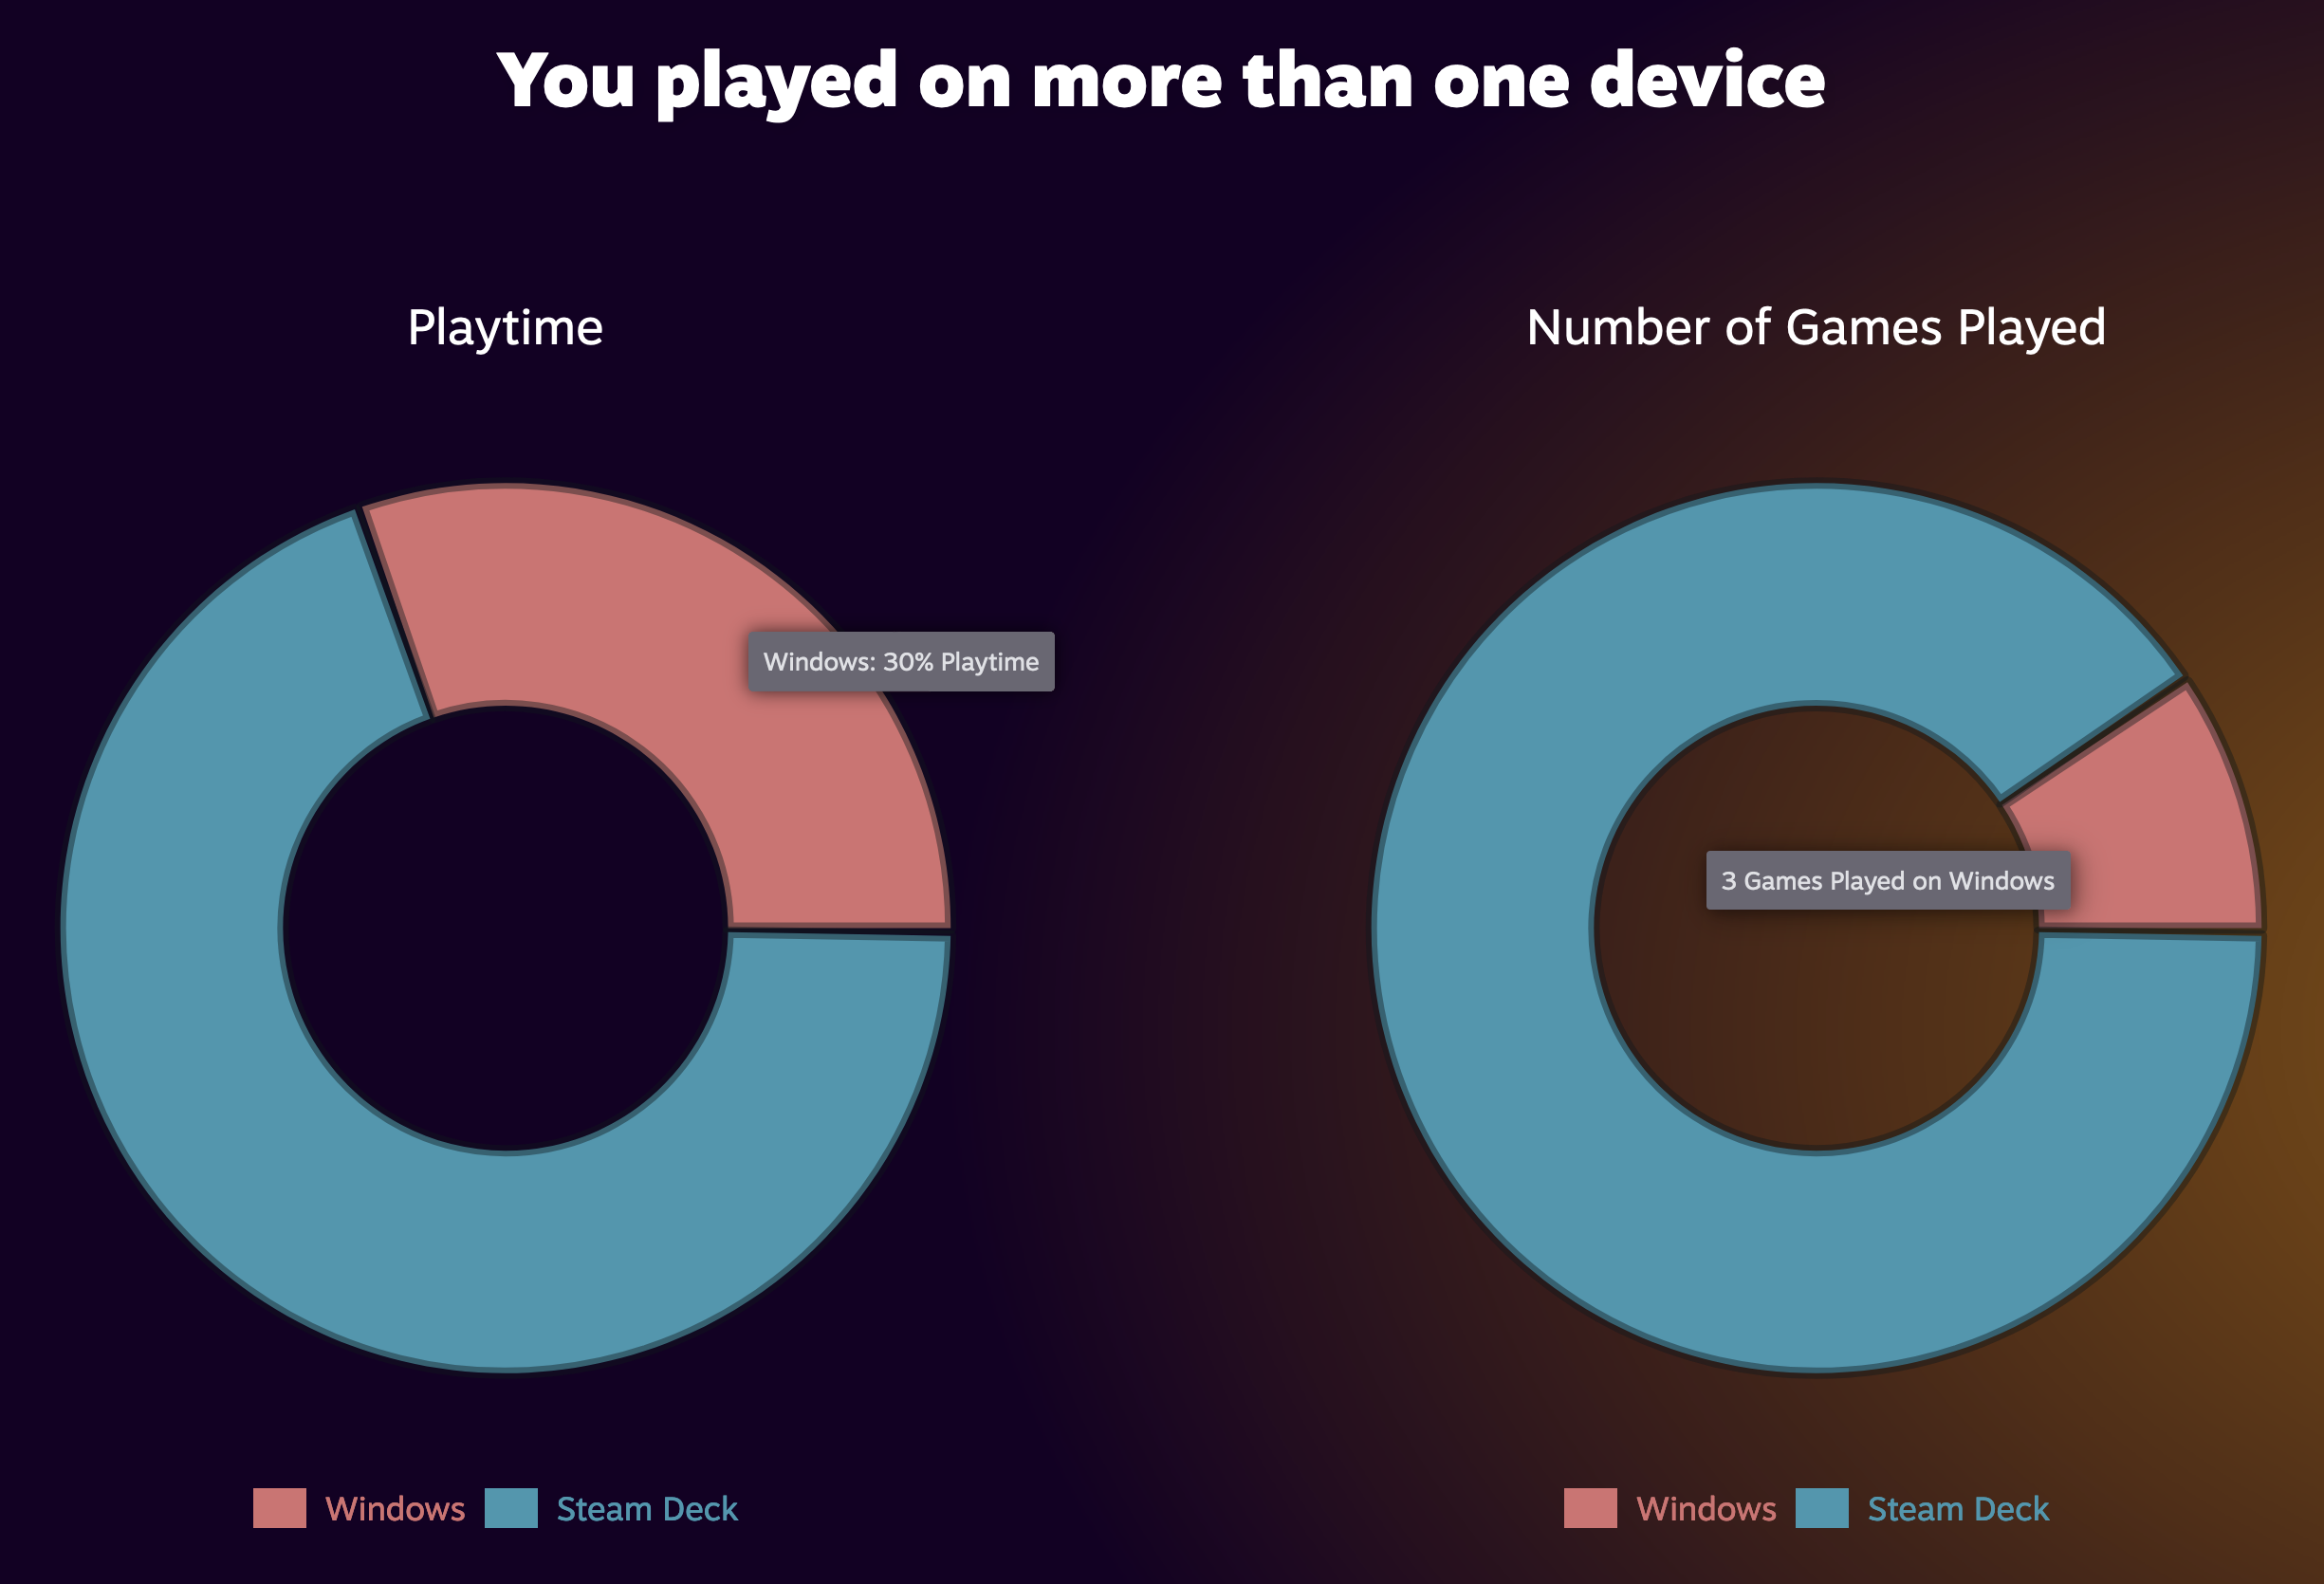
And that is only the numbers from Steam games and while I was online. But an even bigger amount of playtime wasn’t tracked because I was playing non-Steam games (Diablo II Resurrected alone devoured at least a 3-digit number of hours) or/and was playing offline, so the actual difference is much more significant.
Like I said, nowadays I use my desktop PC only for Dota, everything else I play on Steam Deck.
2024-07-09 | 4K OLED TV as an external display
A year or so later after I said that…
…I only need to get a better TV…
…I got one, and not just one but a stellar LG OLED G3 - a 4K (3840x2160) TV-set with VRR support, which makes it a great target to check out Steam Deck capabilities as a docked gaming console.
Just in case, the versions I tested with:
- SteamOS
3.5.19; - LG OLED G3 firmware
03.30.74, webOS8.3.0-1508.
TV connection problems
Connecting experience from Dock to TV (via HDMI) is (was?) an absolute dogshit in Gaming mode. Often (way too often) it doesn’t display on the first try, so you need to unplug/plug it several (a goddamn lot of) times, otherwise the TV will be showing No Signal, while Steam Deck’s own screen will be black, implying that it does try to display to somewhere.
Even when you finally will manage to get connected to TV, there is a non-zero chance that you’ll get crackling sounds, which you can get rid of only by repeating the whole damn ritual (yet another several times).
It is probably worth to mention that in Desktop mode it always connects to TV on the very first try, so it’s only Gaming mode who is being shit. Amusingly enough, when you are connected to the TV in Desktop mode and you’ll try to switch to Gaming mode, then all of a sudden it will lose the connection and you’ll get No Signal on your TV again.
Eventually, after numerous re-plugging/reboots and enabling/disabling safe mode in Display settings I got to a point where both Steam Deck screen and TV started going black, which is better than No Signal, but still not a proper result. However, from that I figured that there might be something wrong with the screen settings somewhere in the config files.
In several places on the internet people say to delete ~/.local/share/kscreen/ folder - that’s where the configurations for external displays are stored - and they claim that this might help to “reset” the connection, so it would re-configure next time you connect to that TV. You probably don’t have to delete the entire folder, only the files containing your TV model, but either way, this will not help for Gaming mode (Gamescope), because it doesn’t use KScreen (only Desktop mode does). Moreover, if you never connected to an external display in Desktop mode, then you won’t even have anything in this folder.
For Gaming mode the config files are in ~/.config/gamescope/ (thanks to this dude for finding that out), and in modes.cfg there I had the following contents:
LG Electronics LG TV SSCR2:1280x800@60
which probably the values that got set at one of the times when I tried connecting with safe mode enabled. I changed the resolution from 1280x800 to 3840x2160, and that helped, the next connection was not just black screen but a proper display.
However, needless to say that next time I tried to connect to the TV again I got the No Signal yet again. This time I just deleted modes.cfg and also edid.bin from that same folder, and then TV got connected. But then yet another next time when I tried to connect I got No Signal yet fucking again, and removing files did not help, so the entire ritual needed to be repeated (an unpredictable amount of times) again!
So it seems that deleting the ~/.config/gamescope/ contents doesn’t actually do anything useful, as edid.bin SHA1 checksum is always the same (actually, it’s one value when the cable is unplugged and another when it is plugged, but those values do not change between tries/reboots), so it might have been just a coincidence that deleting it once resulted in a successful connection.
The amount of time I wasted on dancing around this problem is quite outrageous. And the only thing that works is the dumb re-plugging/re-docking with an uncertain amount of attempts. Like a said, an absolute dogshit experience.
…However, a bit later I bought a what seems to be a proper/good (judging by the price) HDMI cable, and with that one the connection works much better (although I still need to re-plug the HDMI cable occasionally). And then after some more updates for both Steam Deck and Dock it all got even better, so now I can’t even recall the last time when I had any issues with connecting to TV.
Picture quality
When I finally was able to get the picture on TV, I could see how the colors along with the overall picture quality are so much better than what I got on my “old” TV. I simply did not expect it to look that good.
Actually, at first I got a rather blurry picture, but that turned out to be because I haven’t set the correct resolution in Steam Deck settings (not sure why it wasn’t set automatically):
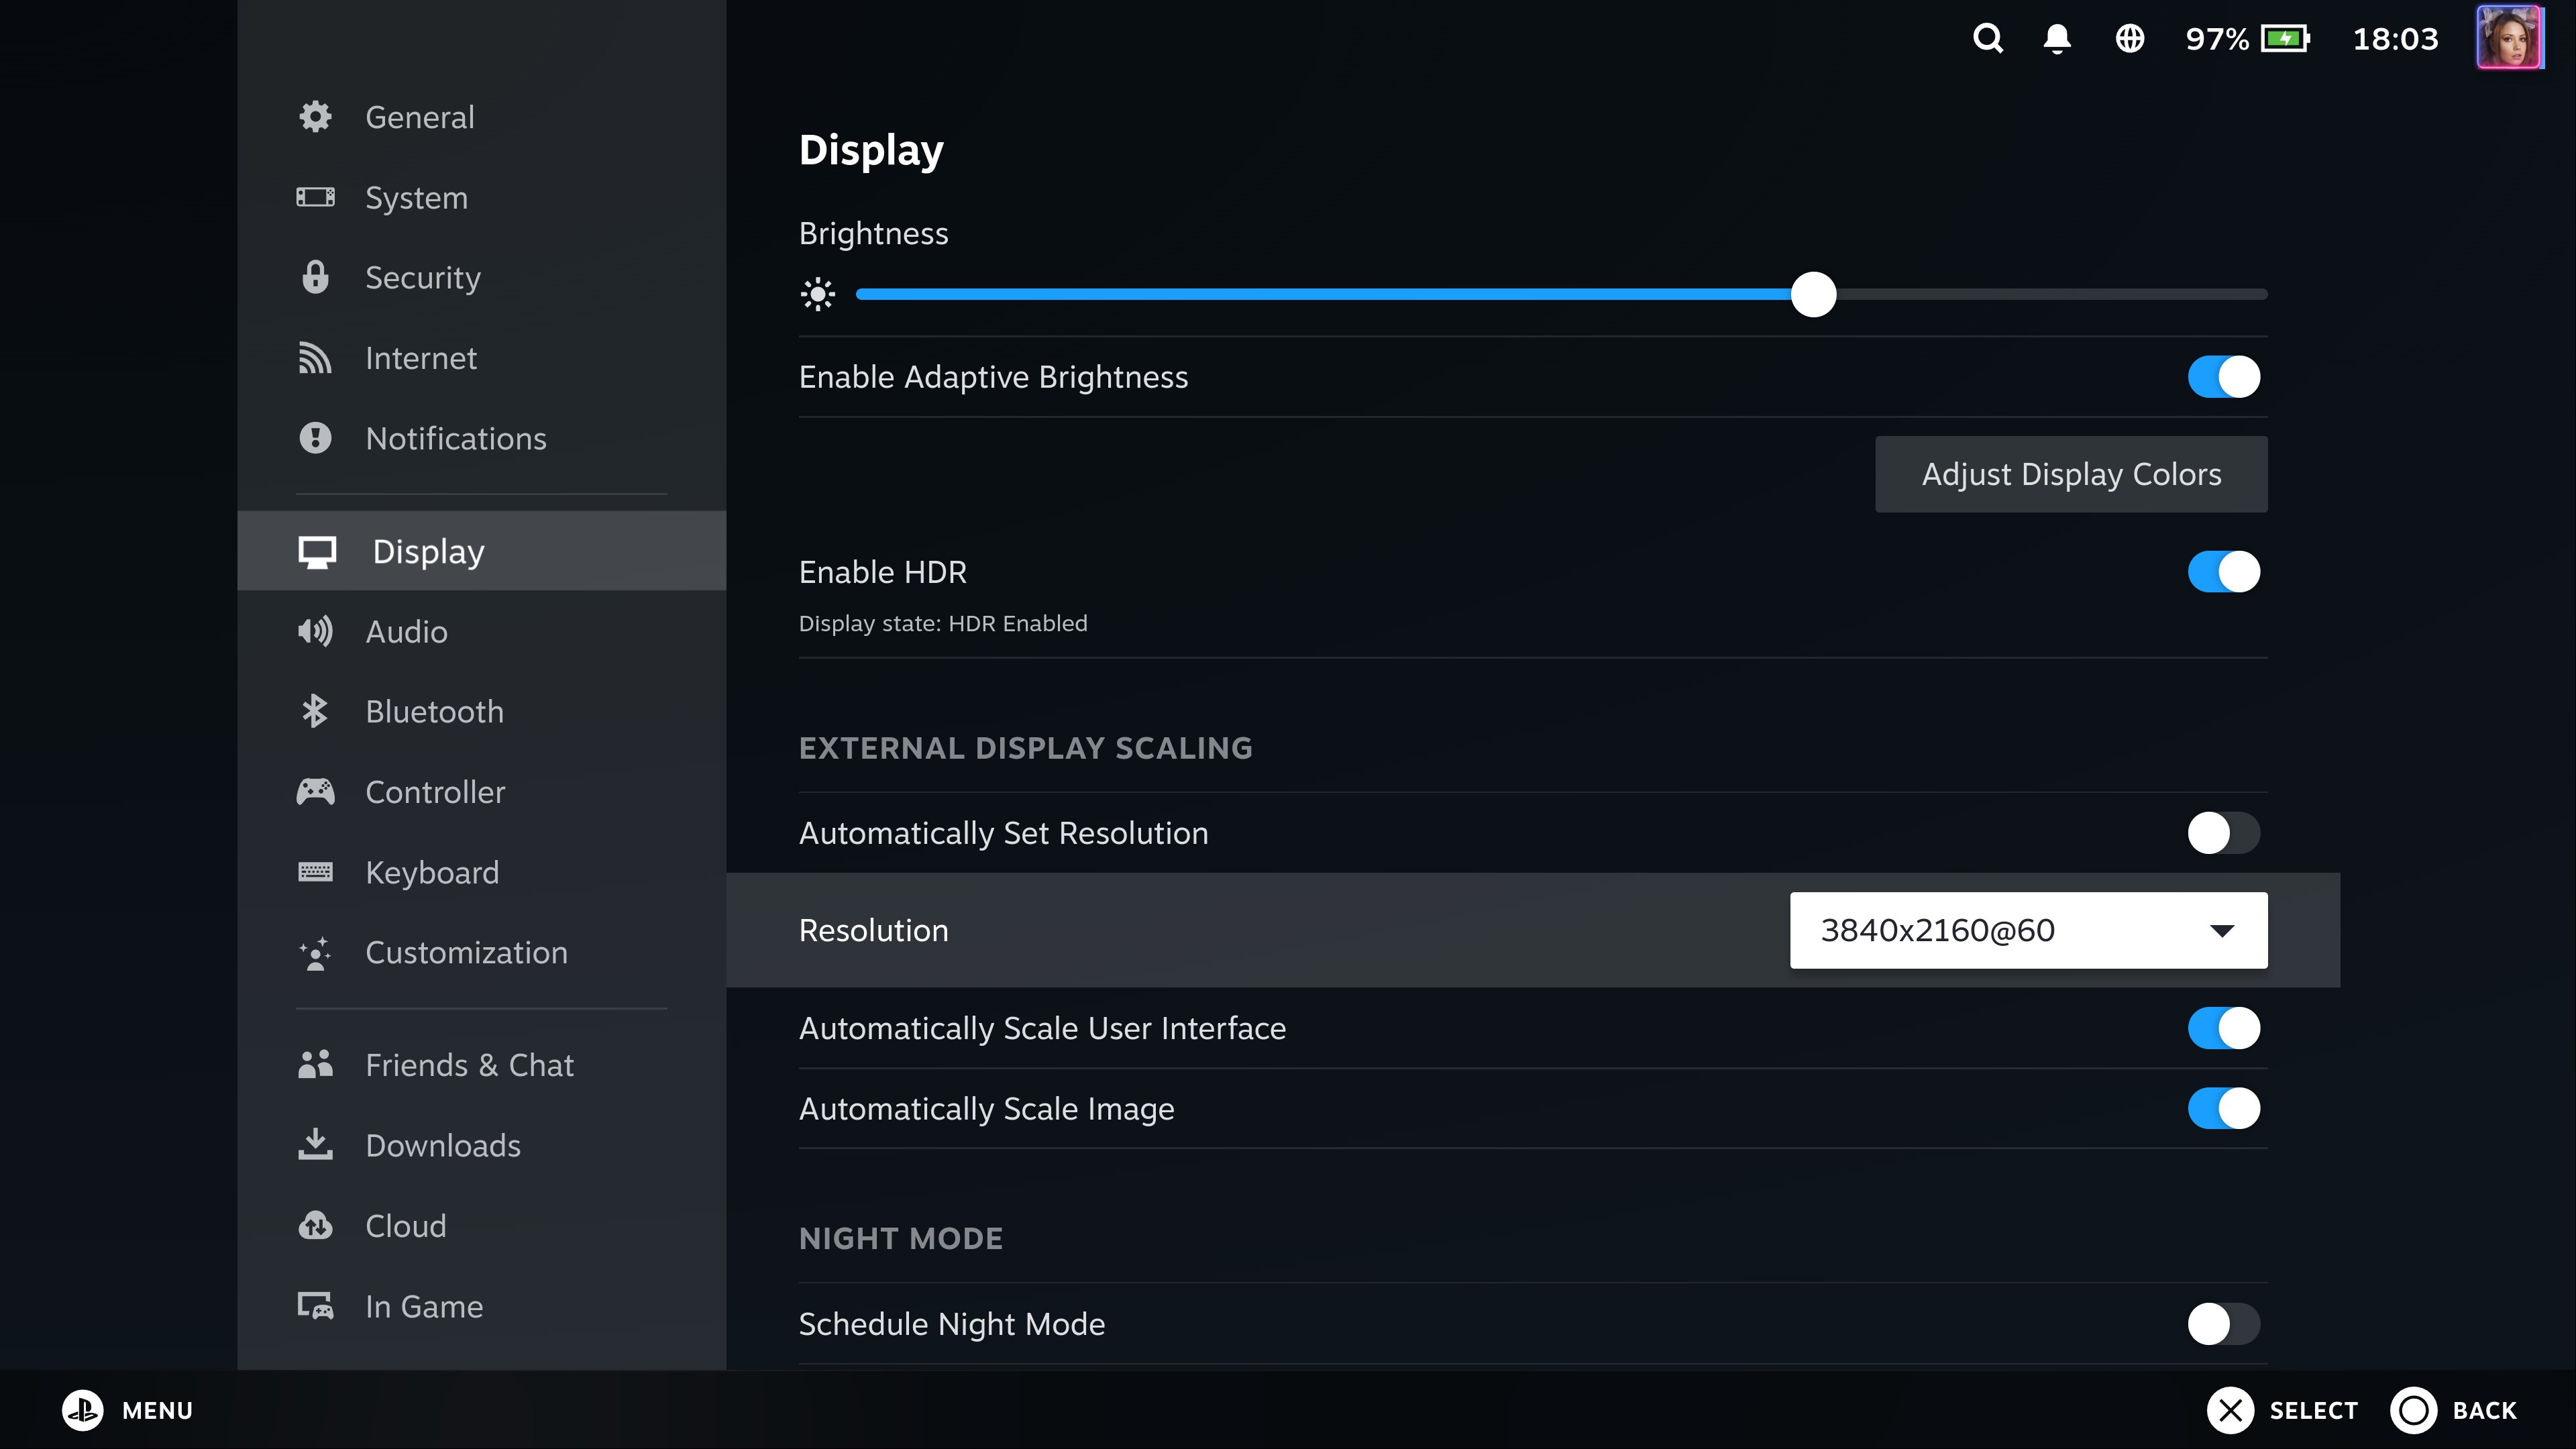
Later I toggled the automatic resolution, and it was setting the correct resolution too, so the SteamOS GUI was perfectly clear. But the games were still rendering blurry, and as it turned out, the resolution also needs to be set for every single game it its Properties. Don’t know why this is not being done automatically, but okay. One not so obvious detail here is that you need to set the resolution to Native rather than to an exact value:
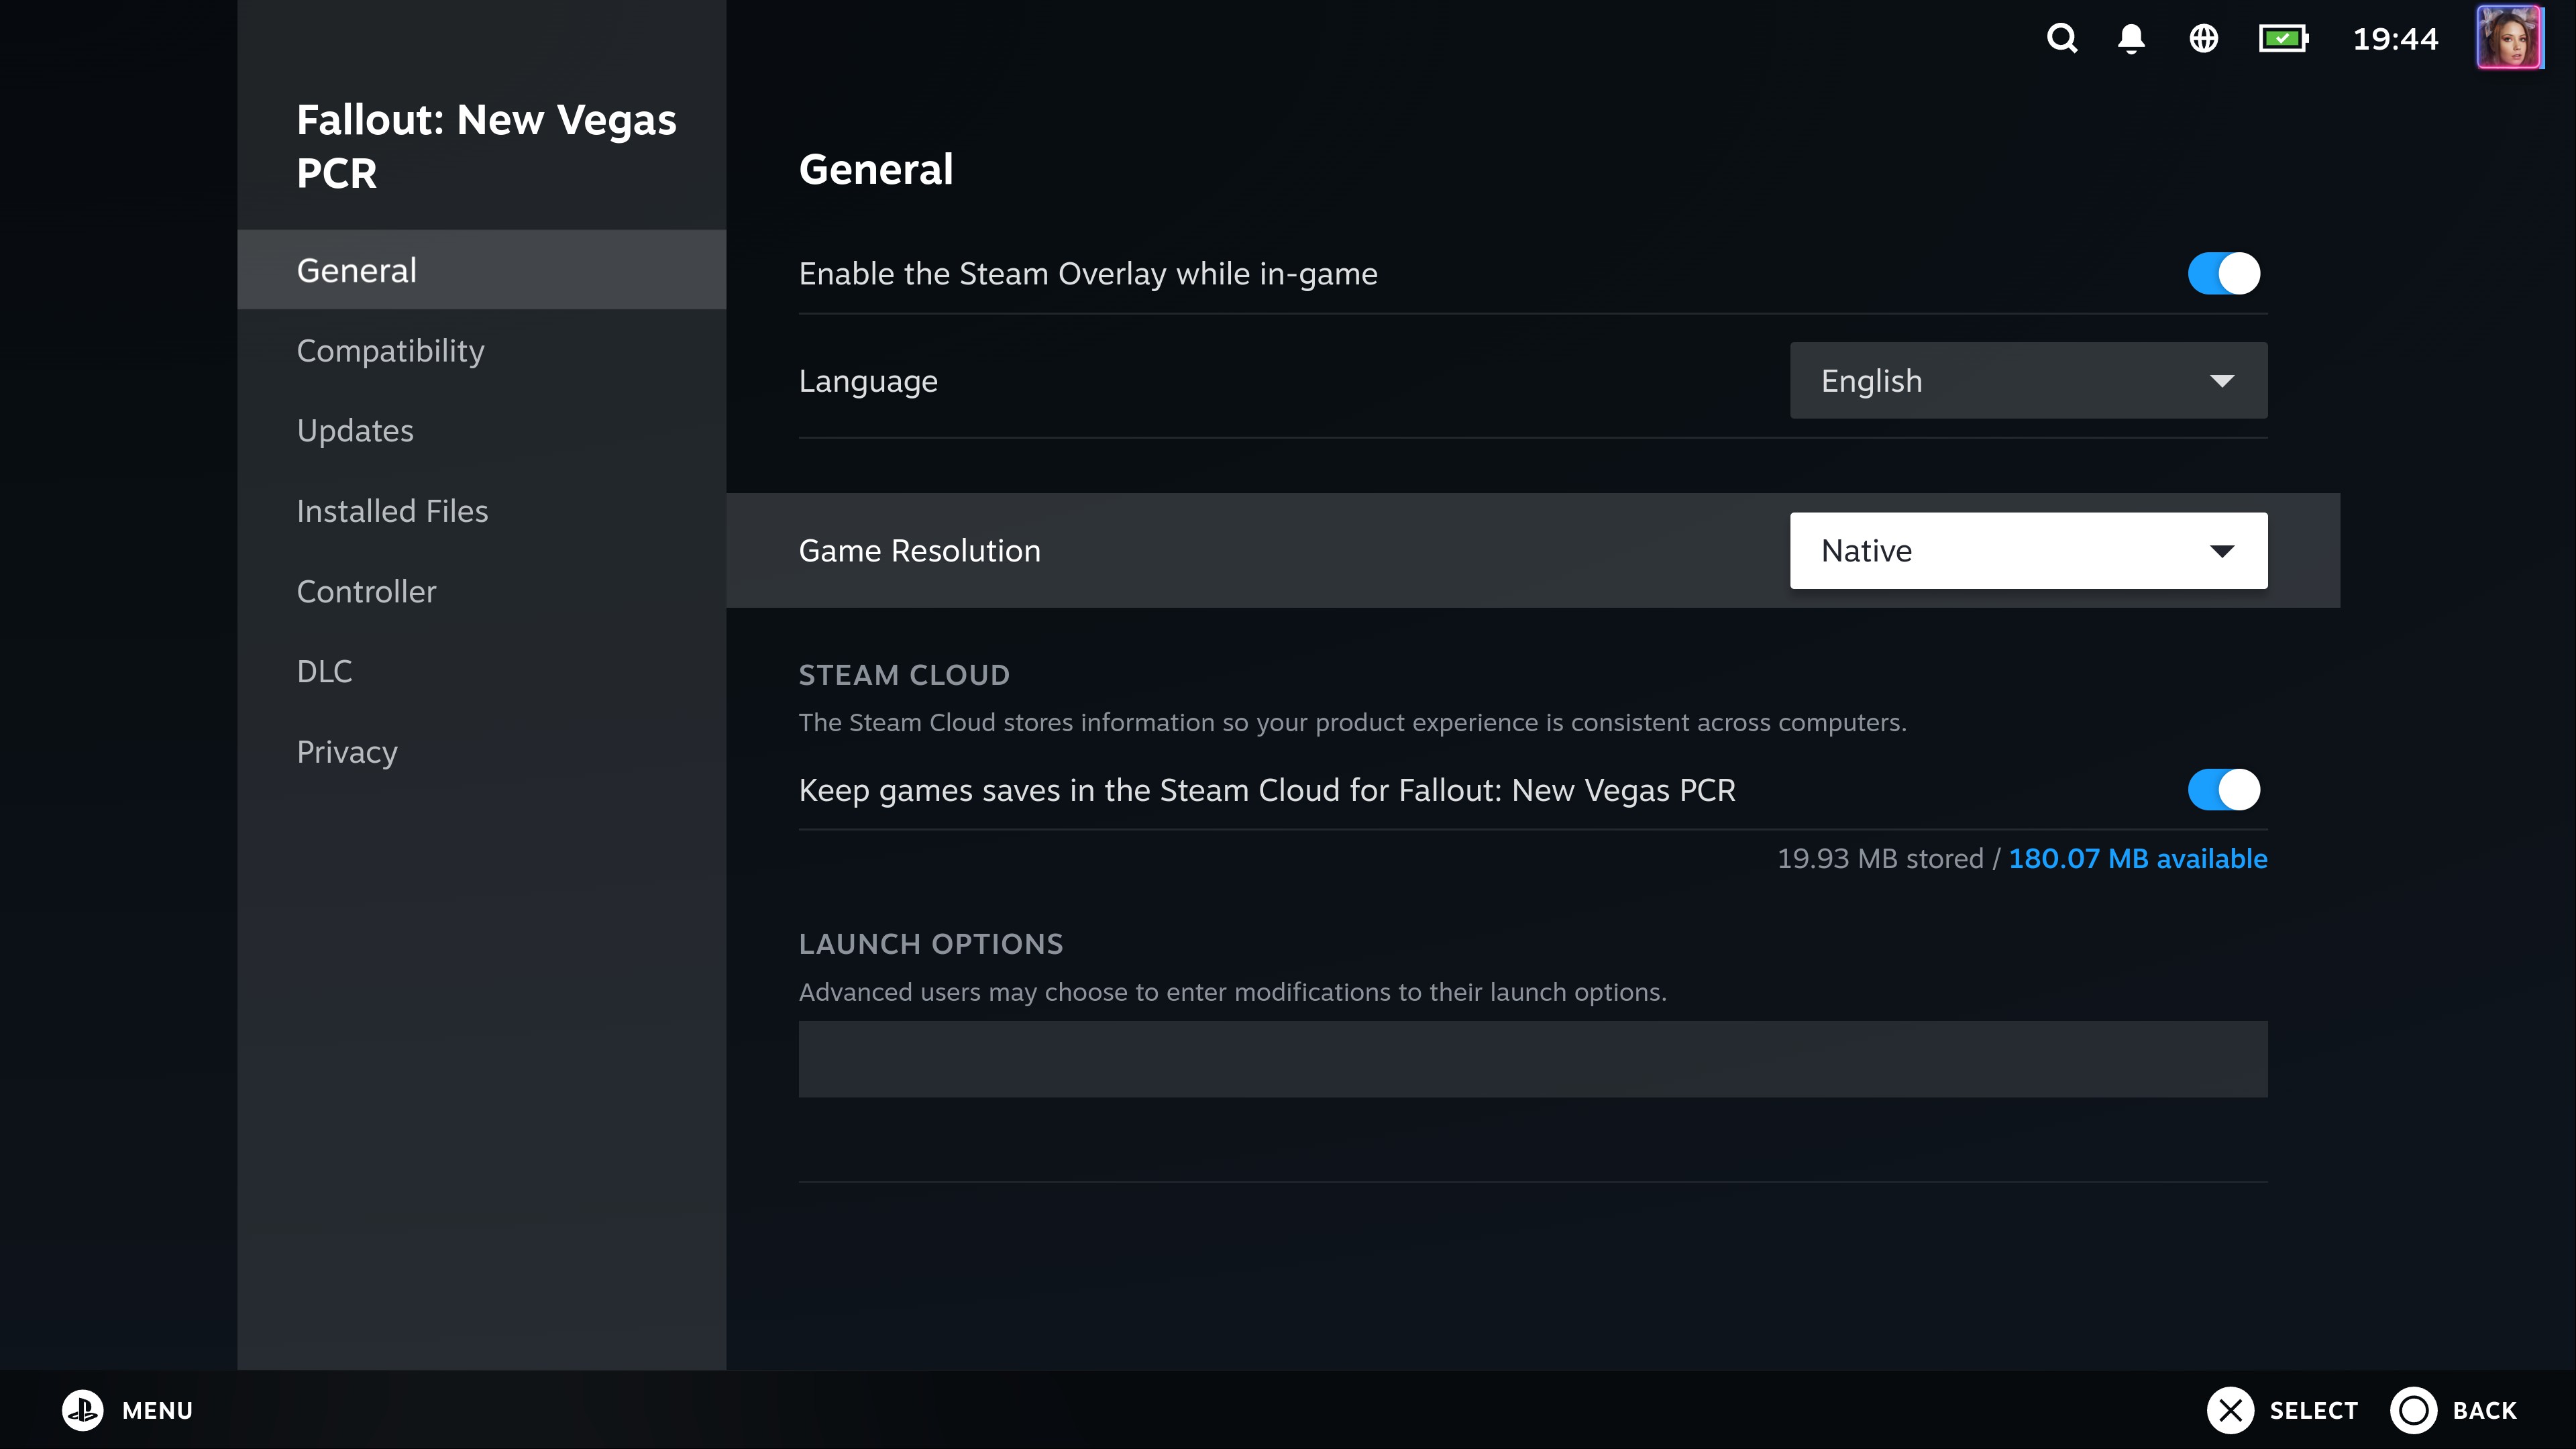
And then the games started to look awesome. I mean, really awesome, even rather old games. For that kind of beauty I can even forget how inferior DualSense gamepad controls are and properly enjoy playing from sofa.
VRR
At some point (starting with version 3.5?) Steam Deck added VRR support for external displays. And I saw the VRR toggle in Quick Access Menu, but it was inactive. As I learned, to make it enabled and togglable in my case of LG OLED G3 TV I needed to enable these settings on the TV (likely, AMD FreeSync Premium is the one):
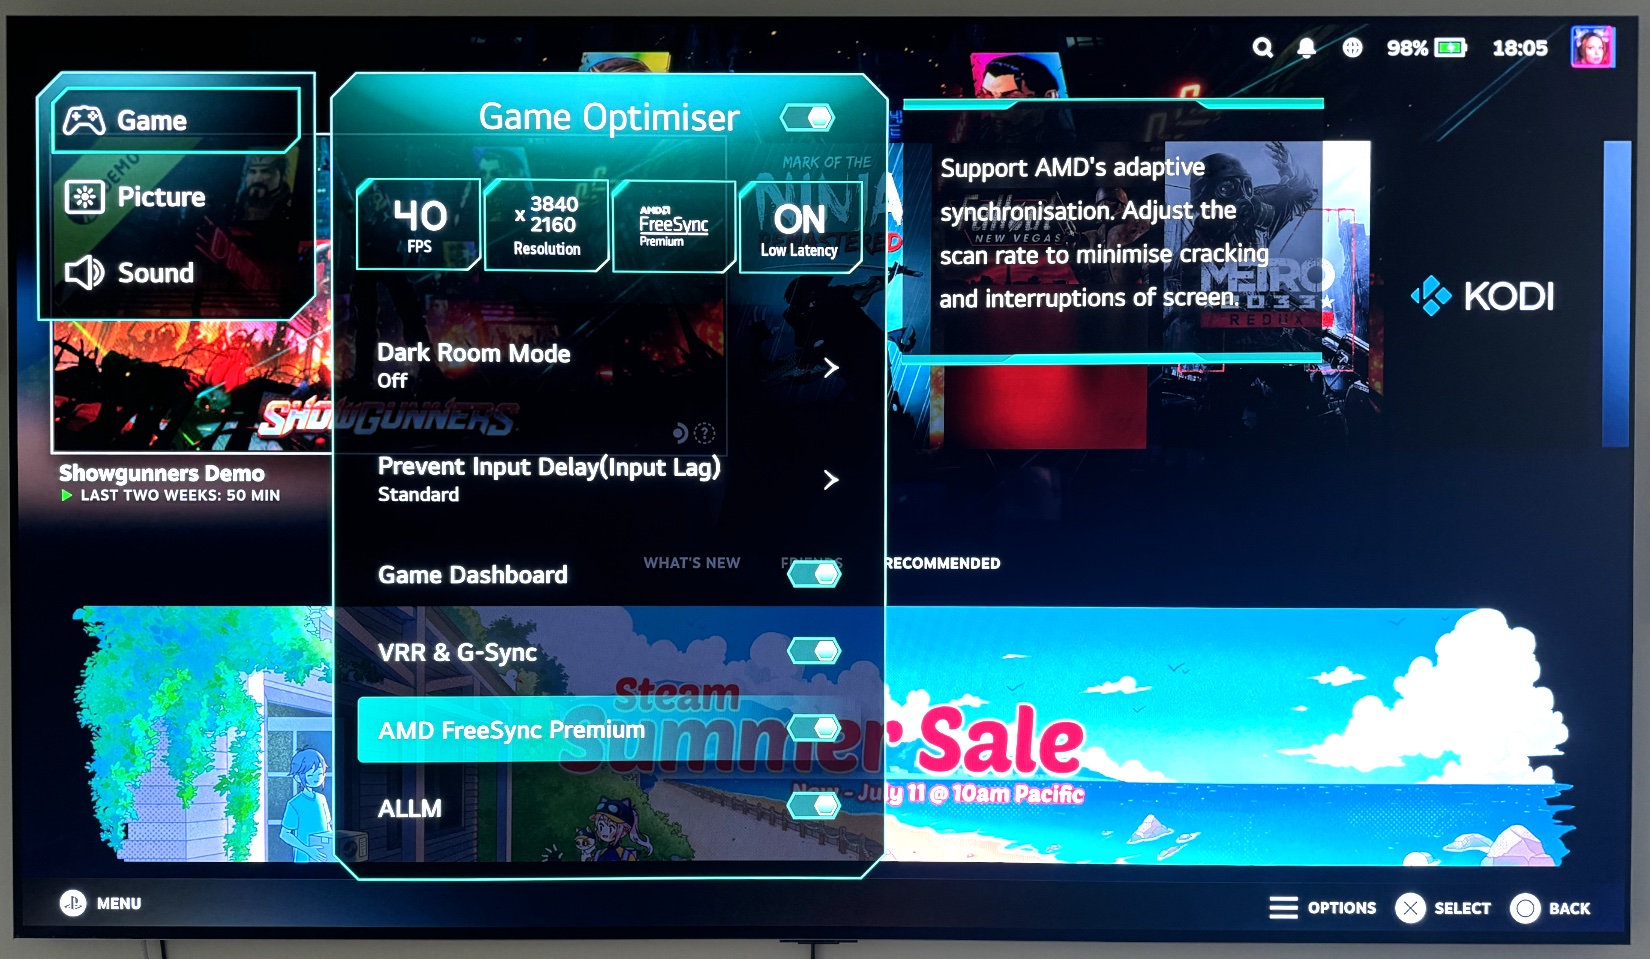
Apologies for the photos of the TV instead of proper screenshots, but I couldn’t find how to make screenshots in webOS (apparently, LG removed this functionality).
But even with all these settings enabled on the TV, the VRR toggle on Steam Deck was still inactive. I had to restart/shutdown and re-plug/re-dock several times, until it finally became active and I could toggle it on. The TV’s quick settings menu also shows that VRR is enabled, although I am not sure if this has any relation to VRR being enabled on Steam Deck:
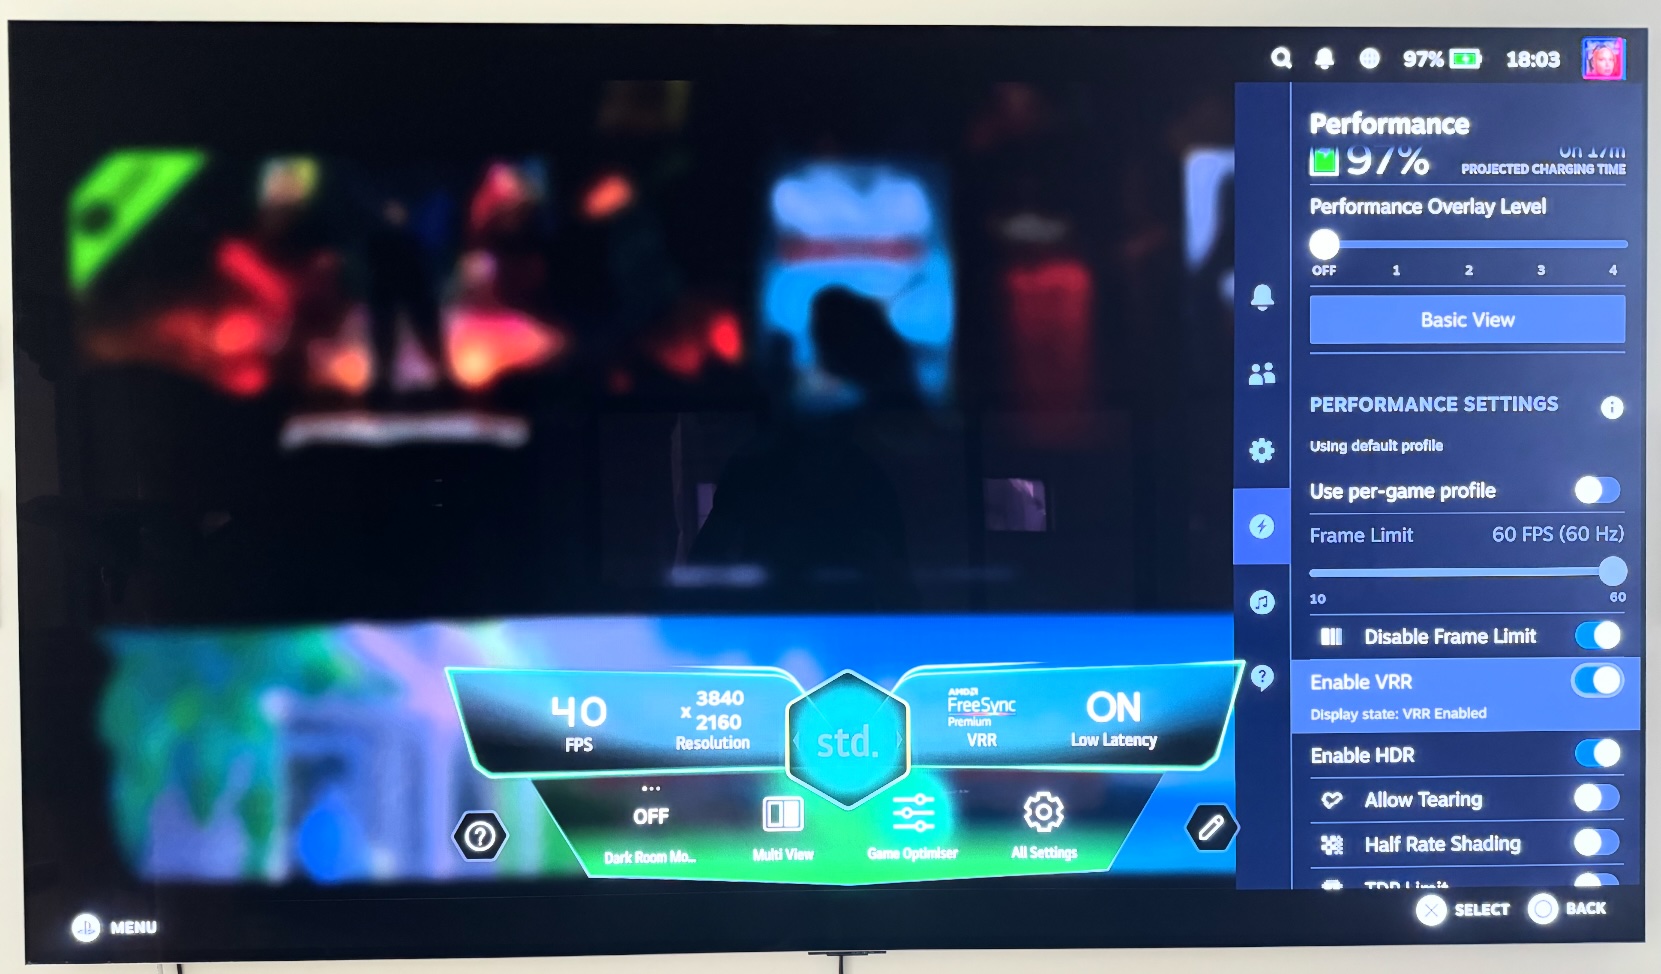
Also not sure why it shows 40 FPS here, usually it is 60 FPS (maximum available at 3840x2160 resolution). Looks suspiciously the same value as what I have as the cap for the games when I play undocked. And actually, could that be the VRR kicking in?
Regarding the VRR itself, I cannot tell that I noticed any benefits from it being enabled. To me it all plays the same both with it enabled and disabled.
FSR
The FSR I heard a lot about, like how magical it is and how it helps with performance on higher resolutions. The way I understand it works is:
- You have a display with a certain high resolution (
3840x2160in my case); - You set the game resolution to a lower value (for example,
1920x1080), so it would spend less hardware resources on rendering; - FSR will upscale that
1920x1080resolution to3840x2160, so you will get a nice picture without blurring on3840x2160, while the hardware “cost” will be as if you rendered to1920x1080.
For example, here’s how I enabled it with Fallout New Vegas. First I’ve set the game resolution to 1920x1080 (here it is done in the game launcher, but usually these settings are available within a game):
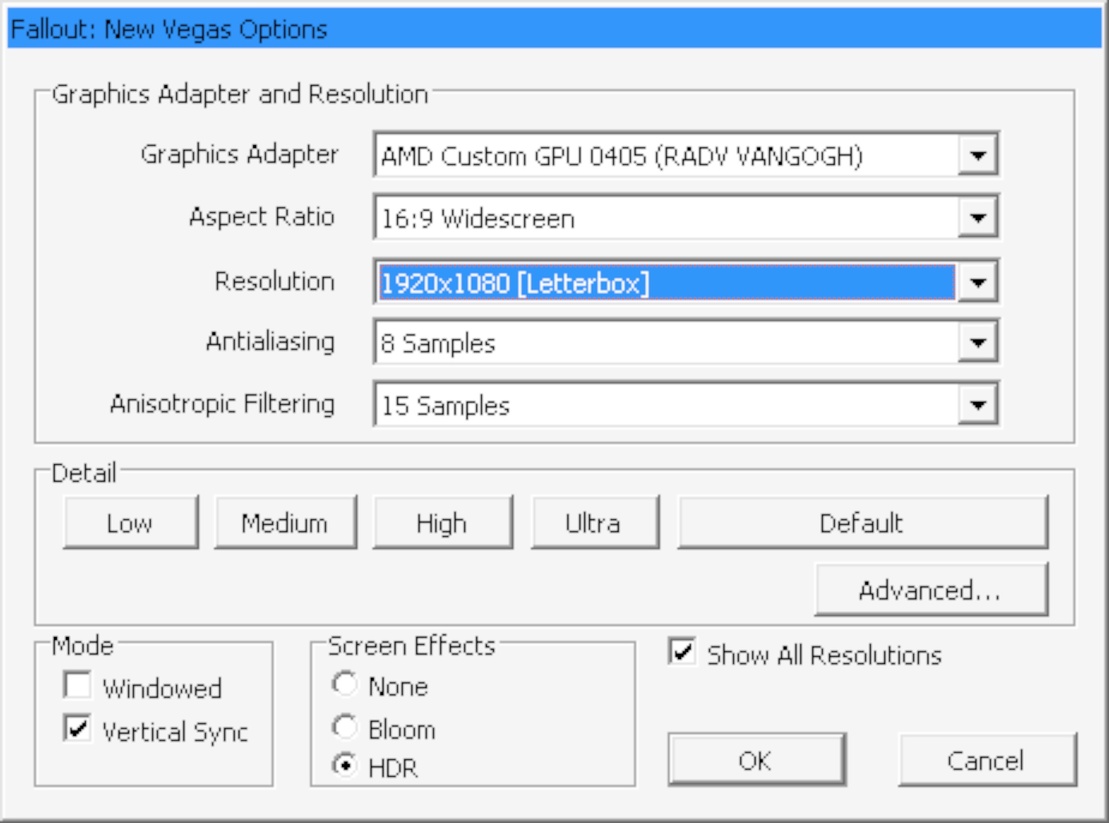
Then in the Quick Access Menu on the Performance tab I’ve set Scaling Filter to FSR. To see whether it is enabled or not, you can increase the MangoHud level of metrics to maximum, and it will be showing the FSR status too. Here it is OFF:
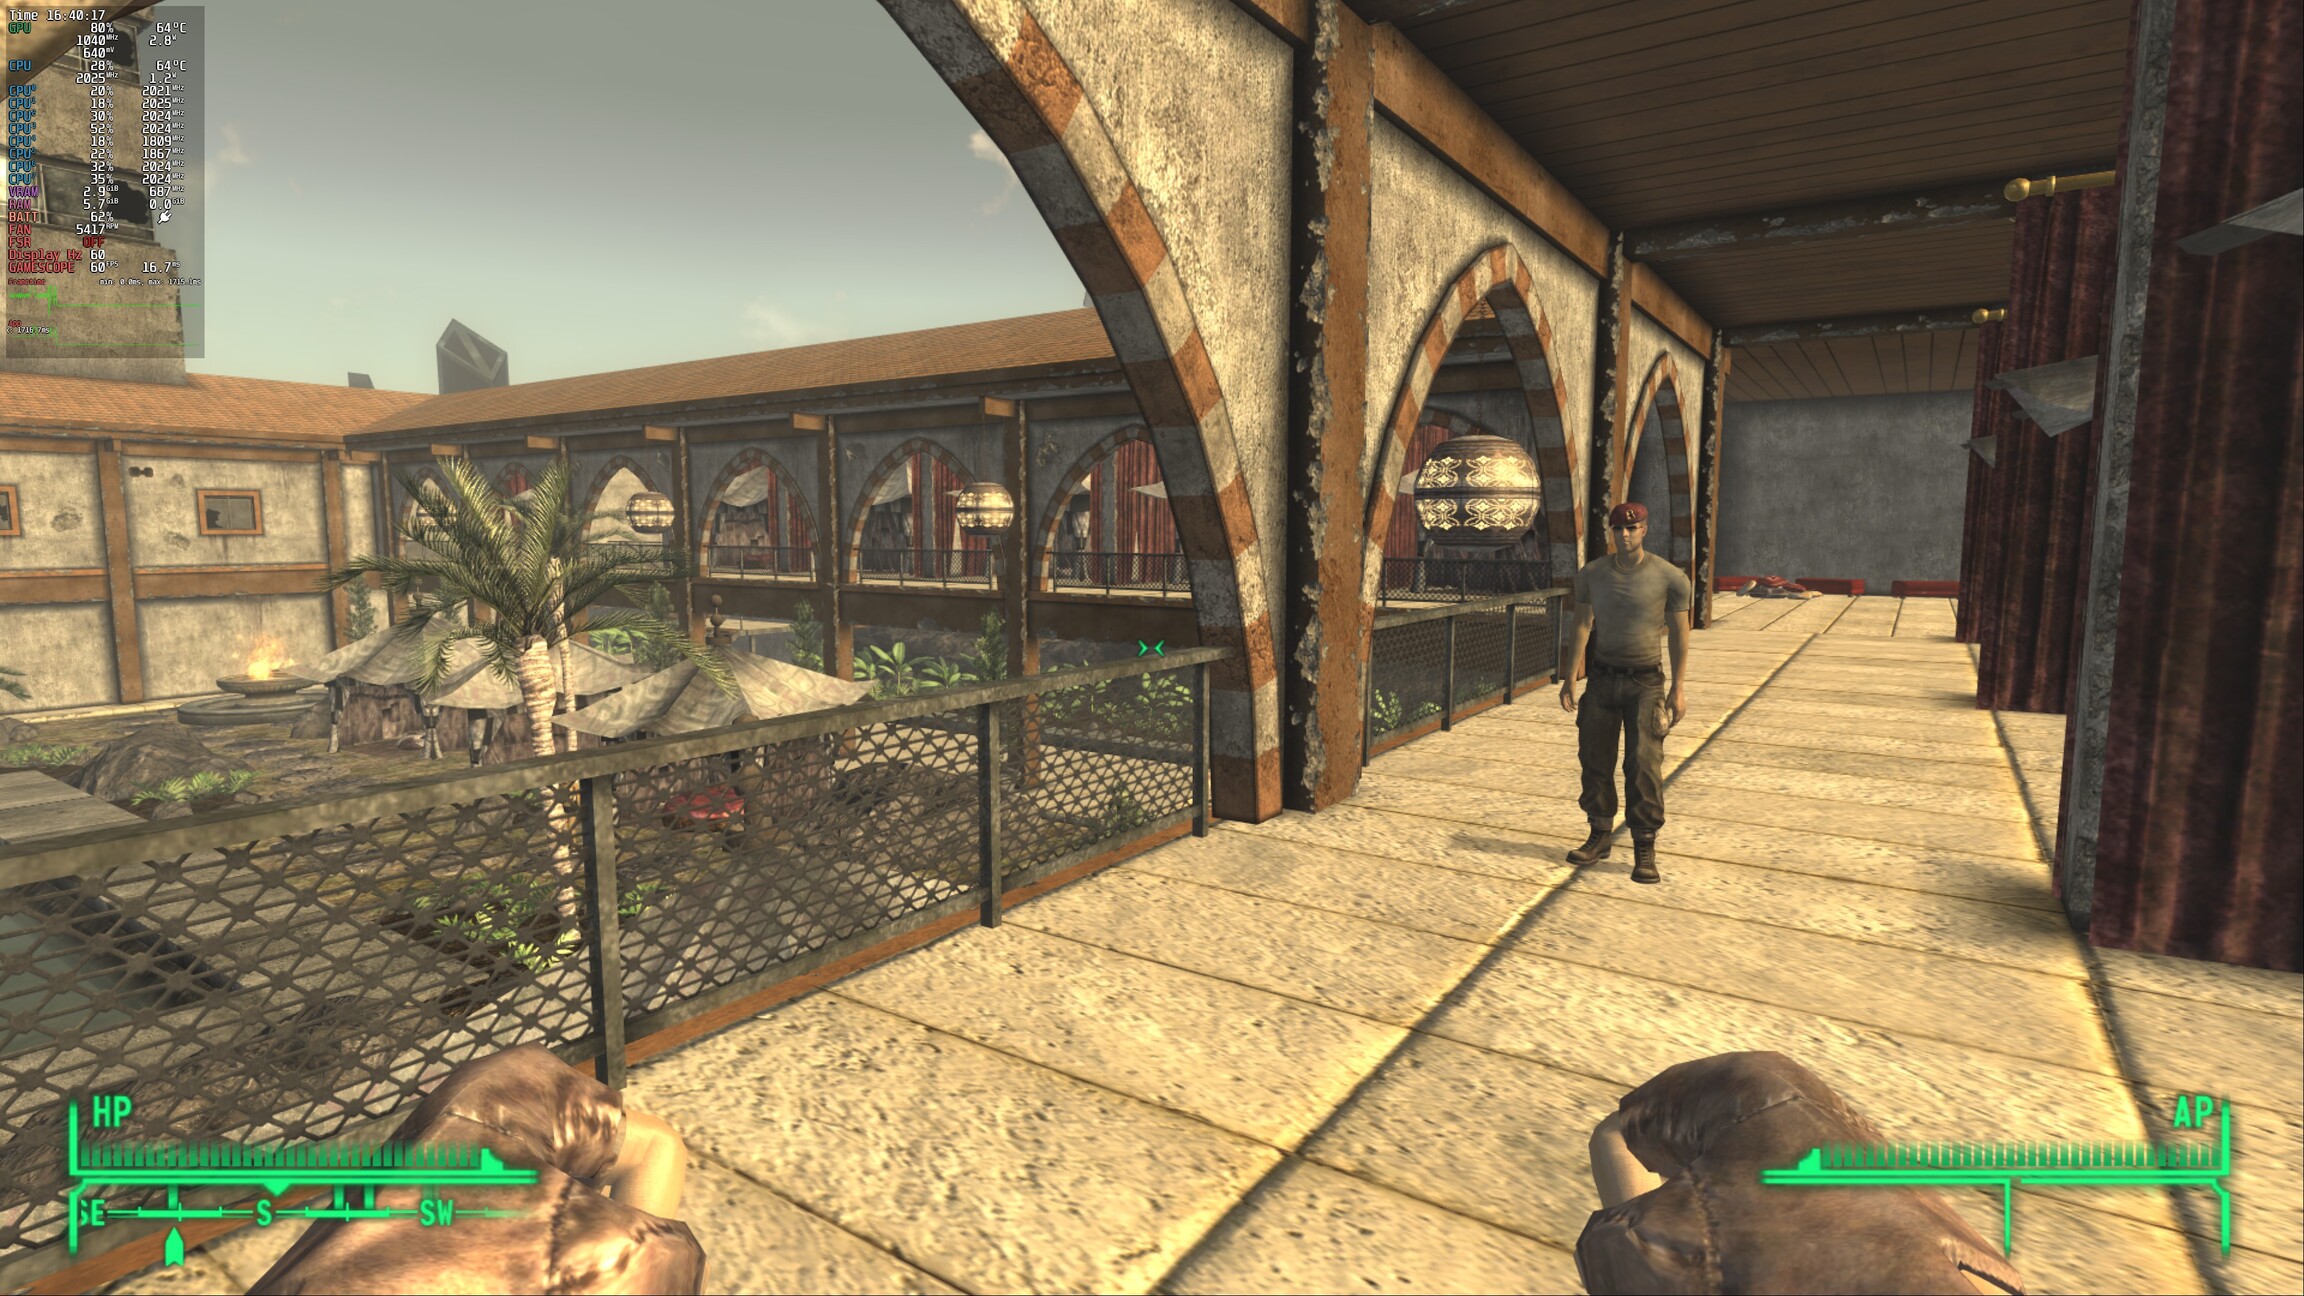
and here it is ON:
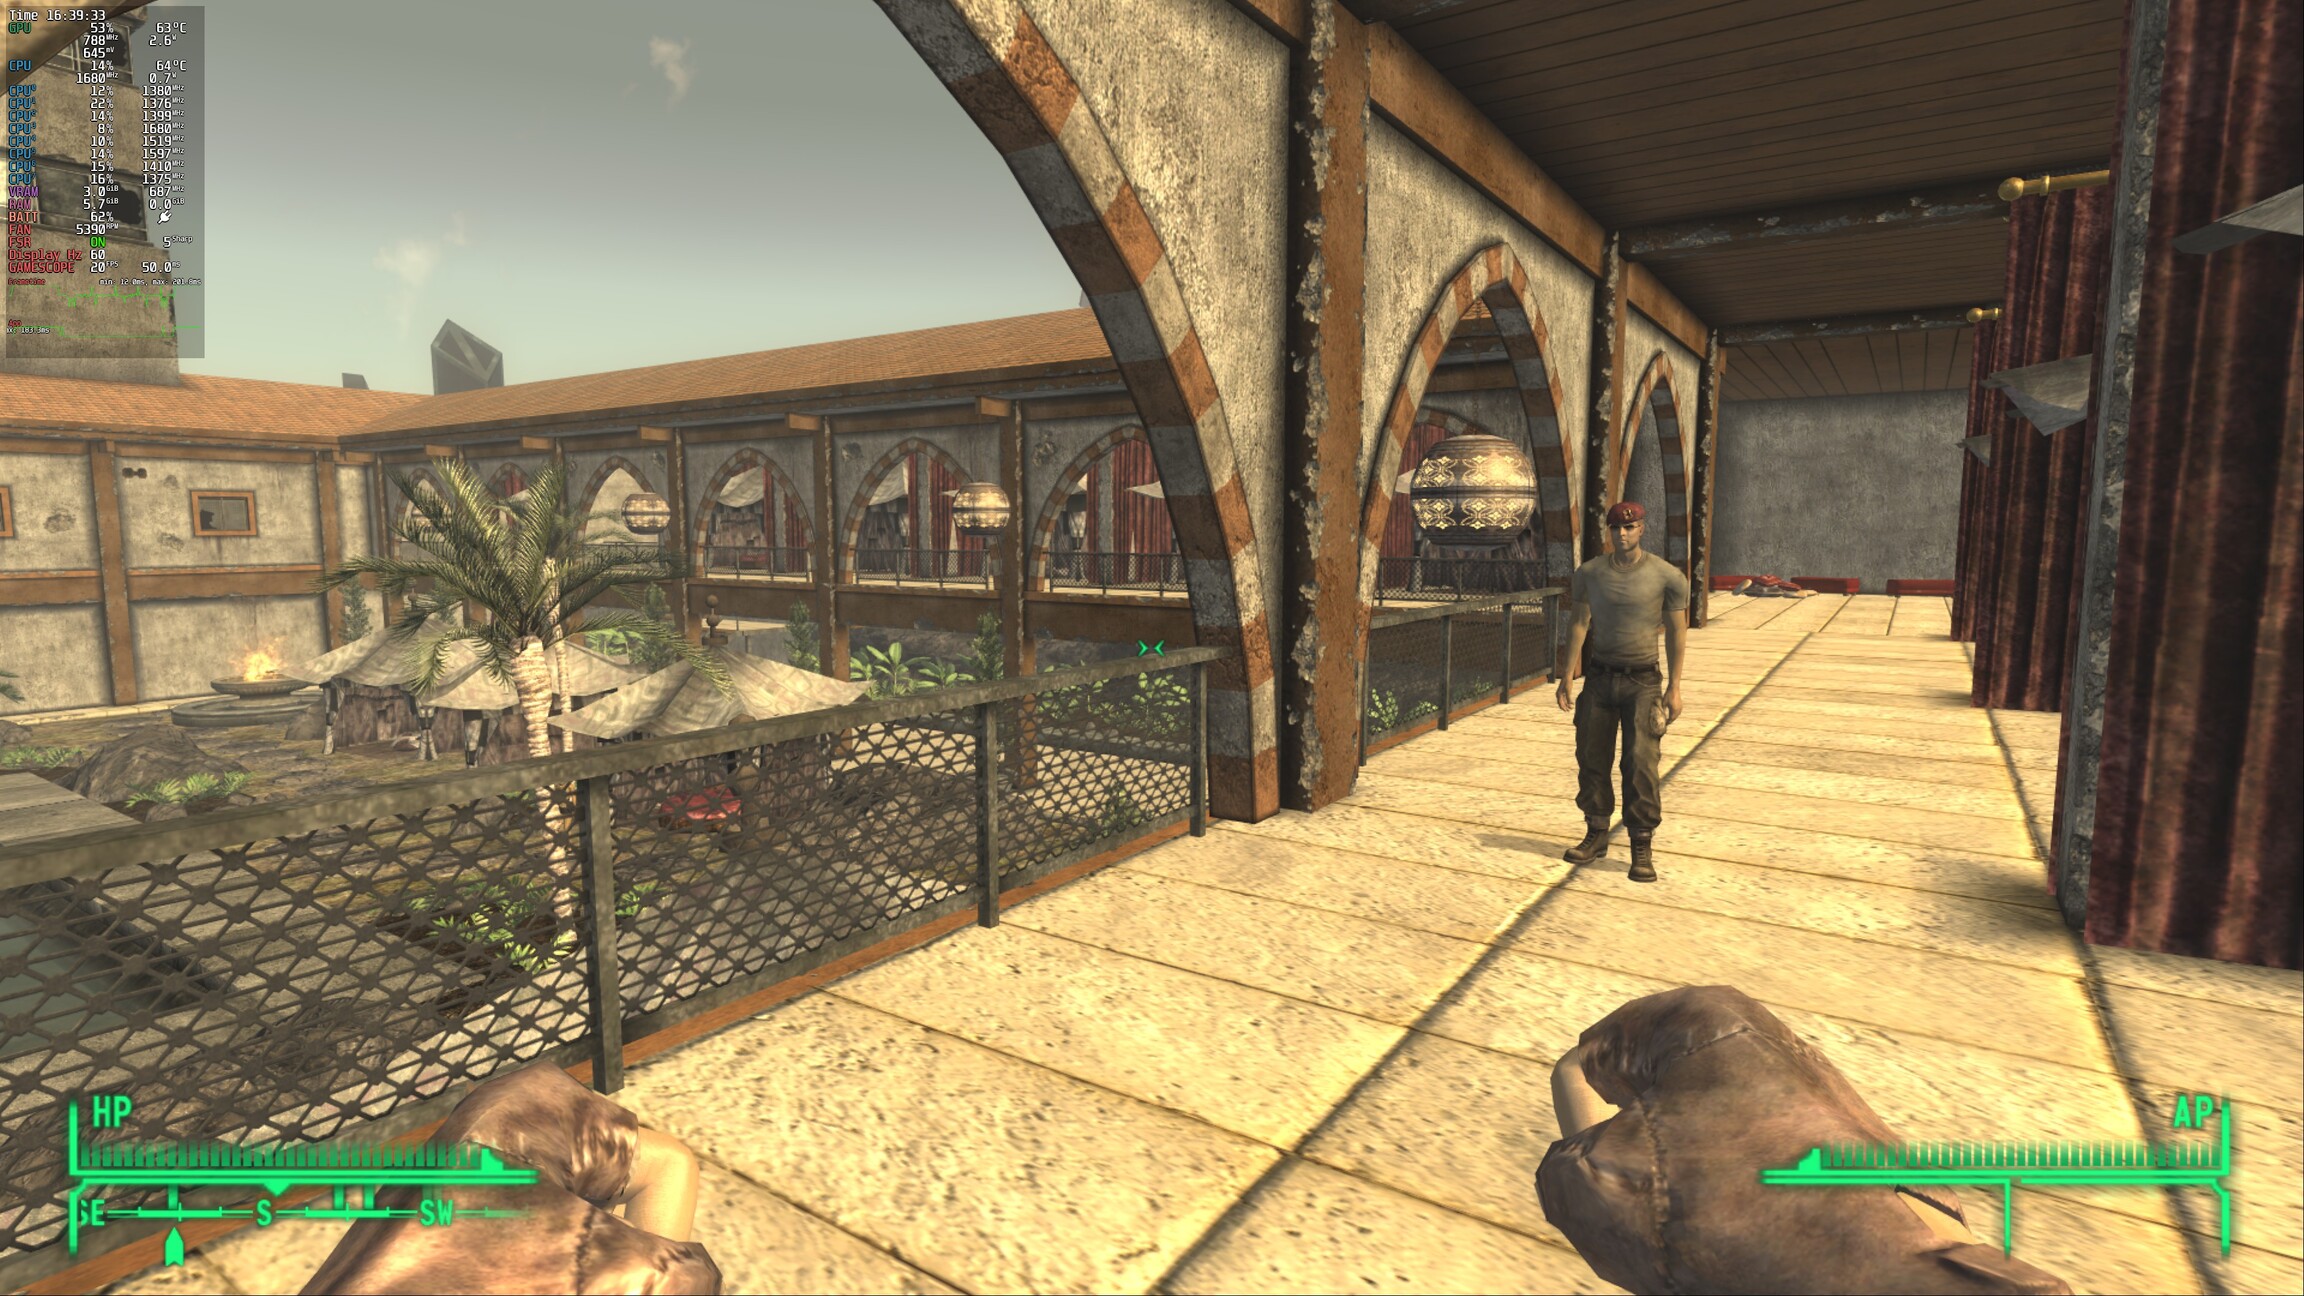
The screenshots are not in 3840x2160 resolution because I scaled them down to make the files size smaller. And anyway, the effect of applied FSR is only(?) visible “live”, so it cannot(?) be seen on screenshots, and the screenshots are here just to demonstrate the enabled FSR label in MangoHud.
Okay, the FSR is enabled, and the picture actually did become pretty clear / not blurred, so this lower resolution of 1920x1080 was indeed upscaled to 3840x2160. But what else I noticed right away is that with FSR disabled I get 60 FPS (the maximum available at 3840x2160 resolution), but with FSR enabled I only get pathetic 20 FPS! I guess, upscaling to 4K is quite a heavy job, so scenario isn’t really viable. Hell, I got much higher FPS with the game resolution set to 3840x2160, so what’s the point of using FSR at all then? Am I expected to set my 4K TV resolution to 1080p and set games resolution to 720p? Will FSR then be able to upscale that with an adequate performance? But even if it will, what’s the point then, as I’ll be already loosing my 4K.
I tested it with a different game, Metro 2033 Redux, but the result was similar. The external display (TV) resolution is set to 3840x2160 and the resolution in game settings is set to 1920x1080:
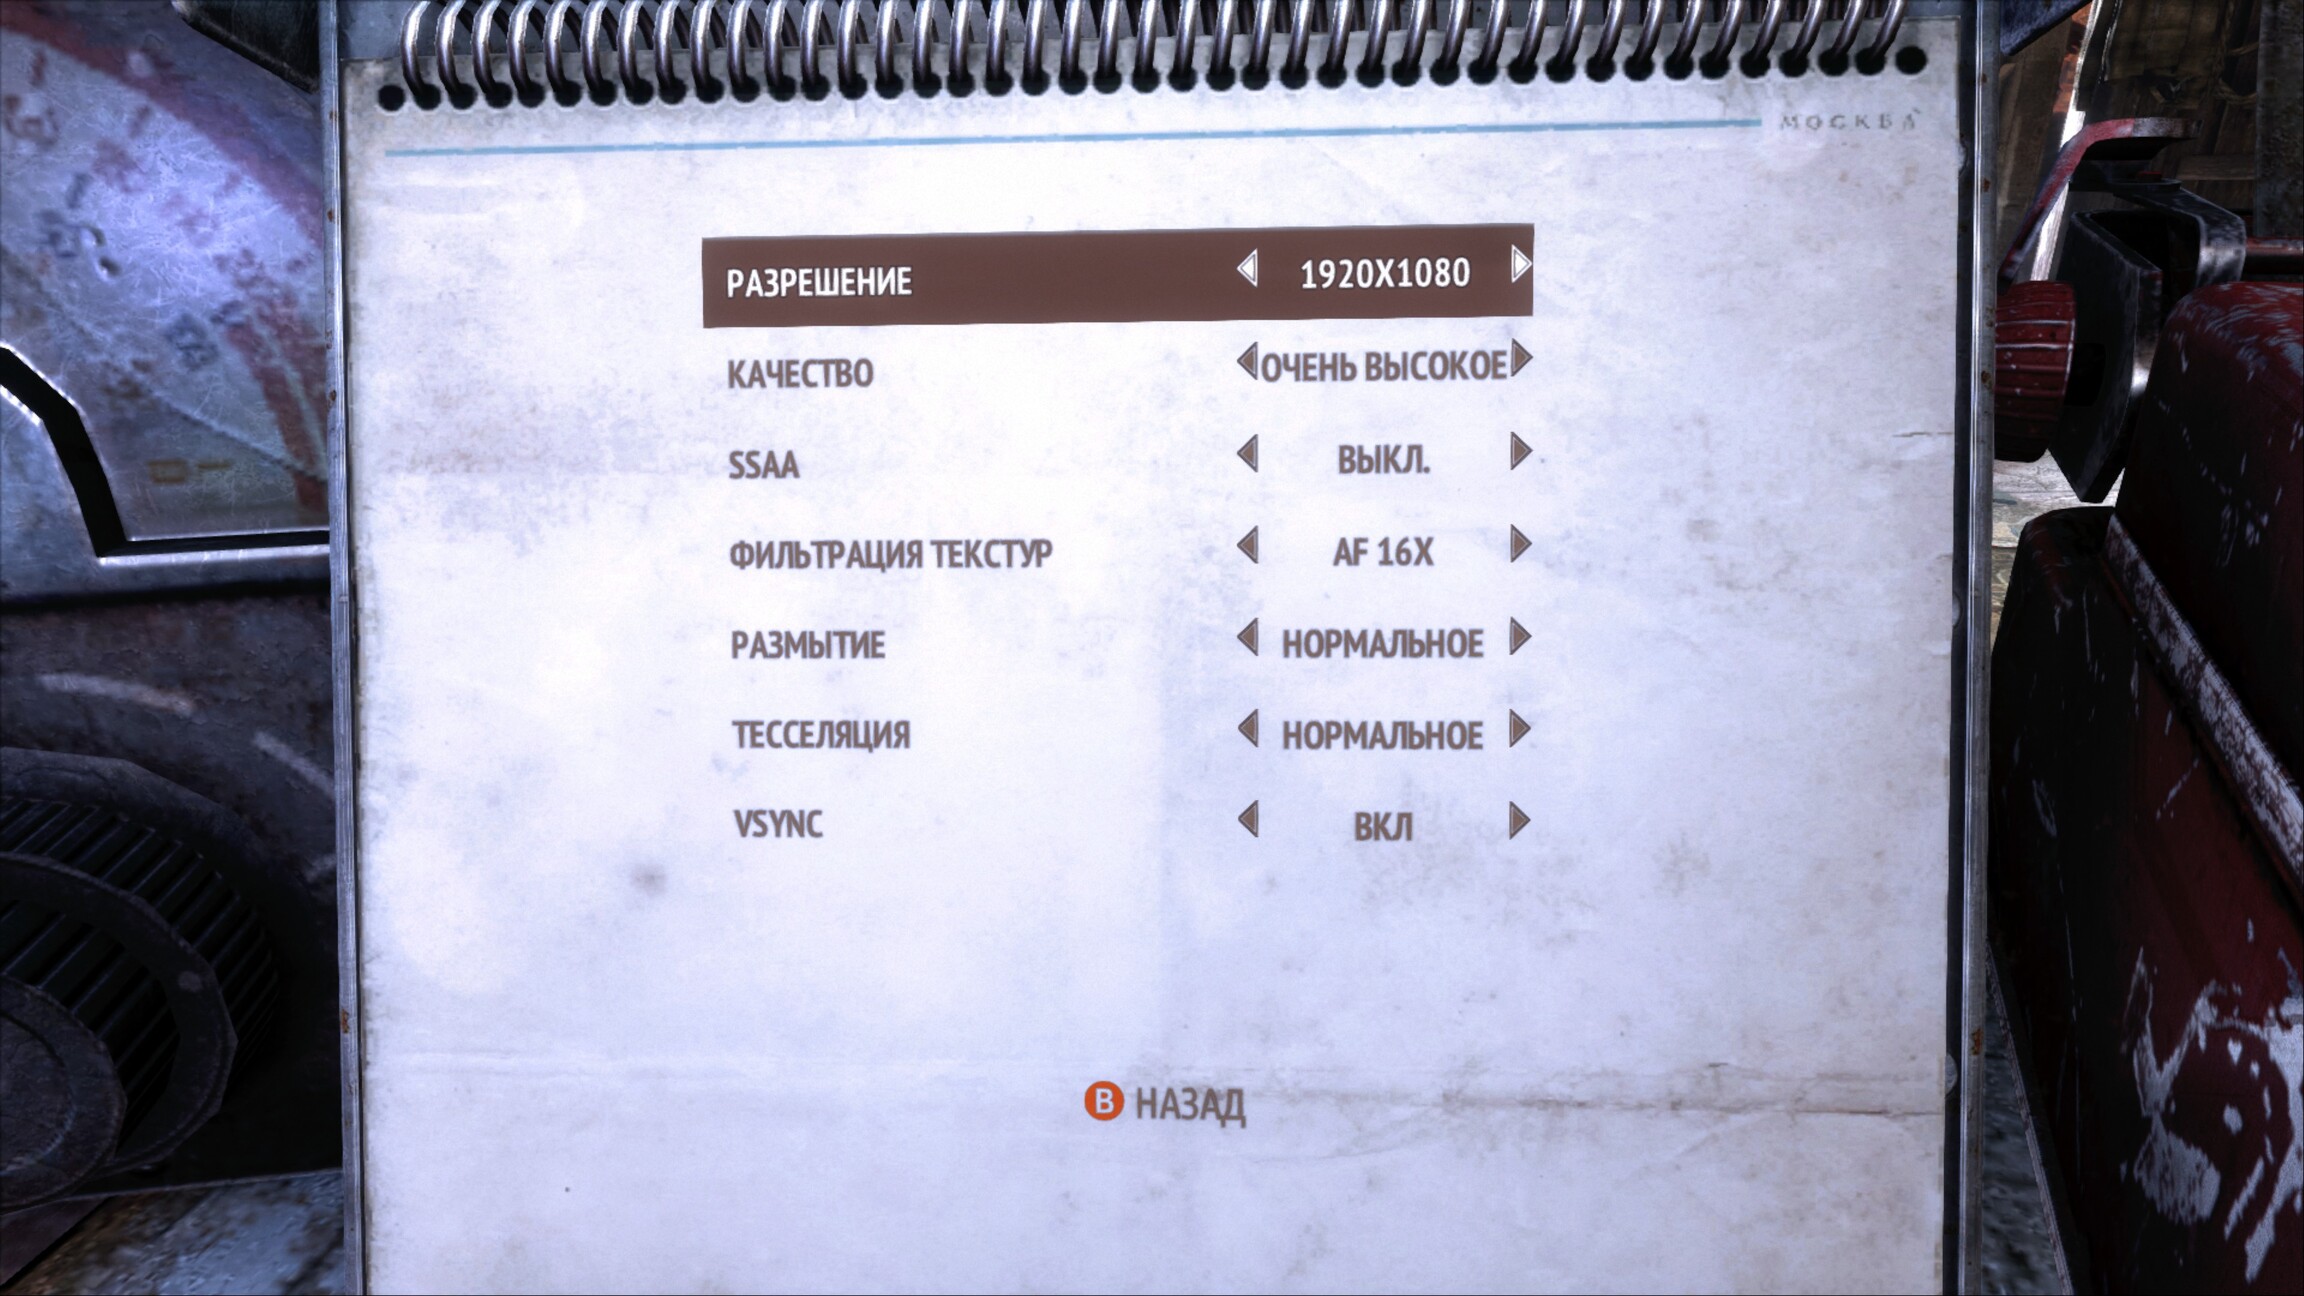
FSR disabled:

FSR enabled:
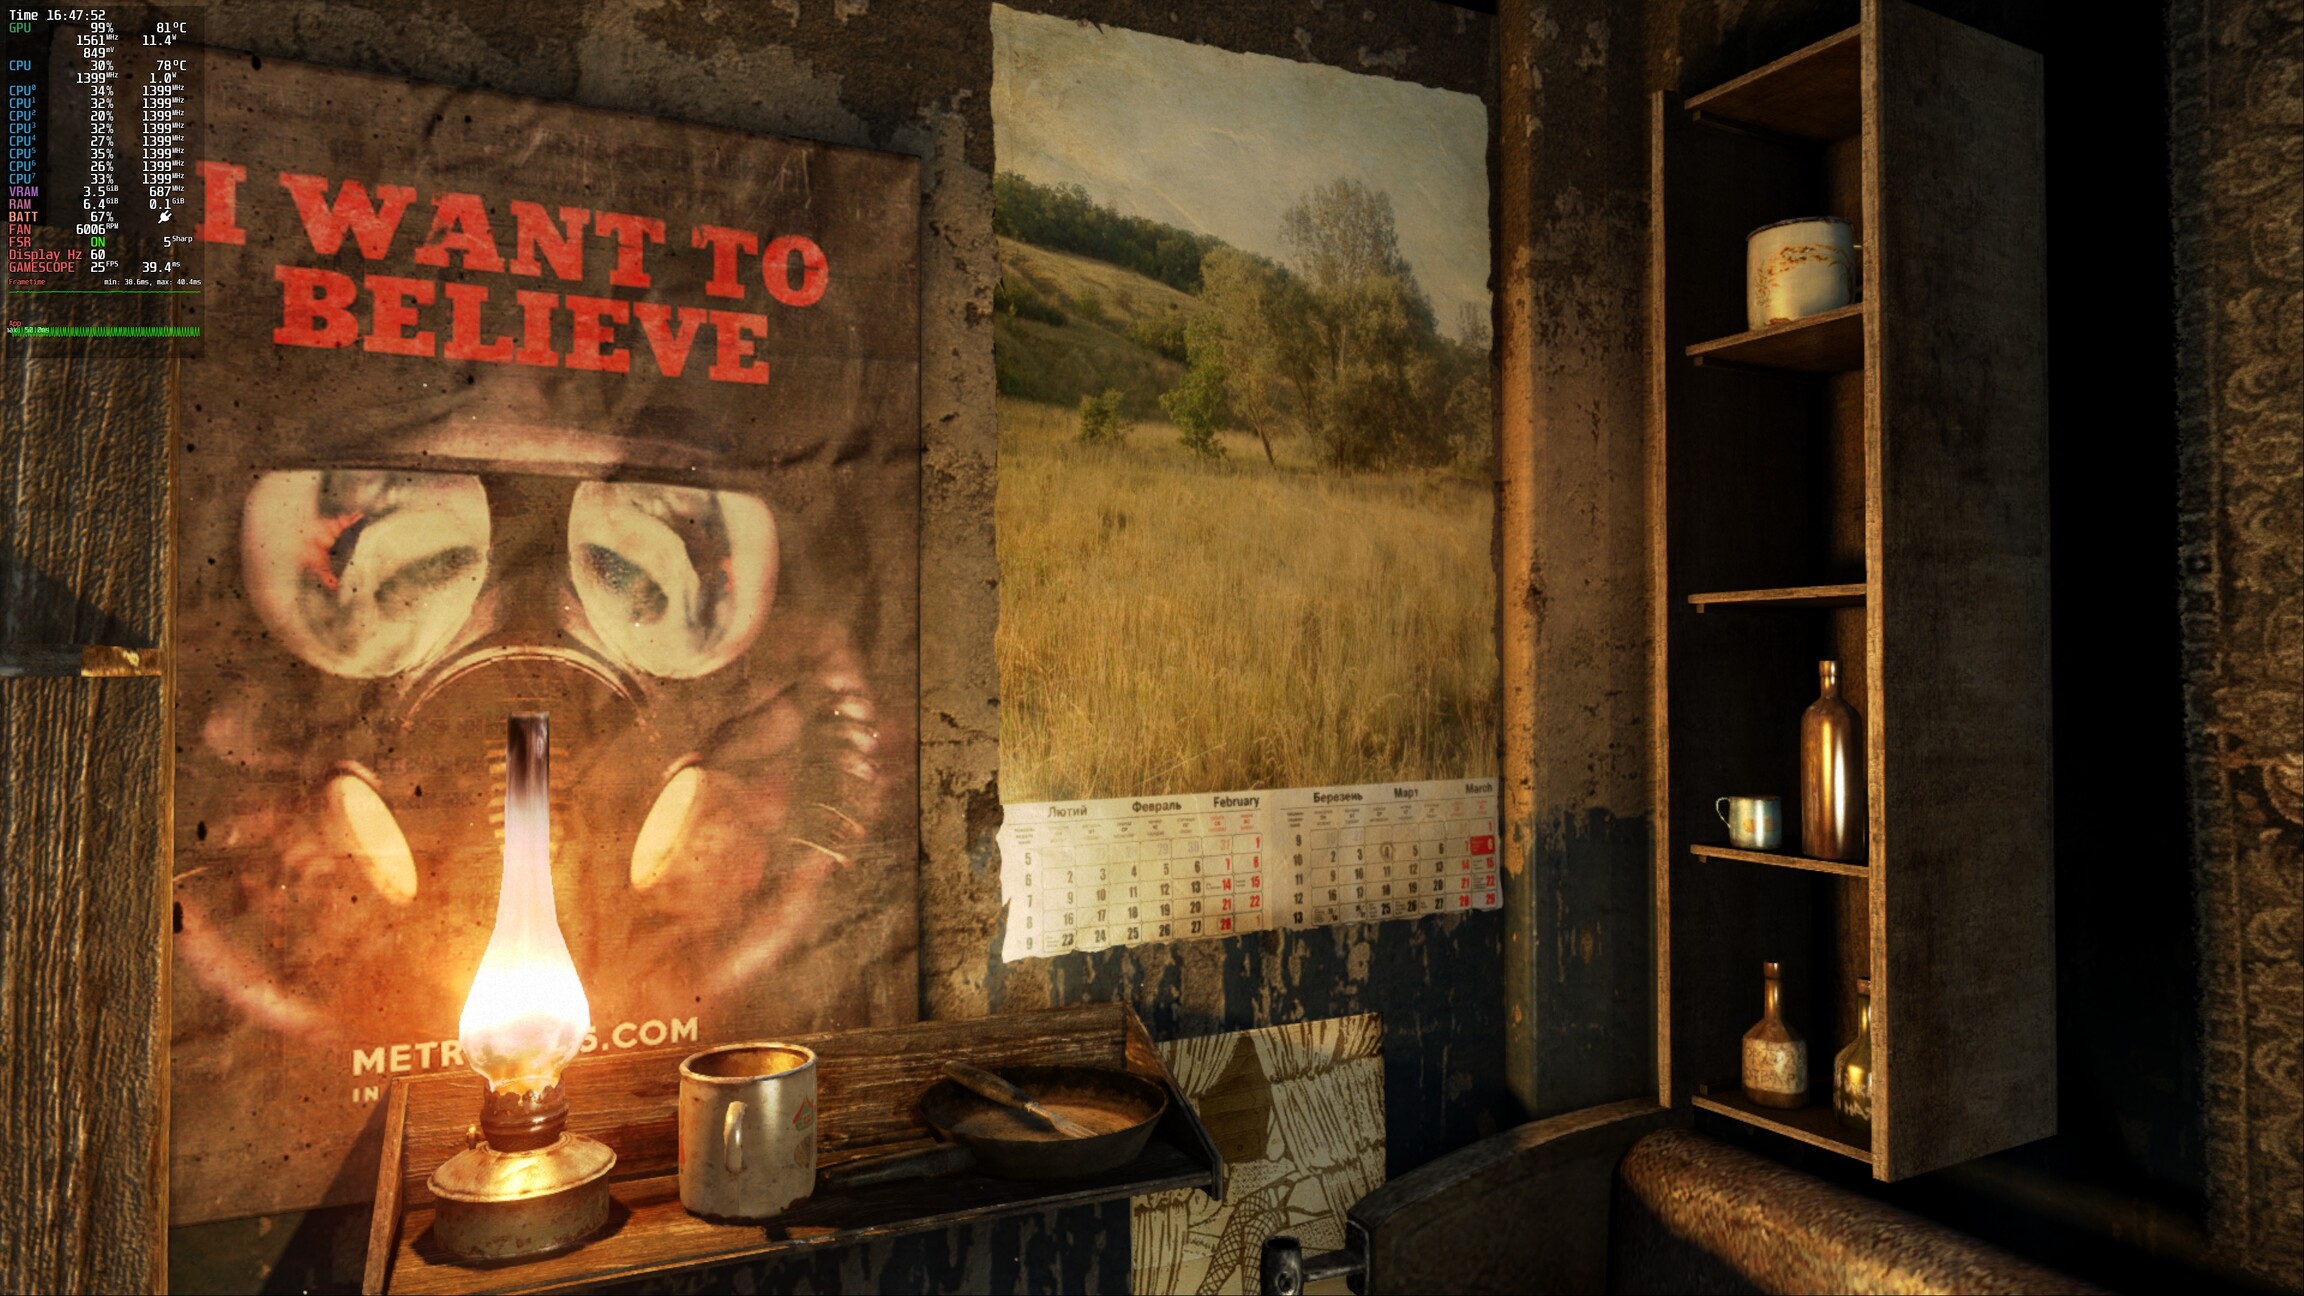
So again, enabling FSR dropped FPS from 36 to 25.
Moreover, in some games it doesn’t even enable. For instance, here’s Showgunners game, and FSR never gets to ON with it:
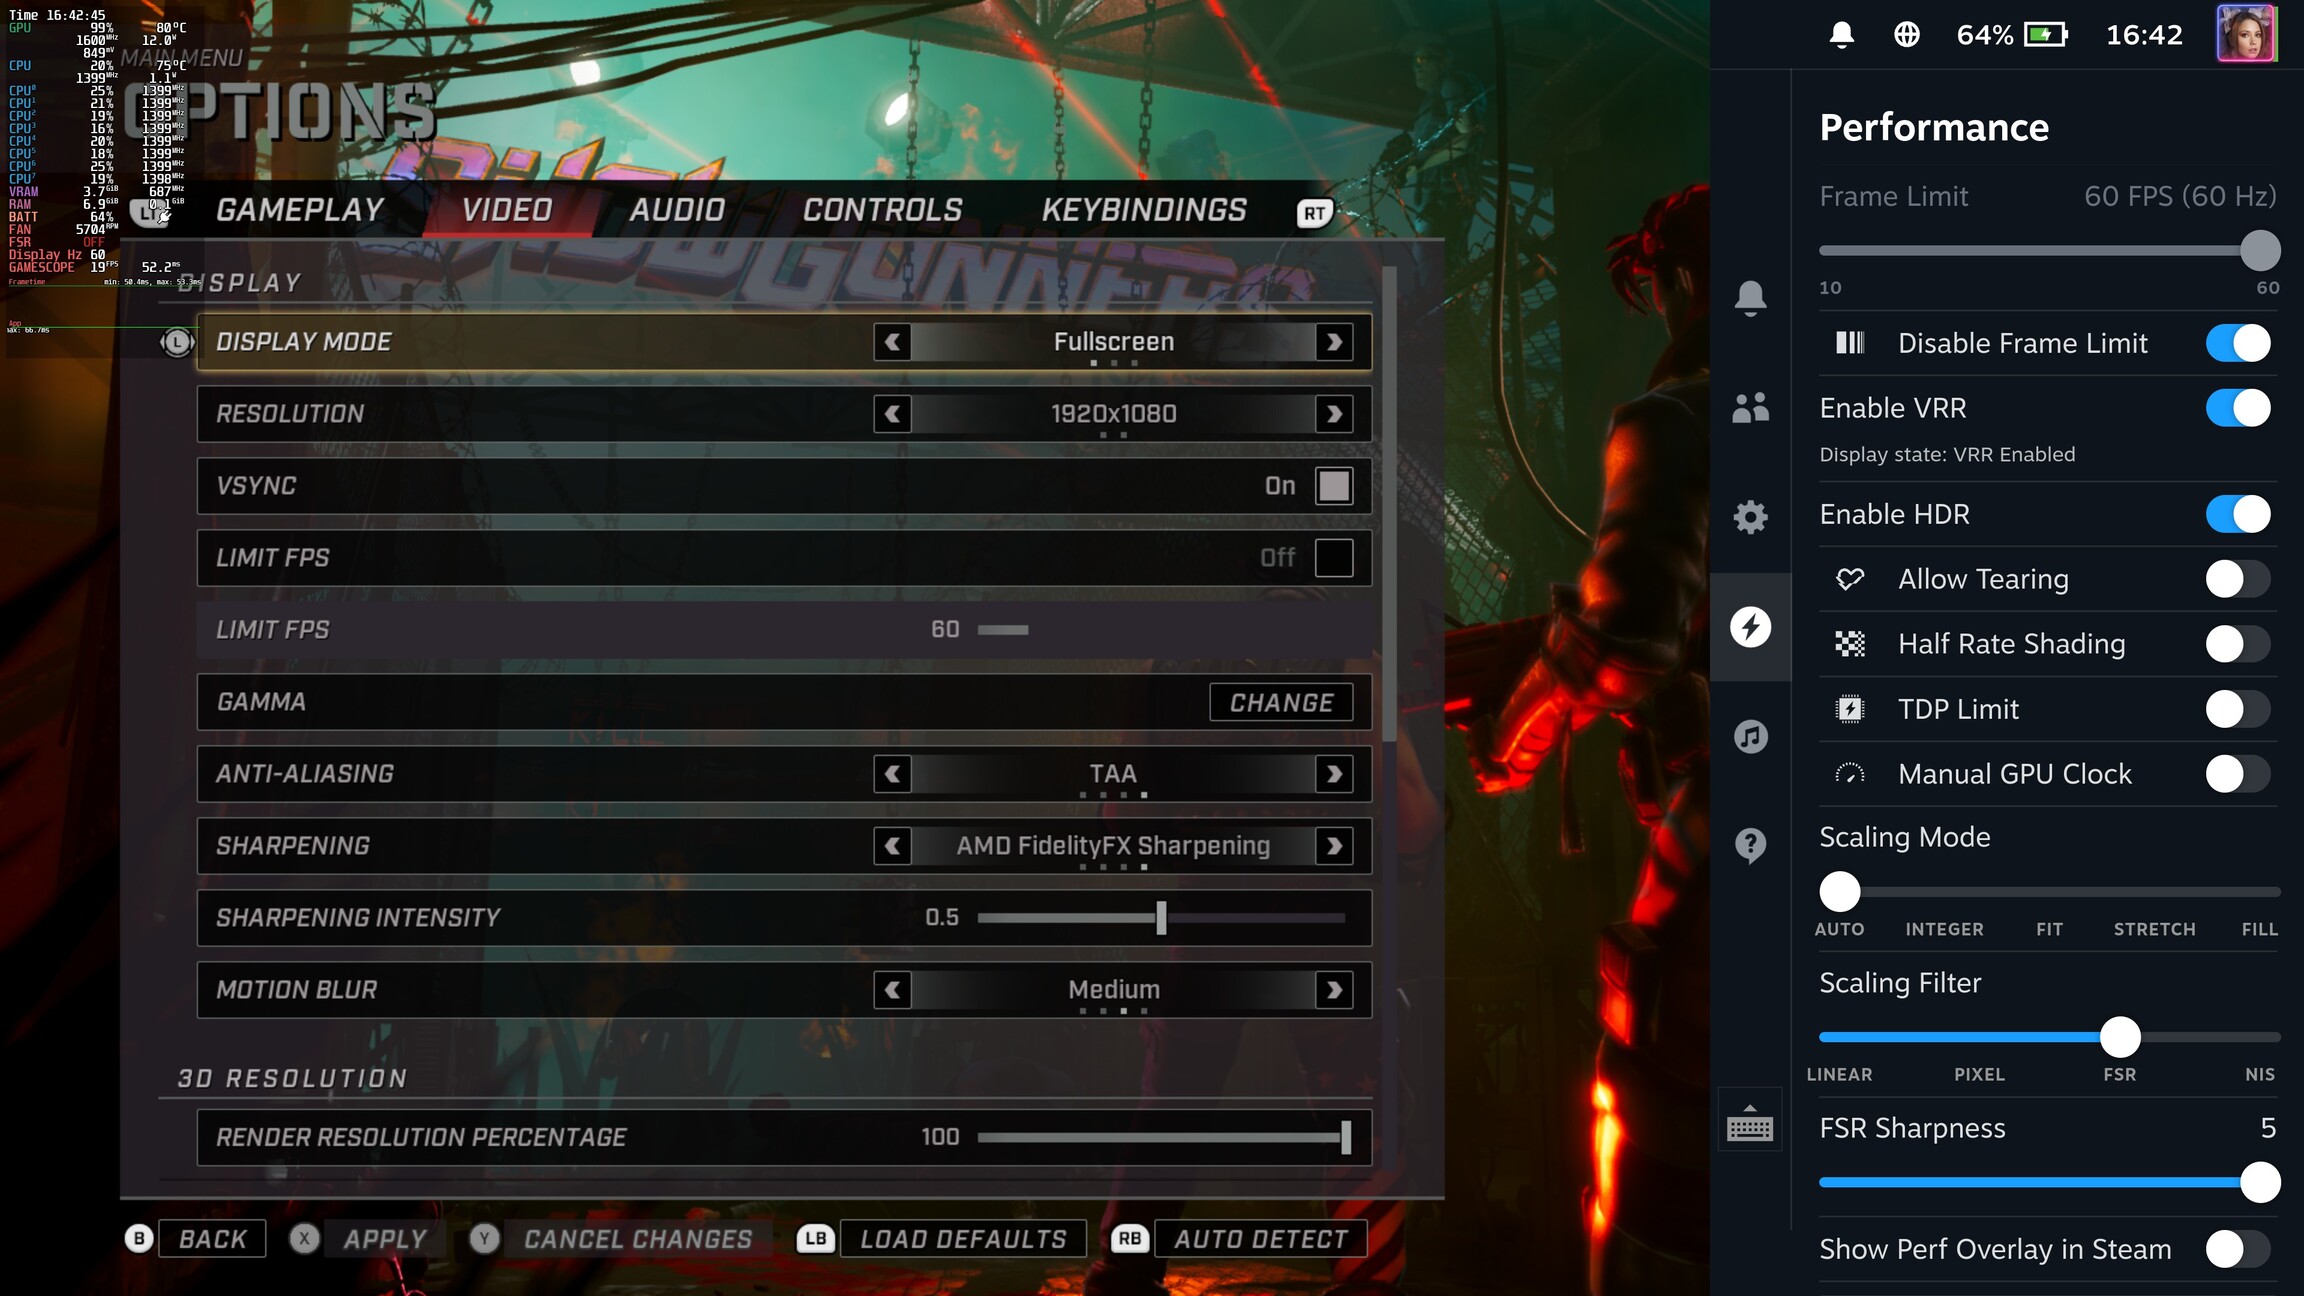
Switching between fullscreen and windowed mode has no effect either, the FSR is always OFF.
Either way, disregarding FSR/VRR/etc, Captain Obvious rushes to report that in general rendering to 4K resolution greatly increases the load on Steam Deck’s hardware, so it isn’t a lot of modern games that you’ll be able to play there with decent FPS.
2024-11-05 | Steam Game Recording
In November 2024 (couldn’t find the announcement, so I used their page date) Valve added Game Recording in Steam, and it works on Steam Deck too.
The recordings are saved to Media gallery, and while it is possible to export them from there, the UI isn’t very convenient, in my opinion. It might work better in the desktop client, but I struggled with it quite a bit tring to export a video in Gaming mode.
So instead I decided to just get the files directly from disk, but I was somewhat surprised to see that it is not a single file per recording but a collection of files, which are furthermore also split into video and audio streams. To make it worse, in some cases it might be several such collections per one recording session, which would look like this:
$ tree /home/deck/.local/share/Steam/userdata/YOUR-ID/gamerecordings/video
├── bg_9361349647978725376_20260103_151654
│   ├── chunk-stream0-00001.m4s
│   ├── chunk-stream0-00002.m4s
│   ├── chunk-stream1-00001.m4s
│   ├── chunk-stream1-00002.m4s
│   ├── init-stream0.m4s
│   ├── init-stream1.m4s
│   └── session.mpd
├── bg_9361349647978725376_20260103_151658
│   ├── chunk-stream0-00001.m4s
│   ├── chunk-stream0-00002.m4s
│   ├── chunk-stream1-00001.m4s
│   ├── chunk-stream1-00002.m4s
│   ├── init-stream0.m4s
│   ├── init-stream1.m4s
│   └── session.mpd
├── bg_9361349647978725376_20260103_151704_0
│   ├── chunk-stream0-00001.m4s
│   ├── chunk-stream1-00001.m4s
│   ├── init-stream0.m4s
│   ├── init-stream1.m4s
│   └── session.mpd
├── bg_9361349647978725376_20260103_151706_0
│   ├── chunk-stream0-00001.m4s
│   ├── chunk-stream1-00001.m4s
│   ├── init-stream0.m4s
│   ├── init-stream1.m4s
│   └── session.mpd
└── bg_9361349647978725376_20260103_151709
    ├── chunk-stream0-00001.m4s
    ├── chunk-stream0-00002.m4s
    ├── chunk-stream0-00003.m4s
    ├── chunk-stream0-00004.m4s
    ├── chunk-stream1-00001.m4s
    ├── chunk-stream1-00002.m4s
    ├── chunk-stream1-00003.m4s
    ├── chunk-stream1-00004.m4s
    ├── init-stream0.m4s
    ├── init-stream1.m4s
    └── session.mpd
Good news that at least they share the same prefix in their names - here it is bg_9361349647978725376 - so it is possible to find all the “collections” from the same recording. Although I imagine different recording sessions of the same game would have the same prefix, so then one would also need to consider the date/time too.
Anyway, joining the collection files into one single video file with FFmpeg is trivial enough:
$ cd /home/deck/.local/share/Steam/userdata/YOUR-ID/gamerecordings/video/bg_9361349647978725376_20260103_151654/
$ ffmpeg \
        -i <(cat ./init-stream0.m4s ./chunk-stream0-*.m4s) \
        -i <(cat ./init-stream1.m4s ./chunk-stream1-*.m4s) \
        -pix_fmt yuv420p \
        -c copy ./single.mp4
But doing this for every such collection in order to “assemble” the final video for the entire recording session is less trivial, so I made a script for that, and here is how you can use it:
$ ./concat-steam-game-recording.sh \
    -p /home/deck/.local/share/Steam/userdata/YOUR-ID/gamerecordings/video \
    -r bg_9361349647978725376
[DEBUG] Path to recordings: /home/deck/.local/share/Steam/userdata/YOUR-ID/gamerecordings/video
[DEBUG] Recording ID: bg_9361349647978725376
[DEBUG] Path to output: ./out.mp4
[DEBUG] Found FFmpeg: /usr/bin/ffmpeg
[DEBUG] Temporary folder: /tmp/tmp.9VbN8P7Ww6

Processing [/home/deck/.local/share/Steam/userdata/YOUR-ID/gamerecordings/video/bg_9361349647978725376_20260103_151654]...
Processing [/home/deck/.local/share/Steam/userdata/YOUR-ID/gamerecordings/video/bg_9361349647978725376_20260103_151658]...
Processing [/home/deck/.local/share/Steam/userdata/YOUR-ID/gamerecordings/video/bg_9361349647978725376_20260103_151704_0]...
Processing [/home/deck/.local/share/Steam/userdata/YOUR-ID/gamerecordings/video/bg_9361349647978725376_20260103_151706_0]...
Processing [/home/deck/.local/share/Steam/userdata/YOUR-ID/gamerecordings/video/bg_9361349647978725376_20260103_151709]...

Concatenating into the final video file...

$ mpv ./out.mp4


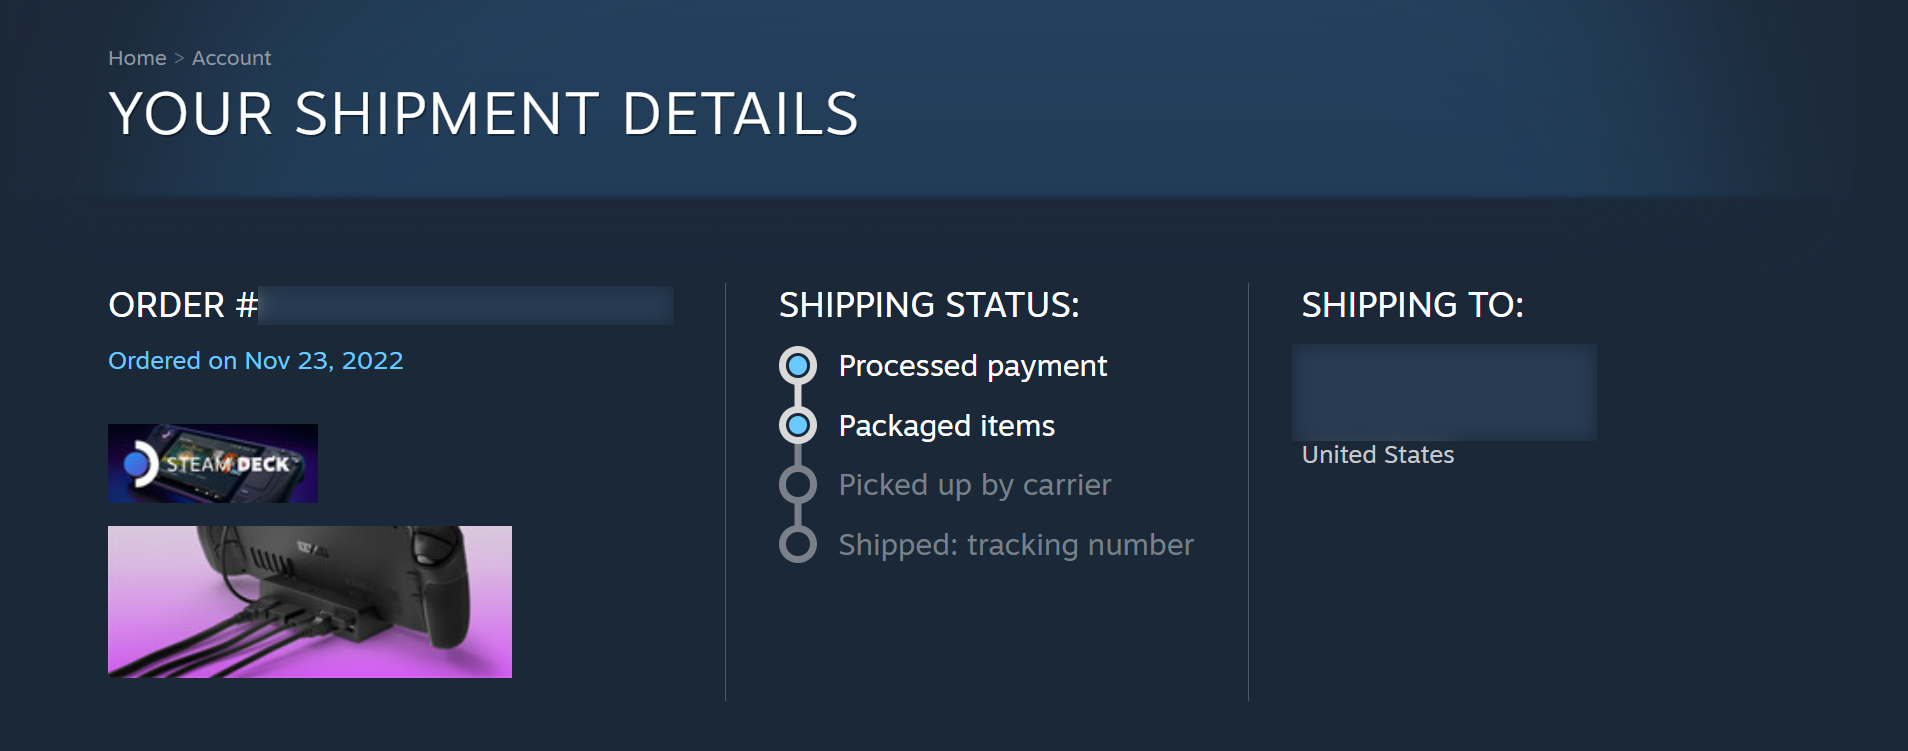
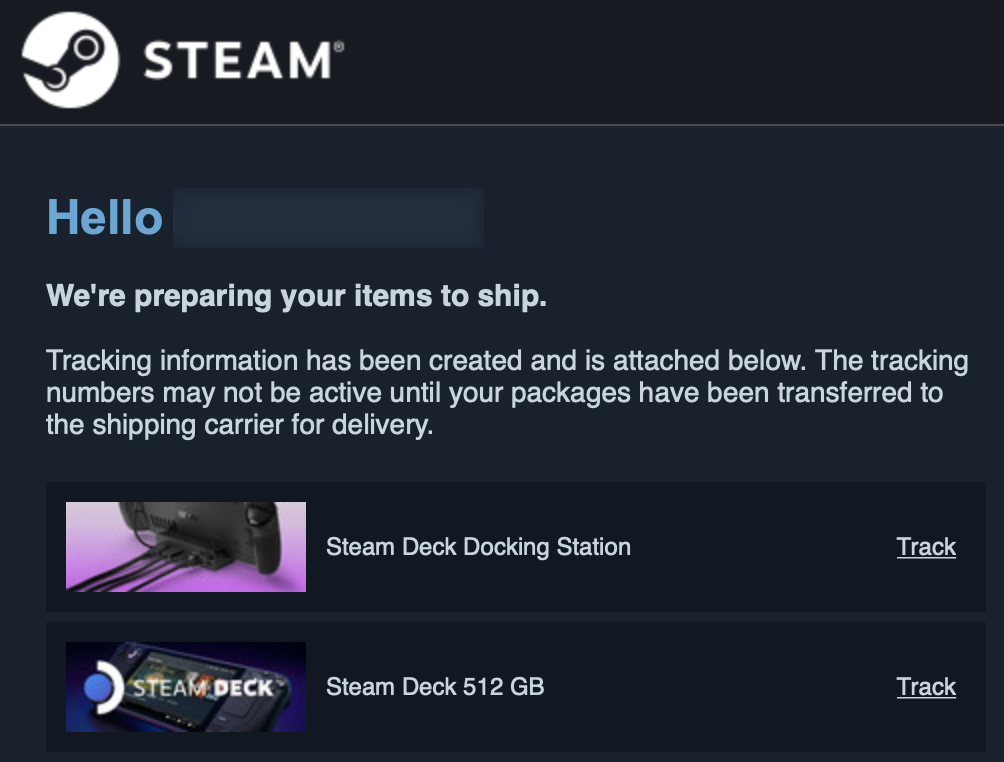
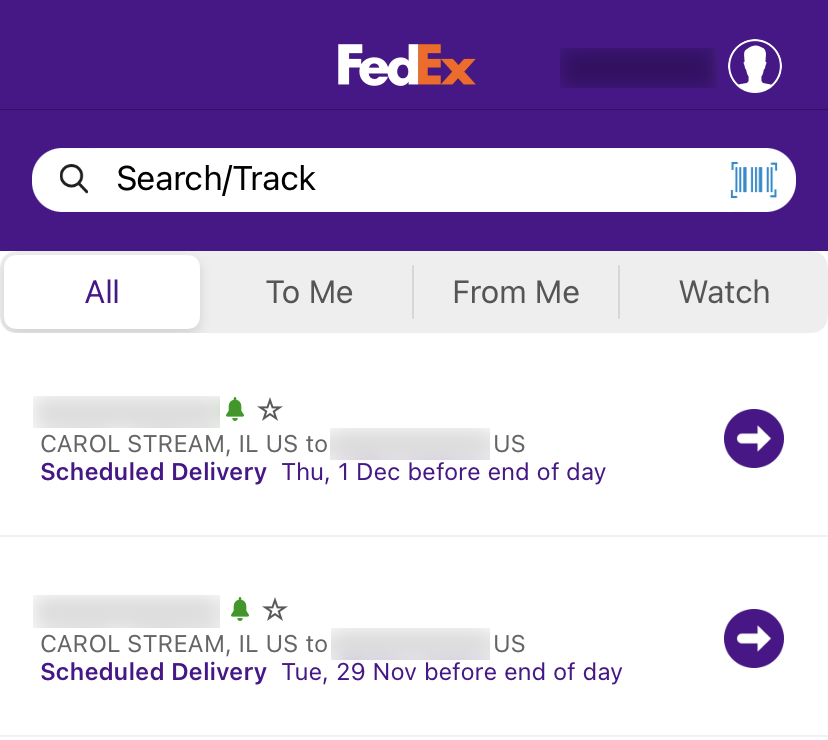
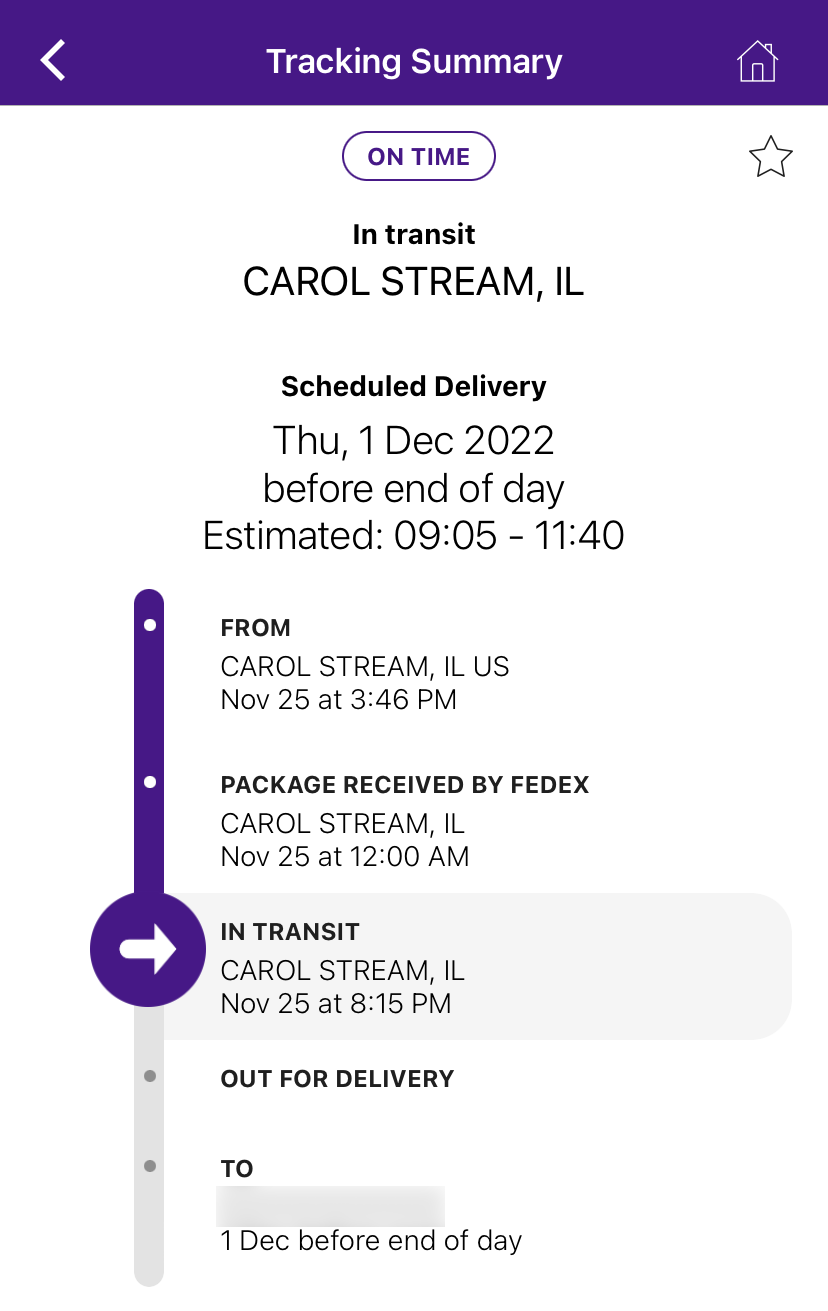
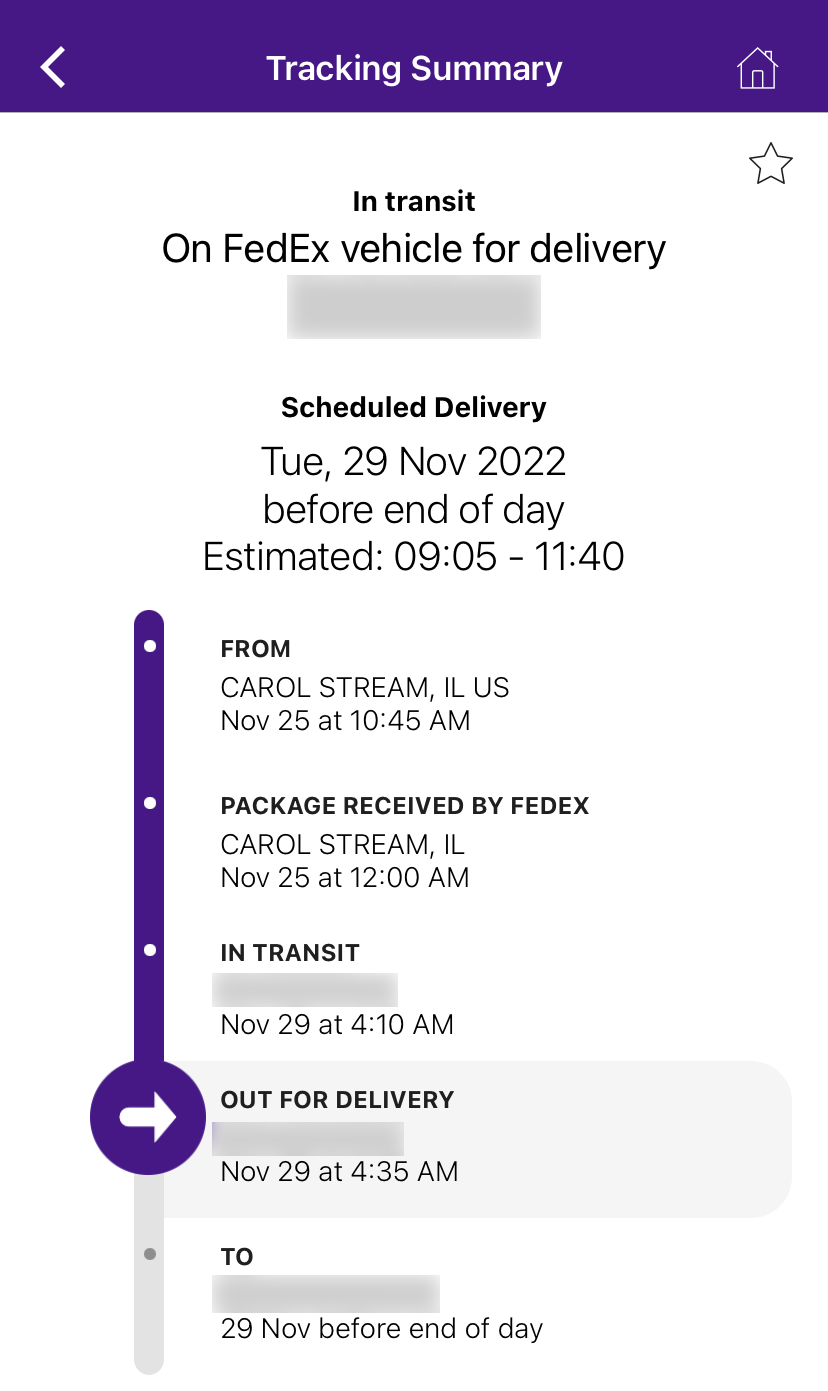
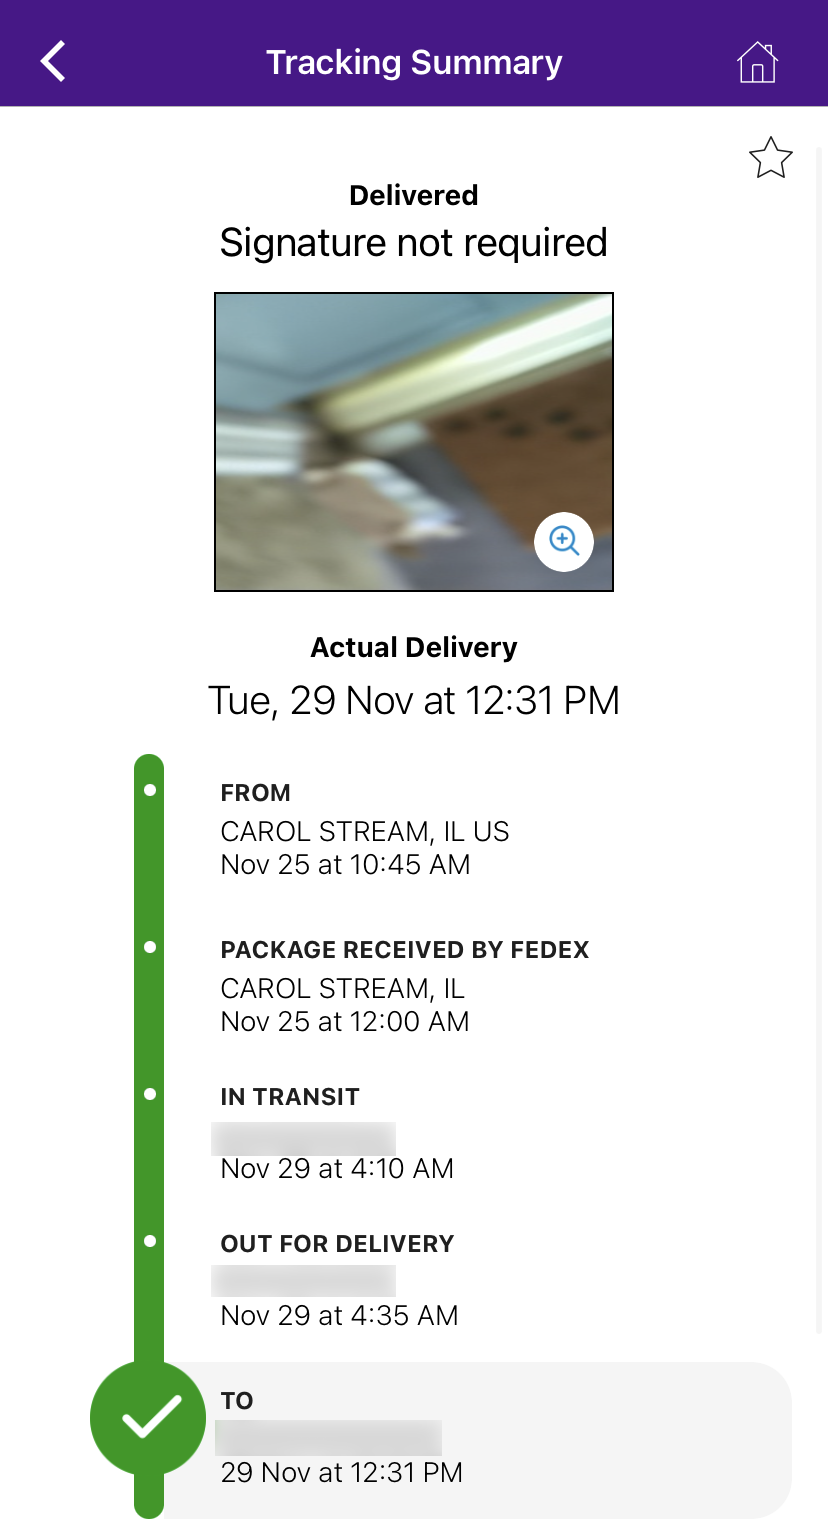
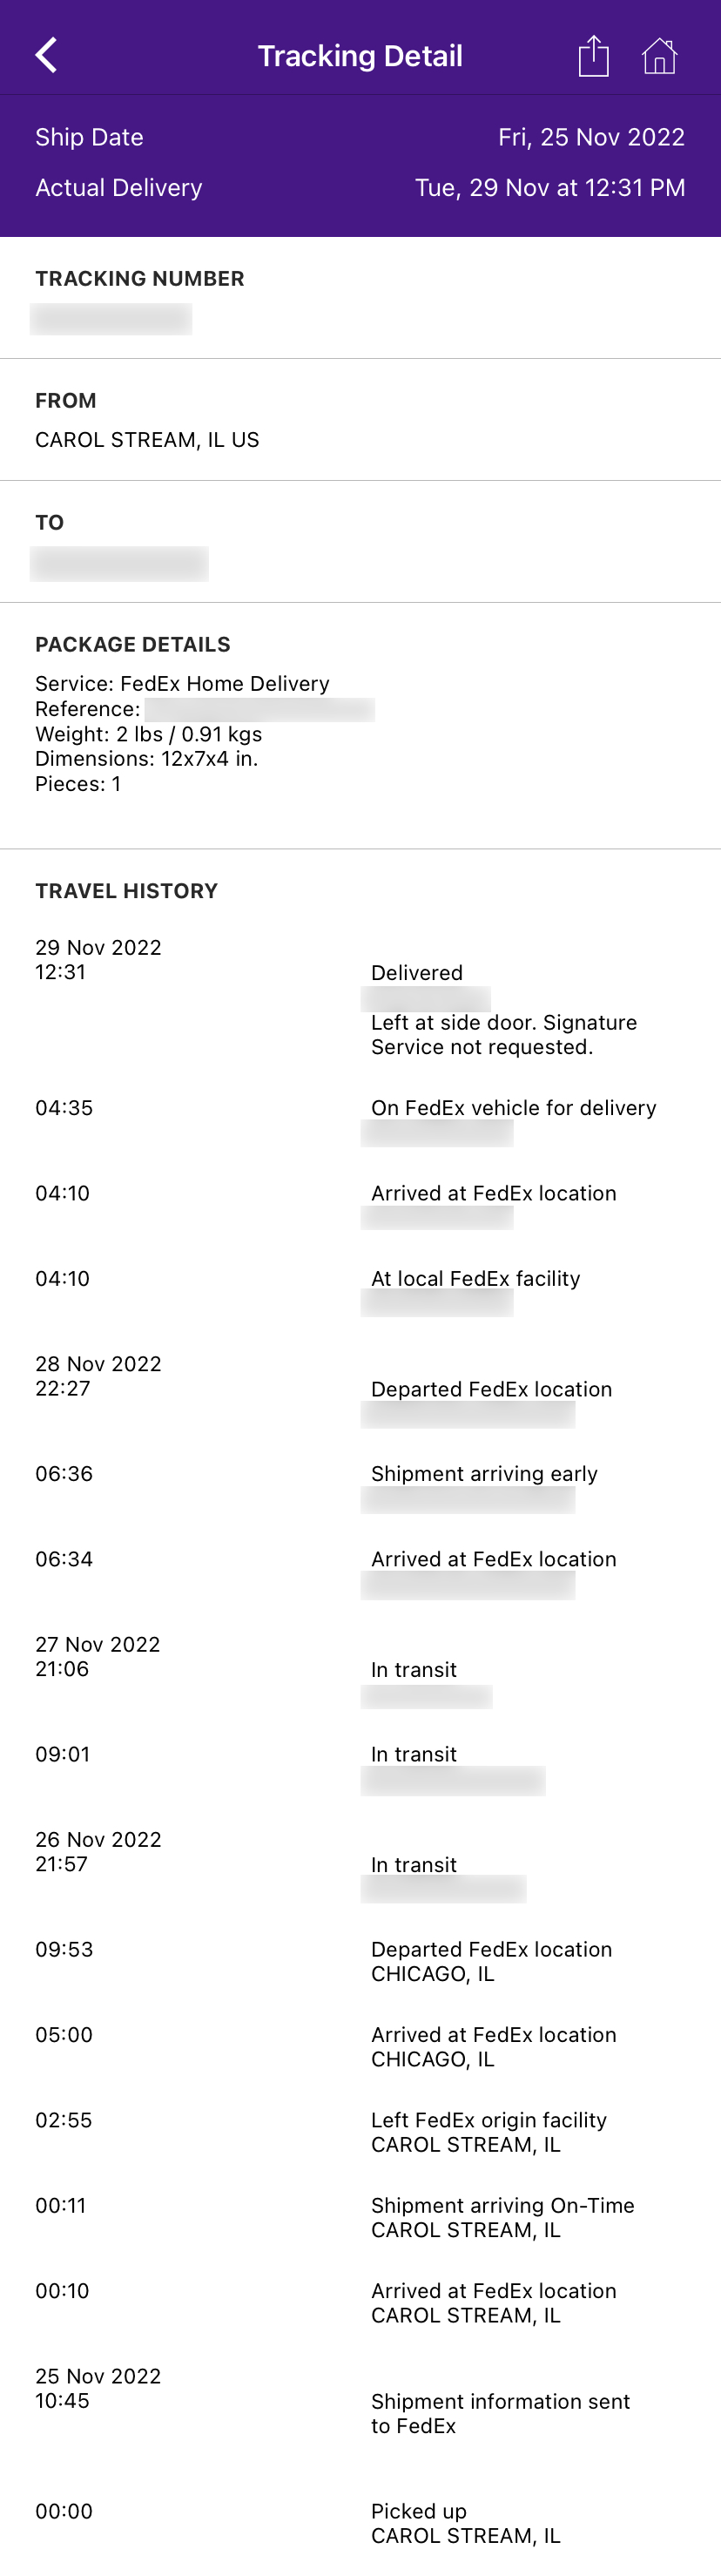
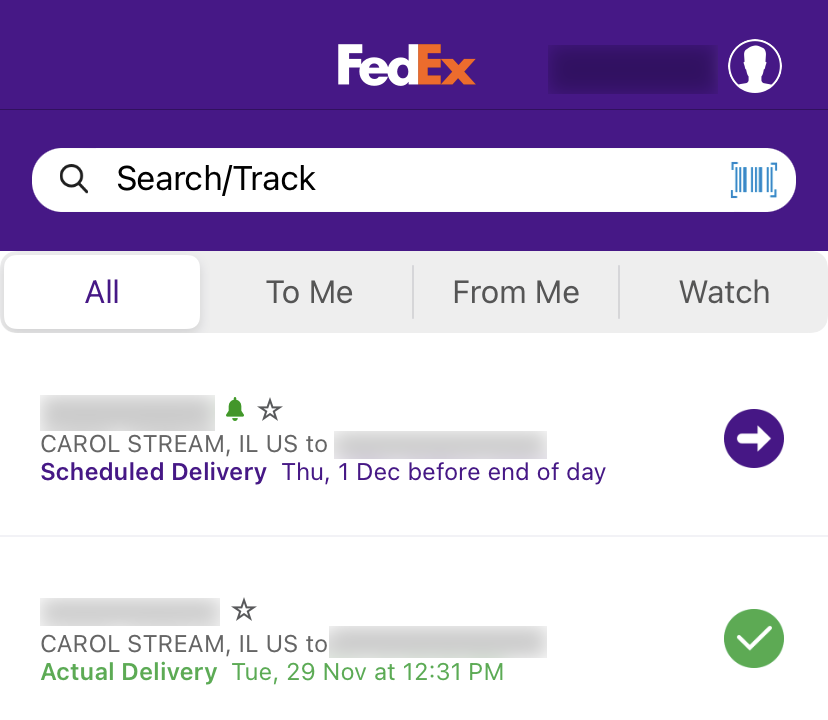
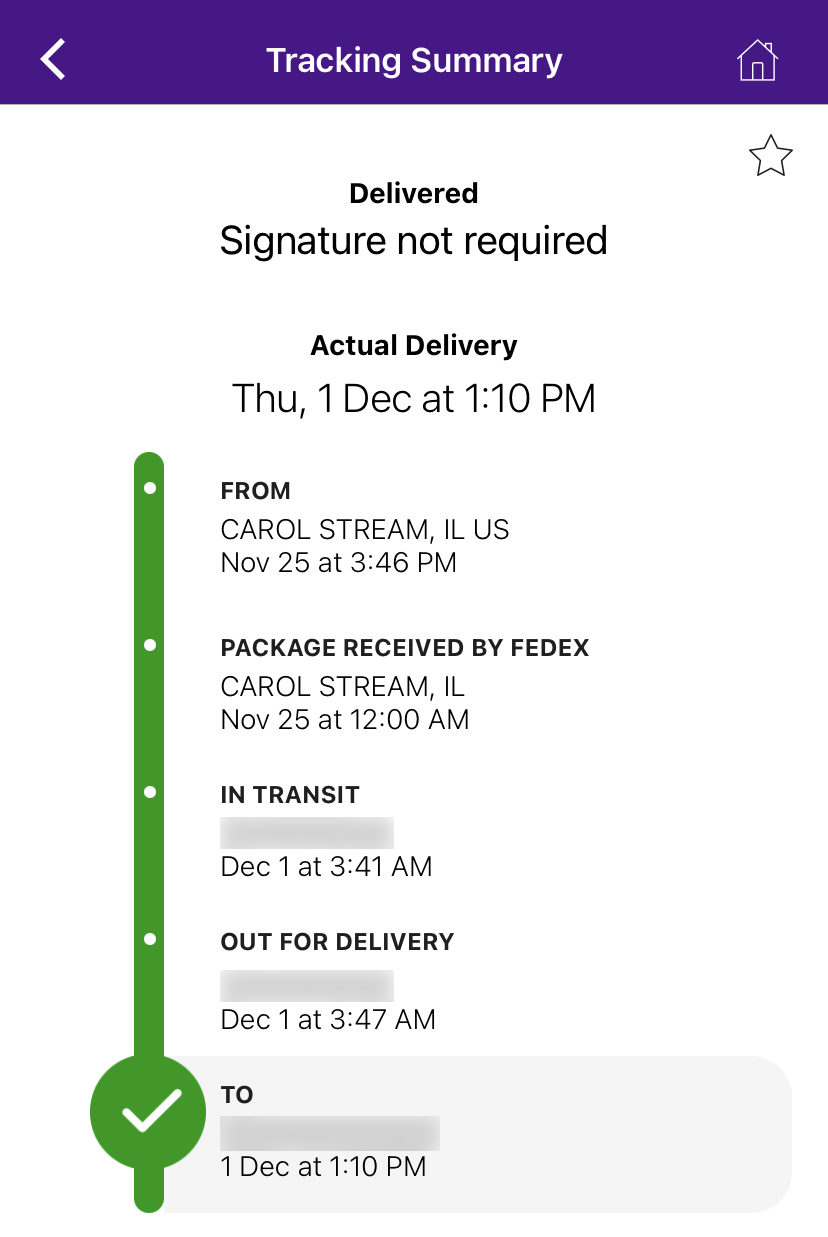
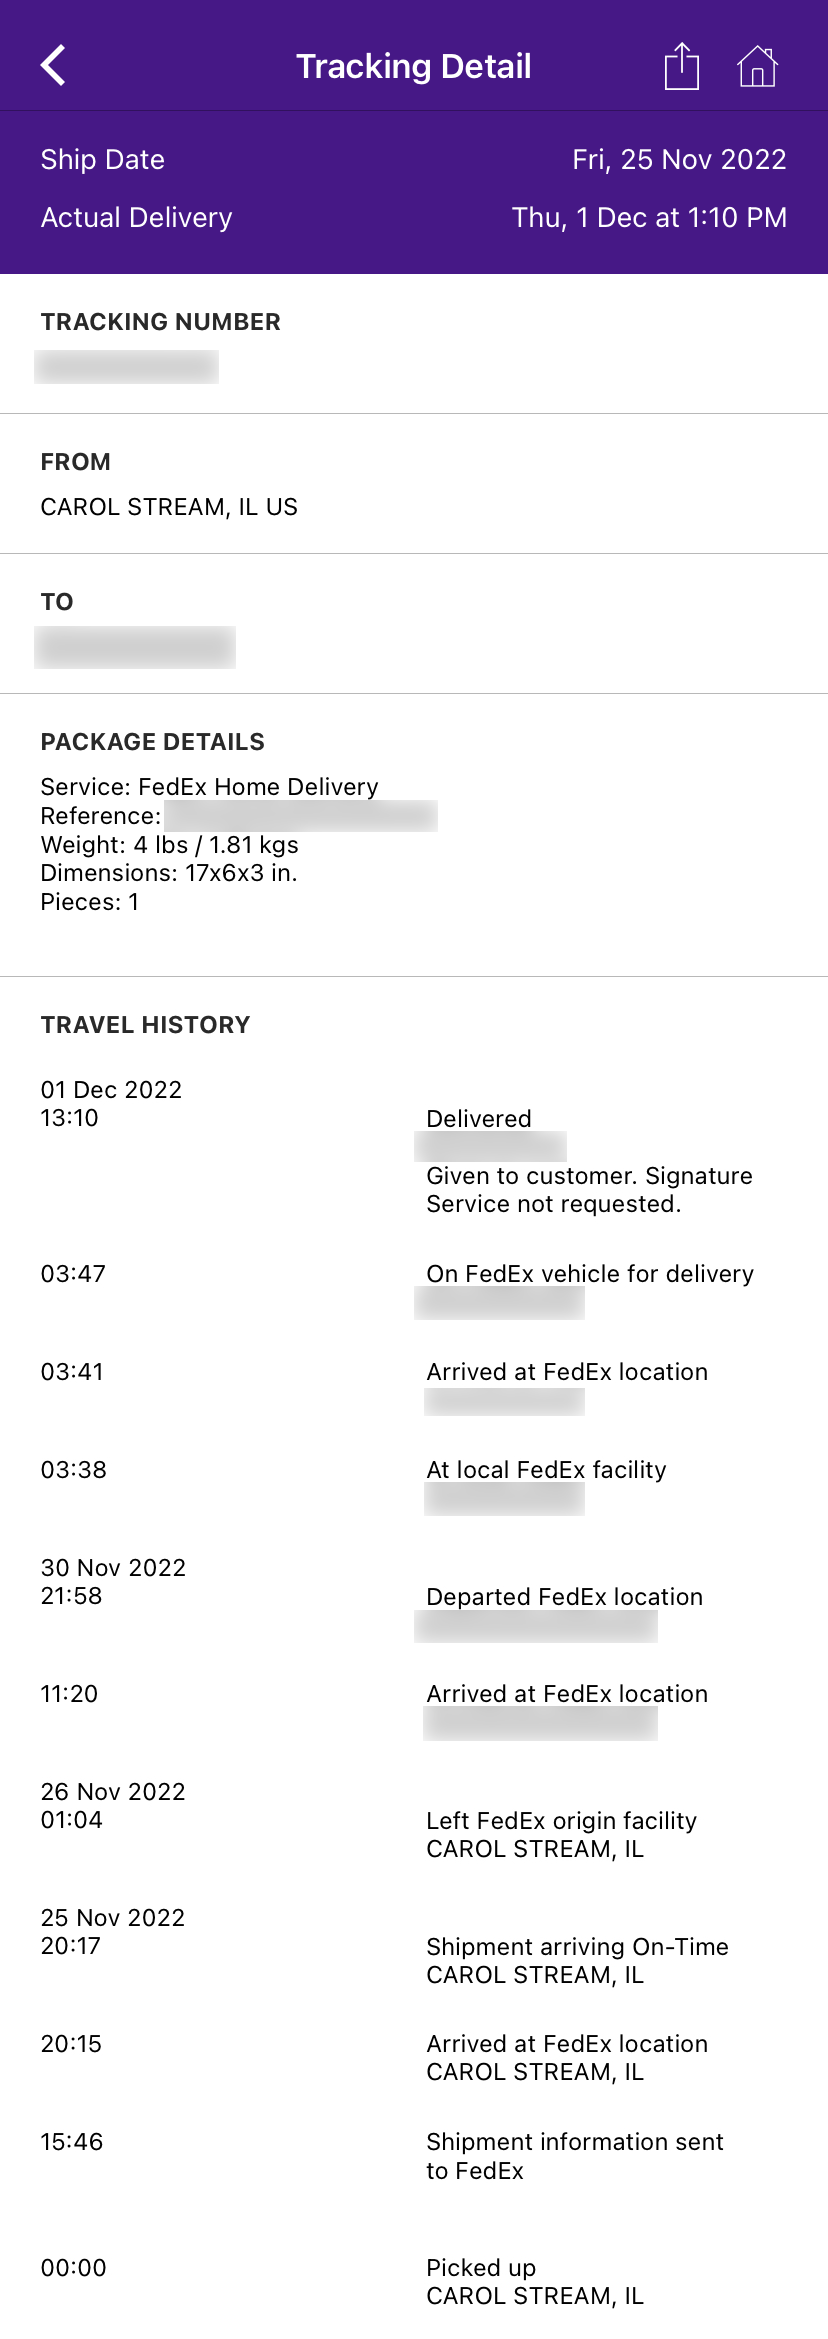
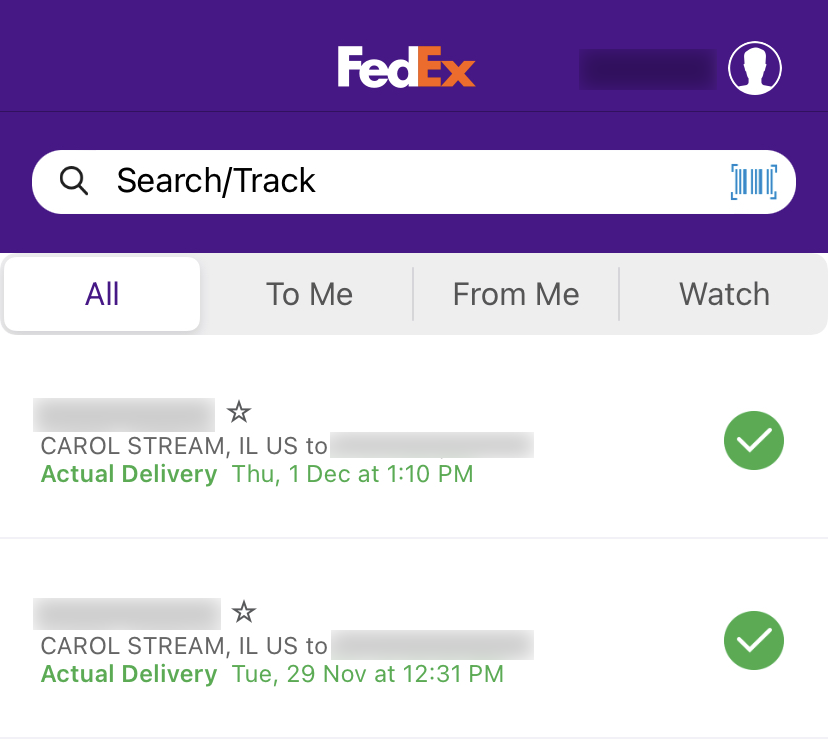
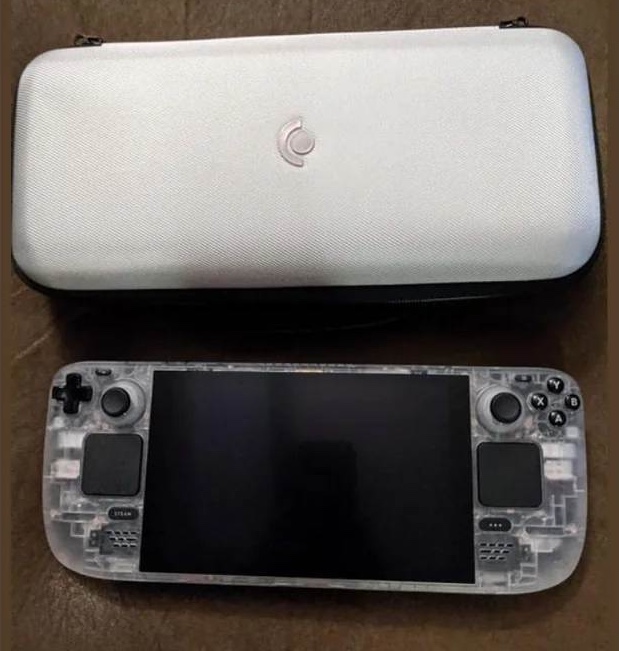
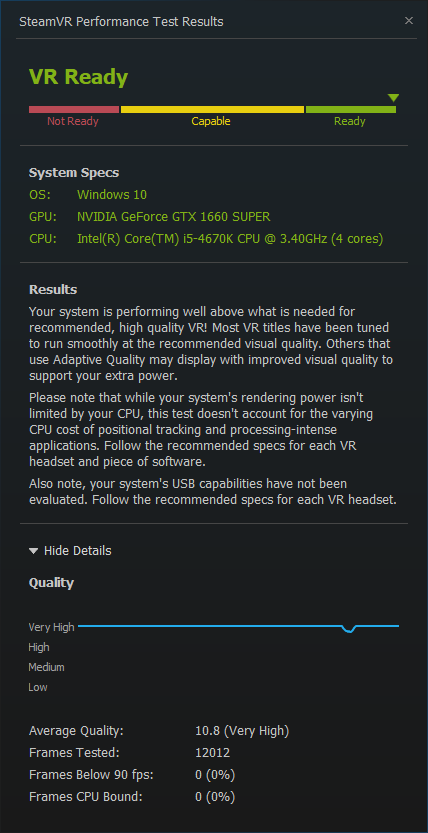