NuGet and npm packages in Azure DevOps Artifacts for a C++ library
These days more and more developers are incapable of working with anything else but packages, as manually unpacking a ZIP archive and copying libraries with headers to the right places seems to them an impossible task.
But apart from said developers, using packages can indeed improve the development experience.

We distribute our C++ based SDK to many other teams, and for quite a some time they were asking us to do it exactly in packages (in particular, with NuGet and npm).
At first we were reluctant to that, as, for example, using NuGet packages is certainly a far less universal way of distributing a library comparing to simple ZIP archives (it might be shocking, but not everybody uses Visual Studio and MSBuild). But finally we decided that it will be just better/easier to make everyone happy and to ship our stuff in whatever form they want, especially that it actually wouldn’t be that much of an additional effort anyway.
Since we already have an Azure DevOps subscription, it seemed like a good idea to host those packages in Azure DevOps Artifacts. That way we don’t need to set-up internal hosting infrastructure and to take care of authorization. So the only thing we need to do is to start creating and publishing the actual packages.
I’ll describe the process for Windows, but it shouldn’t make much of a difference on other platforms (especially for .NET Core and npm).
C++ library project
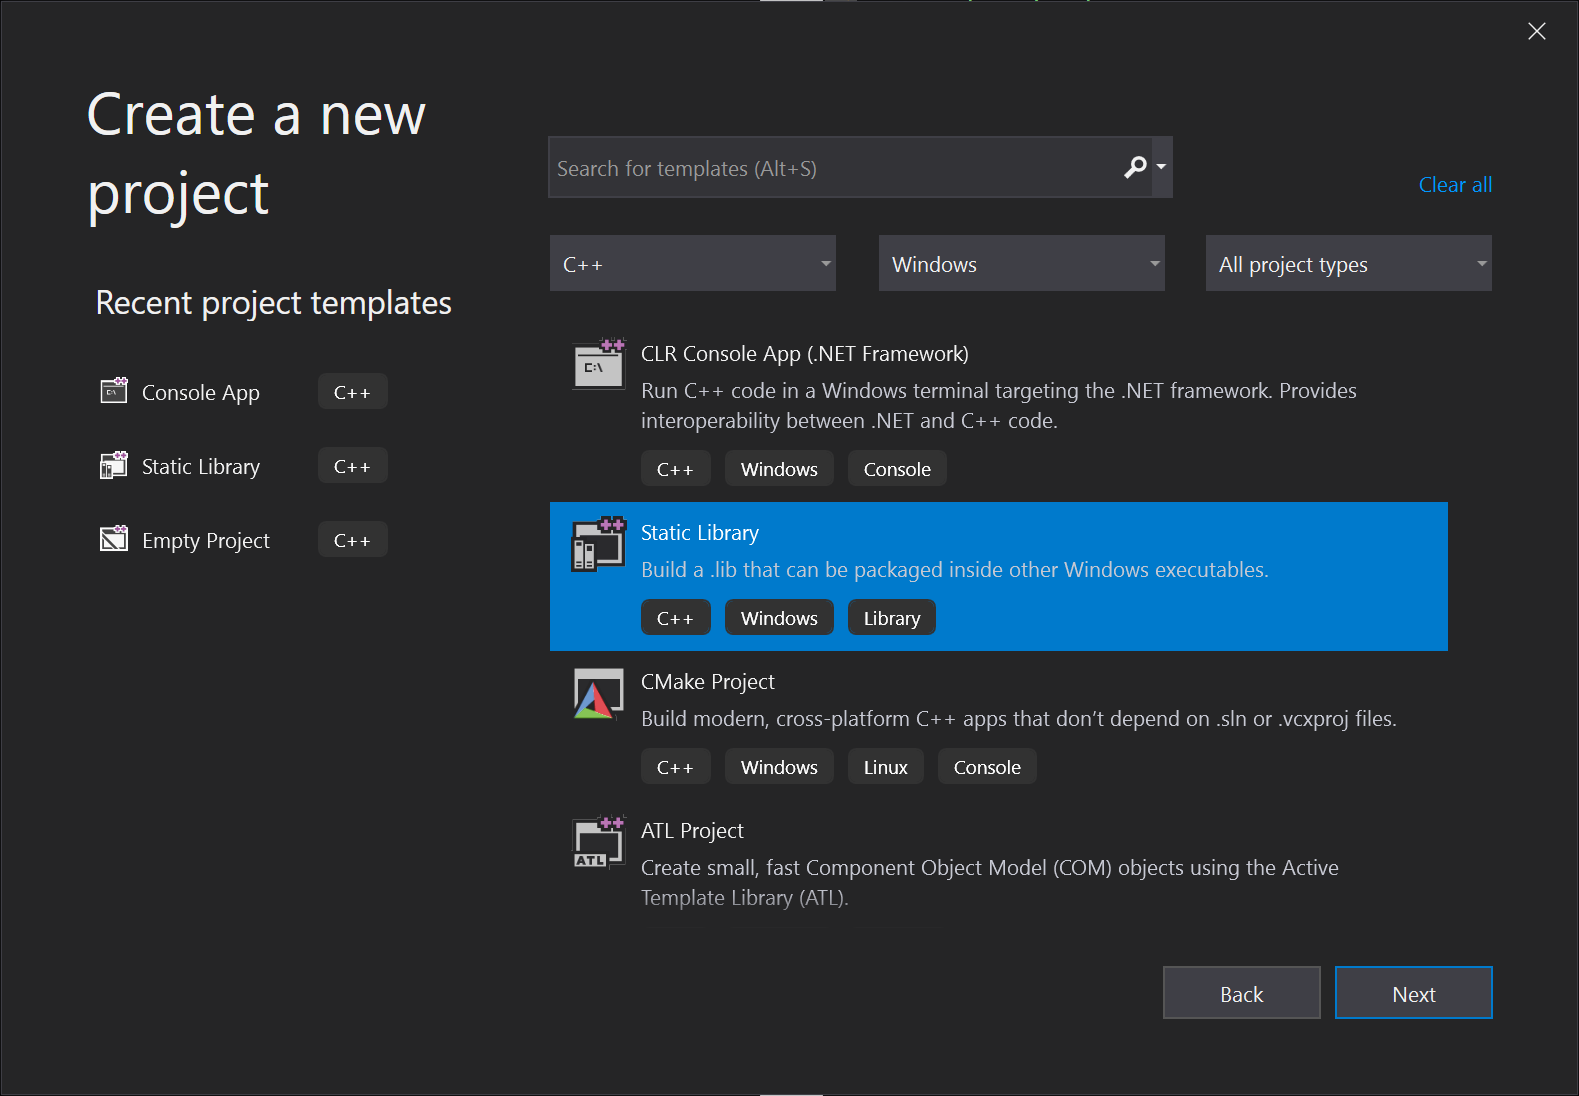
Let’s create some simple C++ library, which we will then pack into packages.
With Visual Studio project as an example:
// somelib.h

#pragma once

namespace Some {
    void doSomething();
}
// somelib.cpp
#include "pch.h"
#include "framework.h"
#include <iostream>
#include "somelib.h"
namespace Some {
void doSomething()
{
std::cout << "Something from the library" << std::endl;
}
}Build it with both Debug and Release configurations for x64 platform. You should get the following output:
somelib/build/x64/
├── Debug
│   ├── pch.obj
│   ├── somelib.idb
│   ├── somelib.lib
│   ├── somelib.obj
│   ├── somelib.pch
│   ├── somelib.pdb
│   └── ...
└── Release
    ├── pch.obj
    ├── somelib.lib
    ├── somelib.obj
    ├── somelib.pch
    ├── somelib.pdb
    └── ...
Packages
NuGet
NuGet package is pretty much the same thing as a ZIP archive, but with more strict internal structure and some additional meta-information for build systems (MSBuild).
How to create NuGet package
You’ll need either NuGet or dotnet from .NET Core. Here I’ll be using just NuGet.
Packing NuGet package
Official documentation for creating NuGet packages in general can be found here. And here is the article for creating C++ (native) packages, although not a very detailed one, and actually I didn’t exactly follow its instructions.
One great thing about having a NuGet package instead of a regular ZIP archive is that user (developer) can just install it and start using the library seamlessly. For that to work the project build system should know where the headers and corresponding library binaries are. And as I understood, for that you need to create a .targets file (somename.somelib.targets - must match the package ID from .nuspec):
<?xml version="1.0" encoding="utf-8"?>
<Project ToolsVersion="15.0" xmlns="http://schemas.microsoft.com/developer/msbuild/2003">
<ItemDefinitionGroup Label="x64, debug" Condition="'$(Platform)' == 'x64' And $(Configuration.ToLower().IndexOf('debug')) > -1">
<Link>
<AdditionalDependencies Condition="'$(Platform)' == 'x64'">$(MSBuildThisFileDirectory)..\..\lib\native\x64\debug\*.lib;%(AdditionalDependencies)</AdditionalDependencies>
</Link>
<ClCompile>
<AdditionalIncludeDirectories>$(MSBuildThisFileDirectory)include;%(AdditionalIncludeDirectories)</AdditionalIncludeDirectories>
</ClCompile>
</ItemDefinitionGroup>
<ItemDefinitionGroup Label="x64, release" Condition="'$(Platform)' == 'x64' And $(Configuration.ToLower().IndexOf('debug')) == -1">
<Link>
<AdditionalDependencies Condition="'$(Platform)' == 'x64'">$(MSBuildThisFileDirectory)..\..\lib\native\x64\release\*.lib;%(AdditionalDependencies)</AdditionalDependencies>
</Link>
<ClCompile>
<AdditionalIncludeDirectories>$(MSBuildThisFileDirectory)include;%(AdditionalIncludeDirectories)</AdditionalIncludeDirectories>
</ClCompile>
</ItemDefinitionGroup>
<ItemGroup Condition="'$(Platform)' == 'x64'">
<ReferenceCopyLocalPaths Include="$(MSBuildThisFileDirectory)..\..\lib\native\x64\debug\*.lib" />
<ReferenceCopyLocalPaths Include="$(MSBuildThisFileDirectory)..\..\lib\native\x64\release\*.lib" />
</ItemGroup>
</Project>So here you are literally telling MSBuild where is what and for which configuration. This likely can be shortened/optimized, but it worked for me as it is. There are also more options like checking for the toolchain version and the way of linking, but I just don’t have time (and/or real need) to investigate all of them. If you are feeling curious, I would recommend to inspect the freeglut package as its freeglut.targets has a very detailed collection of conditions.
Create a .nuspec file (somelib.nuspec):
<?xml version="1.0"?>
<package>
	<metadata>
		<id>somename.somelib</id>
        <title>Some library</title>
		<version>2019.10.50826</version>
		<description>Some simple library to test NuGet packages</description>
        <authors>YOUR NAME</authors>
        <projectUrl>http://your.website</projectUrl>
        <copyright>YOUR NAME</copyright>
		<tags>native</tags>
        <dependencies>
            <group targetFramework="native"></group>
        </dependencies>
	</metadata>
	<files>
        <file src="lib\**" target="lib" />
        <file src="build\**" target="build" />
	</files>
</package>
Without providing <dependencies> block with a group for native you’ll get the following warning at packing step:
WARNING: NU5128: Some target frameworks declared in the dependencies group of the nuspec and the lib/ref folder do not have exact matches in the other location. Consult the list of actions below:
- Add a dependency group for native0.0 to the nuspec
I don’t know if it is important, but it’s better not to have warnings, innit.
So now you have the following files:
somename.somelib.targetssomelib.nuspec- your library binaries and headers
Take all that and put it into a new package folder like this:
package/
├── build
│   └── native
│       ├── include
│       │   └── somelib.h
│       └── somename.somelib.targets
├── lib
│   └── native
│       └── x64
│           ├── debug
│           │   ├── pch.obj
│           │   ├── somelib.idb
│           │   ├── somelib.lib
│           │   ├── somelib.obj
│           │   ├── somelib.pch
│           │   └── somelib.pdb
│           └── release
│               ├── pch.obj
│               ├── somelib.lib
│               ├── somelib.obj
│               ├── somelib.pch
│               └── somelib.pdb
└── somelib.nuspec
Apparently, folders structure and names are important and should follow certain convention. And for .NET targets you can find some documentation on the matter. But I failed to find anything useful for C++ (native) targets, so I had to guess and check how other packages do it. By the way, that has proven to be quite useful - just go to NuGet, look for C++ packages using tag:native query and inspect their internals.
If you won’t include some of these files: .obj, .idb, .pdb or .pch - you might get this error later:
Error LNK1112 module machine type 'x86' conflicts with target machine type 'x64'…even though both library and target applications are build for x64.
Or you can get an error about unresolved external symbol:
Error LNK2019 unresolved external symbol "void __cdecl Some::doSomething(void)" (?doSomething@Some@@YAXXZ) referenced in function main SomeAppIncluding those files resolved both errors for me, but what’s weird is that after the error was resolved, I repacked the package without them, and the project built fine. So what was different the first time I added this package without them?
Anyway, pack the package:
$ nuget pack somelib.nuspec -OutputDirectory /d/temp/out/
Attempting to build package from 'somelib.nuspec'.
Successfully created package 'D:/temp/out/somename.somelib.2019.10.50826.nupkg'.
Azure DevOps feed
Now you have your NuGet package. It is ready to be distributed and used, so you can send it to someone for them to test it in their project, or you can just as well do it yourself.
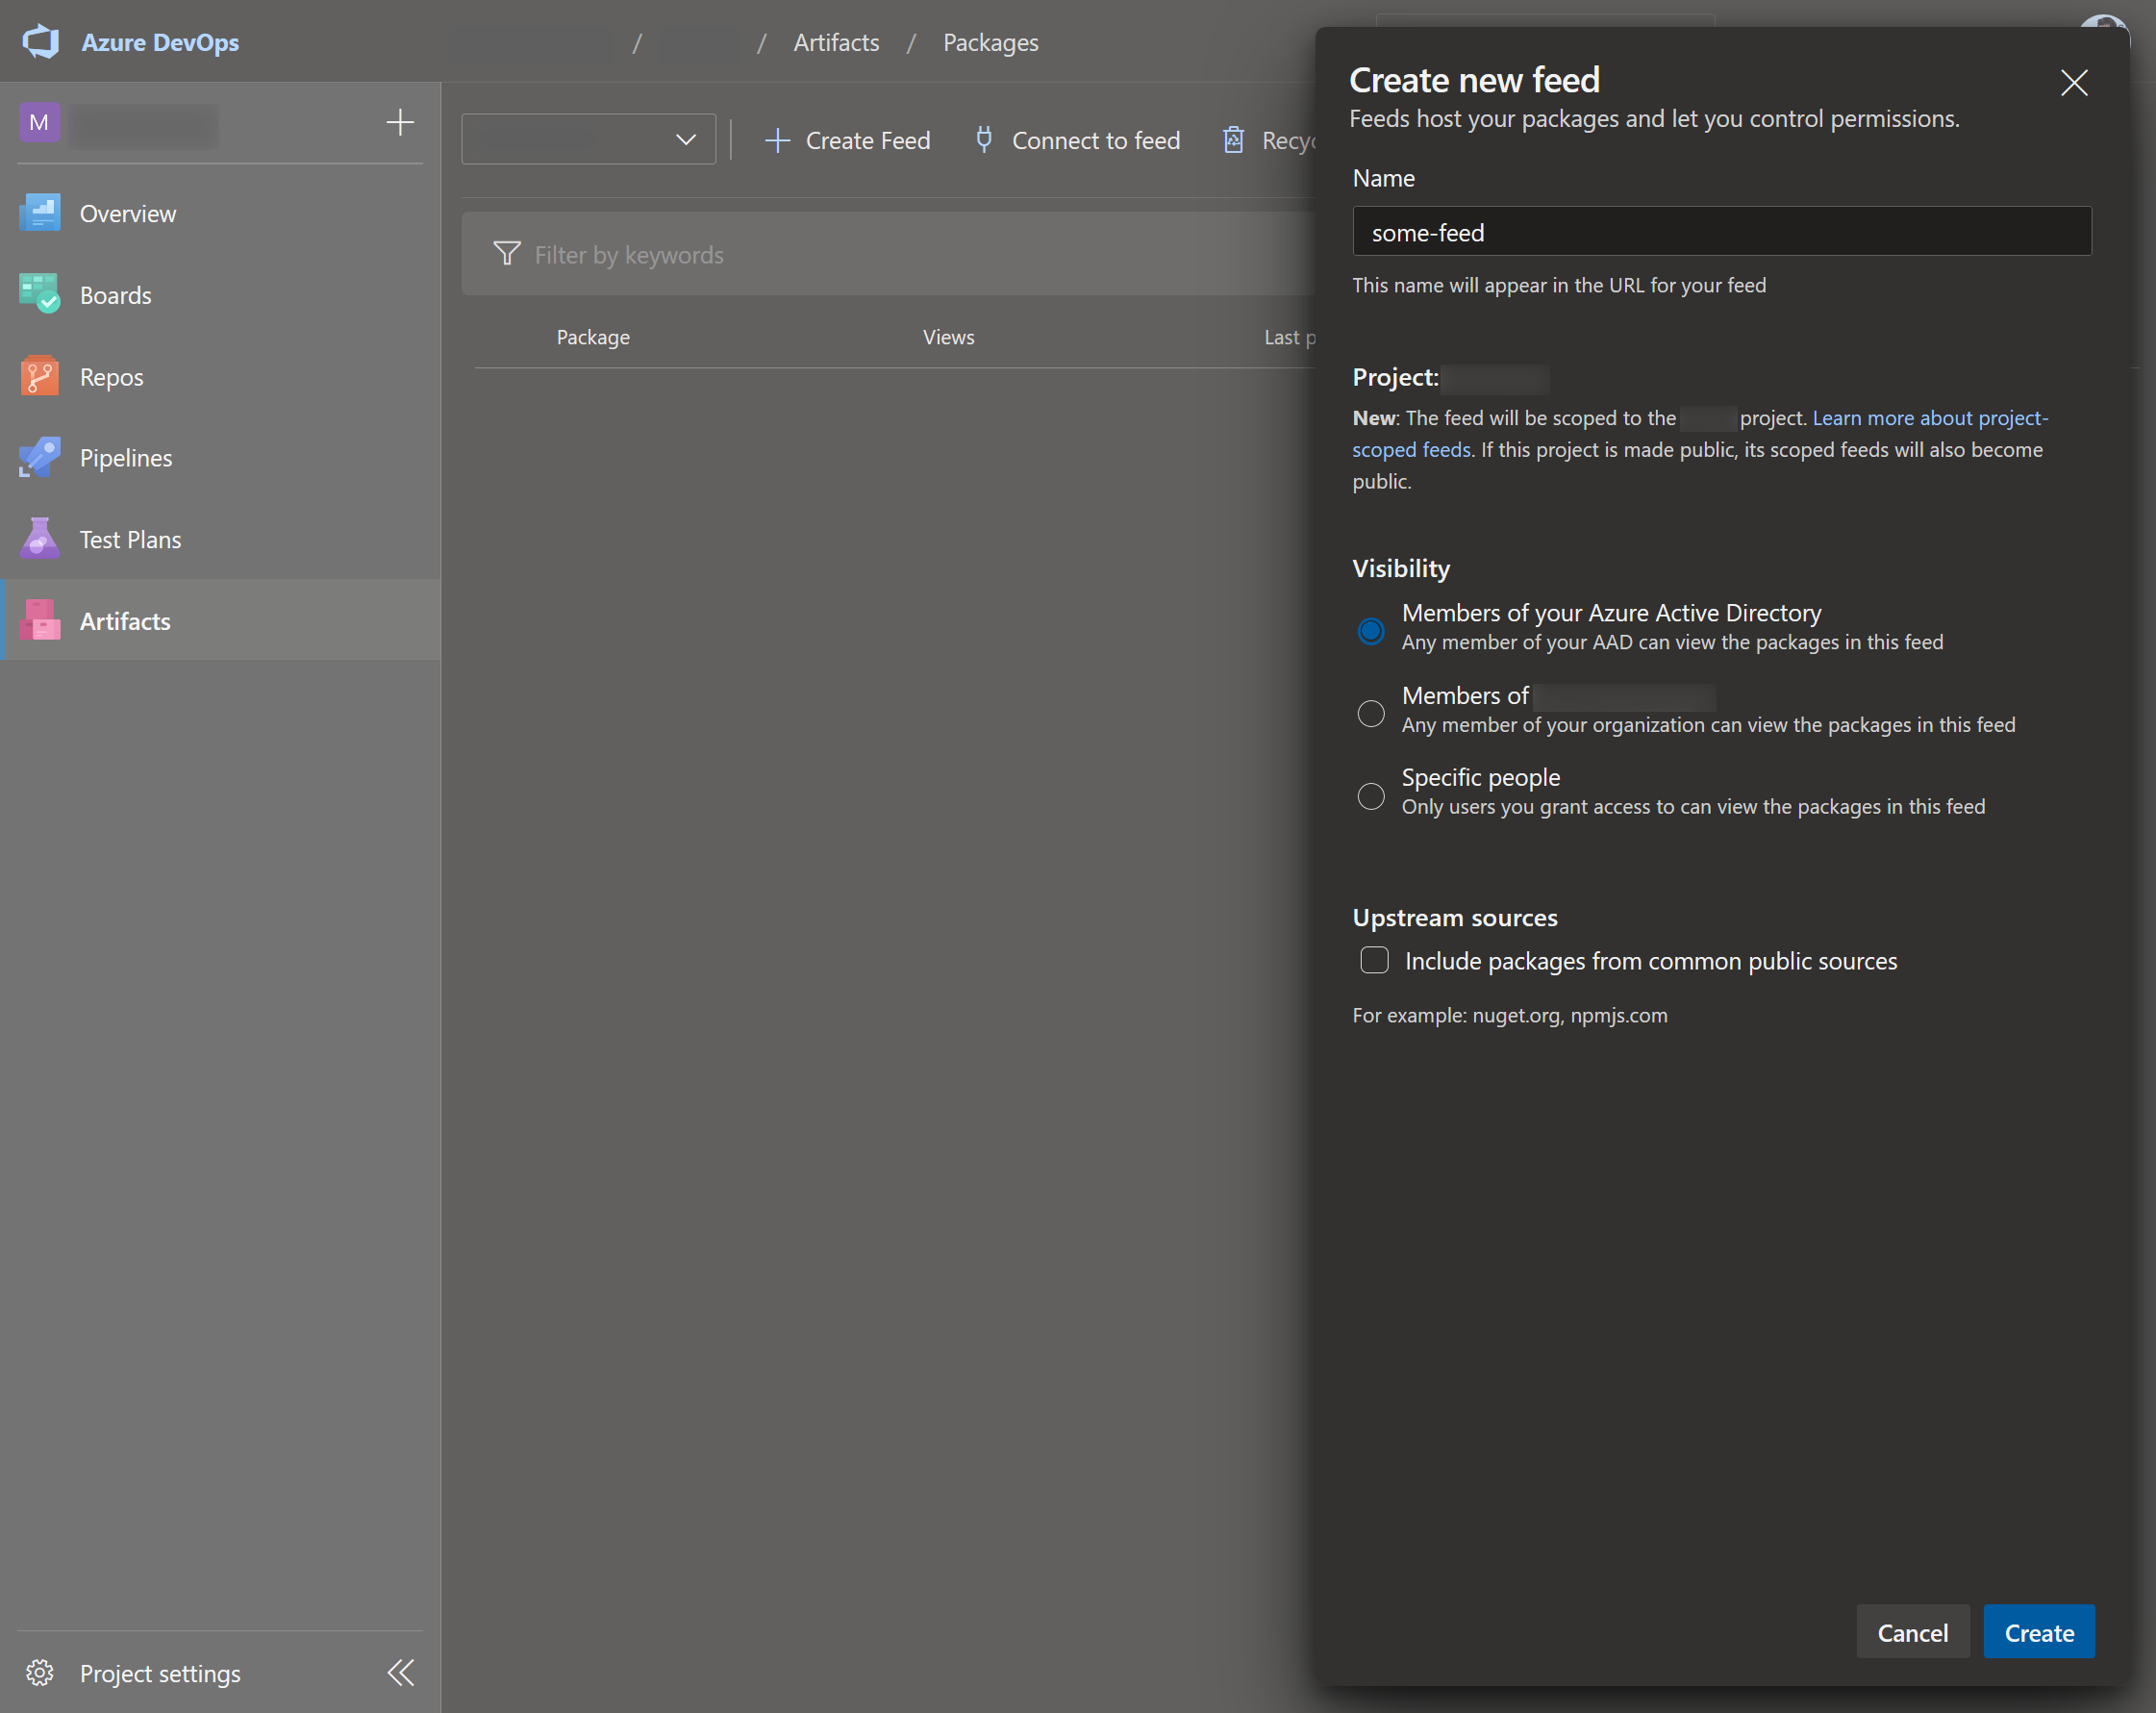
But it is better to publish it to some proper NuGet feed, and in our case it is Azure DevOps Artifacts (although, of course any other compatible feed is fine too, including self-hosted ones). Here’s how a feed can be created there:
Connect to the feed using NuGet:
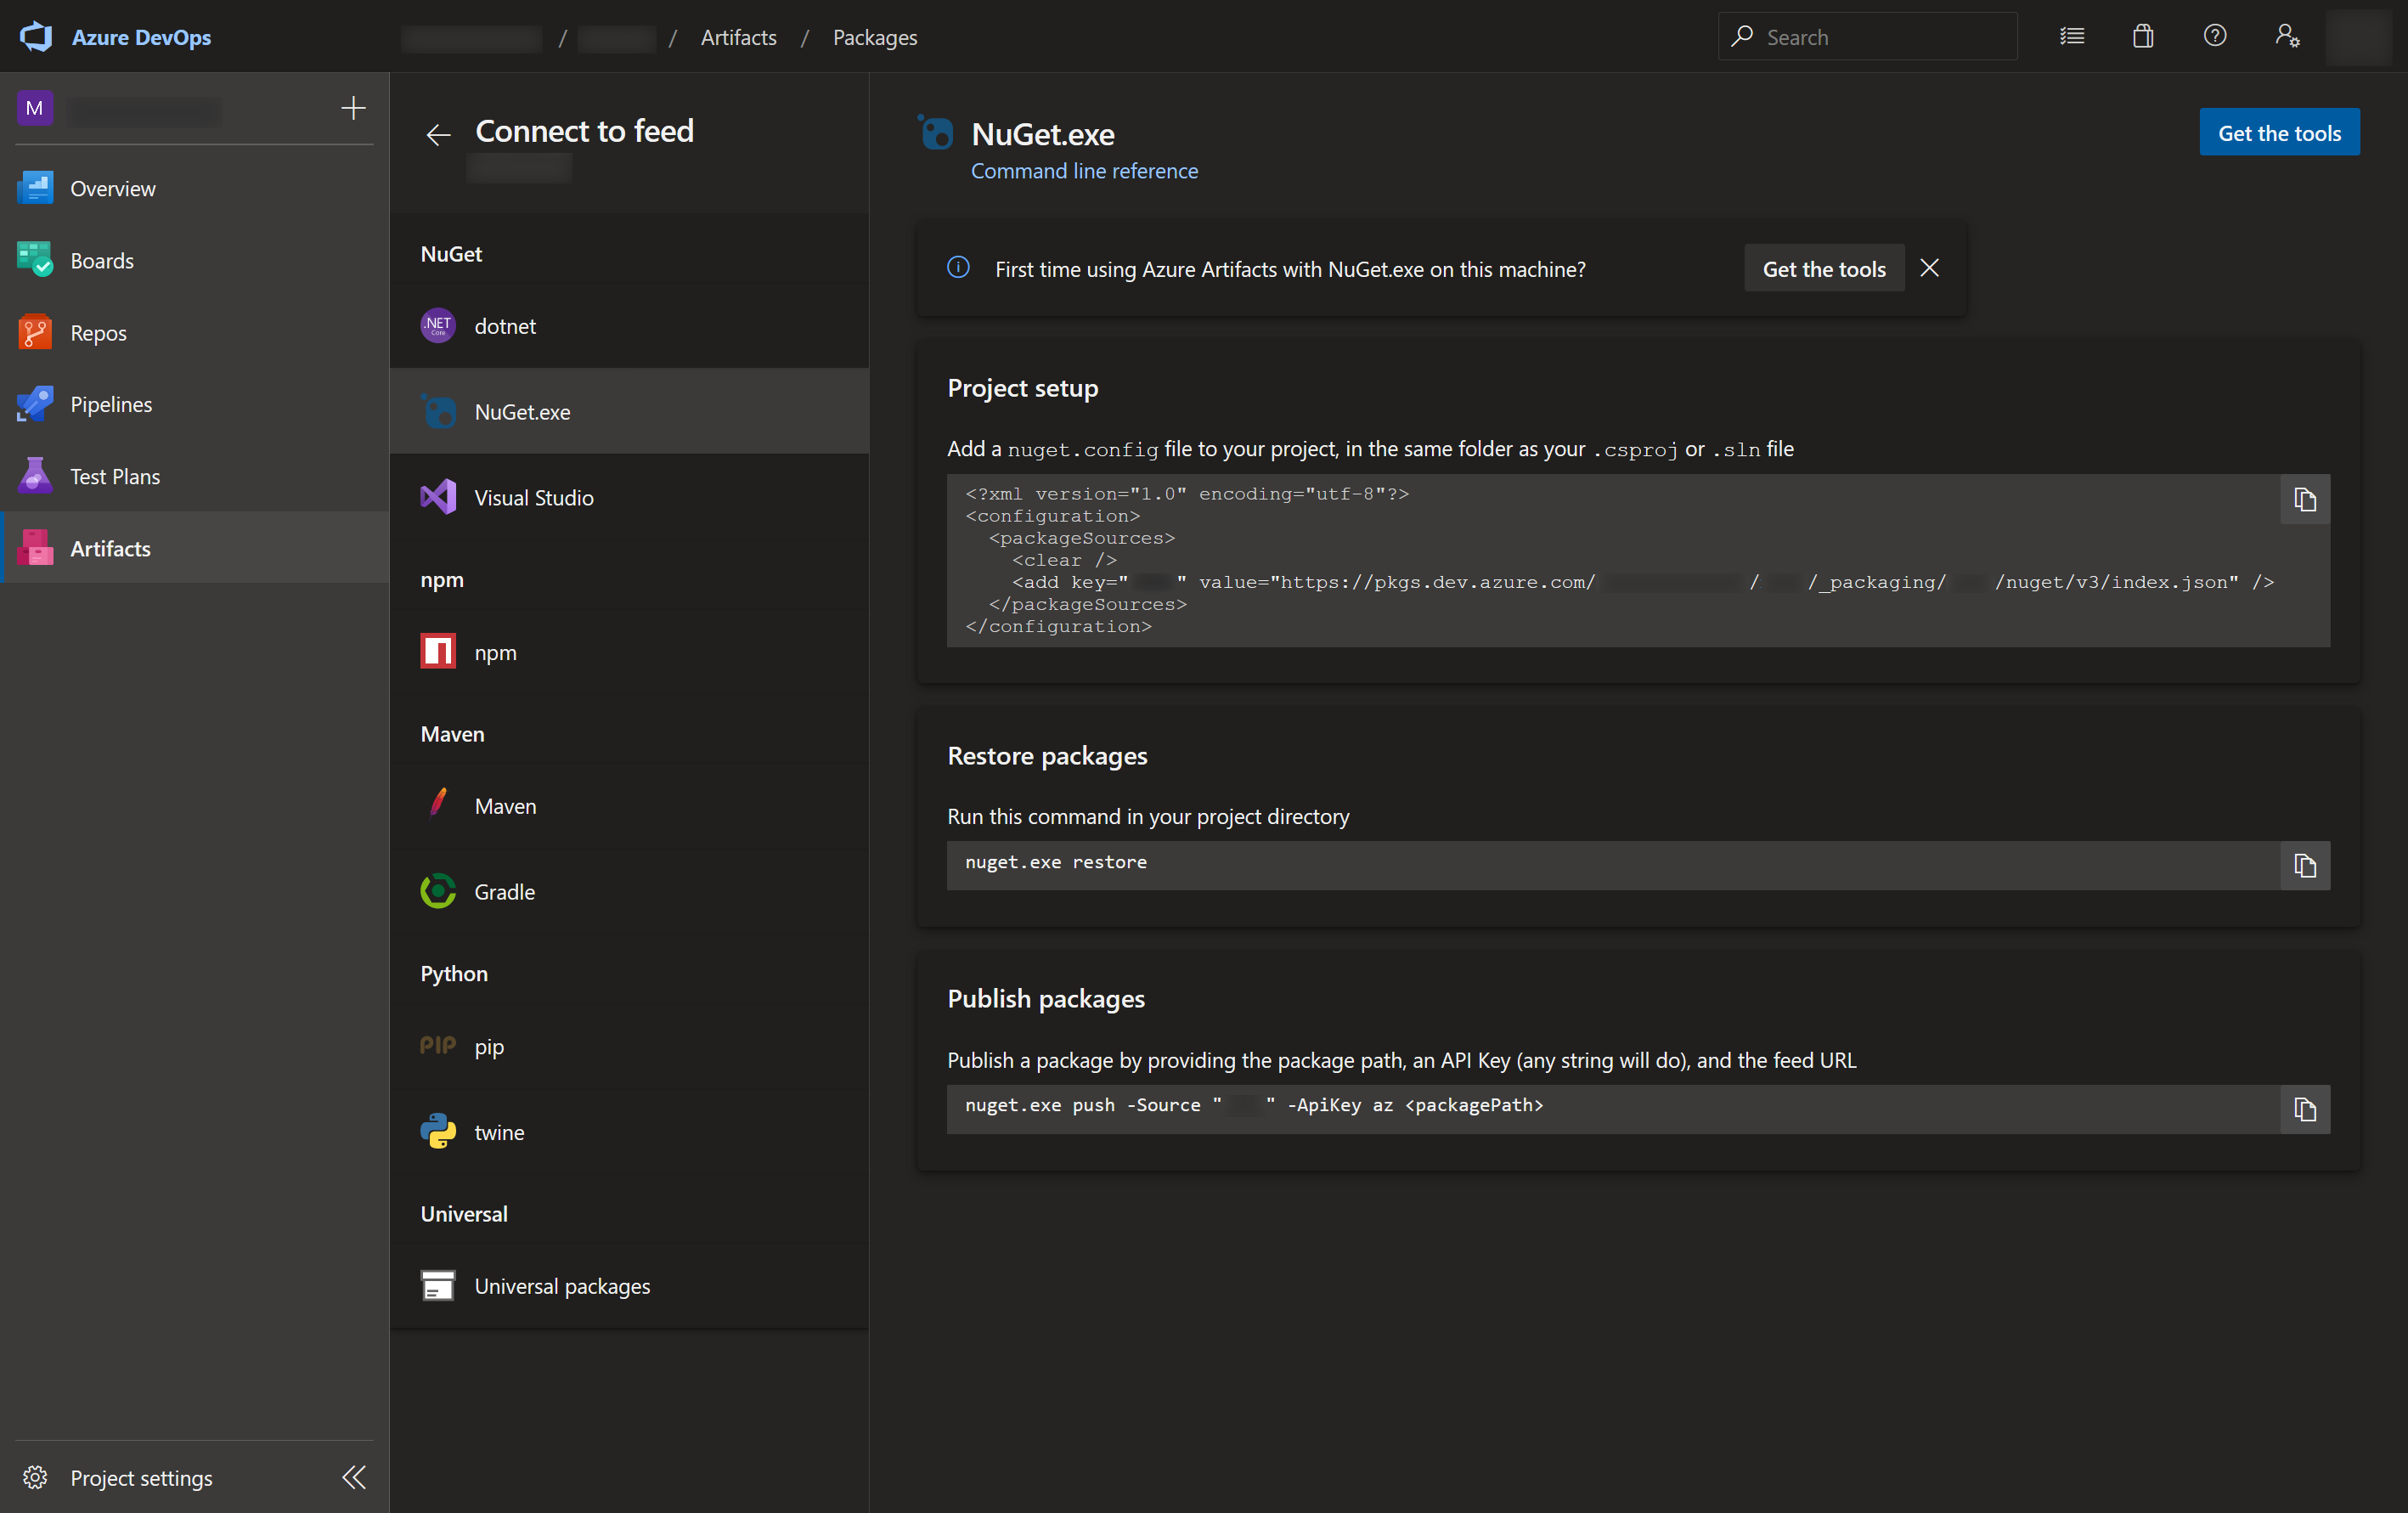
The value for key from packageSources is your feed URL.
Publishing NuGet package
Now you can publish the package to your feed. Microsoft has the following documentation about that, from which you’ll notice that you might need some mysterious-nowhere-to-find API key, but don’t start spewing curses, as actually it is not really needed - just provide any value for the -ApiKey parameter (for instance, just key is fine).
For the actual publishing you’ll need to provide an access token. Microsoft calls it personal access token (PAT), and you can obtain it in 2 ways:
- by using Azure Artifacts Credential Provider
- by issuing one manually
Getting PAT from Azure Artifacts Credential Provider
Install Azure Artifacts Credential Provider (follow “Manual installation on Windows” steps, for example). Having installed it, you should have the following in your ~/.nuget folder:
/c/Users/YOUR-NAME/.nuget/plugins/
├── netcore
│   └── CredentialProvider.Microsoft
└── netfx
    └── CredentialProvider.Microsoft
When you’ll run nuget push, you will get an authentication window:
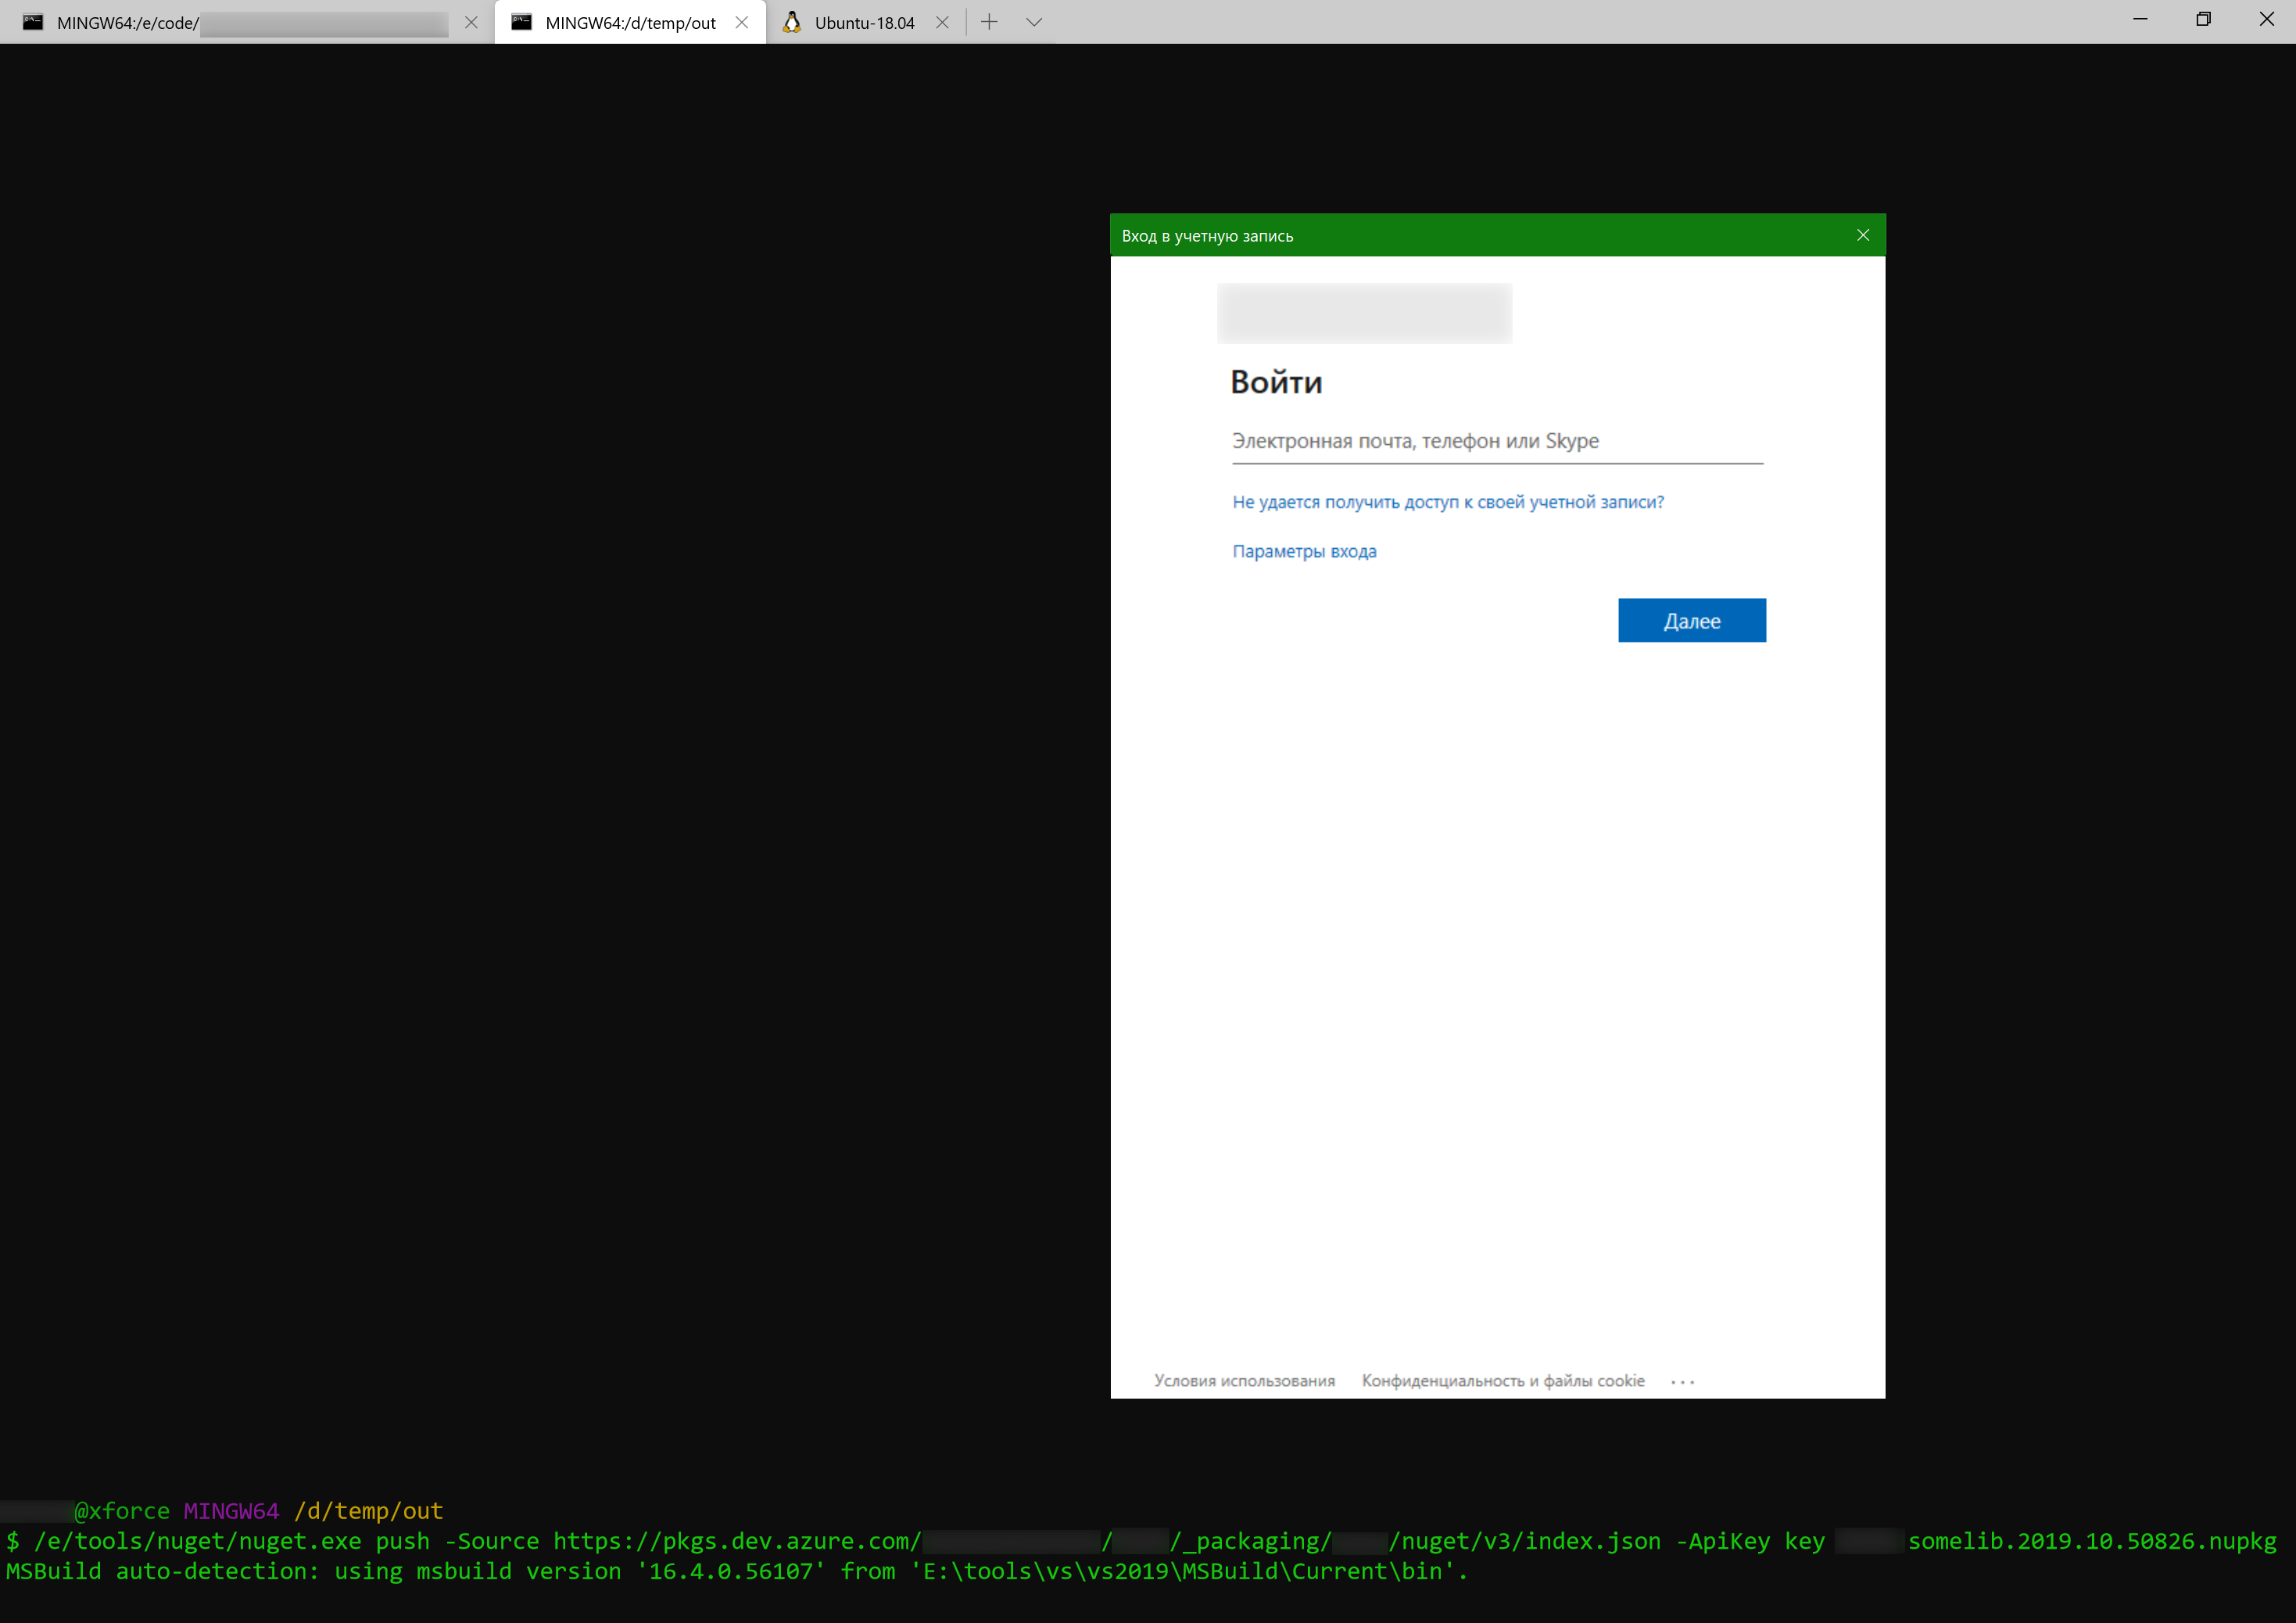
Enter your credentials (from the Microsoft Azure DevOps account), and a new PAT will be generated, and then the package will be published.
Here’s the whole output:
$ /e/tools/nuget/nuget.exe push -Source https://pkgs.dev.azure.com/ORGANIZATION-NAME/PROJECT-NAME/_packaging/FEED-NAME/nuget/v3/index.json -ApiKey "key" somename.somelib.2019.10.50826.nupkg
MSBuild auto-detection: using msbuild version '16.4.0.56107' from 'E:\tools\vs\vs2019\MSBuild\Current\bin'.
    [CredentialProvider]VstsCredentialProvider - Acquired bearer token using 'ADAL UI'
    [CredentialProvider]VstsCredentialProvider - Attempting to exchange the bearer token for an Azure DevOps session token.
Pushing somename.somelib.2019.10.50826.nupkg to 'https://pkgs.dev.azure.com/ORGANIZATION-NAME/SOME-ID/_packaging/ANOTHER-ID/nuget/v2/'...
  PUT https://pkgs.dev.azure.com/ORGANIZATION-NAME/SOME-ID/_packaging/ANOTHER-ID/nuget/v2/
  Accepted https://pkgs.dev.azure.com/ORGANIZATION-NAME/SOME-ID/_packaging/ANOTHER-ID/nuget/v2/ 5178ms
Your package was pushed.
From now on all the new nuget push commands will work without showing this authentication dialog, as the new PAT is now saved locally on the machine.
You will also get the following e-mail:
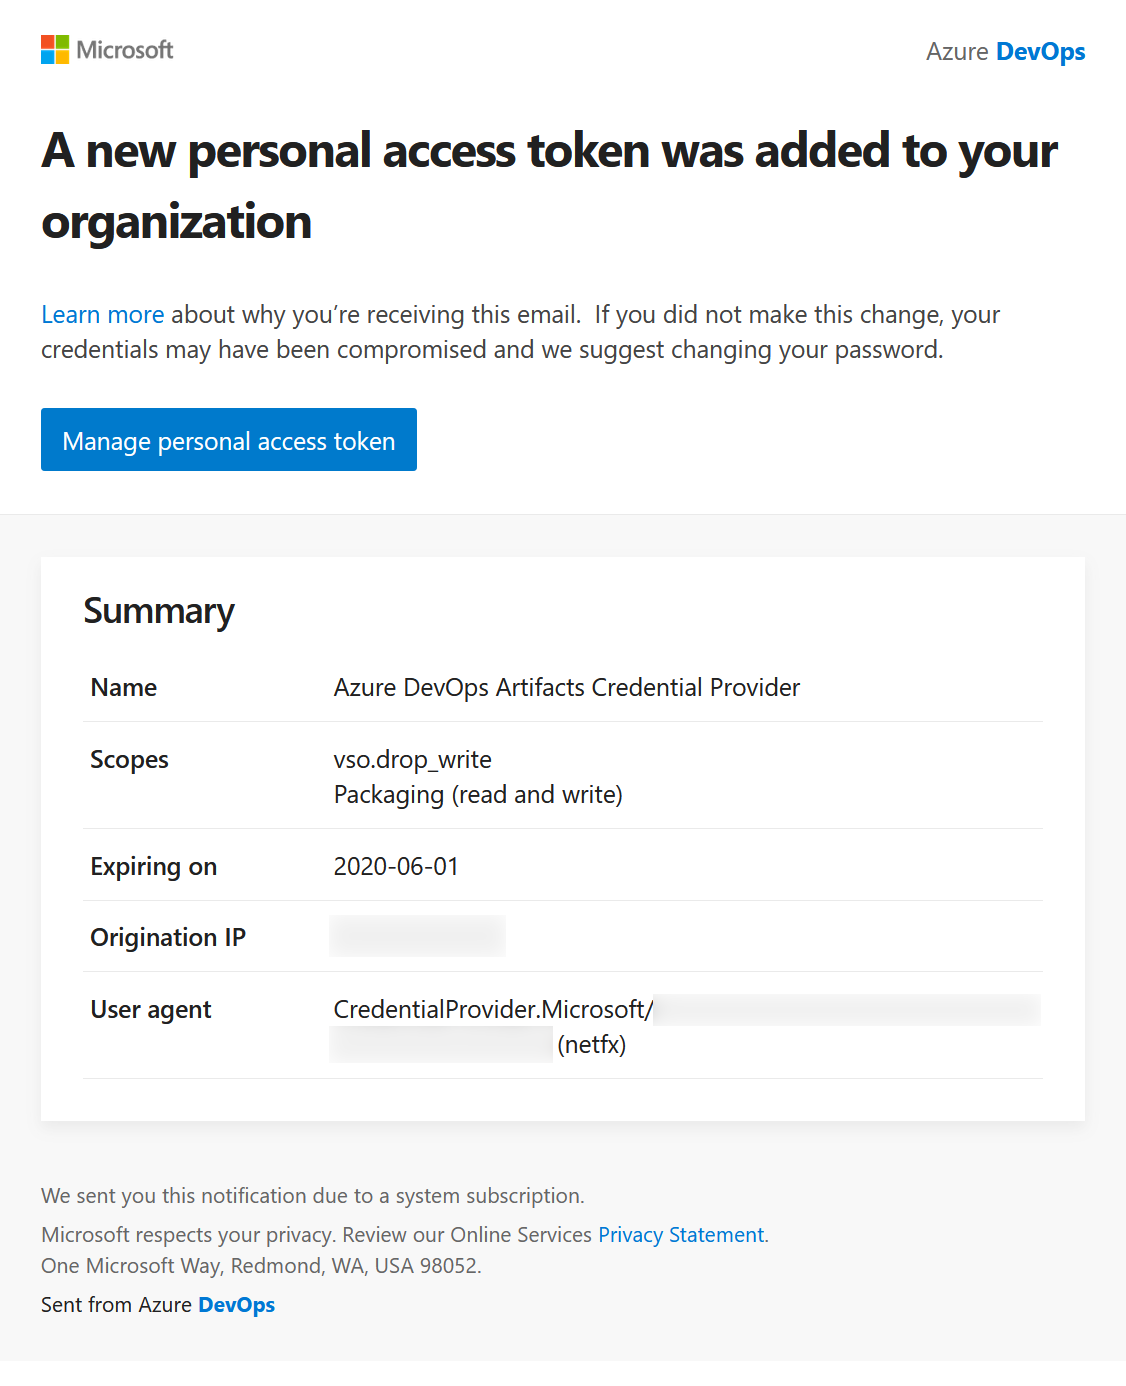
Having opened the link, you’ll be able to see the token’s expiration date and the list of its scopes:
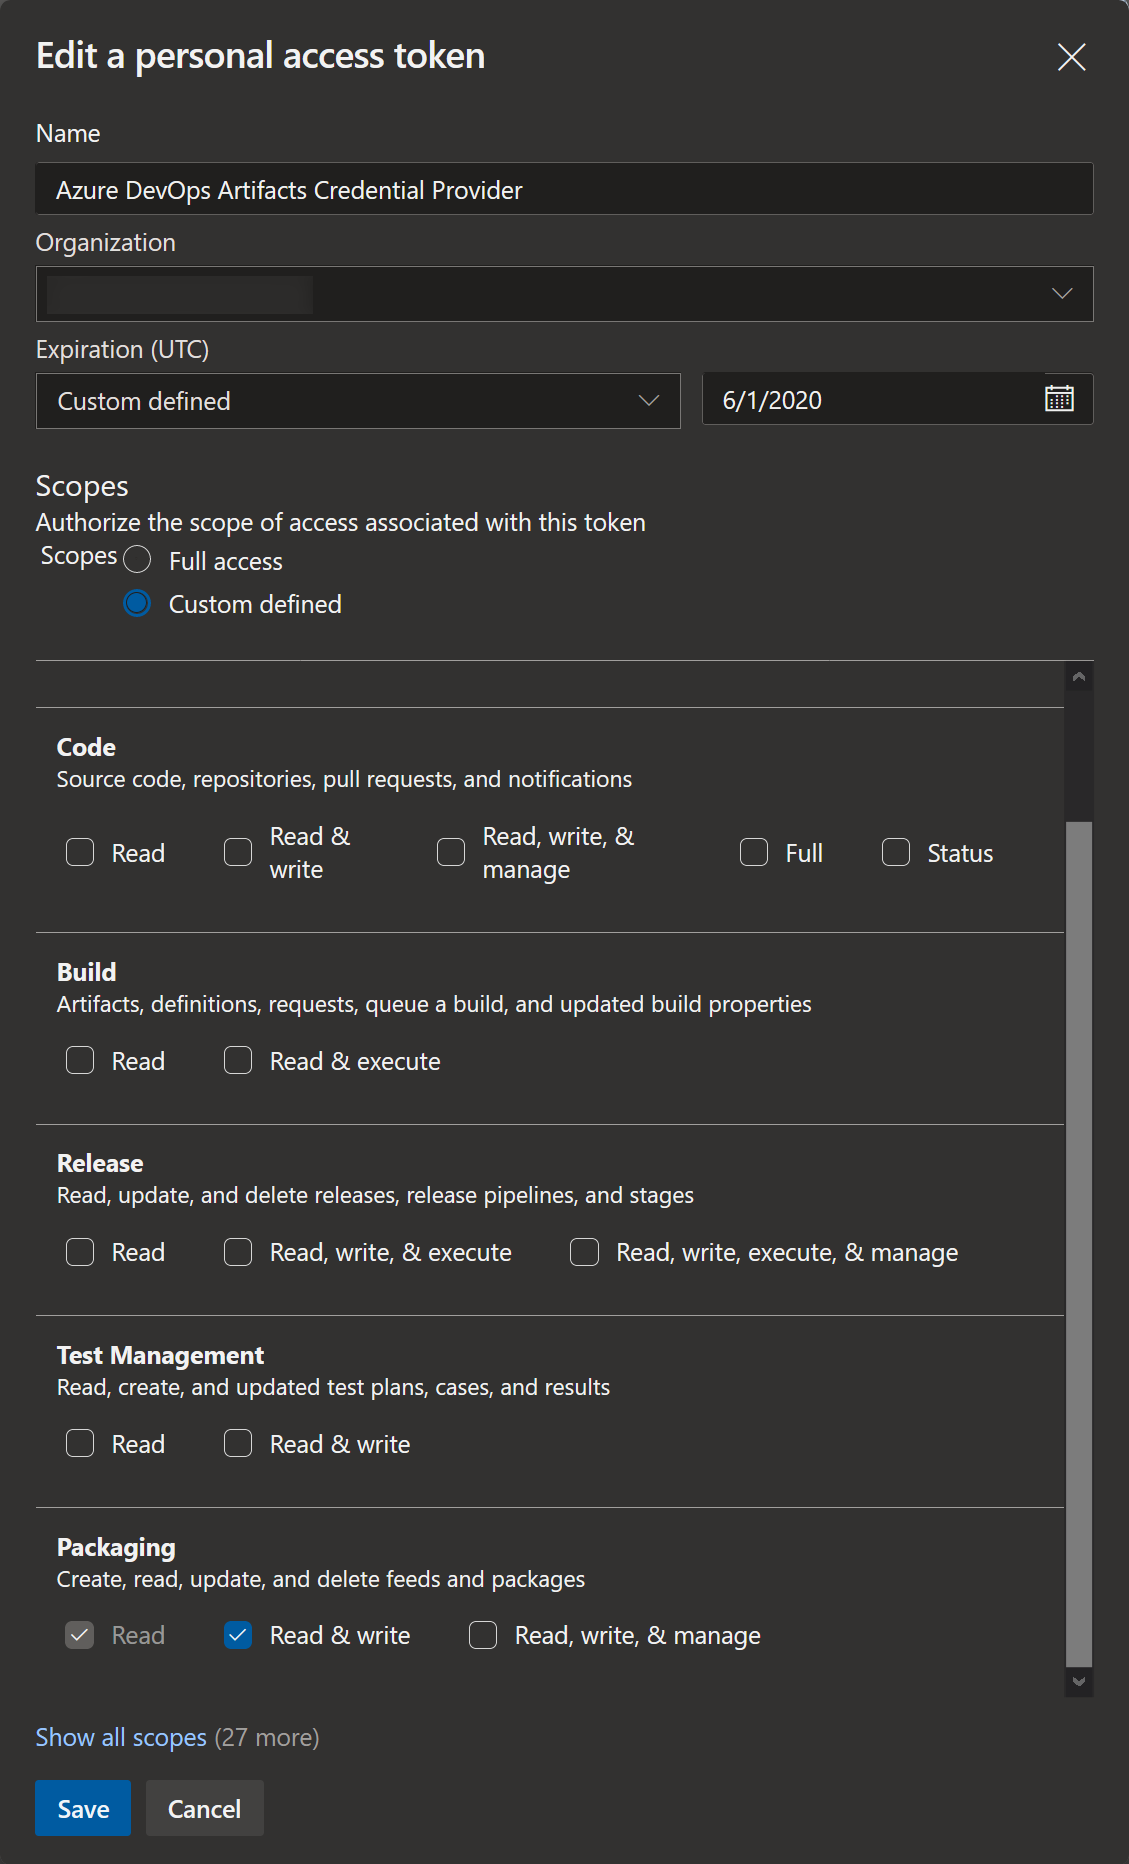
Sadly, you can’t get the token value, so if you’ll need to authorize NuGet on a different machine, you’ll need to repeat the authorization procedure to generate a new PAT there.
Issuing a new PAT in Azure DevOps
After I discovered this option, I can say that I like it much more than using Azure Artifacts Credential Provider.
Open Personal Access Tokens page and issue a new token. Select Packaging scope for it, Read, write, & manage. The expiration is up to you, but you can’t set it for longer than 1 year.
After clicking Create you’ll get the token value - save it somewhere, as it’s the last time you see it.
Okay, back to the publishing. If you run nuget push now (without having Azure Artifacts Credential Provider installed), it will ask you for inline credentials:
$ nuget push -Source "https://pkgs.dev.azure.com/ORGANIZATION-NAME/PROJECT-NAME/_packaging/FEED-NAME/nuget/v3/index.json" -ApiKey "key" somename.somelib.0.0.53001.nupkg
MSBuild auto-detection: using msbuild version '14.0.25420.1 built by: D14REL' from 'C:\Program Files (x86)\MSBuild\14.0\Bin'.
Please provide credentials for: https://pkgs.dev.azure.com/ORGANIZATION-NAME/PROJECT-NAME/_packaging/FEED-NAME/nuget/v3/index.json
UserName:
And here I provided my Azure DevOps e-mail (Office 365 account) and used PAT as the password. But! Actually, it doesn’t seem to care about UserName, so you can set any crazy value there, as it’s only PAT what matters.
You can save your NuGet source and PAT locally, so you wound’t need to enter them every time you push a new package:
$ nuget sources add -Name "SOME-NAME-FOR-YOUR-SOURCE" -Source "https://pkgs.dev.azure.com/ORGANIZATION-NAME/PROJECT-NAME/_packaging/FEED-NAME/nuget/v3/index.json" -Username "DOESNTMATTER" -Password "HERE-GOES-YOUR-PAT"
Package source with Name: SOME-NAME-FOR-YOUR-SOURCE added successfully.
It will be saved to C:\Users\YOUR-NAME\AppData\Roaming\NuGet\NuGet.Config. That’s important to note, as if you’ll be using build agents from some CI/CD system such as TeamCity, they might not be able to find it, or rather they will use their own config: for example, my TeamCity agent runs as a Local System, and the config it uses is stored here: C:\Windows\System32\config\systemprofile\AppData\Roaming\NuGet\NuGet.Config.
You can check available NuGet sources:
$ nuget sources list
Registered Sources:
    1.  nuget.org [Enabled]
        https://api.nuget.org/v3/index.json
    2.  SOME-NAME-FOR-YOUR-SOURCE [Enabled]
        https://pkgs.dev.azure.com/ORGANIZATION-NAME/PROJECT-NAME/_packaging/FEED-NAME/nuget/v3/index.json
    3.  Microsoft Visual Studio Offline Packages [Enabled]
        C:\Program Files (x86)\Microsoft SDKs\NuGetPackages\
Now you can publish like this:
$ nuget push -Source "SOME-NAME-FOR-YOUR-SOURCE" -ApiKey "key" somename.somelib.2019.10.50826.nupkgWhy do you still need to provide this meaningless ApiKey? Who the fuck knows, but without it you’ll get the following error:
Response status code does not indicate success: 400 (Bad Request - The request to the server did not include the header X-NuGet-ApiKey, but it is required even though credentials were provided. If using NuGet.exe, use the -ApiKey option to set this to an arbitrary value, for example "-ApiKey AzureDevOps" (DevOps Activity ID: L5DVGEDC-0F5D-4LD7-993D-82355D7B3DFB)).What’s more hilarious is that there is even a command for storing ApiKey in the NuGet config too:
$ nuget setapikey "key" -Source https://pkgs.dev.azure.com/ORGANIZATION-NAME/PROJECT-NAME/_packaging/FEED-NAME/nuget/v3/index.jsonYou might think, “here’s where you can save the PAT and drop the Username and Password values, dumbo!”, but I can assure you that it’s still not for PAT, as nuget push will still fail and will ask for credentials, so the ApiKey value really is meaningless.
Here’s the full NuGet config now (~/AppData/Roaming/NuGet/NuGet.Config):
<?xml version="1.0" encoding="utf-8"?>
<configuration>
  <packageSources>
    <add key="nuget.org" value="https://api.nuget.org/v3/index.json" protocolVersion="3" />
    <add key="SOME-NAME-FOR-YOUR-SOURCE" value="https://pkgs.dev.azure.com/ORGANIZATION-NAME/PROJECT-NAME/_packaging/FEED-NAME/nuget/v3/index.json" />
  </packageSources>
  <disabledPackageSources>
    <add key="Microsoft and .NET" value="true" />
  </disabledPackageSources>
  <packageSourceCredentials>
    <SOME-NAME-FOR-YOUR-SOURCE>
        <add key="Username" value="DOESNTMATTER" />
        <add key="Password" value="ENCODED-VALUE-OF-YOUR-PAT" />
      </SOME-NAME-FOR-YOUR-SOURCE>
  </packageSourceCredentials>
  <apikeys>
    <add key="https://pkgs.dev.azure.com/ORGANIZATION-NAME/PROJECT-NAME/_packaging/FEED-NAME/nuget/v3/index.json" value="ENCODED-VALUE-FOR-JUST-THIS-SILLY-KEY" />
  </apikeys>
</configuration>
And now you can publish without providing ApiKey:
$ nuget push -Source "SOME-NAME-FOR-YOUR-SOURCE" somename.somelib.2019.10.50826.nupkgWhen you’ll need to update the PAT, there is a command for that too:
$ nuget sources update -Name "SOME-NAME-FOR-YOUR-SOURCE" -Username "DOESNTMATTER" -Password "HERE-GOES-YOUR-NEW-PAT"
Package source "SOME-NAME-FOR-YOUR-SOURCE" was successfully updated.
How to use NuGet package
In case of NuGet packages for C++ development, the main consumers are those using Visual Studio and MSBuild. So let’s see how it works for a Visual Studio C++ project.
Create a simple C++ console application (let’s call it TestApp) and add a new NuGet source using your feed URL:
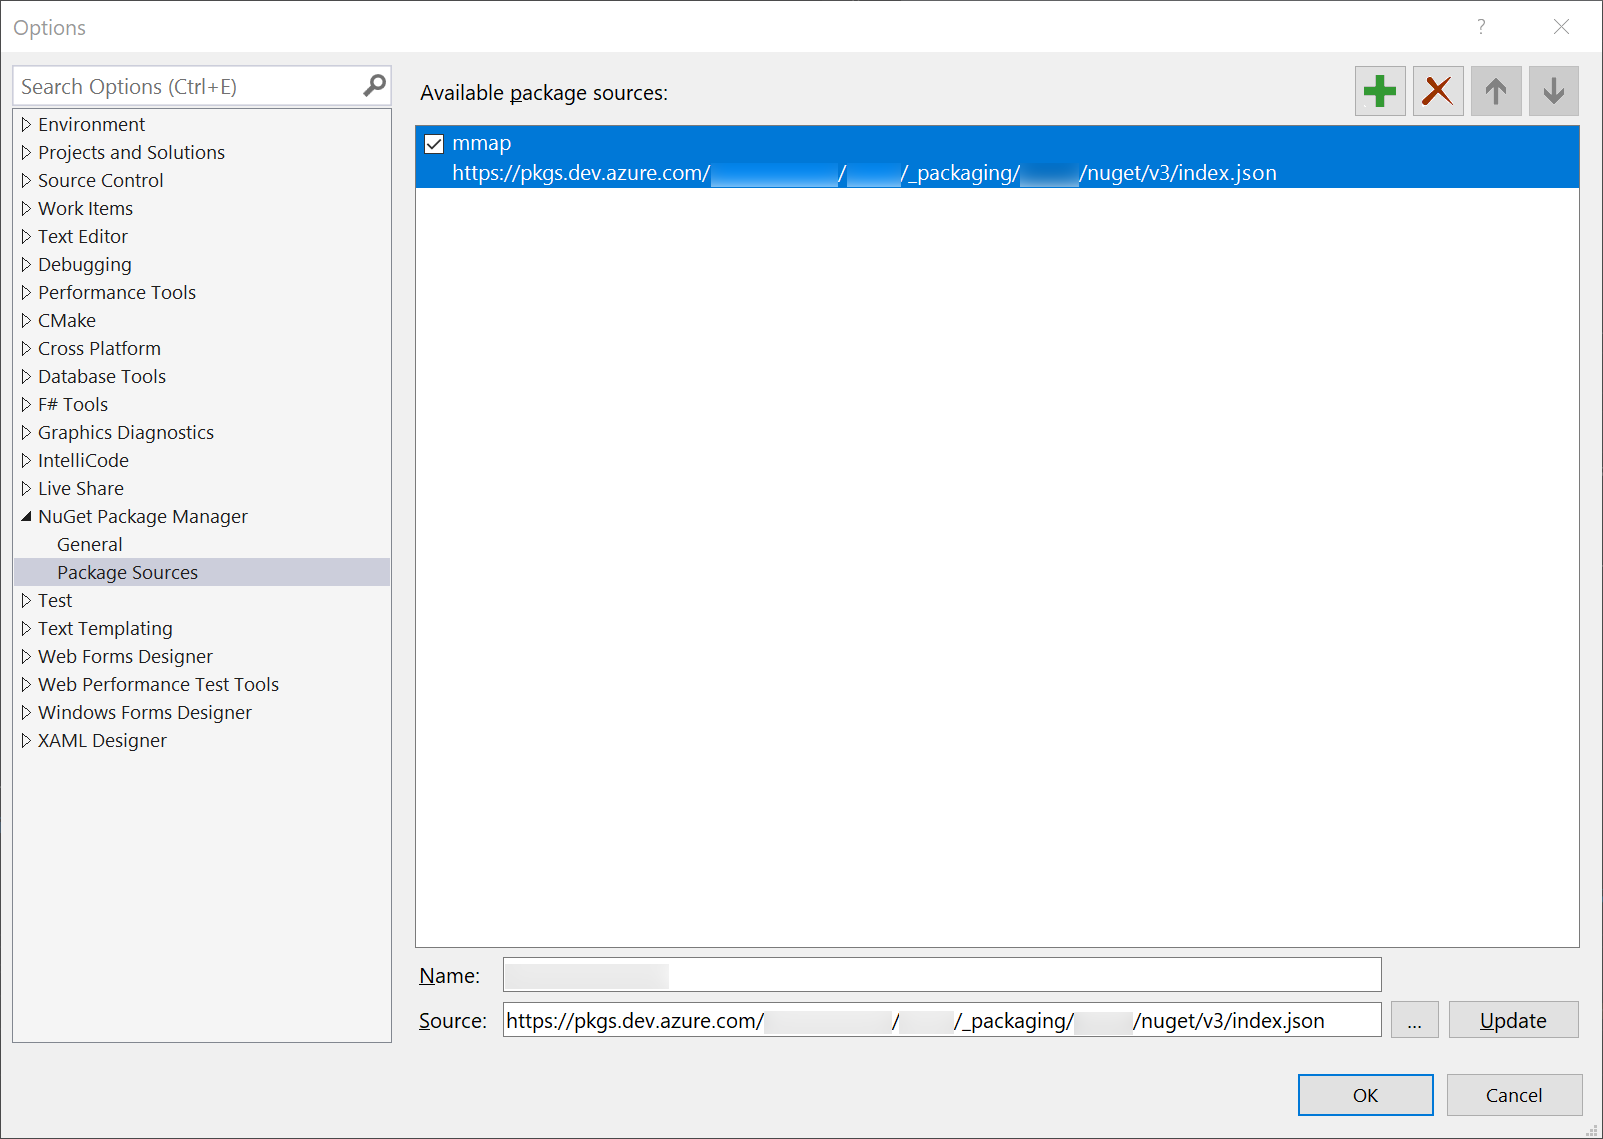
Now you will be able to discover and install somename.somelib package from your Azure DevOps packages feed:
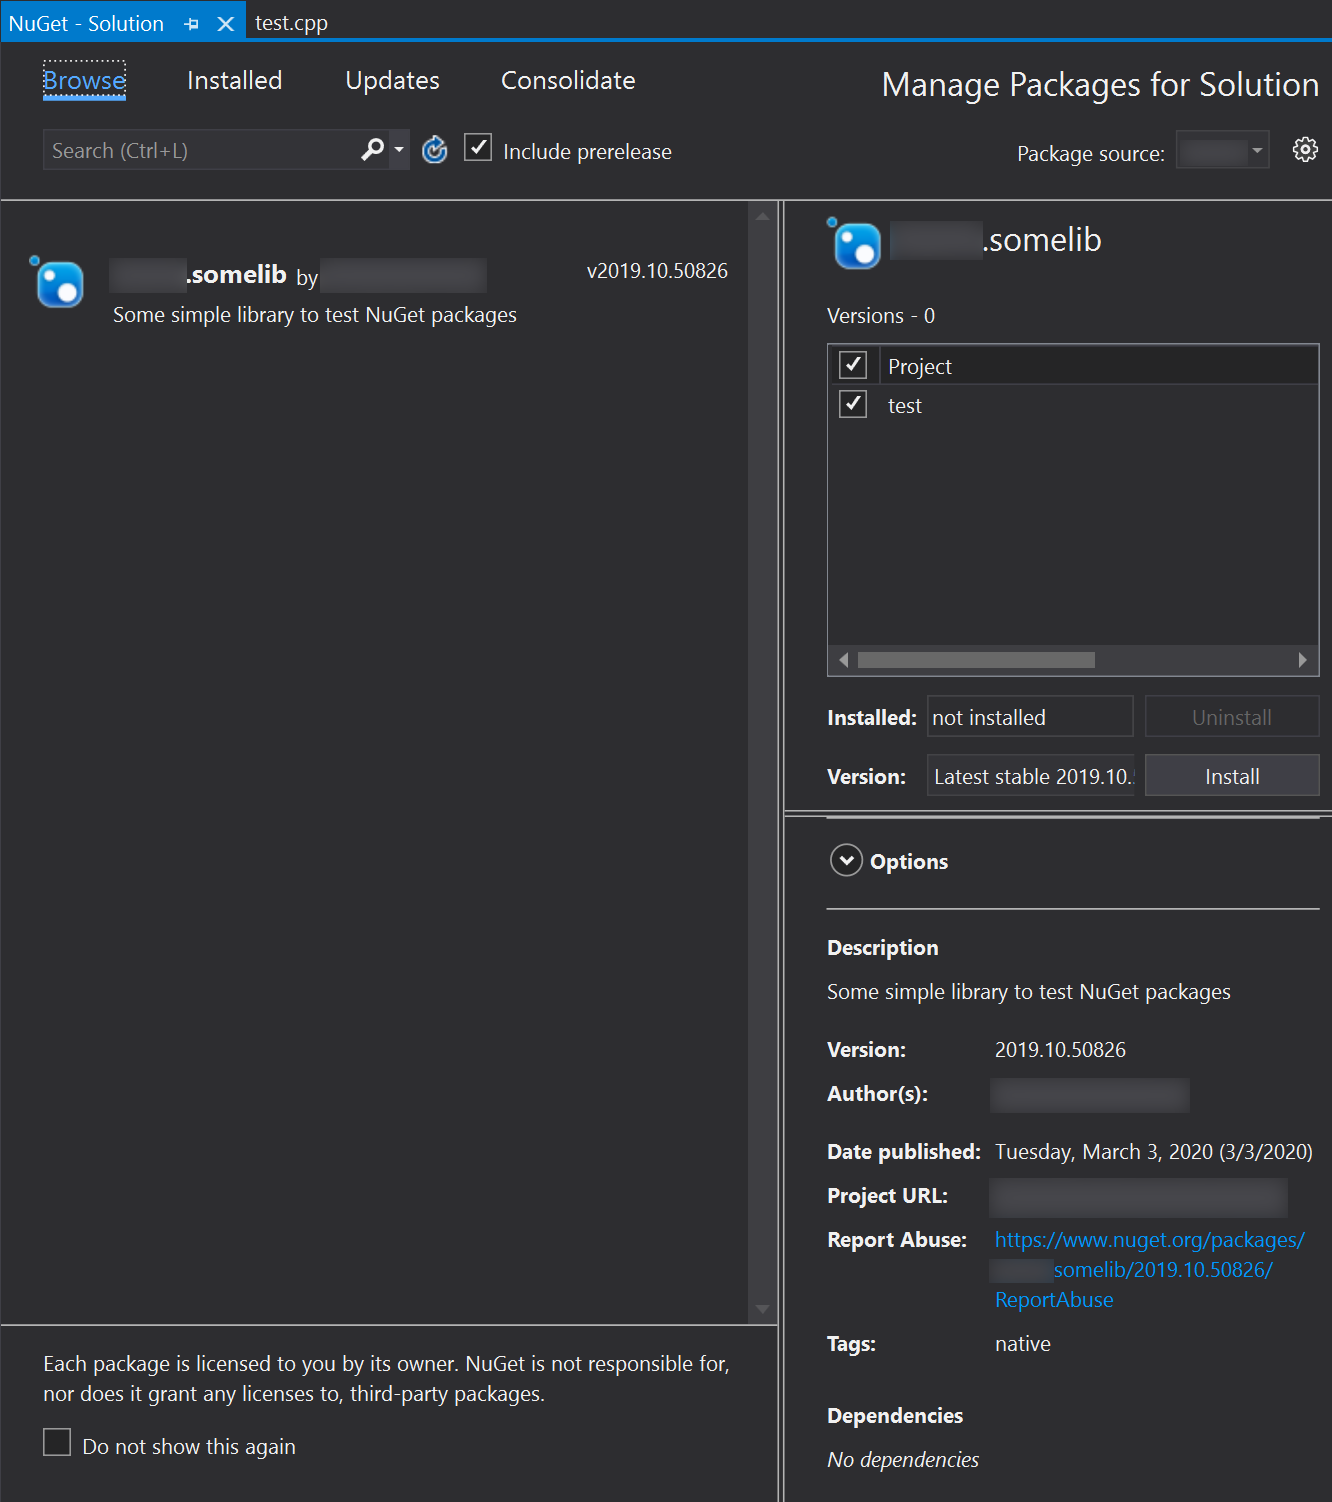
Awesome, right?
Having installed the package, you should get the following structure in your project directory:
TestApp/packages
└── somename.somelib.2019.10.50826
    ├── build
    │   └── native
    │       ├── include
    │       │   └── somelib.h
    │       └── somename.somelib.targets
    ├── lib
    │   └── native
    │       └── x64
    │           ├── debug
    │           │   ├── pch.obj
    │           │   ├── somelib.idb
    │           │   ├── somelib.lib
    │           │   ├── somelib.obj
    │           │   ├── somelib.pch
    │           │   └── somelib.pdb
    │           └── release
    │               ├── pch.obj
    │               ├── somelib.lib
    │               ├── somelib.obj
    │               ├── somelib.pch
    │               └── somelib.pdb
    └── somename.somelib.2019.10.50826.nupkg
If it was packed correctly, you should be able to include the header file without providing the full path to it and to call a method from the library:
#include <iostream>

// no need to do that
//#include "packages/somename.somelib.2019.10.50826/include/somelib.h"
// just include the file
#include "somelib.h"

int main()
{
    std::cout << "ololo" << std::endl;
    // here we call a method from the library
    Some::doSomething();
}
Building and running the project outputs the following:
$ TestApp/x64/Debug/TestApp.exe
ololo
Something from the library
So the library has been successfully discovered and linked from the package.
npm
Like NuGet packages, npm packages are basically just archives. But unlike NuGet packages, they don’t require strict folder structure, specific file names and also they don’t seem to have any meta information for build systems. Shortly saying, they are considerably easier to create.
The obvious downside here is that in case of C++ projects your build system is unlikely to know anything about libraries installed via npm, so I personally see very little to none point in using npm for C++ projects.
How to create npm package
npm CLI tool
Install Node.js (omg, I can’t believe I actually said that). From that installation you will only need npm tool.
Install authentication tools:
$ npm install -g vsts-npm-auth --registry https://registry.npmjs.com --always-auth falsePacking npm package
The only thing you need is a package.json file - that’s where you describe the package, so the package feed/registry (Azure DevOps in our case) would know something about it.
Copy your library headers and binaries to some new package folder. Like I said, folder structure doesn’t matter, but still it would be nice towards your users to follow some common practice, for example:
package/
├── include
│   └── somelib.h
└── lib
    └── msvc141
        └── x64
            ├── debug
            │   ├── pch.obj
            │   ├── somelib.idb
            │   ├── somelib.lib
            │   ├── somelib.obj
            │   ├── somelib.pch
            │   └── somelib.pdb
            └── release
                ├── pch.obj
                ├── somelib.lib
                ├── somelib.obj
                ├── somelib.pch
                └── somelib.pdb
Go to this folder and initialize the package:
$ npm init --scope=@YOUR-ORGANIZATIONThe --scope parameter makes your package to be part of a specific namespace. Using it for all your other packages will keep them in a separate @YOUR-ORGANIZATION folder in your users projects.
The initialization command will ask you for various things like name, version, license and others, out of which only name and version really matter. Based on all that information provided, it will generate a package.json file.
Having inspected it, I didn’t get the point of certain items there, like main, directories, scripts and license (because we will have a custom license), so I just removed them. Here’s my package.json:
{
  "name": "@YOUR-ORGANIZATION/somelib",
  "version": "2020.3.50904",
  "description": "Some library to test npm packages",
  "author": "YOUR-ORGANIZATION"
}
Note that here you can’t provide 2020.03.50904 as the package version, because it has to be 2020.3.50904 - without leading 0.
That’s it, no other actions are required, this folder with package.json is already a package. It will be packed into an archive later, on publishing step.
I would, however, recommend adding a README.md file too, because it will be used by the Azure DevOps feed to display information about your package.
Azure DevOps feed
The Azure DevOps feed creation is the same as for NuGet packages. Moreover, you can use the same feed for publishing both NuGet and npm packages.
The only difference here is the connecting procedure:
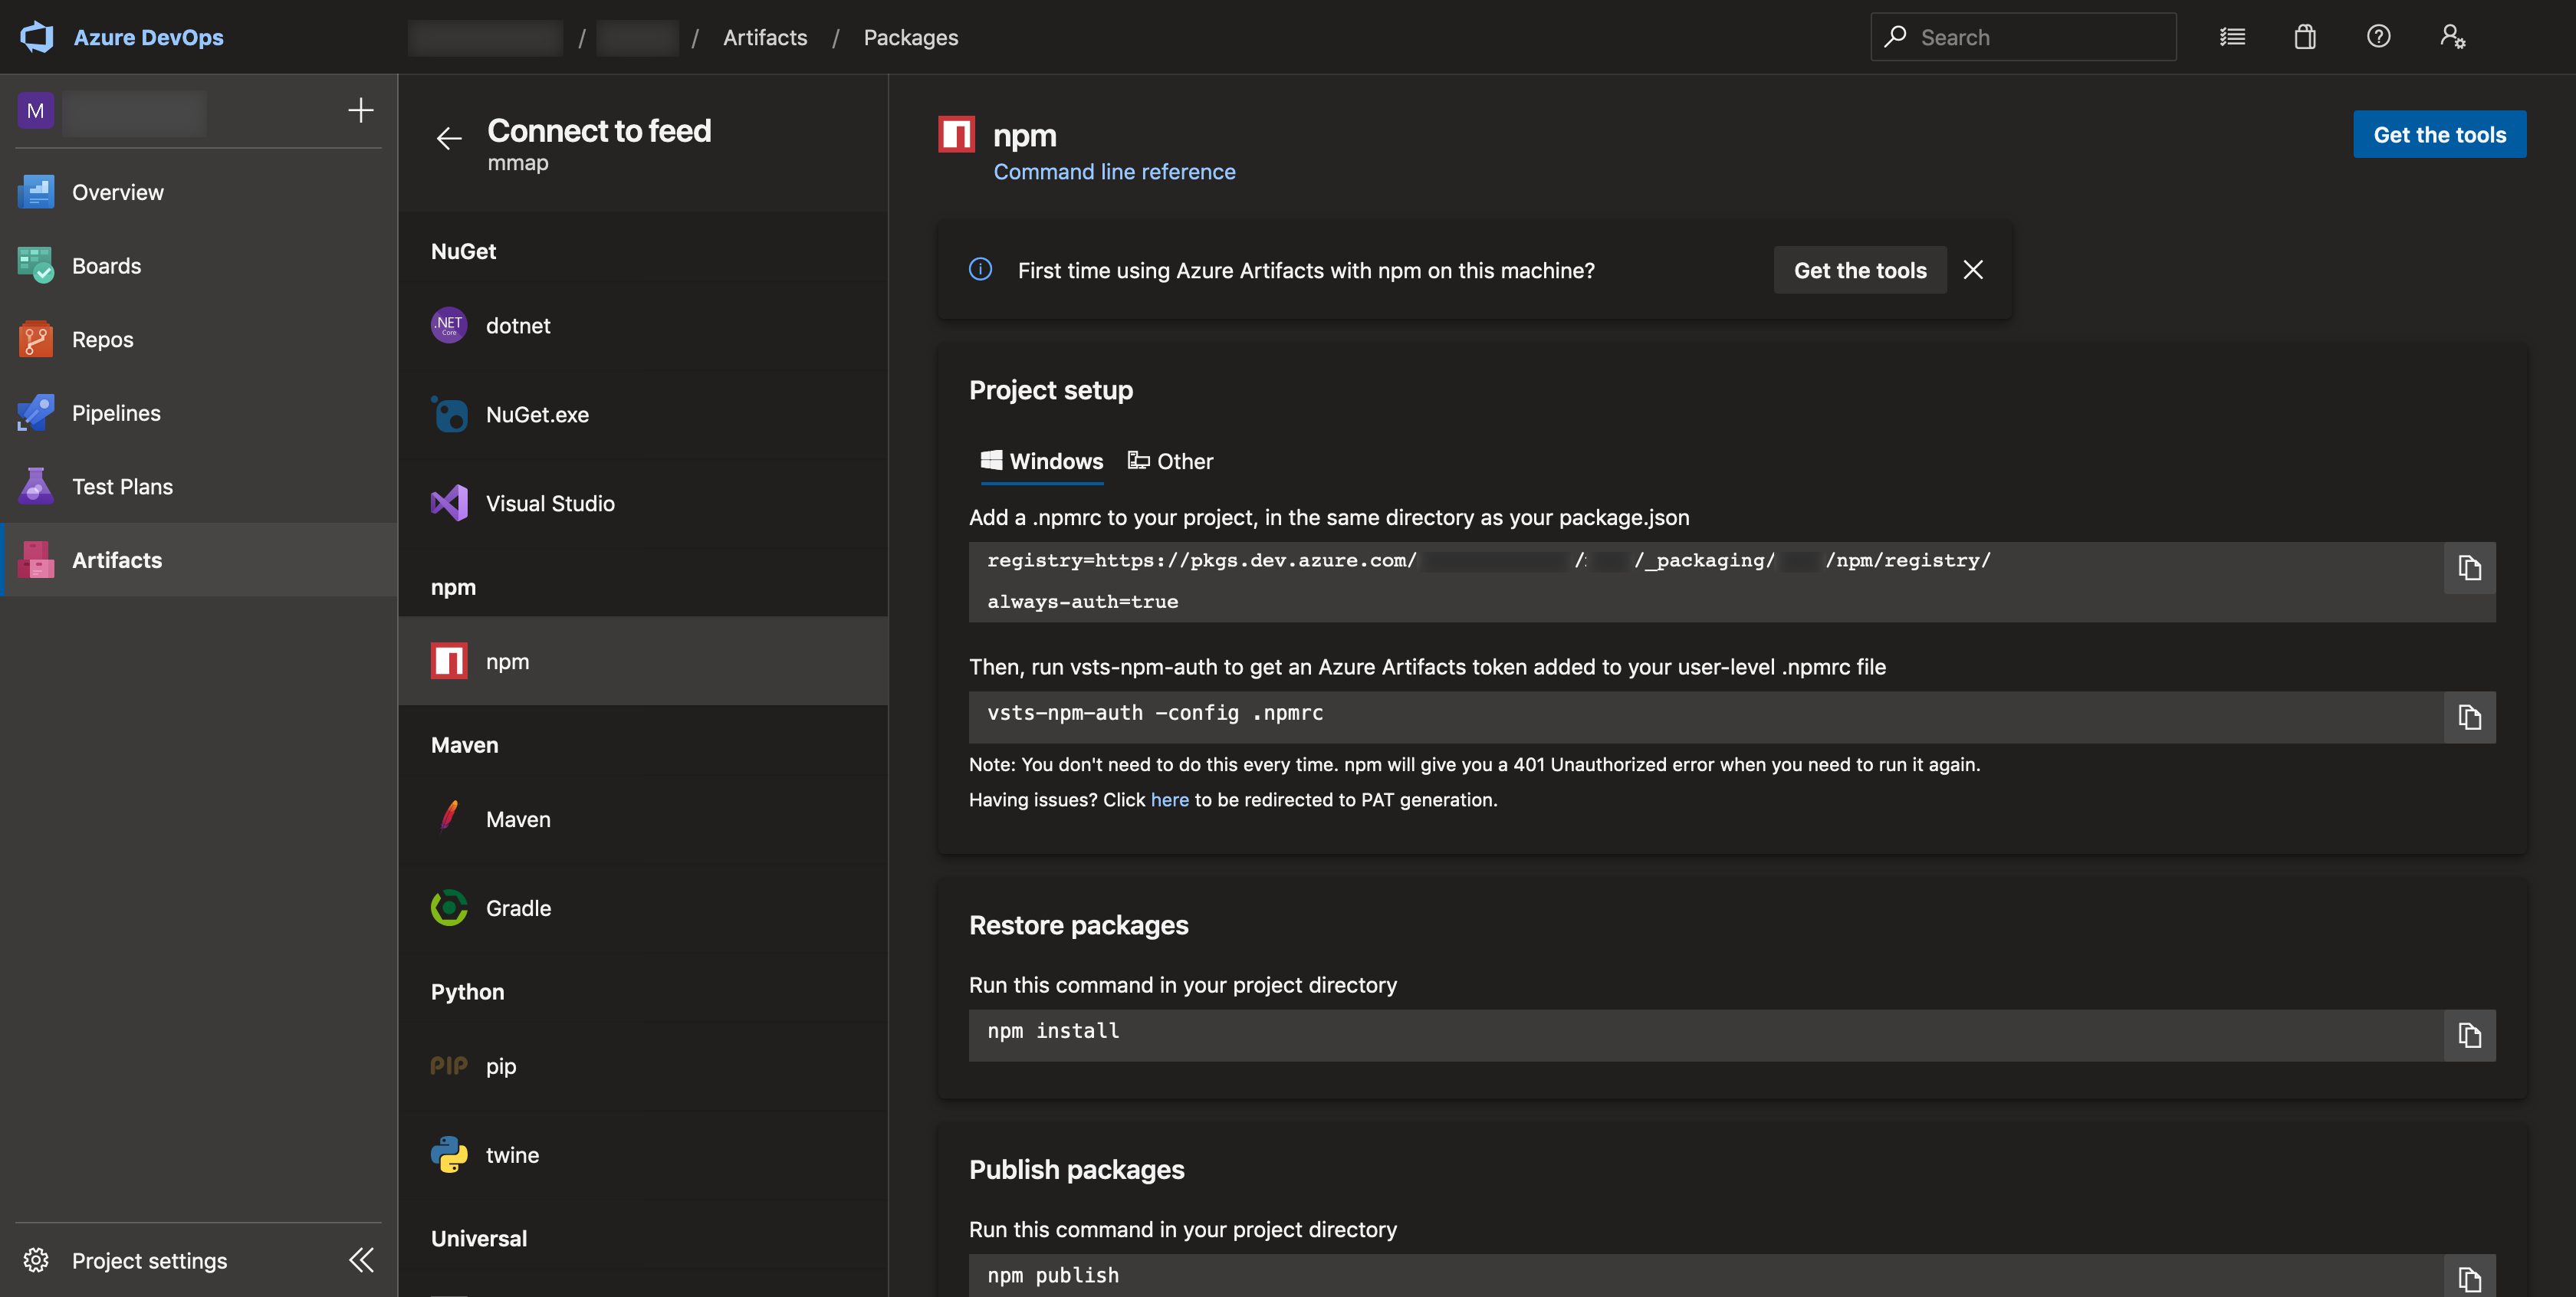
Add a .npmrc to your package (in the same directory with package.json):
registry=https://pkgs.dev.azure.com/ORGANIZATION-NAME/PROJECT-NAME/_packaging/FEED-NAME/npm/registry/

always-auth=true
So now your package directory looks like this:
package/
├── .npmrc
├── include
│   └── somelib.h
├── lib
│   └── msvc141
│       └── x64
│           ├── debug
│           │   ├── pch.obj
│           │   ├── somelib.idb
│           │   ├── somelib.lib
│           │   ├── somelib.obj
│           │   ├── somelib.pch
│           │   └── somelib.pdb
│           └── release
│               ├── pch.obj
│               ├── somelib.lib
│               ├── somelib.obj
│               ├── somelib.pch
│               └── somelib.pdb
└── package.json
Publishing npm package
Almost like with NuGet package, you can get a PAT issued for you or you can issue one yourself.
Automatic PAT
Run vsts-npm-auth in the package folder to get an Azure Artifacts access token:
$ vsts-npm-auth -config .npmrcThat will show an authentication dialog, where you’ll need to login with your Azure DevOps account. It will generate an access token and will put it into C:\Users\YOUR-NAME\.npmrc, so it will be global for all the projects and you won’t need to run this command every time.
Manual PAT
Issue a new PAT or just reuse the one you already have. Encode it to Base64, for example using the very same Node (or some other way):
$ node -e "require('readline') .createInterface({input:process.stdin,output:process.stdout,historySize:0}) .question('PAT> ',p => { b64=Buffer.from(p.trim()).toString('base64');console.log(b64);process.exit(); })"Create an .npmrc in your home folder with the following contents:
; begin auth token
//pkgs.dev.azure.com/YOUR-ORGANIZATION/SOME-ID/_packaging/PROJECT-NAME/npm/registry/:username=YOUR-ORGANIZATION-OR-DOESNTMATTER
//pkgs.dev.azure.com/YOUR-ORGANIZATION/SOME-ID/_packaging/PROJECT-NAME/npm/registry/:_password=YOUR-BASE64-PAT
//pkgs.dev.azure.com/YOUR-ORGANIZATION/SOME-ID/_packaging/PROJECT-NAME/npm/registry/:email=npm requires email to be set but doesn't use the value
//pkgs.dev.azure.com/YOUR-ORGANIZATION/SOME-ID/_packaging/PROJECT-NAME/npm/:username=YOUR-ORGANIZATION-OR-DOESNTMATTER
//pkgs.dev.azure.com/YOUR-ORGANIZATION/SOME-ID/_packaging/PROJECT-NAME/npm/:_password=YOUR-BASE64-PAT
//pkgs.dev.azure.com/YOUR-ORGANIZATION/SOME-ID/_packaging/PROJECT-NAME/npm/:email=npm requires email to be set but doesn't use the value
; end auth token
In case of a buildbot you might want to put this .npmrc file not to your user home folder but to some shared path in the system.
Finally, publish the package:
$ npm --userconfig=/path/to/where/you/have/the/pat/.npmrc publish
npm notice
npm notice package: @YOUR-ORGANIZATION/somelib@2020.3.50904
npm notice === Tarball Contents ===
npm notice 60B     include/somelib.h
npm notice 142.3kB lib/msvc141/x64/debug/somelib.idb
npm notice 146B    package.json
npm notice 61.4kB  lib/msvc141/x64/debug/somelib.lib
npm notice 928.2kB lib/msvc141/x64/release/somelib.lib
npm notice 2.2kB   lib/msvc141/x64/debug/pch.obj
npm notice 2.9kB   lib/msvc141/x64/release/pch.obj
npm notice 57.0kB  lib/msvc141/x64/debug/somelib.obj
npm notice 923.2kB lib/msvc141/x64/release/somelib.obj
npm notice 2.0MB   lib/msvc141/x64/debug/somelib.pch
npm notice 2.0MB   lib/msvc141/x64/release/somelib.pch
npm notice 389.1kB lib/msvc141/x64/debug/somelib.pdb
npm notice 380.9kB lib/msvc141/x64/release/somelib.pdb
npm notice === Tarball Details ===
npm notice name:          @YOUR-ORGANIZATION/somelib
npm notice version:       2020.3.50904
npm notice package size:  825.2 kB
npm notice unpacked size: 7.0 MB
npm notice shasum:        SOME-HASH
npm notice integrity:     sha512-VALUE==
npm notice total files:   13
npm notice
+ @YOUR-ORGANIZATION/somelib@2020.3.50904
How to use npm package
Since there is no build system involved, installing an npm package simply downloads and unpacks the archive.
Connect to the feed by adding almost the same .npmrc in the project directory. Here’s how it should look like:
@YOUR-ORGANIZATION:registry=https://pkgs.dev.azure.com/ORGANIZATION-NAME/PROJECT-NAME/_packaging/FEED-NAME/npm/registry/

always-auth=true
Note this @YOUR-ORGANIZATION: (your scope) thing prepending the feed. Without it npm will look for all the packages in this feed, while most likely you’d want npm to use it only for your packages. So basically without specifying the scope you are overriding npm’s default feed - which is what happened to me, and while npm documentation doesn’t seem to mention this explicitly, I found it in a casual example of adding comments.
Now run:
npm install @YOUR-ORGANIZATION/somelib@2020.3.50904After that your project directory will look like this:
test-proj/
├── .npmrc
├── node_modules
│   └── @YOUR-ORGANIZATION
│       └── somelib
│           ├── include
│           │   └── somelib.h
│           ├── lib
│           │   └── msvc141
│           │       └── x64
│           │           ├── debug
│           │           │   ├── pch.obj
│           │           │   ├── somelib.idb
│           │           │   ├── somelib.lib
│           │           │   ├── somelib.obj
│           │           │   ├── somelib.pch
│           │           │   └── somelib.pdb
│           │           └── release
│           │               ├── pch.obj
│           │               ├── somelib.lib
│           │               ├── somelib.obj
│           │               ├── somelib.pch
│           │               └── somelib.pdb
│           └── package.json
├── package-lock.json
└── package.json
If you don’t have package.json, it will complain about that, but the installation will still go fine.
Other than that - this is it, there will be nothing else. So you need to set-up your C++ project manually: where to find headers and where to find library.
Possible issues
At some point we started packing debug binaries too, and that considerably increased the packages size. As a result, npm publish started to fail with different kinds of errors.
npm - JavaScript heap out of memory
FATAL ERROR: CALL_AND_RETRY_LAST Allocation failed - JavaScript heap out of memory
 1: node::DecodeWrite
 2: node_module_register
 3: v8::internal::FatalProcessOutOfMemory
 4: v8::internal::FatalProcessOutOfMemory
 5: v8::internal::Heap::MaxHeapGrowingFactor
 6: v8::internal::Factory::NewRawTwoByteString
 7: v8::internal::Smi::SmiPrint
 8: unibrow::Utf8DecoderBase::WriteUtf16Slow
 9: v8::String::WriteUtf8
10: std::basic_ostream<char,std::char_traits<char> >::basic_ostream<char,std::char_traits<char> >
11: std::basic_ostream<char,std::char_traits<char> >::basic_ostream<char,std::char_traits<char> >
12: std::vector<v8::CpuProfileDeoptFrame,std::allocator<v8::CpuProfileDeoptFrame> >::vector<v8::CpuProfileDeoptFrame,std::allocator<v8::CpuProfileDeoptFrame> >
13: v8::internal::interpreter::BytecodeDecoder::Decode
14: v8::internal::RegExpImpl::Exec
15: v8::internal::RegExpImpl::Exec
16: v8::internal::RegExpImpl::Exec
17: SOME-VALUE
Process exited with code 134
Internet is full of advices about passing --max_old_space_size, and also --max-old-space-size (yes, look closely, that’s a d_i-f-f_e-r_e_n-t option) to increase the memory limit for Node. There is also a special package that does it for you! I fucking lold.
There were also advices with a whole bunch of other options like --optimize-for-size, --max-executable-size, --prod and others (also with - and _ variations), but none of those helped.
Then I noticed tnat we have Node 10.x installed, so I just updated to Node 12.x, and the problem got resolved. This fucking Node, mein gott. People are actually using it in production?
npm - The request must contain a body
Having resolved the out-of-memory issue, we got the next error:
npm ERR! code E400
npm ERR! 400 Bad Request - The request must contain a body when publishing or updating a package (DevOps Activity ID: ACTIVITY-ID) - PUT https://pkgs.dev.azure.com/YOUR-ORGANIZATION/SOME-ID/_packaging/YOUR-PROJECT/npm/registry/@YOUR-NAME%2fPACKAGE-NAME - BadRequest
Process exited with code 1
Not very descriptive, is it? But since absolutely the same configuration was working fine before, it was clear that the only difference is the package size, so that had to be the reason. And indeed, turns out Microsoft has a limitation of 500 MB per package, which we exceeded by staring packing debug binaries too.
So we reverted back to release binaries only, but if our users will demand us to ship debug builds too, then I guess unfortunately we’ll have to migrate from Azure DevOps Artifacts to a self-hosted npm registry (and deal with authorization and other things, which we have in Azure out-of-the-box).
Resulting feed
Here’s what we have now in our Azure DevOps feed:
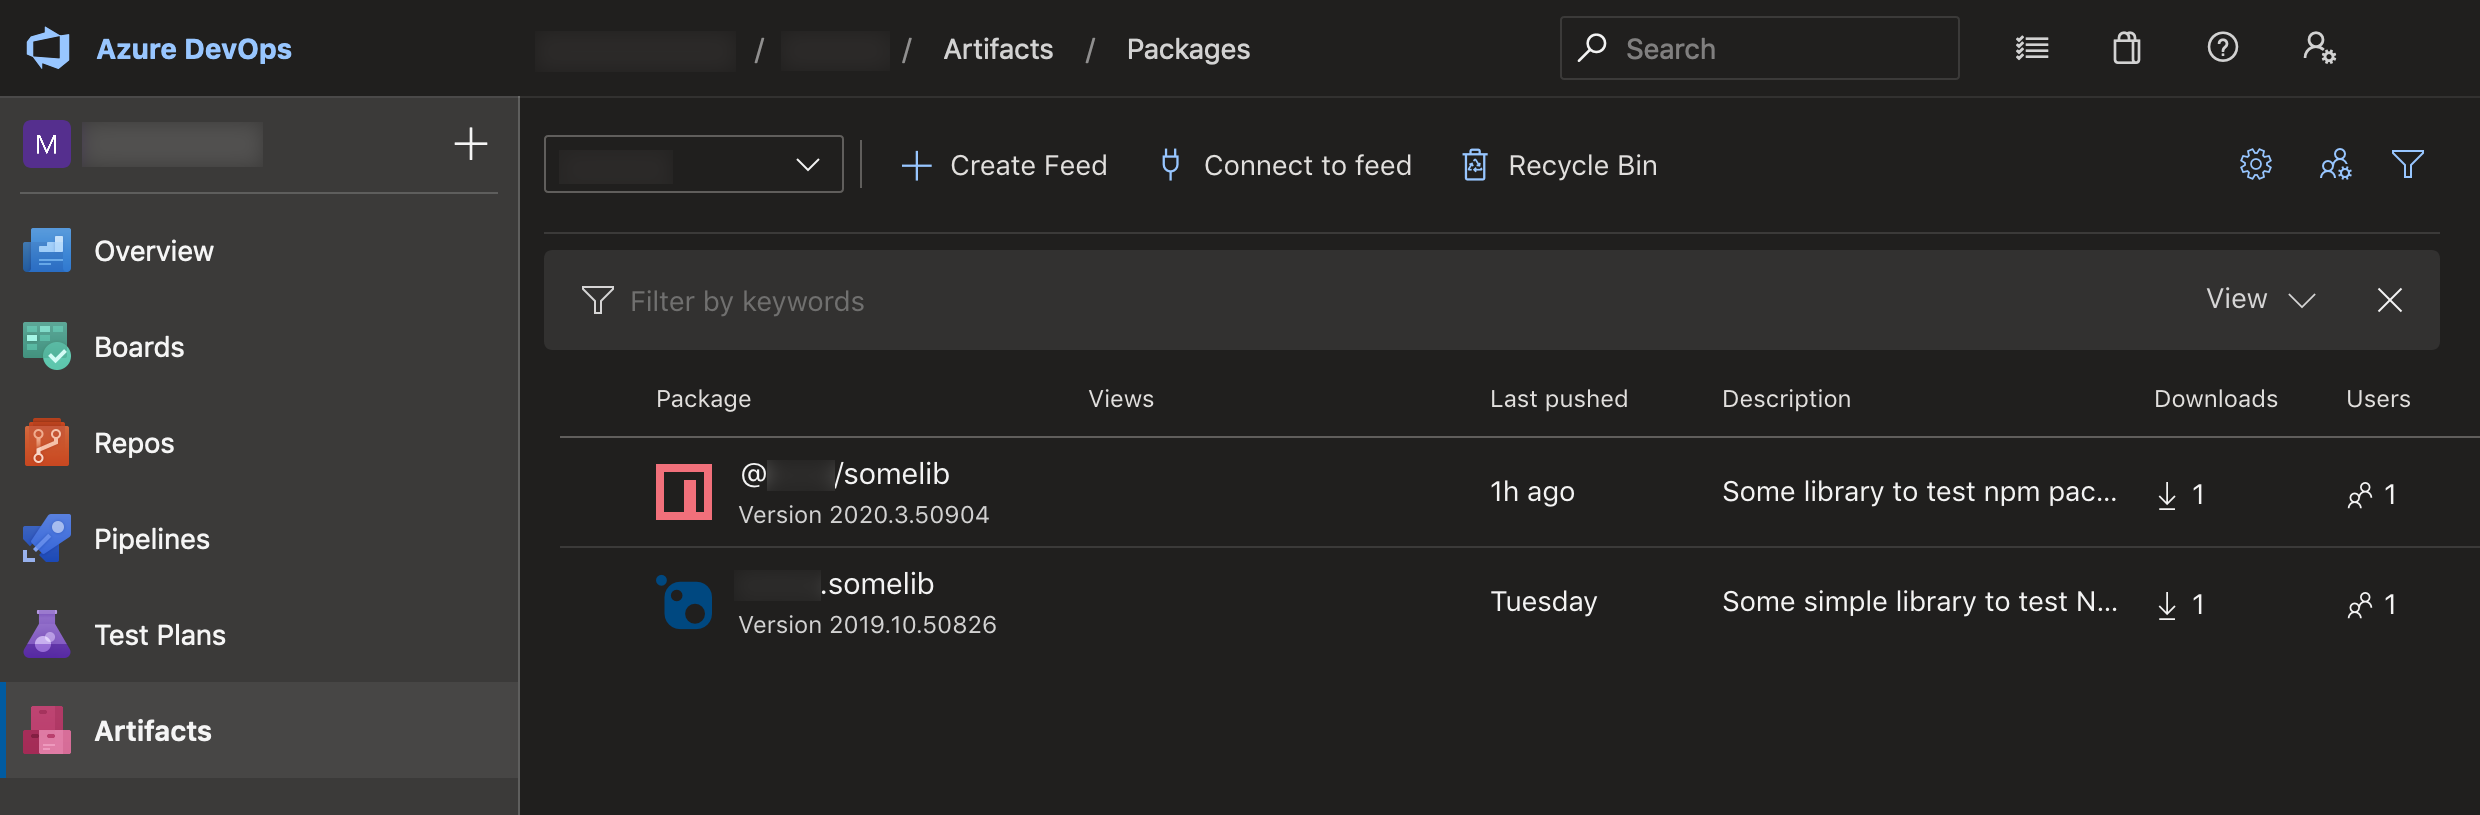
So it’s both NuGet and npm packages in one place.
Following up on the subject, here’s how to promote package versions to certain views.