How to create a Windows service
Let’s create a Windows service - the thing that will run at the background and do stuff. For example, our service will write phrase “ololo” into Event Log.
| OS | Windows 10 x64 |
| language | C# / .NET Framework 4.6 |
| IDE | Visual Studio 2015 |
Creating service
Open Visual Studio and create new Windows Service project:
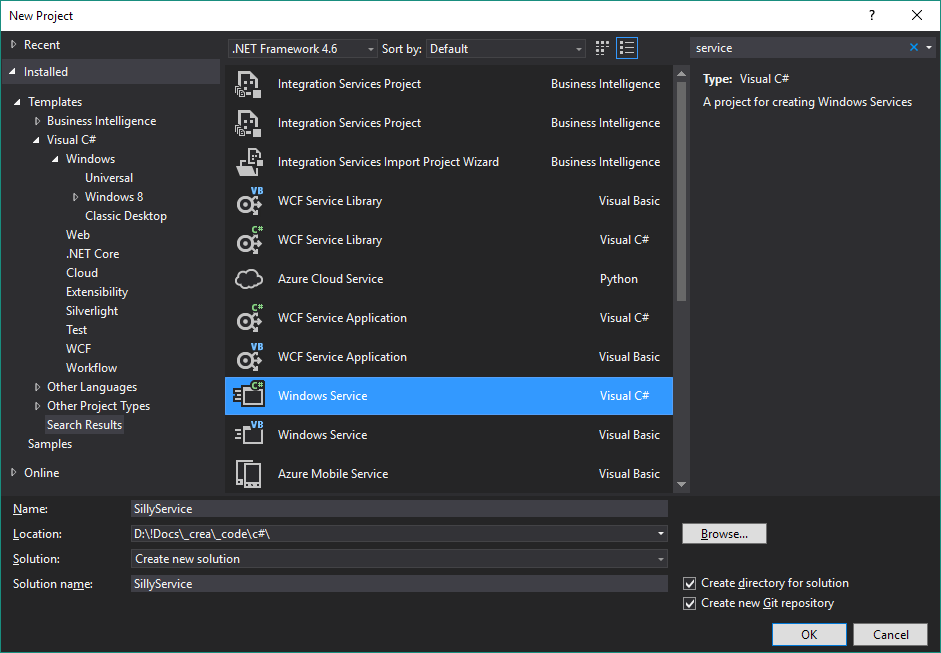
I named it SillyService.
The project starts with opened Service1.cs. Rename it to Service.cs. Actually, it does not matter, but looks better.
This file can be opened from Solution Explorer in 2 modes:
- Just double click on it and you will get a Design mode. That’s how it’s opened now;
- Or right-click on it and choose View Code - you will get the code of the file.
But now we need Design-mode. Click with right button on any free space of the edit area (it’s all free, because we haven’t added anything yet) and choose Properties. Edit them like this (just change the ServiceName):

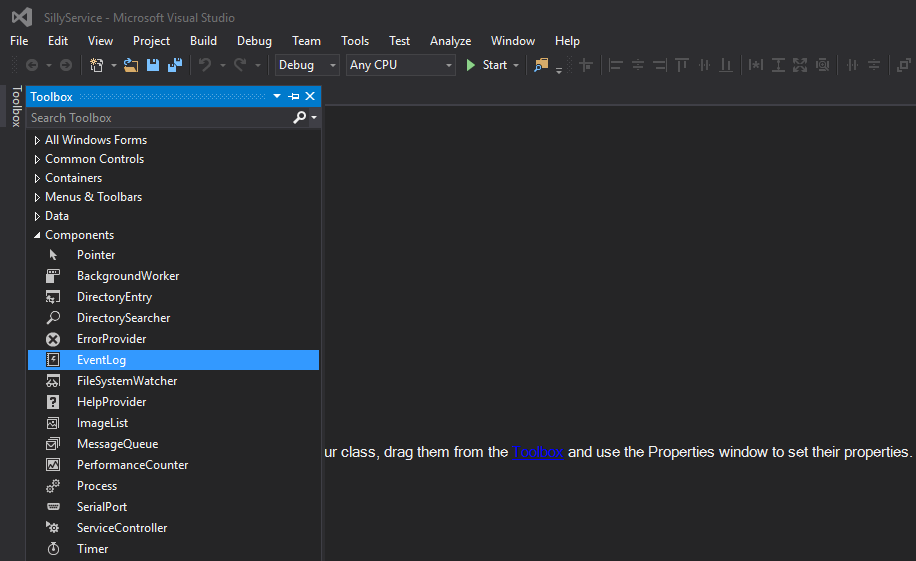
Now find the sliding Toolbox on the left and drag the EventLog element from there into edit area of Service.cs opened in Design mode:
Click on it and choose Properties. Edit them like this:
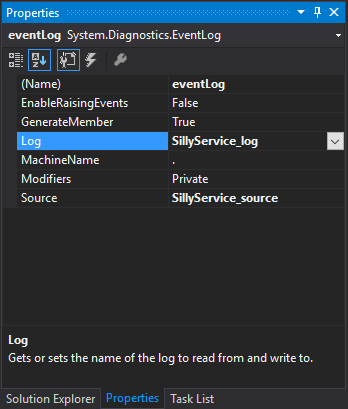
From all my experiments I got that Log and Source should have different names (and be different from the name of service itself). So, I added _log and _source suffixes accordingly.
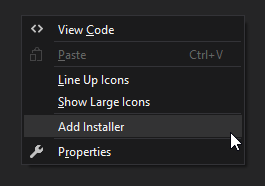
Ok, that’s done. Now right-click somewhere at free space of the edit area of Service.cs (still in Design mode) and choose Add Installer:
A new document will appear in a separate tab containing two elements: serviceProcessInstaller and serviceInstaller, both also available in two modes (Design and View Code). Edit Properties for both elements like this:
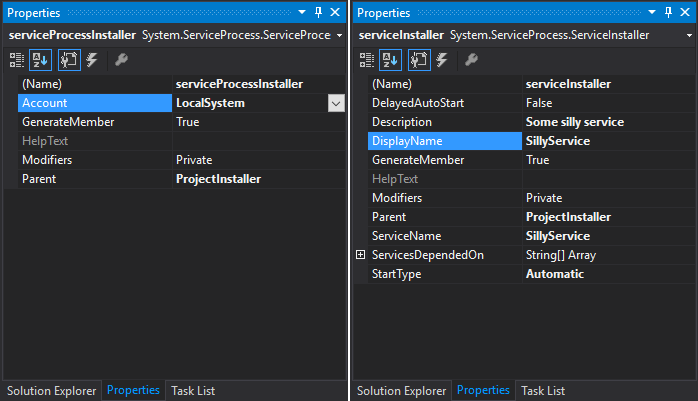
It’s about giving proper names, description and choosing the right authority level (LocalSystem).
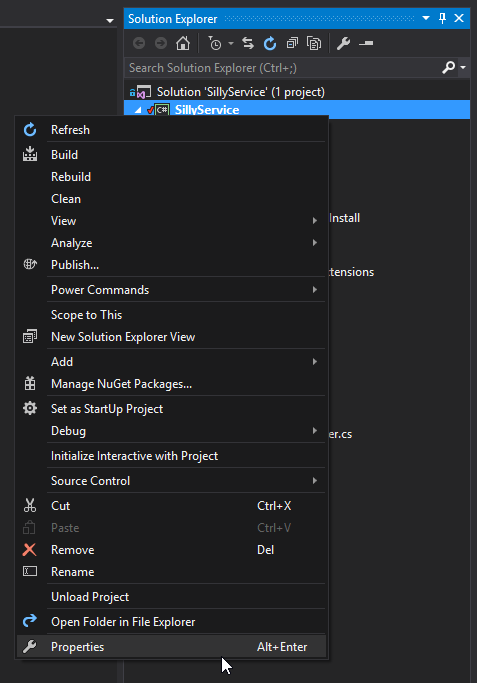
Now let’s create some settings for the service. Right-click on project and choose Properties:
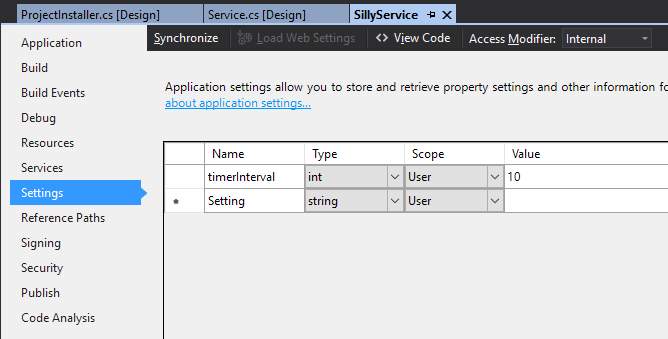
Go to Settings tab and click on the only label there (This project does not contain…). The settings file will be created, and it will be displayed as a table. We will create an int parameter there - timerInterval - which will store a value for timer (how often our service should perform some action):
Save everything and open Service.cs in View Code mode (right-click on the file in Solution Explorer). We will implement some actual stuff that our service will do, which is to write a text string to the Events Log every 10 seconds:
using System.Diagnostics;
using System.Reflection;
using System.ServiceProcess;
using System.Text;

namespace SillyService
{
    public partial class Service : ServiceBase
    {
        /// <summary>
        /// Main timer
        /// </summary>
        private System.Timers.Timer timer2nextUpdate;
        /// <summary>
        /// Timer interval in seconds
        /// </summary>
        private int timerInterval = Properties.Settings.Default.timerInterval;
        // here you can see how this value is being pulled out from Settings

        public Service()
        {
            InitializeComponent();

            // create new Source if it doesn't exist
            EventSourceCreationData escd = new EventSourceCreationData(eventLog.Source, eventLog.Log);
            // eventLog instance was created in Service.cs in Design mode, as you remember
            if (!EventLog.SourceExists(eventLog.Source))
            {
                EventLog.CreateEventSource(escd);
            }
        }

        protected override void OnStart(string[] args)
        {
            // using System.Text;
            StringBuilder greet = new StringBuilder()
                .Append("SillyService has been started.\n\n")
                .Append(string.Format("Timer interval (in seconds): {0}\n", timerInterval))
                // using System.Reflection;
                .Append(string.Format("Path to the executable: {0}", Assembly.GetExecutingAssembly().Location));
            write2log(greet.ToString(), EventLogEntryType.Information);

            // timer settings
            this.timer2nextUpdate = new System.Timers.Timer(timerInterval * 1000);
            this.timer2nextUpdate.AutoReset = true;
            this.timer2nextUpdate.Elapsed
                // what timer's event will do
                += new System.Timers.ElapsedEventHandler(this.timer2nextUpdate_tick);
            this.timer2nextUpdate.Start();
        }

        protected override void OnStop()
        {
            write2log("SillyService has been stopped", EventLogEntryType.Information);
        }

        /// <summary>
        /// Writing to log
        /// </summary>
        /// <param name="message">message text</param>
        /// <param name="type">type of the event</param>
        private void write2log(string message, EventLogEntryType type)
        {
            try { eventLog.WriteEntry(message, type); } catch { }
        }

        /// <summary>
        /// timer's event
        /// </summary>
        private void timer2nextUpdate_tick(object sender, System.Timers.ElapsedEventArgs e)
        {
            write2log("ololo", EventLogEntryType.Information);
        }
    }
}
Build the project.
Installing and launching the service
Now you have 2 files in the path\to\SillyService\bin\Debug directory:
SillyService.exe- executable of the service;SillyService.exe.config- settings-file for the service.
There are actually more files there, but you don’t need them. Copy these 2 into some new directory, like C:\services\SillyService\. By the way, later you might want to use Release build rather then Debug.
Make sure, that Services and Event Viewer applications are closed.
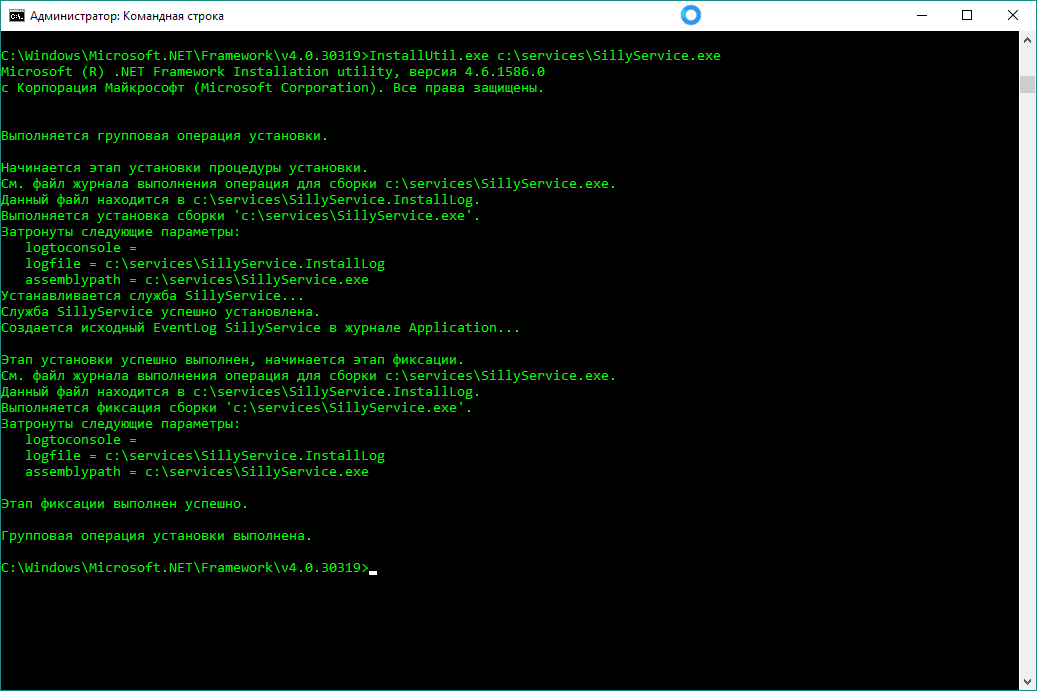
Open command line with administrator rights (or, if you don’t want to deal with command line, use my application), find InstallUtil.exe path (mine was here: C:\Windows\Microsoft.NET\Framework\v4.0.30319\) and execute the following:
C:\Windows\Microsoft.NET\Framework\v4.0.30319>InstallUtil.exe c:\services\SillyService.exeYou’ll get something like this:
Sorry for russian text on the screenshots (some UI on my Windows is in russian), but there is nothing important there anyway.
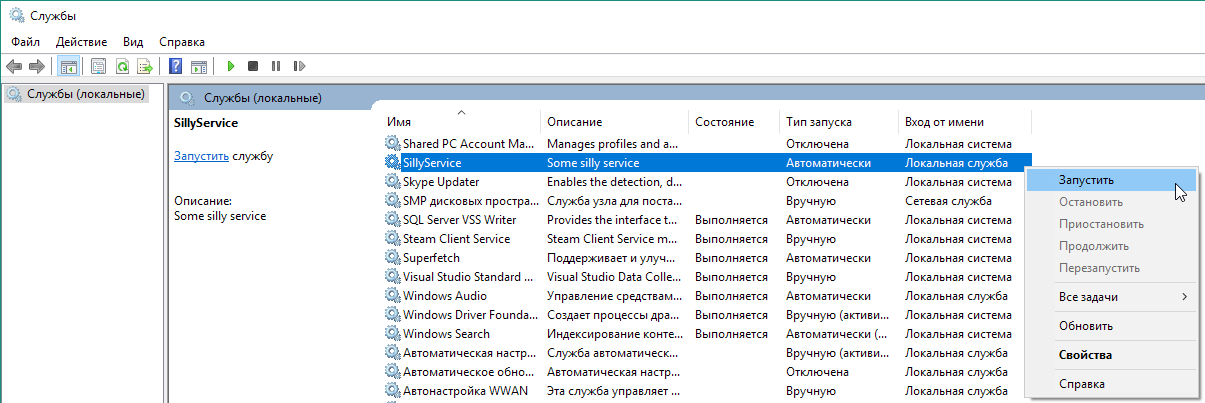
Now you can start the service from Services (services.msc). Just in case, run Services with administrator rights:
After the start of the service you can open Event Viewer to see your service’s log there:
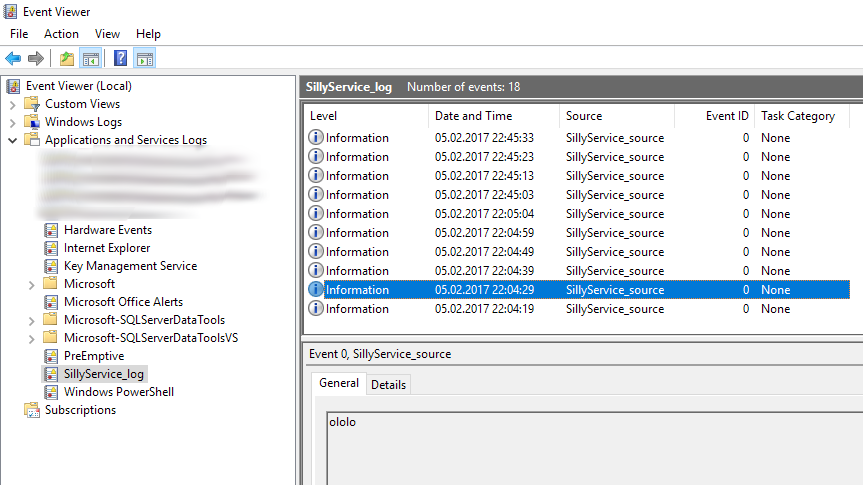
So, service is running, it will start automatically each time you reboot your computer and it will write a line of text to the Event Log every 10 seconds.
Possible problems
Service might not start and give you some error about not answering. Most probably, that is related to Source/Log stuff:
- Check if you’ve set
Local Systemin theAccountfield of serviceProcessInstallerProperties; - Perhaps, you ignored my notice about naming
LogandSource; - Some other access problems. Try to set administrator’s credentials at
Log Ontab of servicePropertiesin Services.
If you would like to uninstall service, use the same command, but just add /u key:
C:\Windows\Microsoft.NET\Framework\v4.0.30319>InstallUtil.exe /u c:\services\SillyService.exeSources
The source code of described SillyService is available here.